Setup ContextHub for Personalization set-up-contexthub

ContextHub is a framework for storing, manipulating, and presenting context data. The ContextHub Javascript API enables you to access stores to create, update, and delete data as necessary. As such, ContextHub represents a data layer on your pages. This page describes how to add context hub to your AEM site pages.

Transcript

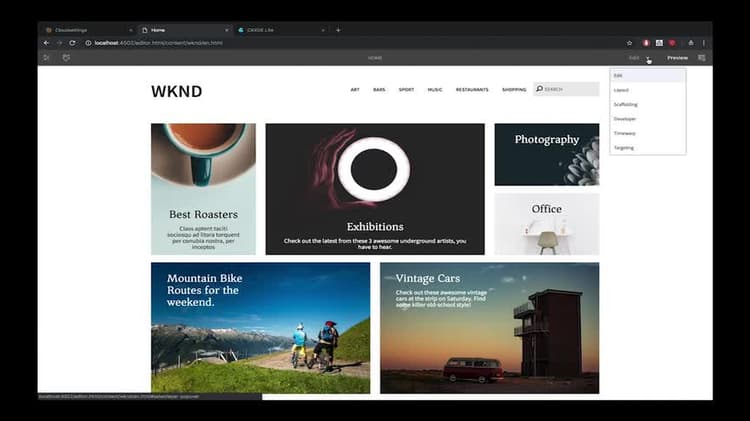
Hi everyone. In this video let’s see how to add ContextHub to your AEM site pages. ContextHub as a framework for storing, manipulating and presenting context data. The client side JavaScript API enables you to access the data for personalizing content. From your AEM homepage, click on Sites and select a WKND sample reference site. Select the homepage and open to edit it. Click on the page view dropdown and now you can see different page view options but not the targeting mode. You also don’t see a ContextHub added to your site page. Let us do a quick setup and revisit the WKND site page. We need to add the ContextHub to your Page Component. ContextHub stores versus context data on the client. The ContextHub javascript API enables you to access stores to create, update and delete data as necessary. As such, contexts have represents a data layer on your pages to enable the context of feature and to link to the contexts of javascript libraries, include the context of compotent in the head section of your page. Open a new tab and navigate to CRXDE light. From the Applications folder navigate to the weekend site components and select the custom header library file. Open the following code to your custom header file to include ContextHub to your site pages. Make sure to save your changes. Navigate to the first tab and then click on Adobe Experience Manager logo. We need to create a site configuration and enable the ContextHub segments. ContextHub includes a segmentation engine that manages segments and it determines which segments are resolved for the current context. Several segments are defined. You can use the javascript API to determine resolved segments. Navigate to Tools and select Configuration Browser under General Settings. Select the WKND site configuration. If you don’t see a configuration for your site, you can create one by clicking on the Create button. Now lets select the WKND and click on View Properties. Make sure to choose ContextHub segments checkbox and cloud service configuration checkbox. Save the changes and exit the window. From AEM homepage, click on Personalization and Audiences under Navigation. Segment creation. Depending on the information you have already collected about your site visitors and the goals you want to achieve, you will need to define the segments and strategies needed for your targeted content. These segments are then used to provide a visitor with specifically targeted content. Select the WKND site and you can now notice a few segments. These segments are copied from the We.Retail reference site. You can also create your segments by clicking on the Create button. Lets navigate back to WKND site root page JCR content node and add few properties to complete our setup. Assigning the cloud configuration path, segmentation path and ContextHub path to our site root node so you can create a personalized experience for your audience. Using the ContextHub, you can manipulate the context data and test your result segments. You can add it directly using CRXDE or you can open the page properties and edit it using the dialog box. Note that we need to add three properties to enable ContextHub. The three properties are: CQ configuration, ContextHub path and Segment path. Click on the Advanced tab and let’s add the value for the first property: CQ configuration under a cloud configurations. Click on the Pathfinder option and select the WKND site configuration. Now let’s move the Personalization tab to add the two other properties. Click on the ContextHub path and select Library, Settings, Cloud Settings and the default ContextHub configuration. Similarly let’s select the segment path as /configuration, WKND site, Settings, WCM, segments, and then save your changes. Let’s switch to the CRXDE tab and do a quick refresh. You can now notice that three properties for configuration path, ContextHub path and segments path are added under the JCR ontent node.

Let’s navigate back to the WKND site homepage and refresh your page. You should now be able to select the Targeting mode from the page view option dropdown. And you can also notice the default ContextHub that gets added to your site pages. Targeting mode helps content authors to create different experiences for different user segments.

NOTE
We use the WKND reference site for this video and it is not part of AEM release. You can download the latest version here.

Add ContextHub to your pages to enable the ContextHub features and to link to the ContextHub JavaScript libraries. The ContextHub JavaScript API provides access to the context data that ContextHub manages.

Adding ContextHub to a Page Component adding-contexthub-to-a-page-component

To enable the ContextHub features and to link to the ContextHub JavaScript libraries, include the contexthub component in the <head> section of your web page. The HTL code for your page component resembles the following example:

<!--/* Include Context Hub */-->
<sly data-sly-resource="${'contexthub' @ resourceType='granite/contexthub/components/contexthub'}"/>

Site Configuration and ContextHub Segments site-configuration-and-contexthub-segments

ContextHub includes a segmentation engine that manages segments and determines which segments are resolved for the current context. Several segments are defined. You can use the Javascript API to determine resolved segments. Enable the ContextHub segments for your site under Configuration Browser.

Create Segments create-segments

Create AEM segments that act as rules for the teasers. That is, they define when content within a teaser appears on a web page. Content can then be specifically targeted to the visitor’s needs and interests, depending on the segment(s) they match.

Assigning Cloud Configuration, Segment path and ContextHub path to your site assigning-cloud-configuration-segment-path-and-contexthub-path-to-your-site

Assigning the Cloud configuration path, segmentation path and ContextHub path to your site root node so you can create a personalized experience for your audience. Using the ContextHub, you can manipulate the context data and test your resolved segments.

CRXDE Lite

You can read more about ContextHub and segmentation below:
recommendation-more-help
bb44cebf-d964-4e3c-b64e-ce882243fe4d