
Create a storefront
By the end of this page, you will have a new GitHub repository from the Commerce boilerplate, the Code Sync app on that repo, a storefront configuration for your Commerce backend, starter content in Document Authoring on DA.live, and a local clone.
Use the Which backend do you have? table and finish prerequisites before the tasks below. When Commerce data or services are missing, the fix is usually the backend checklist, not a broken repository.
For npm install, npm start, and local preview, use Boilerplate getting started. If accounts and tools are not ready, read Before you start first.
You can return later for optional steps such as SidekickBrowser extension that helps creators edit, preview, and publish content from a content folder, and helps developers open source documents from published pages. or the Universal Editor.
Site Creator or this walkthrough
Section titled “Site Creator or this walkthrough”This page walks through repository creation, Code Sync, configuration, content, and local setup in order. When your organization allows it, use Site Creator in DA.live so one flow can create the GitHub repo, add starter content, and fill most storefront configuration. If you cannot use Site Creator, follow GitHub, Code Sync, and the DA.live config generator as separate tasks below.
Which should you use?
Section titled “Which should you use?”Use Site Creator first when you want the fastest path and your organization allows it.
Stay on this page when you need to see how the pieces connect, or when Site Creator is not an option. Typical cases include the following:
- You are new to the stack and want to see what each step does before you run it in a live project.
- Your organization limits who can create repositories or install GitHub Apps, so you follow an approved process step by step.
- You are fixing a store that is only partly configured, or you must run steps in a fixed order for automation.
- You already have a repository and you use Site Creator only to connect content. You may still run some tasks by hand, and the sections below explain what each part is for.
Big picture
Section titled “Big picture”This tutorial uses Edge Delivery ServicesAdobe's hosting and delivery infrastructure that turns authored documents into fast HTML pages served from servers close to the shopper. You push code to GitHub; Edge Delivery Services builds and publishes automatically. (EDS) to host the storefront, the Commerce boilerplate for code, and Document Authoring (DA.live) for page content. You create a new EDS storefront from the Commerce boilerplate template . After you connect your own backend, the same repo holds local preview, demo content, and a path to production.
The diagram caption and the numbered list below describe the same flow, so you can skim either one first.
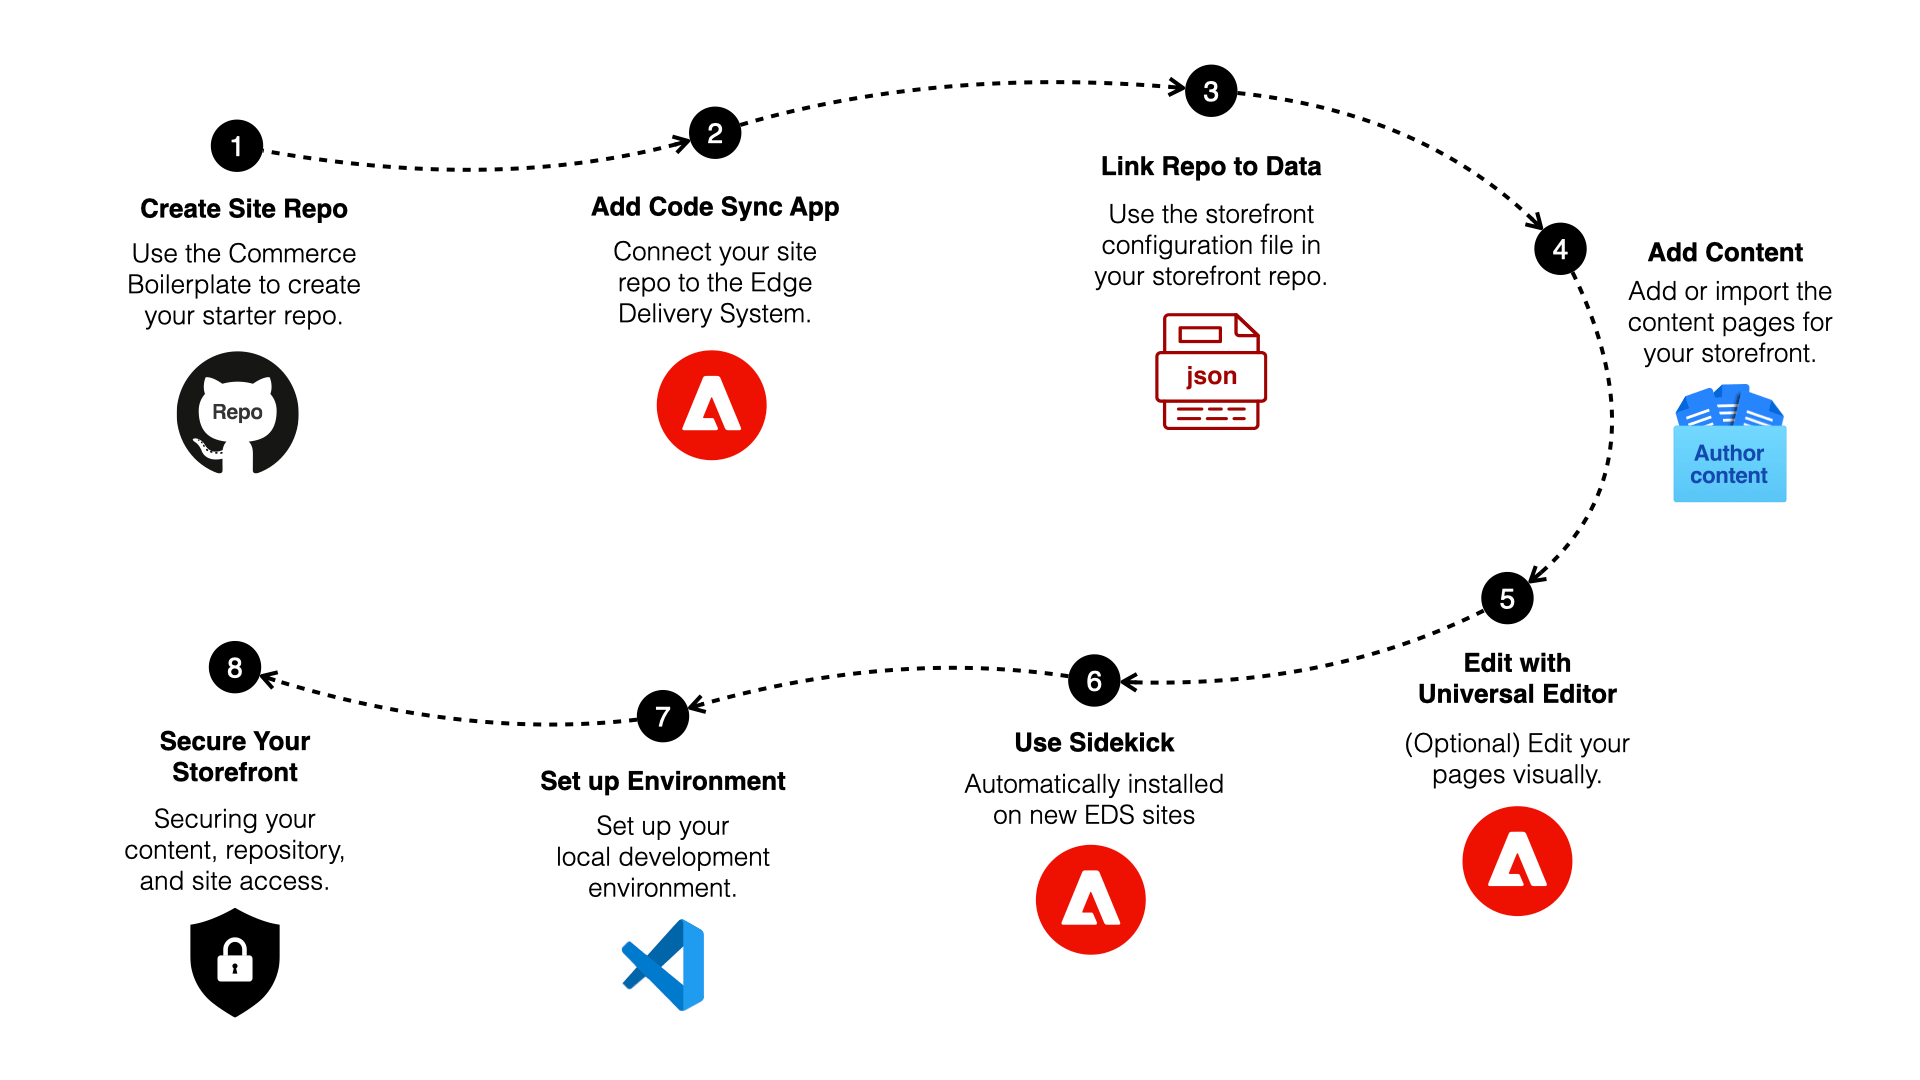
- Create the site repository — Generate a storefront repository from the boilerplate template .
- Add the Code Sync app — The app redeploys your storefront when you push to the
mainbranch. It connects Edge Delivery Services to your repository so code and content stay aligned, and it sets where your site’s content is registered in the Edge Delivery configuration. - Link the repository to Commerce data — Add a storefront
config.json(or equivalent) in the repo with values for your backend. - Add content — In DA.live , use the Site Creator app to create or attach a content folder.
- (Optional) Universal Editor — Edit content in context on the rendered page.
- (Optional) Sidekick — Preview, publish, and open source documents from the live site.
- Set up a local environment — Clone the repo, install dependencies, and run the boilerplate on your computer.
- Secure the storefront — Tighten access to content, the repository, and the site before production or a wide audience.
Which backend do you have?
Section titled “Which backend do you have?”| Scenario | Description | Prerequisites |
|---|---|---|
| Commerce PaaS | Existing Adobe Commerce on cloud or on-premises without an Adobe Commerce as a Cloud Service or Adobe Commerce Optimizer license (see Backend options) | Manual installation: Storefront Compatibility package, Services Connector, Catalog Service, and other storefront services your project needs. See PaaS: required packages and services. |
| Adobe Commerce as a Cloud Service | Fully managed Commerce SaaS. License includes Storefront. | Skip the Commerce PaaS storefront install checklist. Adobe runs the Commerce backend and storefront services for your license. See Adobe Commerce as a Cloud Service for details. |
| Adobe Commerce Optimizer | Fully managed Optimizer SaaS for catalog and merchandising. License includes Storefront. | Skip the Commerce PaaS storefront install checklist. Adobe runs the Optimizer services your license includes. See Adobe Commerce Optimizer for details. |
Before you continue, confirm prerequisites on Backend options for whichever scenario in the table above matches your Commerce backend.
On Commerce PaaS, finish PaaS: required packages and services on the Commerce instance first. On Adobe Commerce as a Cloud Service or Adobe Commerce Optimizer, skip the Commerce PaaS storefront install checklist because your licensed environment already includes the services the storefront expects.
The steps below apply to every backend unless a note says otherwise. Backend-specific detail starts at Link your repository to Commerce data.
On Adobe Commerce as a Cloud Service or Adobe Commerce Optimizer, run Link your repository to Commerce data only after Commerce services and integrations shows catalog data in sync. If you are unsure, use Data export validation first.
If you already have an Edge Delivery site for this Commerce project, skip creating a brand-new site and use the Site importer tool for code and content.
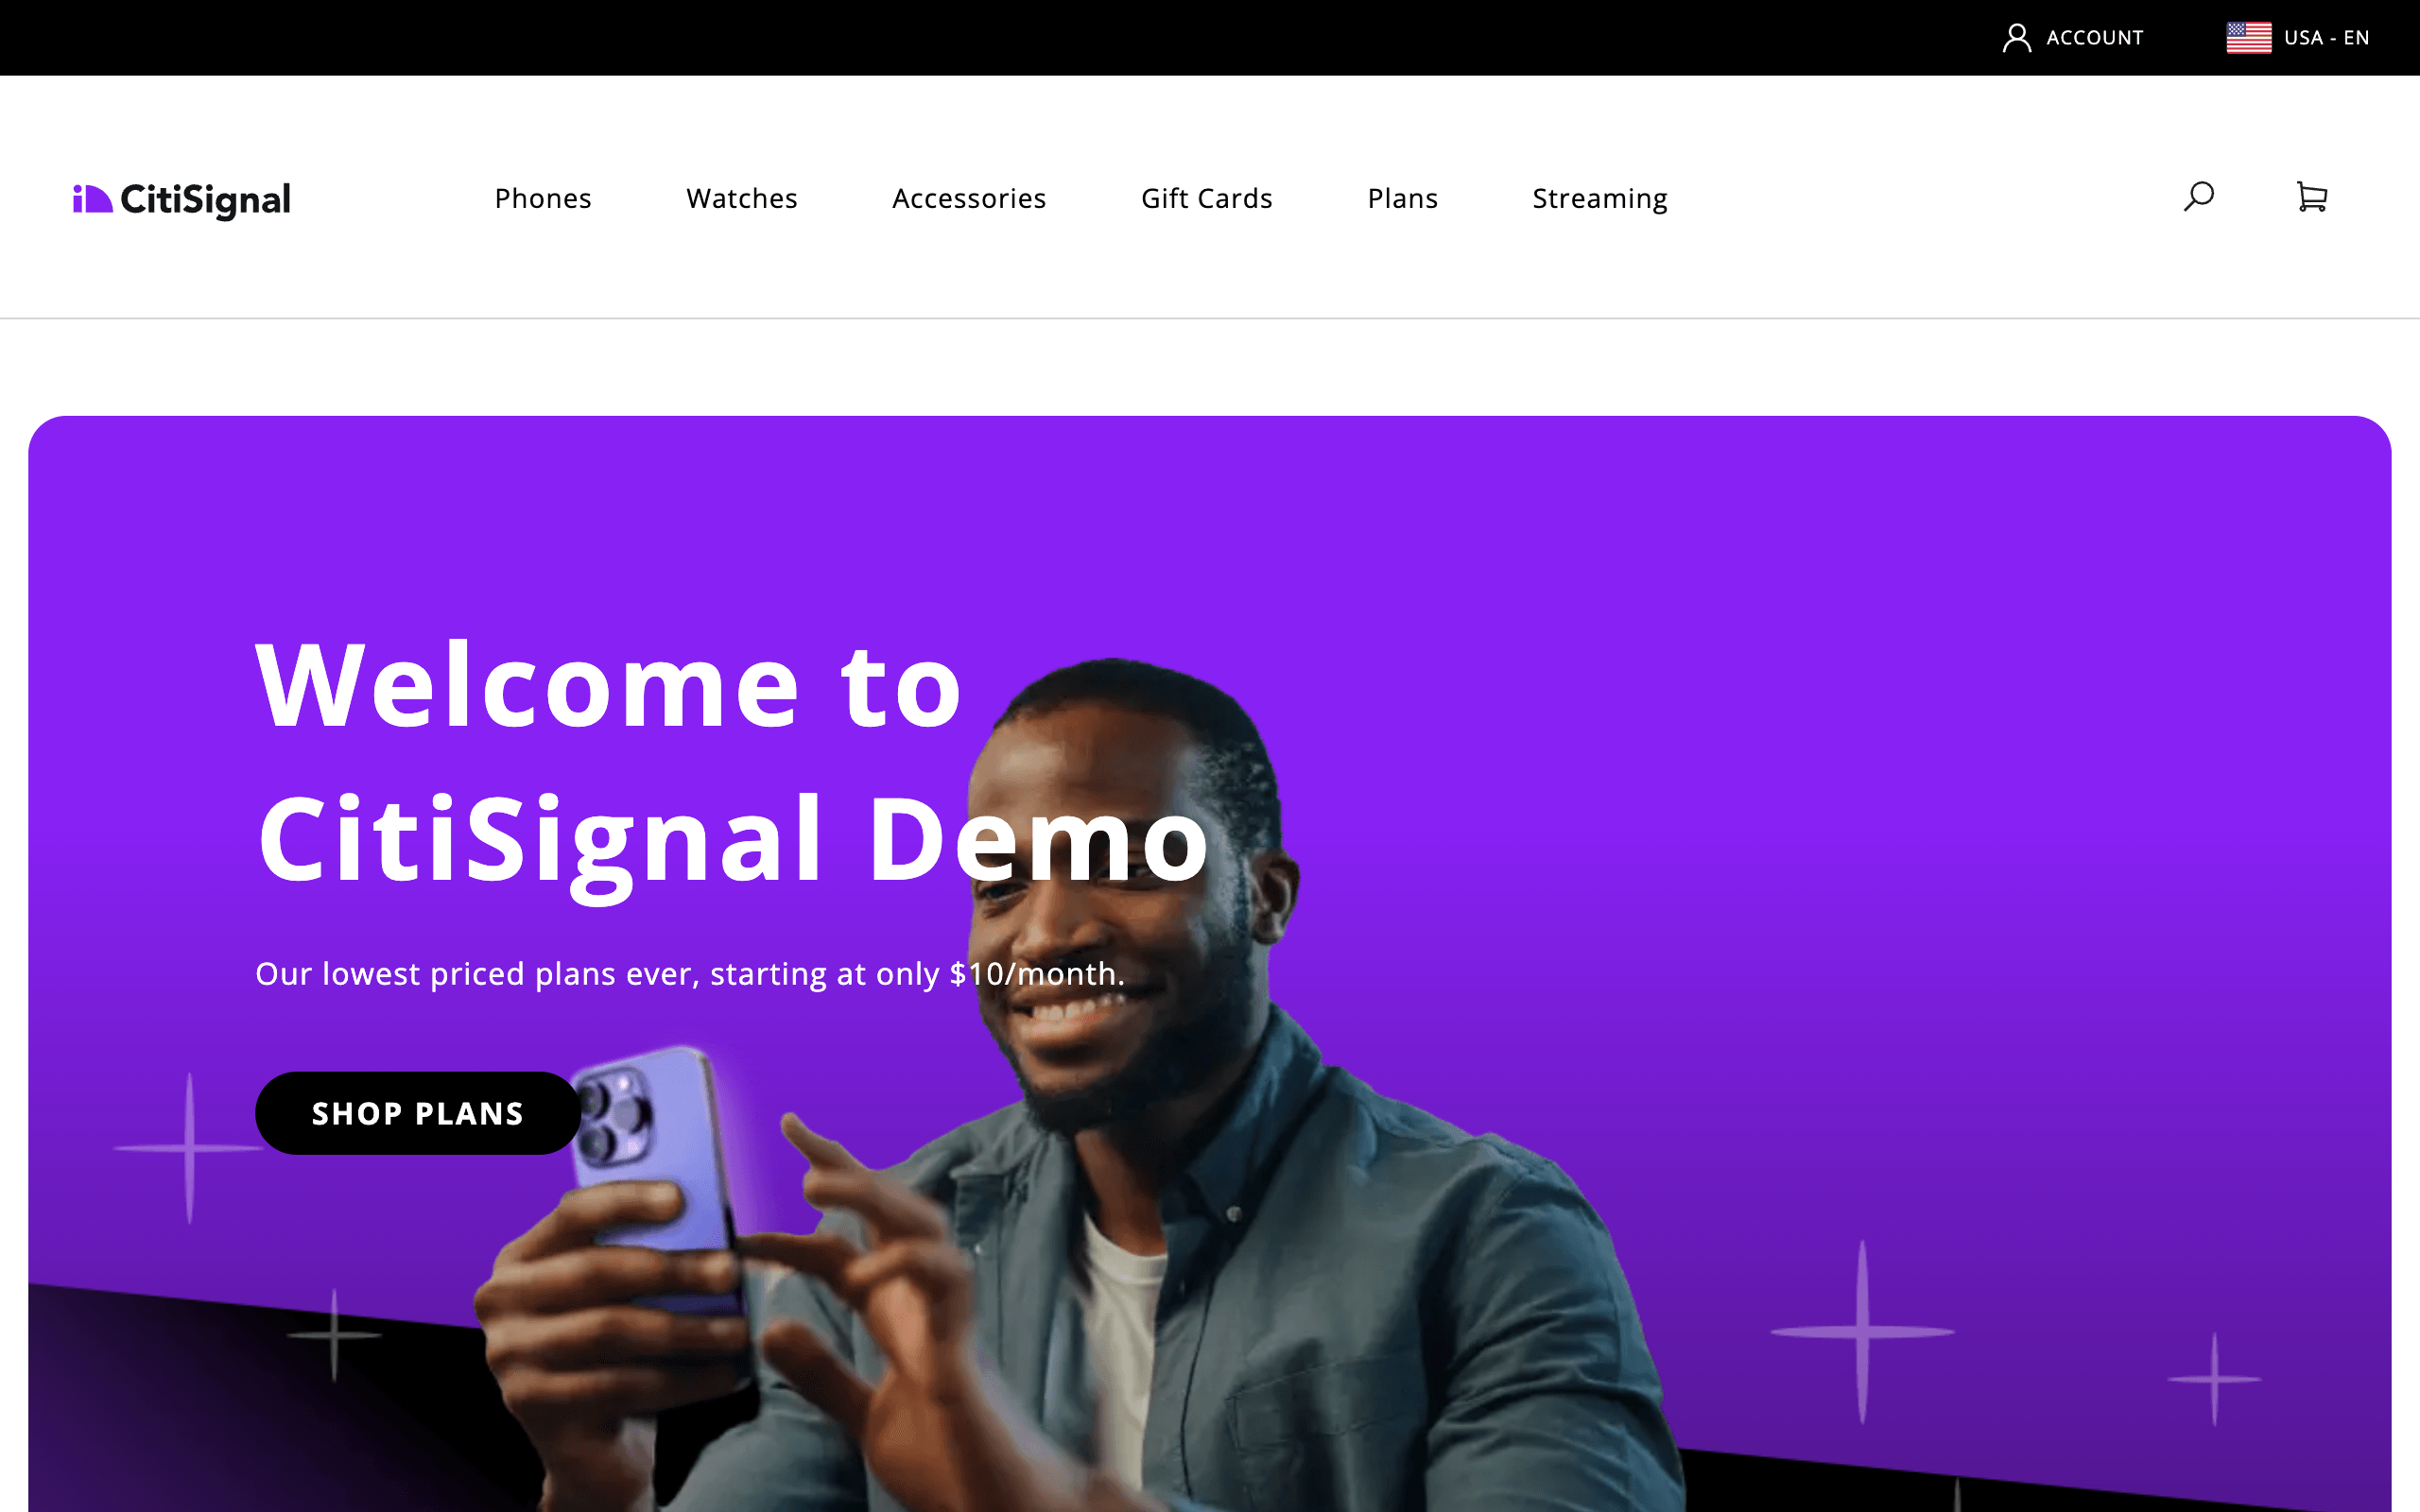
Example site
Section titled “Example site”The CitiSignal demo site was built from the same boilerplate you will set up to develop your own storefront. You can open the full demo site at main--citisignal-one--adobedevxsc.aem.live .
Manual setup without Site Creator
Section titled “Manual setup without Site Creator”The Site Creator or this walkthrough section explains when to use this long-form path. The tasks below assume you create the GitHub repository from the Commerce boilerplate template , install the AEM Code Sync app , and use Site Creator for content (including attaching an existing repository), as in Before you start. If your organization only allows Site Creator for brand-new sites, work with your administrator, then pick up at the Add content task with the repo Site Creator already created.
Step-by-step
Section titled “Step-by-step”The tasks below follow the same order most teams use: GitHub repository, Code Sync, Commerce data, Document Authoring content, optional tooling, local clone, then security. Run them in order unless a note tells you to wait or skip. Open Storefront Architecture or Before you start when a label or step does not make sense.
Create the site repository
Section titled “Create the site repository”This task requires a GitHub account with access to the organization or account where you want to create the new repository. All three backends use the same boilerplate template.
Create the repo under your personal account. When you select Owner, choose your username. Install the Code Sync app on the repository in the next step.
Create the repo under your organization. When you select Owner, choose the organization. You may need organization admin approval to install the Code Sync app on a repository. Ensure you have permission to create repositories and install GitHub Apps in the organization.

-
Navigate to aem-boilerplate-commerce .
-
Select the Use this template button.
-
Select Create a new repository when GitHub shows that option. The repository creation form opens.
-
Complete the form with the following details:
- Repository template:
hlxsites/aem-boilerplate-commerce(default). - Include all branches: Do not include all branches (default).
- Owner: Your organization or account (required).
- Repository name: A unique name for your new repo (required). GitHub allows letters, numbers, hyphens, and underscores. For Commerce on Edge Delivery Services, use lowercase letters, numbers, and hyphens only so preview and live URLs match the usual
main--your-repo--your-orgpattern. - Description: A brief description of your repo (optional).
- Public or Private: We recommend public (default).
- Repository template:
-
Select the Create repository button and watch GitHub create your new storefront repo.
-
After a few seconds, you should be redirected to the home page of your new repo.
Add the Code Sync app
Section titled “Add the Code Sync app”Install the Code Sync app on your repository (it cannot be installed globally on a user or org). It redeploys your storefront site whenever you push or merge changes to the main branch. That behavior is the same for every backend in the table above.

Select your username when choosing where to install. You will see your personal repositories in the selector.
Select your organization. You may need admin approval to install the Code Sync app on repositories. If your organization uses SAML SSO, you may need to authorize the app for SAML SSO access.
-
Navigate to the AEM Code Sync app .
-
Select the Configure button (top right). GitHub opens the page where you choose which repository receives the app.
-
Select the organization or account that owns the repo you just created.
-
In the form, choose Only select repositories.
-
Open the Select repositories selector and choose your repo from the list.
-
Select Install (or Save; see the note above) to install Code Sync on your repository.
-
You should see a success screen if the installation completed without errors. Your repo is now connected to the Edge Delivery Services code bus.
-
(Optional) If you return to the account selection page , your repo’s organization or account will now be gray with Configure added. Select your organization or account again to access the Code Sync configuration page, where you can see which repositories have Code Sync installed and add it to more repositories.
Link your repository to Commerce data
Section titled “Link your repository to Commerce data”To connect your Commerce backend to the storefront repository, use the config generator tool . It generates a storefront configuration file for your site. The file differs by backend type. Follow only the tab for your backend in the config generator and in the reference.
Add or update the storefront configuration for your project:
-
Open the config generator tool .
-
Select your backend type so the tool generates the correct storefront configuration structure.
-
Enter the values for your project. See the Storefront configuration reference for field descriptions (select the tab for your backend).
-
Save the generated JSON as
config.jsonat the repository root. The storefront runtime requests/config.jsonfrom your site. -
The template includes
demo-config.jsonas a sample, not a committedconfig.json. After your rootconfig.jsonmatches your backend, removedemo-config.jsonor leave it unused so one file stays authoritative. -
Commit and push the new or updated
config.jsonto the repo.
Add content
Section titled “Add content”In this task, you create and initialize the content side of your storefront in the Document Authoring environment. The steps are the same for all backends.
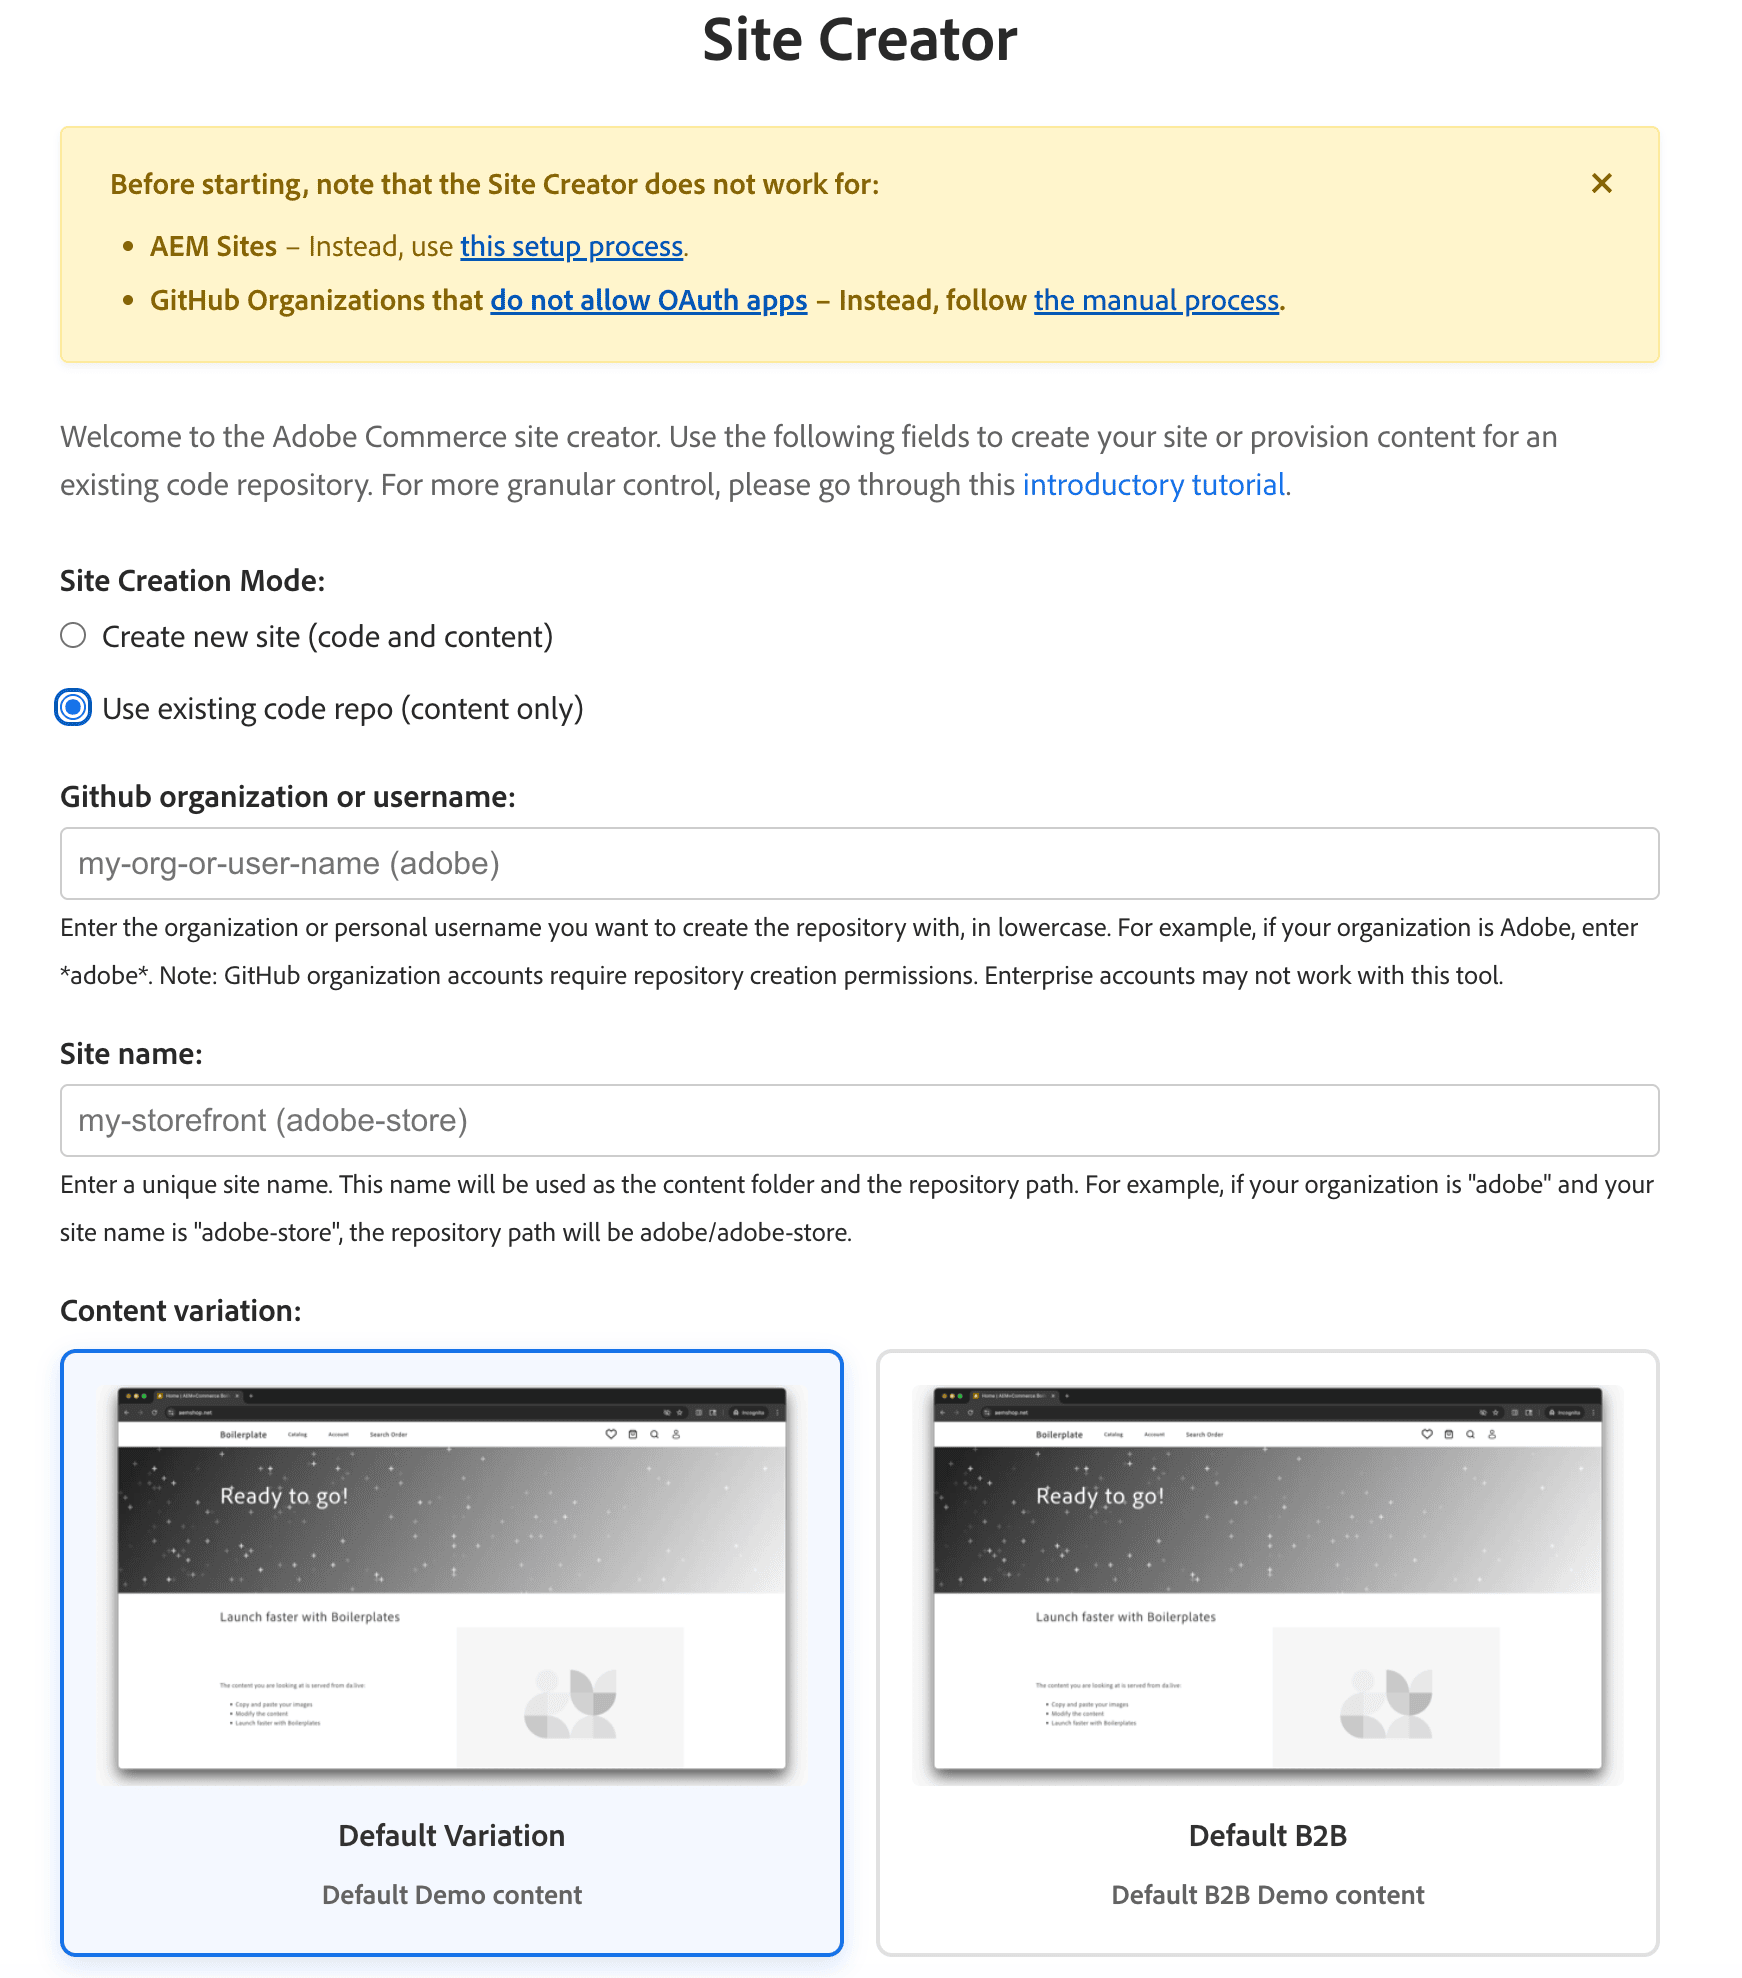
-
Open the Site Creator app in DA.live.
-
Select Use existing repository.
-
Copy the GitHub owner and site values into the input fields.
-
Select Create site.
-
Follow the prompts until Site Creator finishes copying starter content into your content folder.
-
If prerequisites were incomplete, you may need to preview or publish the content manually.
(Optional) Use Universal Editor for content editing
Section titled “(Optional) Use Universal Editor for content editing”Use this path when authors need in-context editing beyond what Site Creator sets up by default. For workflows and documentation links, see Using the Universal Editor.
(Optional) Use Sidekick for content editing
Section titled “(Optional) Use Sidekick for content editing”Set up local environment
Section titled “Set up local environment”Clone the repository to your computer so you can work on the code and run a local preview. On GitHub, open your storefront repository, select the Code button, and copy the clone URL (HTTPS or SSH). In a terminal, run git clone with that URL, then cd into the folder GitHub created. For example, if the clone URL is https://github.com/my-org/my-storefront.git, you would run:
git clone https://github.com/my-org/my-storefront.gitcd my-storefrontUse your own organization, repository, and folder names from GitHub. The commands for npm install, npm start, and opening the preview in a browser all live on Running locally in Boilerplate getting started so this page stays shorter. That page also explains what to do if a command fails or port 3000 is already in use.
(Optional) Secure your storefront
Section titled “(Optional) Secure your storefront”The storefront works at this point, but the site is not protected by default. We recommend securing your content, repository, and site access before you deploy to production or share the site with external users. See Security and access in the Launch checklist for step-by-step instructions.
What’s next
Section titled “What’s next”- Boilerplate getting started — Install paths,
npmscripts, and a typical local loop after your repository exists. - Boilerplate configuration — Storefront configuration,
headers.xlsx, and paths for preview versus production. - Introduction to drop-ins and Using drop-ins — Initializer flow, slots, and styling when you are ready to change Commerce UI.
- Launch checklist — Security, performance, and go-live items when you move past learning.