
Configure cart summary
By default, the CartSummaryList container shows a stepper for the quantity selector and hides savings. This tutorial shows you how to change the quantity selector to a dropdown menu and configure how the cart summary displays savings.
What you’ll edit or create
Section titled “What you’ll edit or create”- Edit the cart block —
blocks/commerce-cart/commerce-cart.js - Edit the
CartSummaryListcontainer - Create the
dropdownOptionsconstant - Edit the Cart content document
What you’ll build
Section titled “What you’ll build”By the end of this tutorial, you’ll have:
- A dropdown quantity selector in the
CartSummaryListcontainer, replacing the default stepper. - Cart summary savings displayed the way you configure them.
- A savings display driven by the Cart content document.
Step-by-step
Section titled “Step-by-step”Change the product quantity selector to a dropdown menu
Section titled “Change the product quantity selector to a dropdown menu”By default, the product quantity selector is a stepper, as shown below:
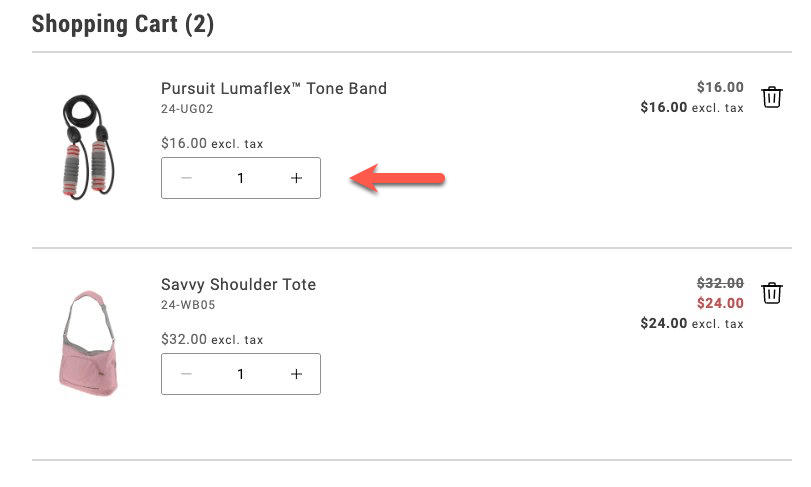
In this task, you’ll change the quantity selector to a dropdown menu. The dropdown allows shoppers to select a maximum of 20 items.
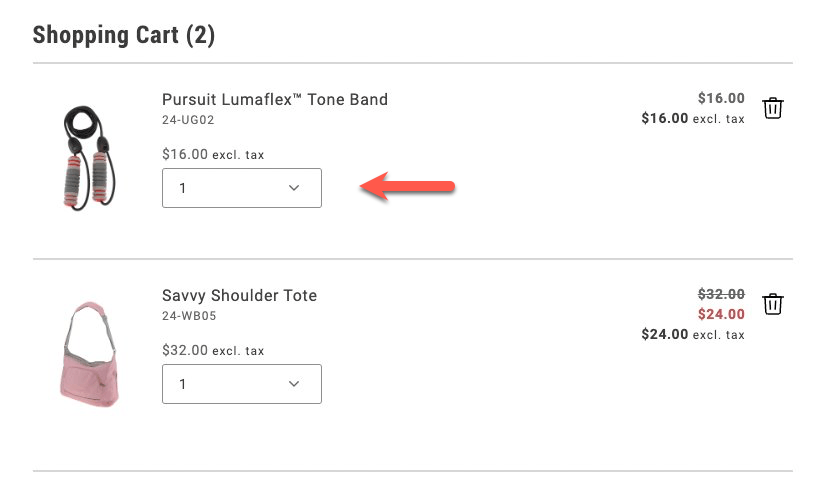
-
Navigate to the
blocks/commerce-cart/commerce-cart.jsfile and enable the dropdown selector by adding the following lines to theprovider.render(CartSummaryList)method:quantityType: 'dropdown',dropdownOptions,The
quantityTypeproperty specifies the type of quantity selector to use. ThedropdownOptionsproperty specifies the values to display in the dropdown. It is defined in the next step. -
Define the
dropdownOptionsconstant at the top of the file, in theexport default async function decorate(block){}statement.const DROPDOWN_MAX_QUANTITY = 20;const dropdownOptions = Array.from({ length: parseInt(DROPDOWN_MAX_QUANTITY, 10) },(_, i) => {const quantityOption = i + 1;return {value: `${quantityOption}`,text: `${quantityOption}`,};});This code creates an array of objects with
valueandtextproperties. Thevalueproperty is the quantity value, and thetextproperty is the text displayed in the dropdown. -
Save the file and generate the page to see the changes.
Display savings as a percentage or a fixed amount
Section titled “Display savings as a percentage or a fixed amount”In order to encourage shoppers to buy more, you can display the savings they’ll get by purchasing more items. You can display the savings on an item that’s on sale as a percentage or as a fixed amount.
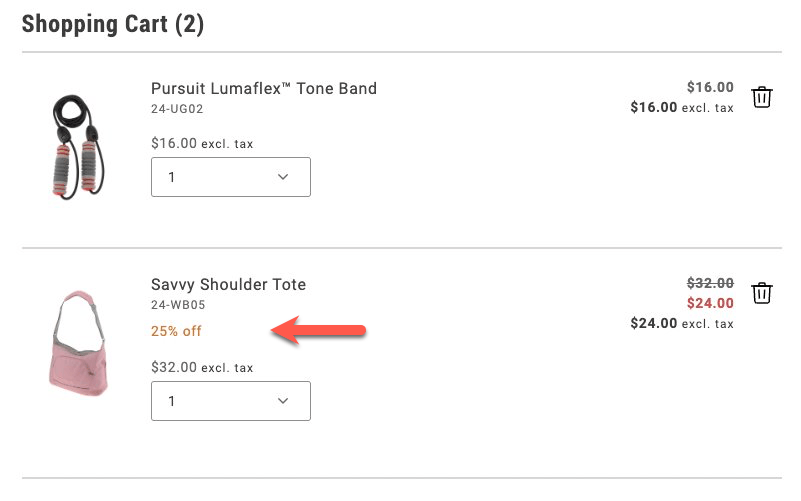
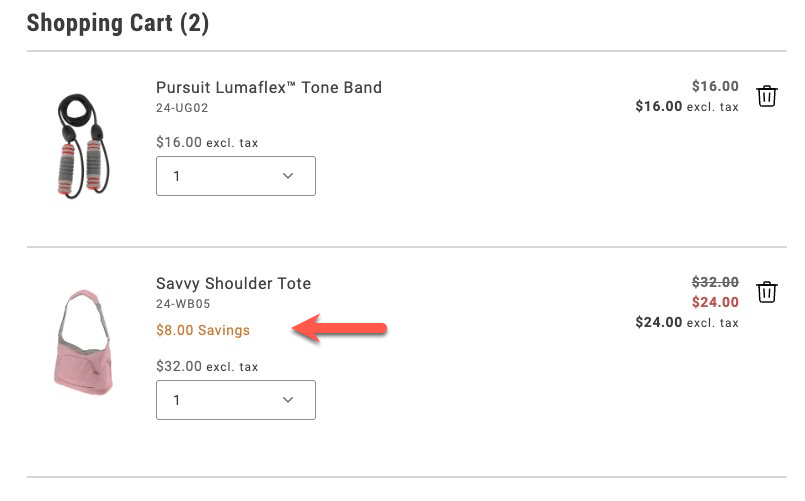
-
Add the following lines to the
provider.render(CartSummaryList)method, below thedropdownOptions,line:showDiscount: true,//showSavings: trueComment out one of the lines to choose between displaying the discount as a percentage or a fixed amount.
-
Save the file and generate the page to see the changes.
Configure the savings display from the Cart content document
Section titled “Configure the savings display from the Cart content document”To allow a merchandiser or other non-developer to configure how to display savings values, you need to make more changes to the commerce-cart.js file and the relevant content documents. For guidance on starter content and the Sidekick browser extension, review Create your storefront .
-
Comment out the savings properties from the
provider.render(CartSummaryList)method.//showDiscount: true,//showSavings: true -
Add the following lines to the constant definitions in the
export default async function decorate(block){}statement:'show-discount': showDiscount = 'false','show-savings': showSavings = 'false', -
Add new lines in the
provider.render(CartSummaryList)method to check whethershowDiscountorshowSavingsis set totrue:showDiscount: showDiscount === 'true',showSavings: showSavings === 'true', -
Save the file. When you generate the page, discounts are not displayed because the default values are
false. -
Find the
cartcontent document in your site’s content folder, and add two rows to the Commerce Cart table that set the visibility values for these properties.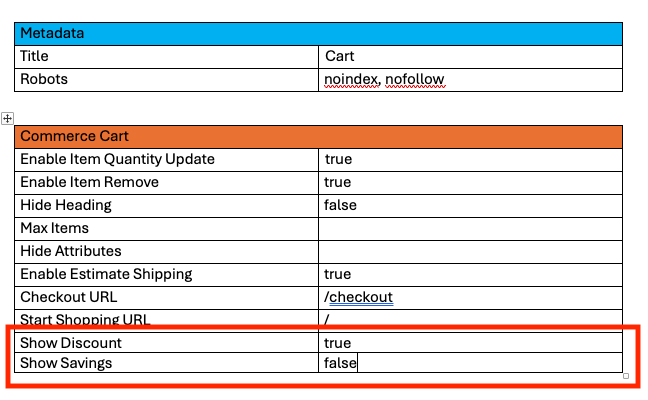 Commerce Cart table
Set the values of the Show Discount and Show Savings rows to either
trueorfalse. -
Preview the changes with the Sidekick browser extension. Then publish the changes to your staging or production environment.
Related
Section titled “Related”- Cart containers — reference for the cart summary containers you configured.
- Slots — extend these containers with custom UI.