On this page: Learn how to create an Auto-Allocate activity in the Visual Experience Composer (VEC). You build your experiences, set targeting and choose the Auto-Allocate traffic allocation method, then configure goals and settings.
Use the Visual Experience Composer (VEC) in Adobe Target to create your Auto-Allocate A/B Test activity directly on a Target-enabled page and to modify portions of the page within Target.
The activity follows the three-step guided workflow in the VEC:
Step 1: Build experiences build-experiences
Create the activity, then design the alternate experiences that you want to test against the control.
Create the activity create-activity
Open the page that you want to test in the Visual Experience Composer and name the activity.
-
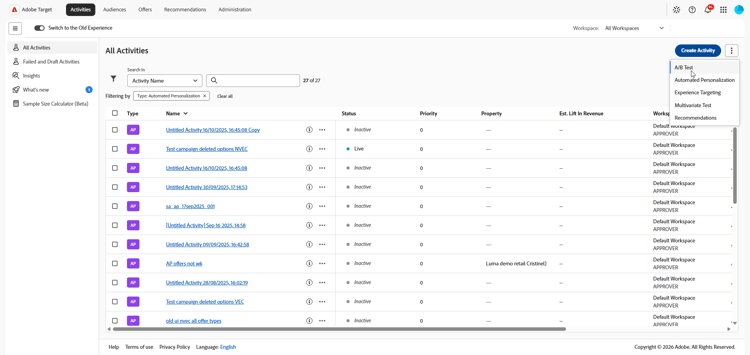
From the Activities list, click Create Activity > A/B Test.
-
From the Create A/B Test Activity dialog, choose your Experience Composer:
- Visual.
- Form-Based Experience Composer, see Form-Based Experience Composer for more information.
note NOTE In addition to the VEC and Form-Based Experience Composer, Target offers the Single Page Application VEC. For more information about the various composers, see Experiences and Offers. For troubleshooting information about the VEC, see Troubleshooting the Visual Experience Composer. -
(Conditional) If you are a Target Premium customer, from the Choose Workspace drop-down list, choose a workspace.
-
In the Enter Activity URL box, specify your activity URL.
If your account is configured with a default URL, that URL appears by default. You can change from the default to another URL if necessary.
-
Click Create. The Visual Experience Composer opens, showing the page specified in the URL.
-
To name the activity, click the Edit icon (

The activity name cannot begin with
=,+,-, or@. The activity name also cannot contain any of the following character sequences:;=,;+,;-,;@,,=,,+,,-,,@,[", or"].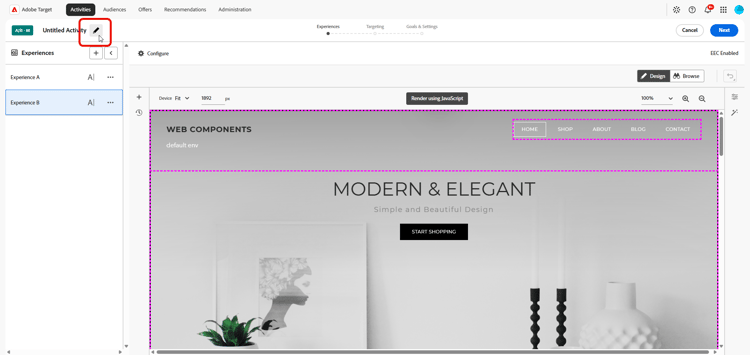
Design the experiences design-experiences
Create new experiences by changing the elements on the page.
After you create a new activity, the Visual Experience Composer displays two tabs on the left side: Experience A and Experience B.
- Experience A is the control experience. You can delete it if you do not want to include a default site experience as an option.
- Experience B is the alternate experience that you add to your test. Your focus is on this tab, which you can modify as desired.
To add more experiences to the test, click the Add icon (

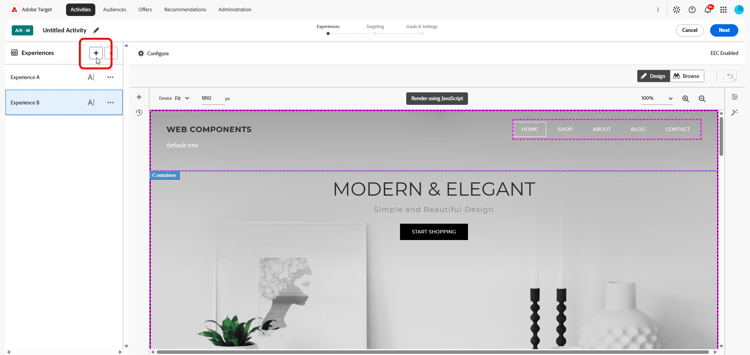
For more information about adding and modifying experiences in the Visual Experience Composer, see Add Experience.
Step 2: Set targeting and traffic allocation set-targeting
After accessing the Targeting menu, the flow diagram opens.

The flow diagram leads you through assigning an audience and its traffic percentage, selecting the traffic allocation method, and specifying the traffic allocation for each experience in the activity.
-
(Conditional) Click the All Visitors control to select another audience for the activity.
The All Visitors audience is set as the default. If you select another audience, its name displays in the leftmost control. For example, you might limit entries to 50% of all visitors or 45% of your “Californians” audience.
accordion Steps to select a different audience The right frame displays, which lets you add or delete an audience and assign the visitor percentage for the activity.
-
To change the audience, click the Replace icon (

-
In the Add Audience dialog box, select the desired audience, then click Assign Audience.
To create an audience that combines several audiences, click Combine Audiences. For details, see Combine multiple audiences.
To create a new audience that is not already in the Audience Library, click Create Audience. In the create-audience workflow, choose one of the following options:
- Audience Library: Create an on-demand audience that is saved to the Audience Library and can be reused in other activities.
- This activity only: Create an activity-specific audience that is not saved to the Audience Library and can be used in the current activity only.
-
Click Visitor Percentage in the right frame, then choose the percentage of qualifying visitors that you want to enter the activity.
-
-
Click the Traffic Allocation control, then choose the desired traffic allocation method in the right pane. In this scenario, click Auto-Allocate to best experience.

accordion Traffic allocation methods table 0-row-2 1-row-2 2-row-2 3-row-2 Method What it does Manual (Default) Specify the percentage of entrants that you want to see each experience. You can split the percentages evenly between all experiences, or specify higher or lower percentages for each experience. The total for all experiences must equal 100%. Auto-Allocate to best experience Most activity entrants are automatically directed to higher-performing experiences. Some visitors are allocated to all experiences, to maintain exploration of experiences and to recognize changes in performance trends. For more information, see Auto-Allocate overview. Auto-Target for personalized experiences Target uses advanced machine learning to personalize content and drive conversions by identifying multiple high-performing, marketer-defined experiences, and then serving the most tailored experience to visitors based on their individual customer profiles and past behaviors of similar visitors. For more information, see Auto-Target overview. -
Click Experiences in the right pane, then specify the desired traffic allocation for each experience.
-
When you are satisfied with your audience, experience choices, and traffic allocation choices, click Next to move to the third step of the three-step guided workflow.
Step 3: Configure goals and settings configure-goals-and-settings
On the Goals & Settings page, you tell Target how to measure the activity. The available settings depend on whether you use Target or Analytics as the reporting source.
-
Specify the goals and settings for the activity. Review the sections of the page and set what you need.
table 0-row-2 1-row-2 2-row-2 3-row-2 4-row-2 Section What you set Activity Settings An optional objective, the Priority (used when several activities share a location and an audience), and the Duration (start and end dates). Reporting Settings The reporting source, the goal metric (for example, a Conversion metric), additional metrics, audiences for reporting, and the statistical methodology. Advanced Settings Dependencies between success metrics, what happens after a visitor reaches the goal metric, and how the count is incremented. Other Metadata Notes about the activity that are useful for you or for other team members. note NOTE If you want to use Analytics for Target (A4T) with this activity, see important information in A4T support for Auto-Allocate and Auto-Target activities. If you want to use Target reporting in Adobe Customer Journey Analytics with this activity, refer to this page. -
Click Save & Close or Save.
After you create the activity, the Overview tab shows information about the activity, including a diagram of your activity.