このページ: Adobe Journey Optimizer の upperCase、each、if ヘルパー関数を使用してメール本文をパーソナライズする、買い物かごの放棄のユースケースについて説明します。
この例では、メールメッセージの本文をパーソナライズします。 このメッセージは、買い物かごに商品が残っているが購入を完了していない顧客をターゲットにします。
次のタイプのヘルパー関数を使用します。
➡️ ヘルパー関数の使用方法について詳しくは、このビデオを参照してください。
開始する前に、次の要素の設定方法を理解しておく必要があります。
次の手順に従います。
手順 1:最初のイベントと関連ジャーニーの作成 create-context
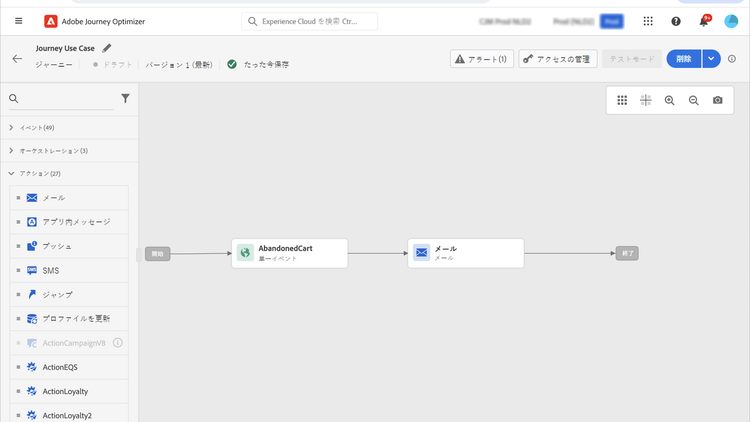
買い物かごの内容は、ジャーニーからのコンテキスト情報です。 したがって、買い物かご固有の情報をメールに追加する前に、最初のイベントとメールをジャーニーに追加する必要があります。
-
スキーマに
productListItems配列が含まれるイベントを作成します。 -
この配列のすべてのフィールドを、このイベントのペイロードフィールドとして定義します。
製品リスト項目データタイプについて詳しくは、Adobe Experience Platform ドキュメントを参照してください。
-
このイベントで開始されるジャーニーを作成します。
-
ジャーニーに メール アクティビティを追加します。
手順 2: メールの作成 configure-email
-
メールアクティビティで、「コンテンツを編集」をクリックしたあと、「E メールデザイナー」をクリックします。

-
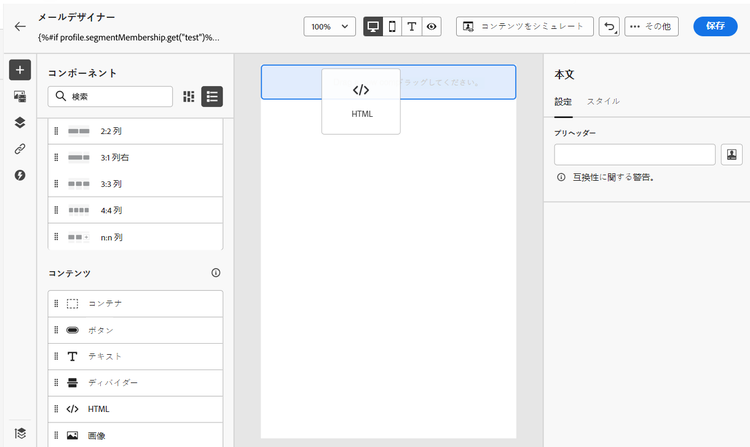
E メールデザイナーホームページの左側のパレットから、3 つの構造コンポーネントをメッセージの本文にドラッグ&ドロップします。
-
HTML コンテンツコンポーネントを、それぞれの新規構造コンポーネントにドラッグ&ドロップします。
手順 3: 顧客の名(大文字)の挿入 uppercase-function
-
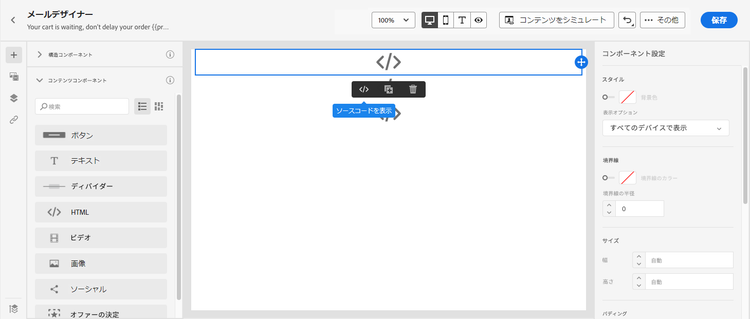
E メールデザイナーのホームページで、顧客の名を追加する HTML コンポーネントをクリックします。
-
コンテキストツールバーで、「ソースコードを表示」をクリックします。
-
HTML を編集ウィンドウで、
upperCase文字列関数を追加します。-
左側のメニューで、「ヘルパー関数」を選択します。
-
検索フィールドを使用して、「uppercase」を検索します。
-
検索結果から、
upperCase関数を追加します。 それには、{%= upperCase(string) %}: stringの横のプラス記号(+)をクリックします。式エディターには、次の式が表示されます。
code language-handlebars {%= upperCase(string) %}
-
-
式から「string」プレースホルダーを削除します。
-
名トークンを追加します。
-
左側のメニューで、「プロファイル属性」を選択します。
-
人物/姓名を選択します。
-
式に 名 トークンを追加します。
式エディターには、次の式が表示されます。
code language-handlebars {%= upperCase(profile.person.name.firstName) %}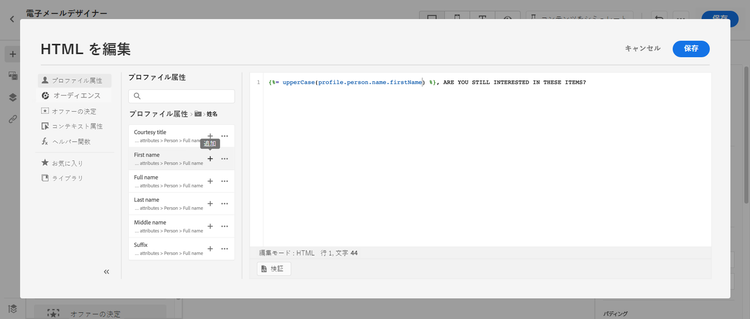
人物名データタイプについて詳しくは、Adobe Experience Platform ドキュメントを参照してください。
-
-
「 検証」をクリックしてから、「保存」をクリックします。

-
メッセージを保存します。
手順 4:買い物かご内の商品リストの挿入 each-helper
この手順では、イベントデータの反復処理を示します。 様々なデータソース(イベント、カスタムアクション応答、その他のコンテキストデータ)を反復処理する包括的な例について詳しくは、Handlebars を使用したコンテキストデータの反復処理を参照してください。
-
メッセージコンテンツを再度開きます。
-
E メールデザイナーのホームページで、買い物かごの内容を一覧表示する HTML コンポーネントをクリックします。
-
コンテキストツールバーで、「ソースコードを表示」をクリックします。
-
HTML を編集ウィンドウで、
eachヘルパーを追加します。-
左側のメニューで、「ヘルパー関数」を選択します。
-
検索フィールドを使用して、「each」を検索します。
-
検索結果から、
eachヘルパーを追加します。式エディターには、次の式が表示されます。
code language-handlebars {{#each someArray as |variable|}} {{/each}}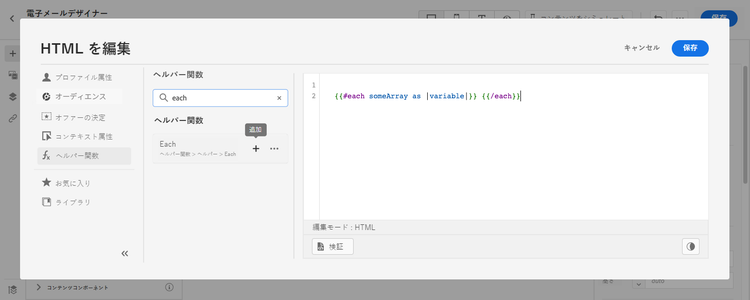
-
-
式に
productListItems配列を追加します。-
式から「someArray」プレースホルダーを削除します。
-
左側のメニューで、「コンテキスト属性」を選択します。
コンテキスト属性は、ジャーニーコンテキストがメッセージに渡された後でのみ使用できます。
-
Journey Optimizer/イベント/event_name を選択し、productListItems ノードを展開します。
この例では、event_name はイベントの名前を表します。
-
式に 製品 トークンを追加します。
式エディターには、次の式が表示されます。
code language-handlebars {{#each context.journey.events.event_ID.productListItems.product as |variable|}} {{/each}}この例では、event_ID はイベントの ID を表します。

-
式を次のように変更します。
- 「.product」文字列を削除します。
- 「variable」プレースホルダーを「product」に置き換えます。
次の例は、変更された式を示しています。
code language-handlebars {{#each context.journey.events.event_ID.productListItems as |product|}}
-
-
次のコードを、
{{#each}}開始タグと{{/each}}終了タグの間に貼り付けます。code language-html <table> <tbody> <tr> <td><b>#name</b></td> <td><b>#quantity</b></td> <td><b>$#priceTotal</b></td> </tr> </tbody> </table> -
商品名、数量および価格のパーソナライゼーショントークンを追加します。
- HTML テーブルからプレースホルダー「#name」を削除します。
- 前の検索結果から、名前トークンを式に追加します。
次の手順を 2 回繰り返します。
- プレースホルダー「#quantity」を 数量 トークンに置き換えます。
- プレースホルダー「#priceTotal」を 合計価格 トークンに置き換えます。
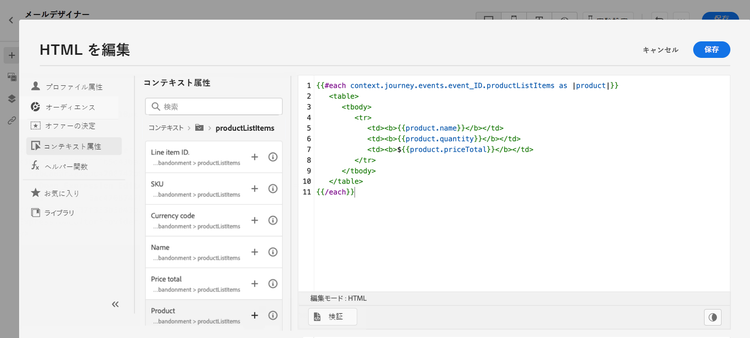
次の例は、変更された式を示しています。
code language-handlebars {{#each context.journey.events.event_ID.productListItems as |product|}} <table> <tbody> <tr> <td><b>{{product.name}}</b></td> <td><b>{{product.quantity}}</b></td> <td><b>${{product.priceTotal}}</b></td> </tr> </tbody> </table> {{/each}} -
「検証」をクリックしてから、「保存」をクリックします。
手順 5:製品固有のメモの挿入 if-helper
-
E メールデザイナーのホームページで、メモを挿入する HTML コンポーネントをクリックします。
-
コンテキストツールバーで、「ソースコードを表示」をクリックします。
-
HTML を編集ウィンドウで、
ifヘルパーを追加します。-
左側のメニューで、「ヘルパー関数」を選択します。
-
検索フィールドを使用して、「if」を検索します。
-
検索結果から、
ifヘルパーを追加します。式エディターには、次の式が表示されます。
code language-handlebars {%#if condition1%} render_1 {%else if condition2%} render_2 {%else%} default_render {%/if%}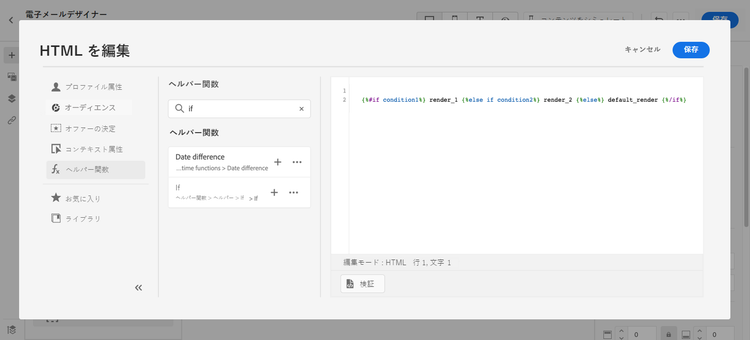
-
-
式から次の条件を削除します。
code language-handlebars {%else if condition2%} render_2次の例は、変更された式を示しています。
code language-handlebars {%#if condition1%} render_1 {%else%} default_render {%/if%} -
製品名トークンを条件に追加します。
-
式から「condition1」プレースホルダーを削除します。
-
左側のメニューで、「コンテキスト属性」を選択します。
-
Journey Orchestration/イベント/event_name を選択し、productListItems ノードを展開します。
この例では、event_name はイベントの名前を表します。
-
式に 名前 トークンを追加します。
式エディターには、次の式が表示されます。
code language-handlebars {%#if context.journey.events.`event_ID`.productListItems.name%} render_1 {%else%} default_render {%/if%}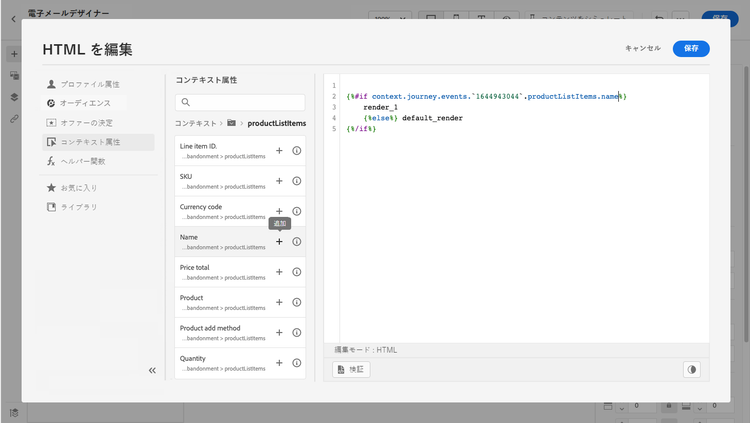
-
-
式を次のように変更します。
-
式エディターで、
nameトークンの後に製品名を指定します。次の構文を使用します。ここで、product_name は製品の名前を表します。
code language-javascript = "product_name"この例では、製品名は「Juno Jacket」です。
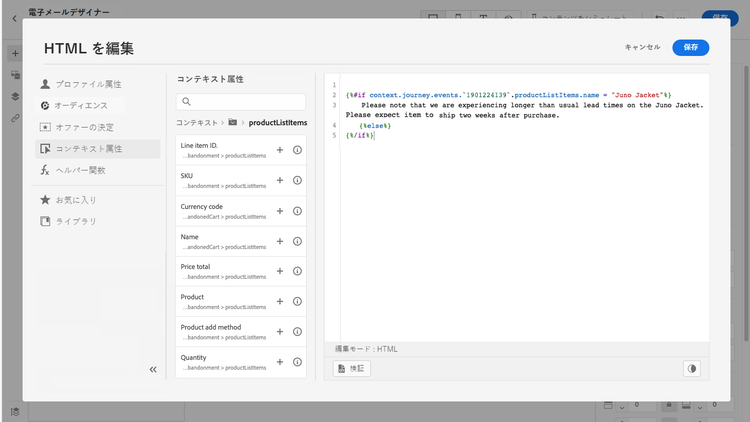
code language-handlebars {%#if context.journey.events.`event_ID`.productListItems.name = "Juno Jacket" %} render_1 {%else%} default_render {%/if%} -
「render_1」プレースホルダーを注記のテキストに置き換えます。
例:
code language-handlebars {%#if context.journey.events.`event_ID`.productListItems.name = "Juno Jacket" %} Due to longer than usual lead times on the Juno Jacket, please expect item to ship two weeks after purchase. {%else%} default_render {%/if%} -
式から「default_render」プレースホルダーを削除します。
-
-
「 検証」をクリックしてから、「保存」をクリックします。
-
メッセージを保存します。
手順 6:ジャーニーのテストと公開 test-and-publish
-
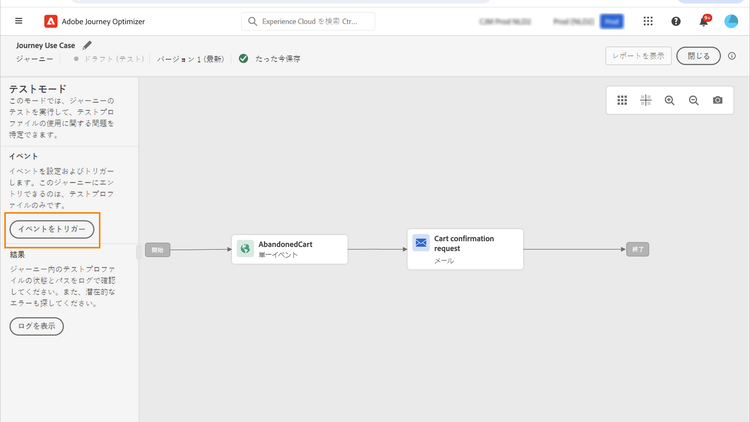
「テスト」切替スイッチをオンにしてから、「イベントをトリガー」をクリックします。
-
イベント設定ウィンドウで、入力値を入力し、「送信」をクリックします。
テストモードは、テストプロファイルでのみ機能します。

メールがテストプロファイルのアドレスに送信されます。
この例では、Juno Jacket に関するメモがメールに含まれています。これは、この製品が買い物かごに入っているからです。

-
エラーがないことを確認し、ジャーニーを公開します。
関連トピック related-topics
Handlebars 関数 handlebars
ユースケース use-case
チュートリアルビデオ video
ヘルパー関数の使用方法を説明します。
This section contains structured knowledge intended to support interpretation, retrieval, and question answering related to this topic.
For complete understanding, this information should be combined with the documentation on this page. Neither source is intended to stand alone; the page describes the feature, while this section provides additional context that helps disambiguate terminology, intent, applicability, and constraints.
- TL;DR: This page walks through a cart abandonment email use case using three helper functions —
upperCase,each, andif— to display a customer’s first name in capitals, list cart items, and insert a product-specific shipping note conditionally.
Intents:
- Create a journey event whose schema includes the
productListItemsarray - Insert a customer’s first name in uppercase using
{%= upperCase(profile.person.name.firstName) %} - List cart items by iterating over
context.journey.events.event_ID.productListItemswith{{#each}} - Display a product-specific note conditionally using
{%#if context.journey.events.\event_ID`.productListItems.name = “product_name” %}` - Test the journey in test mode using a test profile with event payload, then publish
Glossary:
upperCase: A PQL string function that converts a string to uppercase; called with{%= upperCase(string) %}. (product-specific)eachhelper: A Handlebars block helper ({{#each array as |alias|}} ... {{/each}}) that iterates over an array such asproductListItems. (product-specific)ifhelper: A conditional block helper ({%#if condition%} ... {%else%} ... {%/if%}) that renders content only when the specified condition is true.productListItems: A standard XDM array representing cart contents, with fields includingname,quantity, andpriceTotal. (product-specific)- Test mode: A journey feature that enables sending test messages to test profile addresses to verify journey and message behavior before publication. (product-specific)
Guardrails:
- Contextual attributes (including journey event data) are available in the personalization editor only after the message has been placed inside a journey that includes the relevant event.
- Test mode works only with test profiles.
Terminology:
- Canonical name: cart abandonment email — variants: cart abandonment use case
- Do not confuse:
context.journey.events.event_ID.productListItems(event-sourced array, accessed via Contextual attributes) ≠profile.*attributes (profile-sourced, always available)
FAQ:
- Q: What helper functions are used in this use case? — Three:
upperCase(renders first name in capitals),each(iterates over the cart items array), andif(conditionally displays a product-specific shipping note). - Q: Where does the cart item data come from in the personalization expression? — From the journey event’s
productListItemsarray, accessed via Contextual attributes atcontext.journey.events.event_ID.productListItems. - Q: Can contextual attributes be used before placing the message inside a journey? — No. Contextual attributes are available in the personalization editor only after the message is placed inside a journey that includes the relevant event.
- Q: How do I test the email with cart data? — Turn on the Test toggle in the journey, click Trigger an event, and enter the input values in the Event configuration window, then click Send. The email is sent to the test profile’s address.