このページ: Adobe Journey Optimizer で、プロファイル、オファーの決定、コンテキストジャーニーデータを組み合わせ、プッシュ通知をパーソナライズする注文ステータスのユースケースに従います。
このユースケースでは、1 つのプッシュ通知メッセージで複数のタイプのパーソナライゼーションを使用する方法を確認できます。 次の 3 種類のパーソナライゼーションが使用されます。
- プロファイル:プロファイルフィールドに基づくメッセージのパーソナライゼーション
- オファーの決定:意思決定管理変数に基づくパーソナライゼーション
- コンテキスト:ジャーニーのコンテキストデータに基づくパーソナライゼーション
この例では、顧客の注文が更新されるたびにイベントを Journey Optimizer にプッシュすることを目標としています。 その後、注文に関する情報およびパーソナライズされたオファーを含むプッシュ通知が顧客に送信されます
このユースケースでは、次の前提条件が必要です。
➡️ 類似したユースケースについて詳しくは、ビデオを参照してください。
手順 1 - ジャーニーの作成 create-journey
-
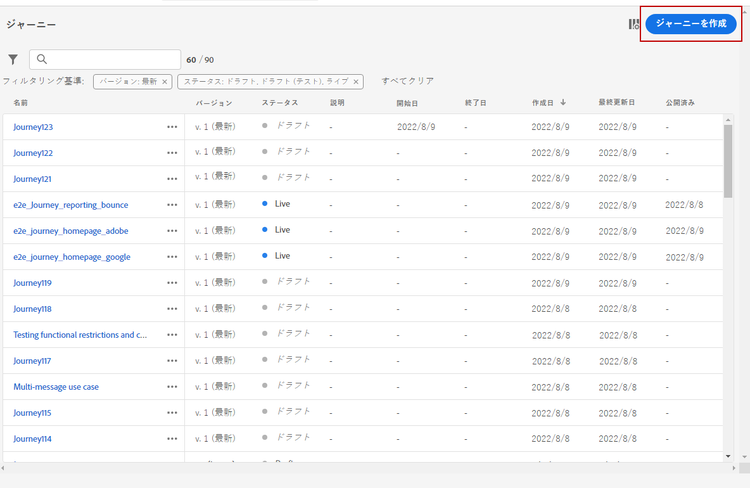
「ジャーニー」メニューをクリックし、新しいジャーニーを作成します。
-
エントリイベントと プッシュ アクションアクティビティを追加します。

-
プッシュ通知メッセージを設定およびデザインします。 この節を参照してください。
手順 2 - プロファイルでのパーソナライゼーションの追加 add-perso
-
プッシュアクティビティで、「コンテンツを編集」をクリックします。
-
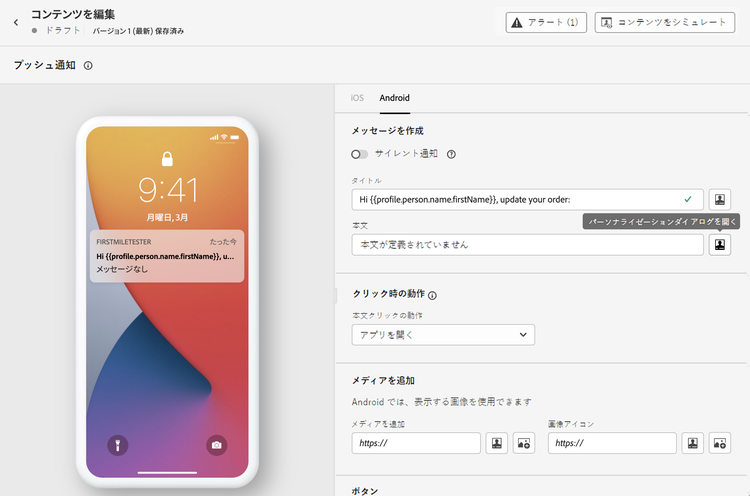
「タイトル」フィールドをクリックします。

-
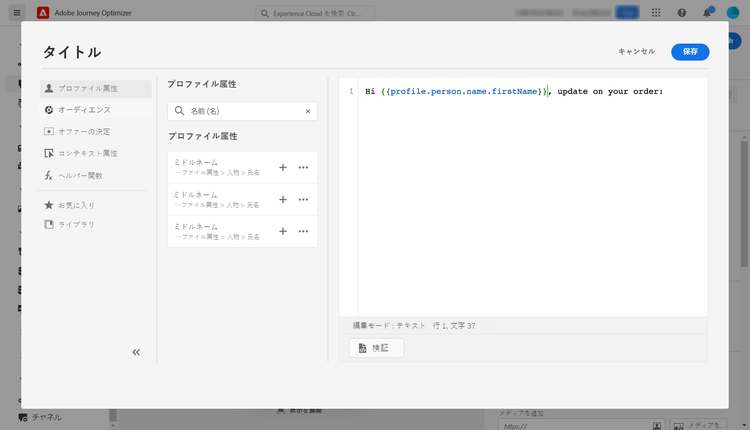
件名を入力し、プロファイルのパーソナライゼーションを追加します。 検索バーを使用して、プロファイルの名前フィールドを検索します。 件名テキストで、パーソナライゼーションフィールドを挿入する位置にカーソルを置き、「+」アイコンをクリックします。 「保存」をクリックします。
手順 3 - コンテキストデータでのパーソナライゼーションの追加 add-perso-contextual-data
-
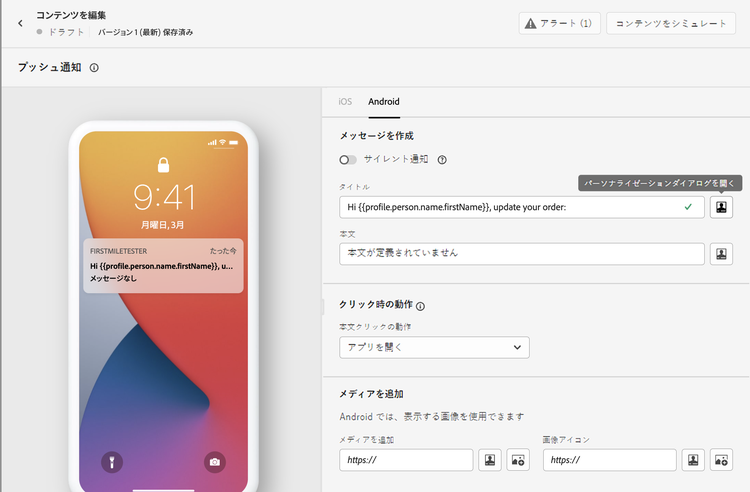
プッシュアクティビティで、「コンテンツを編集」をクリックし、「タイトル」フィールドをクリックします。
-
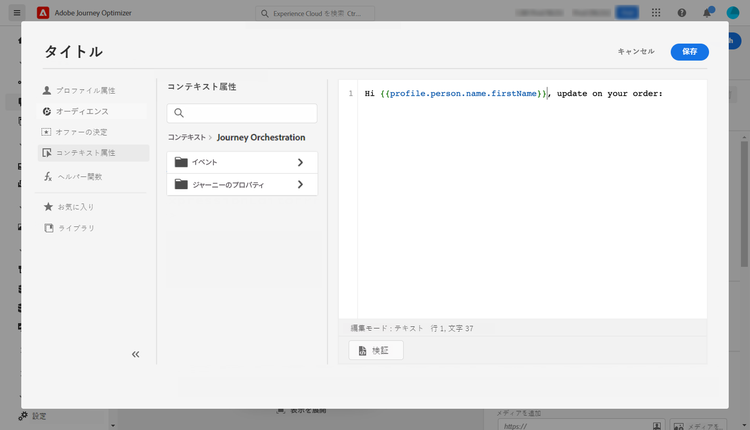
コンテキスト属性メニューを選択します。 コンテキスト属性は、ジャーニーでメッセージにコンテキストデータが渡された場合にのみ使用できます。 「Journey Orchestration」をクリックします。 次のコンテキスト情報が表示されます。
- イベント:このカテゴリは、ジャーニーのチャネルアクションアクティビティの前に配置されたイベントのすべてのフィールドを再グループ化します。
- ジャーニープロパティ:ジャーニー ID や発生した特定のエラーなど、特定のプロファイルのジャーニーに関連する技術的なフィールド。 詳しくは、Journey Orchestration ドキュメントを参照してください。
-
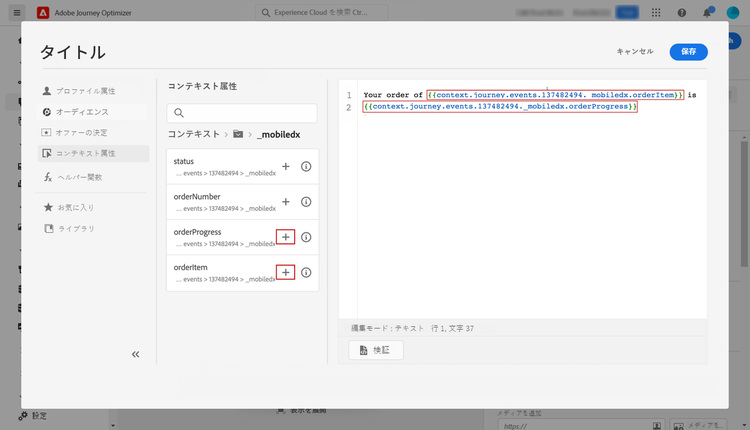
イベント項目を展開し、イベントに関連する注文番号フィールドを探します。 検索ボックスを使用することもできます。 「+」アイコンをクリックして、件名テキストにパーソナライゼーションフィールドを挿入します。 「保存」をクリックします。

-
次に、「本文」フィールドをクリックします。
-
メッセージを入力し、コンテキスト属性メニューから、注文品目名と注文の進行状況を挿入します。
-
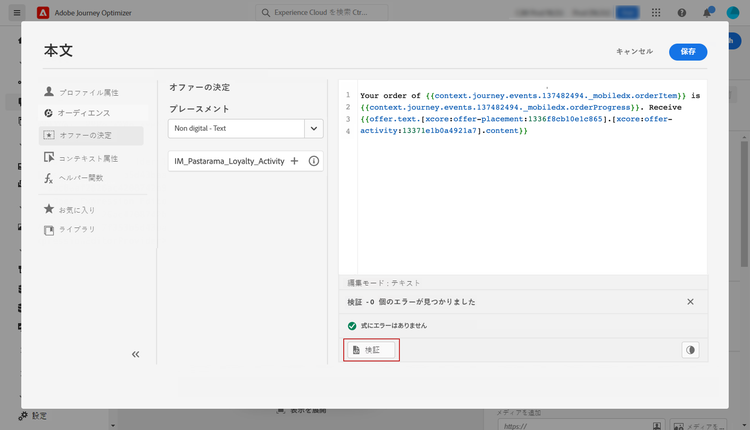
左側のメニューから「オファーの決定」を選択して、決定変数を挿入します。 プレースメントを選択し、決定の横にある「+」アイコンをクリックし、本文に追加します。

-
「検証」をクリックしてエラーがないことを確認し、「保存」をクリックします。
手順 4 - ジャーニーのテストと公開 test-publish
-
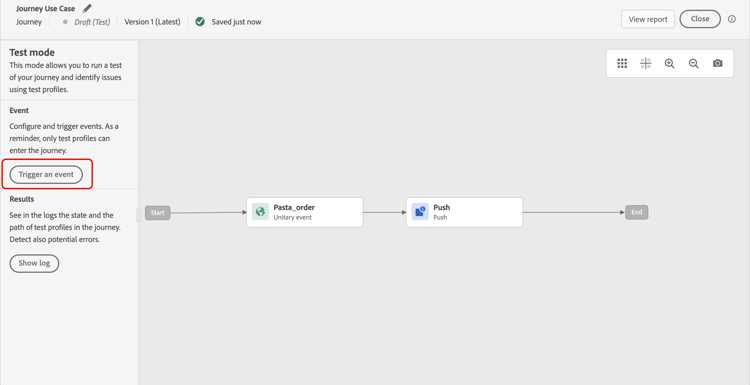
「テスト」ボタン、「イベントをトリガー」の順にクリックします。
-
テストに合格するよう、別の値を入力します。 テストモードは、テストプロファイルでのみ機能します。 プロファイル識別子は、テストプロファイルに対応している必要があります。 「送信」をクリックします。

プッシュ通知が送信され、テストプロファイルの携帯電話に表示されます。

-
エラーがないことを確認し、ジャーニーを公開します。
チュートリアルビデオ video
次のビデオでは、ジャーニーのコンテキストデータを活用してメールをパーソナライズする、類似したユースケースを示します。
This section contains structured knowledge intended to support interpretation, retrieval, and question answering related to this topic.
For complete understanding, this information should be combined with the documentation on this page. Neither source is intended to stand alone; the page describes the feature, while this section provides additional context that helps disambiguate terminology, intent, applicability, and constraints.
- TL;DR: This page walks through an order status push notification use case combining three types of personalization — profile field, offer decision, and contextual journey data — in a single message.
Intents:
- Create a journey with an order event and an Action activity with the Push channel
- Add profile-based personalization (customer’s first name) to the push title
- Add contextual data personalization (order number, item name, order progress) from the journey event
- Add offer decision personalization to the push body
- Test the journey in test mode and publish
Glossary:
- Profile personalization: Message personalization based on a profile field such as the first name. (product-specific)
- Offer decision: Personalization based on decision management variables; inserted from the Offer decisions menu in the personalization editor. (product-specific)
- Context personalization: Personalization based on contextual data from the journey — event fields (e.g., order number, item name, order progress) and journey properties (e.g., journey ID, errors). Available only when a journey has passed contextual data to the message. (product-specific)
- Journey Properties: Technical fields related to the journey for a given profile — such as journey ID or errors encountered — accessible under Contextual attributes > Journey Orchestration. (product-specific)
Guardrails:
- Contextual attributes are available in the personalization editor only if a journey has passed contextual data to the message.
- Test mode works only with test profiles; the profile identifier entered in the event configuration must correspond to an existing test profile.
Terminology:
- Canonical name: Context personalization (listed on the page as “Context”) — the three types are Profile, Offer decision, and Context
- Do not confuse: Profile personalization (based on a profile field) ≠ Context personalization (journey event and properties data, only available if a journey has passed contextual data to the message) ≠ Offer decision personalization (decision management variables)
FAQ:
- Q: What three types of personalization are combined in this use case? — Profile personalization (customer’s first name from a profile field), contextual data personalization (order number, item name, and order progress from the journey event), and offer decision personalization (a decision management offer inserted in the body).
- Q: Where do contextual attributes come from in the personalization editor? — Contextual attributes come from events placed before the Action activity in the journey, and from journey technical properties. They appear in the personalization editor under Contextual attributes > Journey Orchestration > Events (event fields) or Journey Properties (journey metadata).
- Q: What are the prerequisites for this use case? — An order event must be configured with order number, status, and item name fields, and a decision must exist in decision management.
- Q: How do I test the push notification in this use case? — Click the Test button in the journey, then click “Trigger an event” and enter the event values in the Event configuration window. Test mode only works with test profiles; the profile identifier must correspond to an existing test profile.