このページ:メールのヘッダーまたは本文のワンクリックオプトアウトリンクや、ランディングページを経由した 2 ステップのオプトアウトなど、メールに購読解除オプションを追加する方法について説明します。これにより、受信者が今後の通信を停止できます。
ジャーニーやキャンペーンからメッセージを送信する場合は、顧客が今後の通信を登録解除できるようにする必要があります。 購読を解除すると、プロファイルは、今後のマーケティングメッセージのオーディエンスから自動的に削除されます。 プライバシーおよびオプトアウト管理についての詳細情報
メールコンテンツに購読解除リンクを挿入するには、次の操作を実行します。
-
ワンクリック登録解除 URL をメールヘッダーに追加します。 チャネル設定レベルの「リスト登録解除を有効にする」オプションにより、メールヘッダーにオプトアウトリンクが追加されます。 詳しくは、メールヘッダーのオプトアウトを参照してください
-
メールの ワンクリックオプトアウトリンク を有効にします。 詳しくは、ワンクリックオプトアウトリンクを追加する方法を参照してください
-
ランディングページへのリンクを挿入します。 詳しくは、オプトアウトランディングページの追加方法を参照してください
受信者がオプトアウトリンクをクリックすると、登録解除リクエストがそれに応じて処理されます。
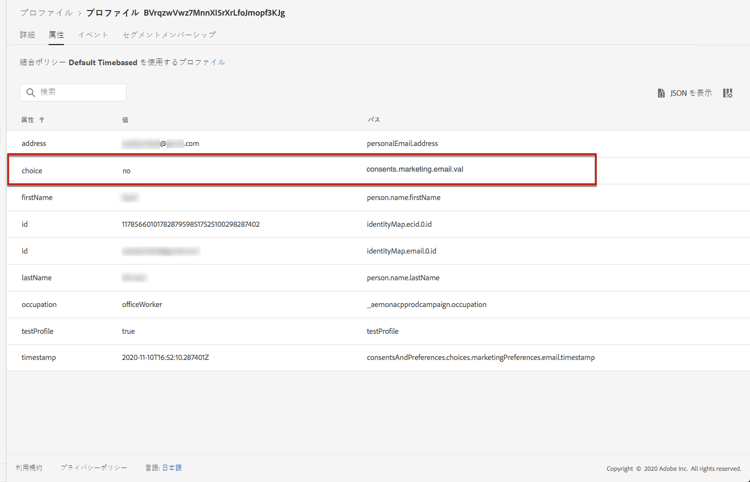
対応するプロファイルの選択が更新されたことを確認するには、Experience Platform に移動して、そのプロファイルを参照します。 「属性」タブで、choice の値が no に変更されたことを確認できます。 同意処理について詳しくは、Experience Platform ドキュメントを参照してください。
ワンステップオプトアウト opt-out-one-step
Adobe Journey Optimizer を使用すると、メールヘッダーに自動生成されたワンクリック登録解除 URL と宛先アドレスを使用してメール設定を行ったり、メール本文にワンクリックオプトアウト URL を含めたりすることができます。
メールヘッダーのワンクリック登録解除 URL unsubscribe-header
ワンクリックリスト登録解除 URL は、メールの送信者情報の横に表示される登録解除リンクまたはボタンであり、受信者は 1 回のクリックでメーリングリストから即座にオプトアウトできます。 「リスト登録解除」オプションを管理する方法について詳しくは、この節を参照してください。
メールコンテンツからのワンクリックオプトアウト one-click-opt-out
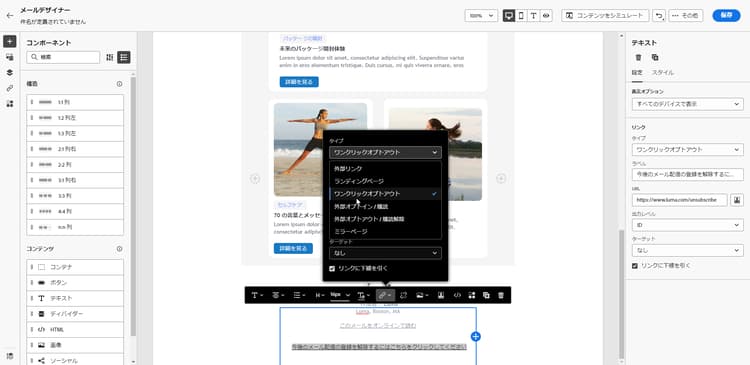
パーソナライズされた登録解除 URL を設定するには、メールメッセージコンテンツにワンクリックオプトアウトリンクを挿入し、以下のように任意の URL を入力します。
-
メールコンテンツにアクセスして、リンクを挿入します。
-
リンクのタイプとして「ワンクリックオプトアウト」を選択します。
-
登録解除後にユーザーがリダイレクトされるランディングページの URL を入力します。 このページは、オプトアウトが成功したことを確認できるように表示されます。
note NOTE 「リスト登録解除」オプションをチャネル設定レベルで有効にし、デフォルトの「ワンクリック登録解除 URL」オプションをオフにした場合は、ユーザーがメールヘッダーの登録解除リンクをクリックしたときにも、このランディングページ URL が使用されます。 詳細情報 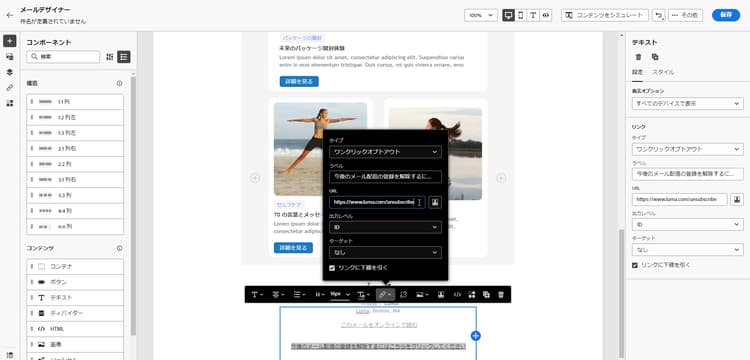
リンクをパーソナライズできます。 パーソナライズされた URL について詳しくは、この節を参照してください。
-
オプトアウトを適用する方法として、チャネルレベルまたは ID レベルを選択します。

- チャネル:オプトアウトは、現在のチャネルのプロファイルのターゲット(メールアドレスなど)に今後送信されるメッセージに適用されます。 複数のターゲットが 1 つのプロファイルに関連付けられている場合、オプトアウトはそのチャネルのプロファイル内のすべてのターゲット(メールアドレスなど)に適用されます。
- ID:オプトアウトは、現在のメッセージに使用されている特定のターゲット(メールアドレスなど)に今後送信されるメッセージに適用されます。
-
変更を保存します。
オプトアウトの 2 つの手順 opt-out-external-lp
標準のオプトアウトメカニズムは、2 つの手順に基づいています。購読者がメールのオプトアウトリンクをクリックすると、購読解除を確認できるようにオプトアウトランディングページにリダイレクトされます。
この購読解除モードを実装するには、オプトアウトランディングページを作成して公開し、メールメッセージに購読解除リンク(ランディングページへのリンクを含む)を追加する必要があります。 これらの手順の概要を以下に示します。
前提条件 prereq-lp
2 つの手順のオプトアウトメカニズムを設定するには、独自の購読解除ランディングページを作成する必要があります。 最初のランディングページはメッセージからリンクされ、コールトゥアクションボタンを含める必要があります。 ユーザーがボタンをクリックすると、確認メッセージが表示されます。
Adobe Journey Optimizer でランディングページを作成して購読解除を管理する方法について詳しくは、このページを参照してください。
また、外部のランディングページを使用することもできます。 その場合は、受信者が登録解除したときに Adobe Journey Optimizer に情報を送信するように API を設定します。
受信者がランディングページから選択内容を送信する際にオプトアウトするには、Adobe Developer を使用して Subscription API 呼び出し を実装し、対応するプロファイルの環境設定を更新する必要があります。
この POST 呼び出しは次の通りです。
エンドポイント:https://platform.adobe.io/journey/imp/consent/preferences
クエリパラメーター:
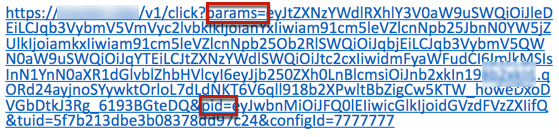
- params:暗号化されたペイロードが格納されています
- pid:暗号化されたプロファイル ID
これら 2 つのパラメーターは、受信者に送信されるサードパーティのランディングページ URL に含まれます。
ヘッダー要件:
- x-api-key
- x-gw-ims-org-id
- x-sandbox-name
- 認証(技術アカウントからのユーザートークン)
リクエスト本文:
| code language-none |
|---|
|
Journey Optimizer では、これらのパラメーターを使用して、Adobe Developer API 呼び出しを通じて対応するプロファイルの選択内容を更新します。
購読解除リンクの追加 add-unsubscribe-link
最初にメッセージに購読解除リンクを追加する必要があります。 これを行うには、以下の手順に従います。
-
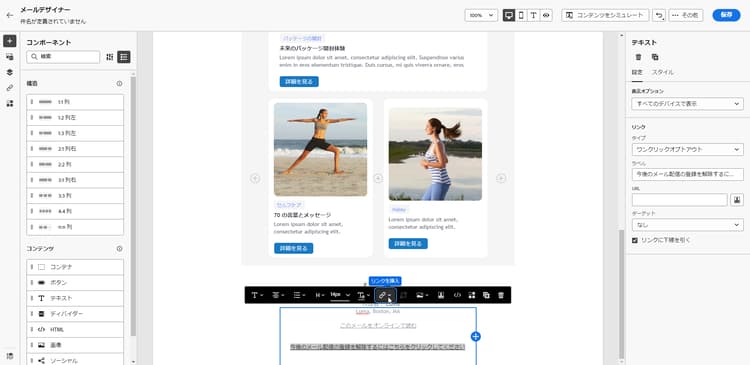
メッセージを作成し、コンテキストツールバーを使用してリンクを挿入します。
-
タイプドロップダウンリストから「ランディングページ」を選択し、「ランディングページ」フィールドでオプトアウトランディングページを選択します。
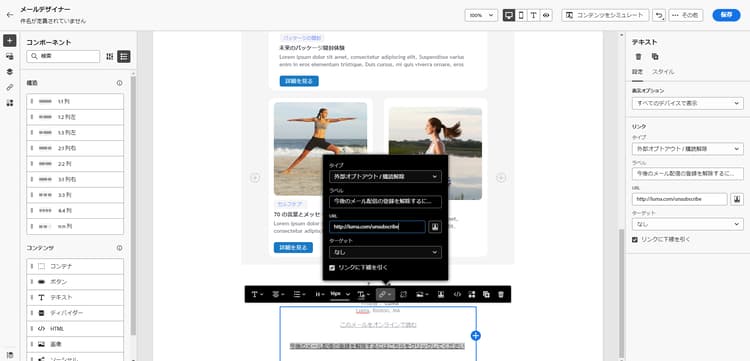
外部のランディングページを使用する場合は、タイプドロップダウンリストから「外部オプトアウト / 購読解除」を選択します。
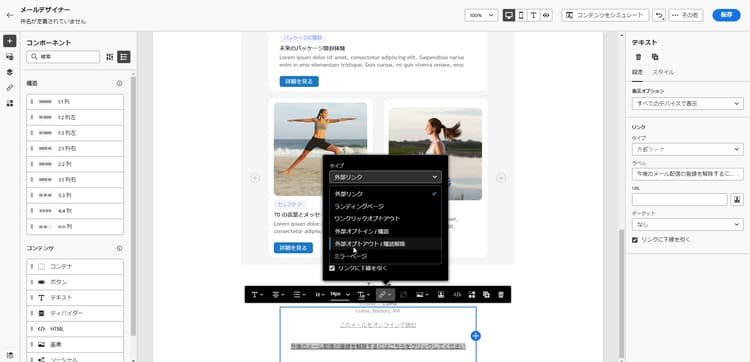
「リンク」フィールドに、サードパーティ製のランディングページへのリンクを貼り付けます。
-
「保存」をクリックします。
登録解除フローについて send-message-unsubscribe-link
ランディングページへの登録解除リンクを設定したら、メッセージを入力してサブスクライバーに送信できます。
ランディングページのオプトアウトフロー全体が正常に完了するには、次のイベントが順番に発生することが予想されます。
-
クリック - メッセージを受信した受信者は、メールの登録解除リンクをクリックします。
-
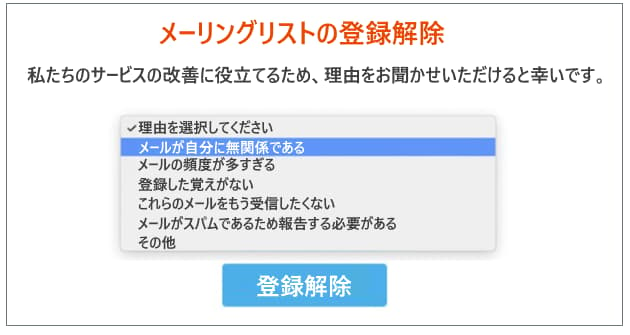
訪問 - ランディングページが読み込まれ、受信者に表示されます。
-
送信 - 受信者は、ランディングページの登録解除ボタンをクリックしてオプトアウトフォームを送信します。
note warning WARNING メール内で登録解除リンクをクリックした場合にのみ、ランディングページが開きます。 購読解除を完了し、プロファイルの同意を更新するには、受信者は、ランディングページのオプトアウトボタンをクリックしてフォームを送信する必要があります。 -
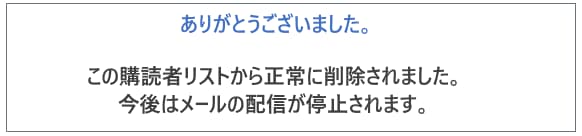
登録解除 - 登録解除リクエストが処理されます。 オプトアウトした受信者は、オプトアウトが成功したことを示す確認メッセージ画面にリダイレクトされます。
-
同意の更新 - API 呼び出しを通じて、プロファイル属性の同意を得てプロファイルデータが更新されます。これにより、今後のメール送信からプロファイルが除外されます。
その結果、購読を再度登録しない限り、このユーザーはブランドから連絡を受けることはありません。
このイベントシーケンスにより、登録解除プロセスが適切に追跡され、プロファイルの同意環境設定がシステムに正確に反映されます。 このフローのいずれかの手順が欠落しているか、順序どおりに実行されない場合は、オプトアウトの実装に問題があることを示すことがあり、調査する必要があります。
This section contains structured knowledge intended to support interpretation, retrieval, and question answering related to this topic.
For complete understanding, this information should be combined with the documentation on this page. Neither source is intended to stand alone; the page describes the feature, while this section provides additional context that helps disambiguate terminology, intent, applicability, and constraints.
- TL;DR: This page explains how to let email recipients unsubscribe in Journey Optimizer — through a one-click opt-out link in the email header or body, or a two-step opt-out via a landing page — so opted-out profiles are excluded from future marketing messages.
Intents:
- Add a one-click unsubscribe URL to the email header
- Add a one-click opt-out link in the email body
- Set up a two-step opt-out through an opt-out landing page
- Configure an external landing page opt-out using the Subscription API
- Choose whether an opt-out applies at the channel or the identity level
- Verify that a profile’s consent choice has been updated after opt-out
Glossary:
- One-click opt-out: An unsubscribe link or URL (in the email header or body) that lets a recipient opt out with a single click (product-specific)
- List-Unsubscribe: The channel-configuration option that adds a one-click unsubscribe URL and mailto address to the email header (product-specific)
- Two-step opt-out: An opt-out mechanism where the recipient clicks the email link and then confirms by submitting a form on an opt-out landing page (product-specific)
- Channel-level opt-out: An opt-out that applies to future messages sent to the profile’s target(s) for the current channel (product-specific)
- Identity-level opt-out: An opt-out that applies to future messages sent to the specific target (email address) used for the current message (product-specific)
- choice: The profile consent attribute whose value changes to “no” once a recipient opts out (product-specific)
Guardrails:
- All marketing messages must include an opt-out link; this is not required for transactional messages. The category (Marketing or Transactional) is defined at the channel configuration level and when creating the message.
- Once a recipient unsubscribes, the profile is automatically removed from the audience of future marketing messages.
- In two-step opt-out, clicking the email link only opens the landing page — the recipient must submit the form (click the opt-out button) to complete the unsubscription and update consent.
- Unsubscribe events may take longer to reflect at the profile level due to downstream data processing.
- The external landing page opt-out requires implementing a Subscription API call (a POST to the consent preferences endpoint) to update the profile’s choice.
Terminology:
- Canonical name: opt-out — Acronym: n/a — variants: unsubscribe, opt-out link, unsubscription link
- Synonyms: “opt-out” = “unsubscribe”
- Do not confuse: “One-step opt-out” (single click via a header or body link) ≠ “Two-step opt-out” (click, then submit a form on a landing page)
- Do not confuse: “Channel” opt-out level (all targets for the channel) ≠ “Identity” opt-out level (only the specific target used for the message)
FAQ:
- Q: Do all emails need an opt-out link? — All marketing messages must include one; transactional messages do not. The Marketing or Transactional category is defined at the channel configuration level and when creating the message.
- Q: What is the difference between the channel and identity opt-out levels? — Channel applies the opt-out to future messages sent to the profile’s target(s) for the current channel (all email addresses on the profile for that channel); Identity applies it only to the specific target (email address) used for the current message.
- Q: Why is a profile’s opt-out not reflected immediately? — Unsubscribe events may take longer to reflect at the profile level due to downstream data processing; allow some time for the system to update.
- Q: In two-step opt-out, is clicking the email link enough to unsubscribe? — No. Clicking only opens the landing page; the recipient must submit the form (click the opt-out button) to complete the unsubscription and update consent.
- Q: How can I confirm a recipient has been opted out? — In Experience Platform, browse to the profile and check the Attributes tab: the choice value has changed to no.
- Q: What is the expected event sequence for a landing-page opt-out? — In order: Click, Visit, Submit, Unsubscribe, Consent update. If any step is missing or occurs out of order, it may indicate an issue with the opt-out implementation.