在此頁面上:遵循購物車放棄使用案例,此案例使用upperCase、each及Adobe Journey Optimizer中的協助程式功能個人化電子郵件內文。
在此範例中,您將個人化電子郵件內文。 此訊息會鎖定在購物車中保留商品,但尚未完成購買的客戶。
您將使用下列型別的協助程式函式:
開始之前,請確定您知道如何設定這些元素:
請依照下列步驟操作:
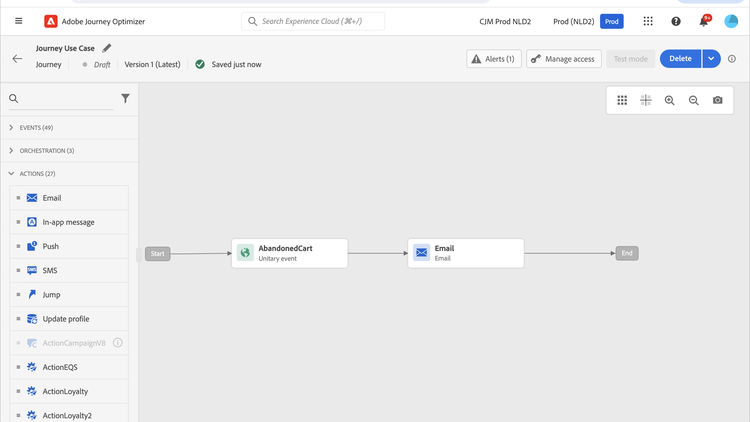
步驟1:建立初始事件和相關歷程 create-context
購物車內容是歷程中的內容相關資訊。 因此,您必須先將初始事件和電子郵件新增至歷程,才能將購物車特定資訊新增至電子郵件。
-
建立其結構描述包含
productListItems陣列的事件。 -
將此陣列中的所有欄位定義為此事件的裝載欄位。
在Adobe Experience Platform檔案中進一步瞭解產品清單專案資料型別。
-
建立從此事件開始的歷程。
-
將 電子郵件 活動新增至歷程。
步驟2:建立電子郵件 configure-email
-
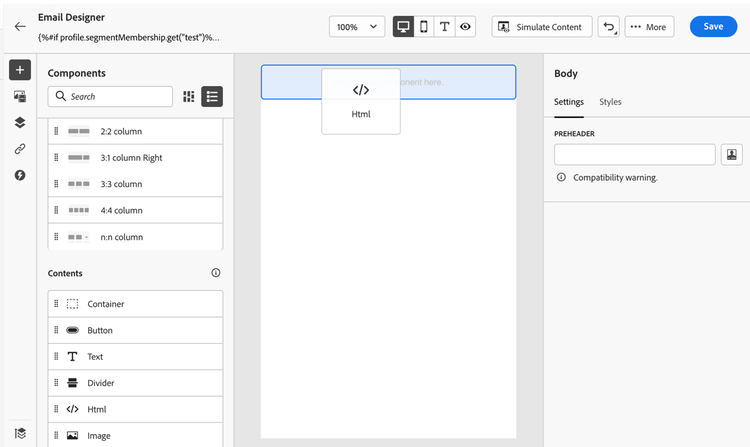
在 電子郵件 活動中,按一下編輯內容,然後按一下電子郵件Designer。

-
從電子郵件Designer首頁的左側浮動視窗,將三個結構元件拖放至訊息內文上。
-
將HTML內容元件拖放至每個新結構元件上。
步驟3:以大寫字母插入客戶的名字 uppercase-function
-
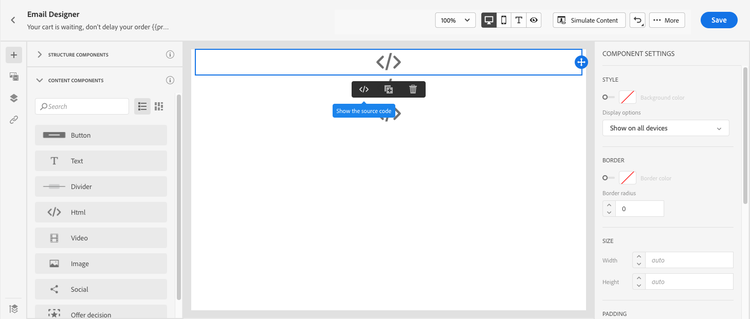
在電子郵件Designer首頁上,按一下您想要新增客戶名字的HTML元件。
-
在內容工具列上,按一下顯示原始程式碼。
-
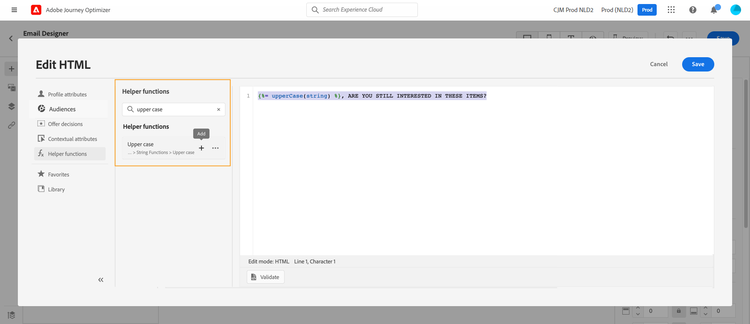
在 編輯HTML 視窗中,新增
upperCase字串函式:-
在左側功能表中,選取協助程式函式。
-
使用搜尋欄位來尋找「大寫」。
-
從搜尋結果中新增
upperCase函式。 若要這麼做,請按一下{%= upperCase(string) %}: string旁的加號(+)。運算式編輯器會顯示此運算式:
code language-handlebars {%= upperCase(string) %}在Helper函式中選取upperCase函式的
-
-
從運算式中移除「字串」預留位置。
-
新增名字代號:
-
在左側功能表中,選取設定檔屬性。
-
選取人員 > 全名。
-
將 名字 權杖新增至運算式。
運算式編輯器會顯示此運算式:
code language-handlebars {%= upperCase(profile.person.name.firstName) %}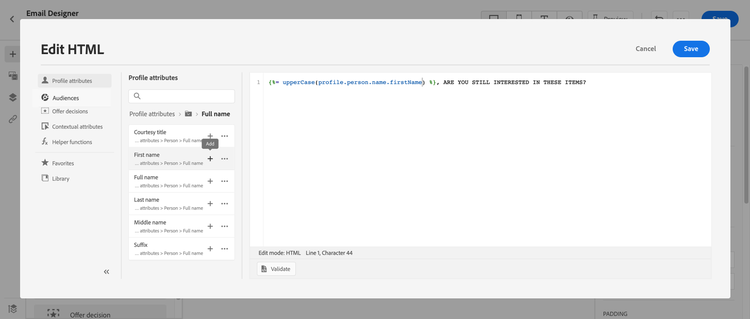
在Adobe Experience Platform檔案中進一步瞭解人員名稱資料型別。
-
-
按一下驗證,然後按一下儲存。
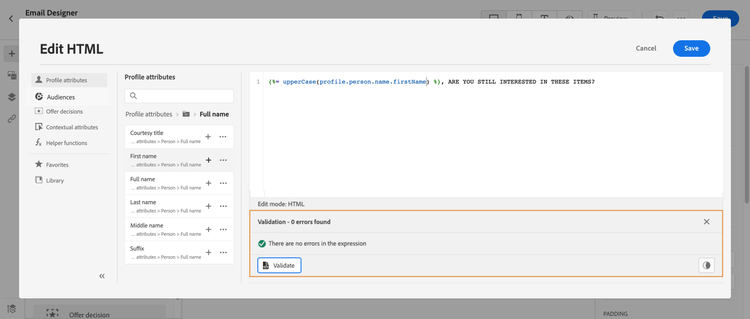
-
儲存訊息。
步驟4:從購物車插入專案清單 each-helper
此步驟示範反複處理事件資料。 如需反複處理不同資料來源(事件、自訂動作回應及其他內容資料)的完整範例,請參閱使用Handlebars反複處理內容資料。
-
重新開啟訊息內容。
-
在電子郵件Designer首頁上,按一下您要列出購物車內容的HTML元件。
-
在內容工具列上,按一下顯示原始程式碼。
-
在 編輯HTML 視窗中,新增
each協助程式:-
在左側功能表中,選取協助程式函式。
-
使用搜尋欄位來尋找「each」。
-
從搜尋結果中新增
each協助程式。運算式編輯器會顯示此運算式:
code language-handlebars {{#each someArray as |variable|}} {{/each}}每個協助程式範本的

-
-
將
productListItems陣列新增至運算式:-
從運算式中移除「someArray」預留位置。
-
在左側功能表中,選取內容屬性。
內容屬性只有在歷程內容已傳遞至訊息之後,才能使用。
-
選取Journey Optimizer > 事件 > 事件名稱,然後展開 productListItems 節點。
在此範例中,event_name代表事件的名稱。
-
將 Product 權杖新增至運算式。
運算式編輯器會顯示此運算式:
code language-handlebars {{#each context.journey.events.event_ID.productListItems.product as |variable|}} {{/each}}在此範例中,event_ID代表您事件的識別碼。
在內容屬性中有productListItems的
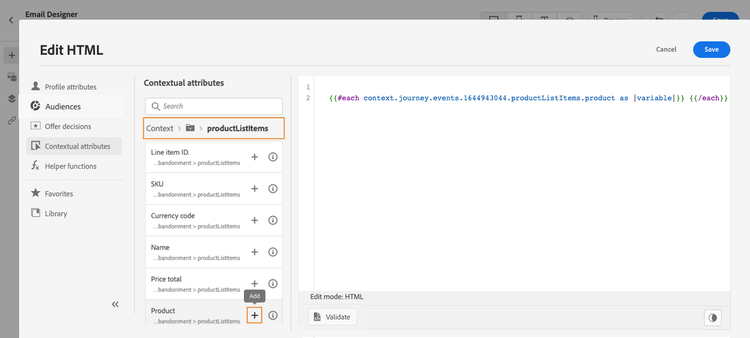
-
修改運算式:
- 移除「.product」字串。
- 將「變數」預留位置取代為「產品」。
此範例顯示修改後的運算式:
code language-handlebars {{#each context.journey.events.event_ID.productListItems as |product|}}
-
-
在開頭
{{#each}}標籤和結尾{{/each}}標籤之間貼上此程式碼:code language-html <table> <tbody> <tr> <td><b>#name</b></td> <td><b>#quantity</b></td> <td><b>$#priceTotal</b></td> </tr> </tbody> </table> -
新增專案名稱、數量和價格的個人化代號:
- 從HTML表格中移除預留位置「#name」。
- 從先前的搜尋結果中,將 Name 權杖新增至運算式。
重複這些步驟兩次:
- 將預留位置「#quantity」取代為 數量 權杖。
- 將預留位置「#priceTotal」取代為 總價 代號。
此範例顯示修改後的運算式:
code language-handlebars {{#each context.journey.events.event_ID.productListItems as |product|}} <table> <tbody> <tr> <td><b>{{product.name}}</b></td> <td><b>{{product.quantity}}</b></td> <td><b>${{product.priceTotal}}</b></td> </tr> </tbody> </table> {{/each}} -
按一下驗證,然後按一下儲存。
設定每個區塊之後,使用[驗證並儲存]的
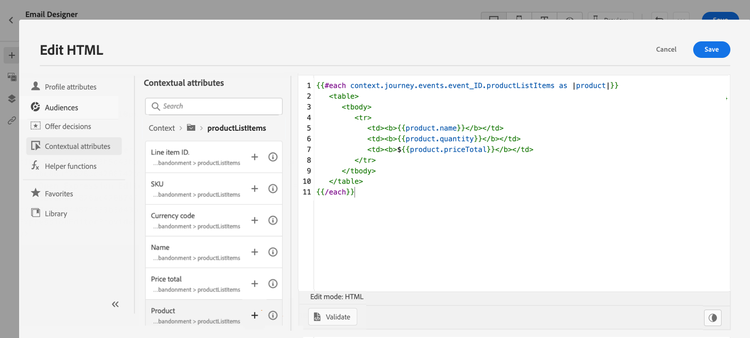
步驟5:插入產品專屬附註 if-helper
-
在電子郵件Designer首頁上,按一下您要插入附註的HTML元件。
-
在內容工具列上,按一下顯示原始程式碼。
-
在 編輯HTML 視窗中,新增
if協助程式:-
在左側功能表中,選取協助程式函式。
-
使用搜尋欄位來尋找「if」。
-
從搜尋結果中新增
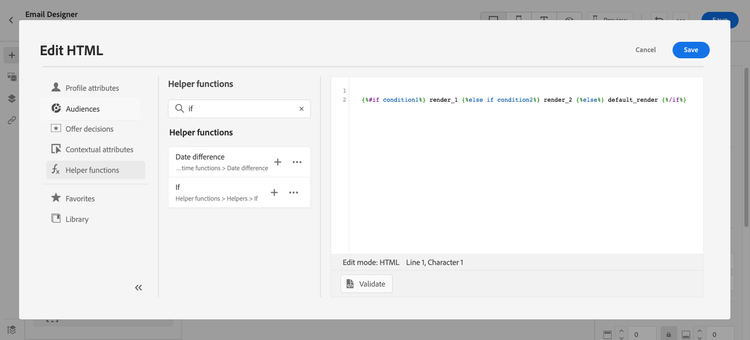
if協助程式。運算式編輯器會顯示此運算式:
code language-handlebars {%#if condition1%} render_1 {%else if condition2%} render_2 {%else%} default_render {%/if%}具有if協助程式範本
-
-
從運算式移除此條件:
code language-handlebars {%else if condition2%} render_2此範例顯示修改後的運算式:
code language-handlebars {%#if condition1%} render_1 {%else%} default_render {%/if%} -
將產品名稱Token新增至條件:
-
從運算式中移除「condition1」預留位置。
-
在左側功能表中,選取內容屬性。
-
選取Journey Orchestration > 事件 > 事件名稱,然後展開 productListItems 節點。
在此範例中,event_name代表事件的名稱。
-
將 Name 權杖新增至運算式。
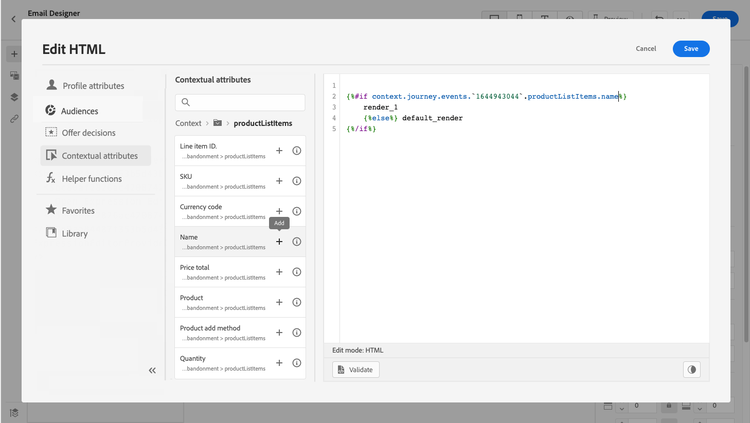
運算式編輯器會顯示此運算式:
code language-handlebars {%#if context.journey.events.`event_ID`.productListItems.name%} render_1 {%else%} default_render {%/if%}在if條件中有productListItems名稱權杖的
-
-
修改運算式:
-
在運算式編輯器中,在
nameToken後面指定產品名稱。使用此語法,其中 product_name 代表產品的名稱:
code language-javascript = "product_name"在此範例中,產品名稱為「Juno Jacket」:
code language-handlebars {%#if context.journey.events.`event_ID`.productListItems.name = "Juno Jacket" %} render_1 {%else%} default_render {%/if%} -
將「render_1」預留位置取代為註記文字。
範例:
code language-handlebars {%#if context.journey.events.`event_ID`.productListItems.name = "Juno Jacket" %} Due to longer than usual lead times on the Juno Jacket, please expect item to ship two weeks after purchase. {%else%} default_render {%/if%} -
從運算式中移除「default_render」預留位置。
-
-
按一下驗證,然後按一下儲存。
設定if區塊後

-
儲存訊息。
步驟6:測試並發佈歷程 test-and-publish
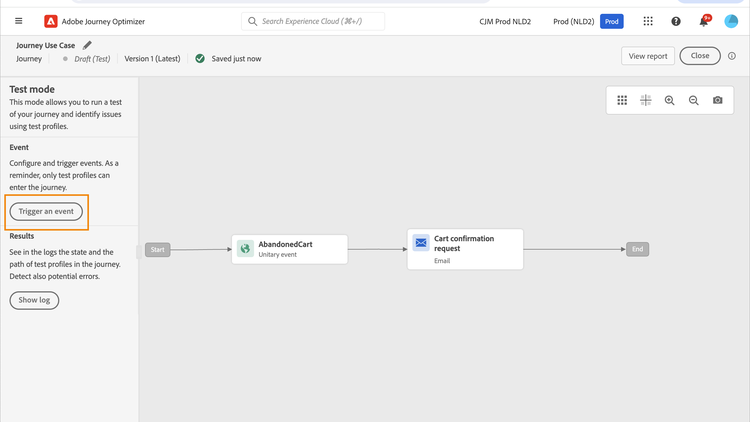
-
開啟 測試 切換,然後按一下觸發事件。
-
在 事件組態 視窗中輸入輸入值,然後按一下傳送。
測試模式僅適用於測試設定檔。
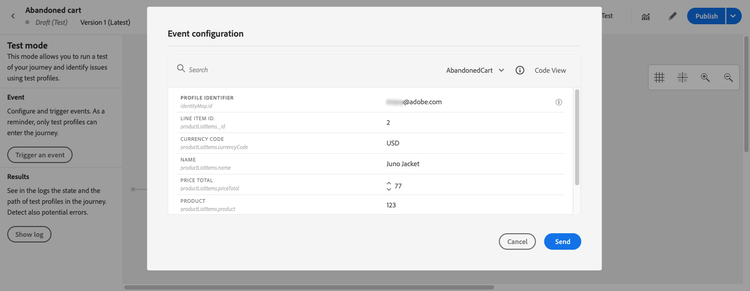
電子郵件會傳送至測試設定檔的地址。
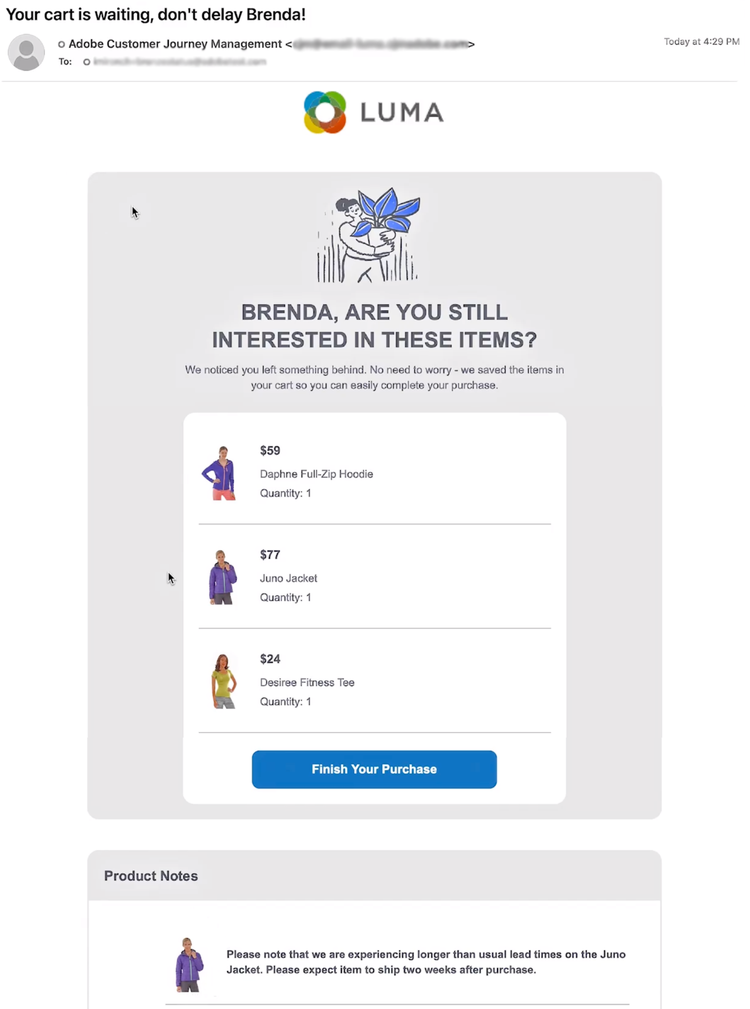
在此範例中,電子郵件會包含有關Juno Jacket的備註,因為此產品已在購物車中:
-
確認沒有錯誤,然後發佈歷程。
相關主題 related-topics
Handlebars函式 handlebars
使用案例 use-case
作法影片 video
瞭解如何使用協助程式函式。
This section contains structured knowledge intended to support interpretation, retrieval, and question answering related to this topic.
For complete understanding, this information should be combined with the documentation on this page. Neither source is intended to stand alone; the page describes the feature, while this section provides additional context that helps disambiguate terminology, intent, applicability, and constraints.
- TL;DR: This page walks through a cart abandonment email use case using three helper functions —
upperCase,each, andif— to display a customer’s first name in capitals, list cart items, and insert a product-specific shipping note conditionally.
Intents:
- Create a journey event whose schema includes the
productListItemsarray - Insert a customer’s first name in uppercase using
{%= upperCase(profile.person.name.firstName) %} - List cart items by iterating over
context.journey.events.event_ID.productListItemswith{{#each}} - Display a product-specific note conditionally using
{%#if context.journey.events.\event_ID`.productListItems.name = “product_name” %}` - Test the journey in test mode using a test profile with event payload, then publish
Glossary:
upperCase: A PQL string function that converts a string to uppercase; called with{%= upperCase(string) %}. (product-specific)eachhelper: A Handlebars block helper ({{#each array as |alias|}} ... {{/each}}) that iterates over an array such asproductListItems. (product-specific)ifhelper: A conditional block helper ({%#if condition%} ... {%else%} ... {%/if%}) that renders content only when the specified condition is true.productListItems: A standard XDM array representing cart contents, with fields includingname,quantity, andpriceTotal. (product-specific)- Test mode: A journey feature that enables sending test messages to test profile addresses to verify journey and message behavior before publication. (product-specific)
Guardrails:
- Contextual attributes (including journey event data) are available in the personalization editor only after the message has been placed inside a journey that includes the relevant event.
- Test mode works only with test profiles.
Terminology:
- Canonical name: cart abandonment email — variants: cart abandonment use case
- Do not confuse:
context.journey.events.event_ID.productListItems(event-sourced array, accessed via Contextual attributes) ≠profile.*attributes (profile-sourced, always available)
FAQ:
- Q: What helper functions are used in this use case? — Three:
upperCase(renders first name in capitals),each(iterates over the cart items array), andif(conditionally displays a product-specific shipping note). - Q: Where does the cart item data come from in the personalization expression? — From the journey event’s
productListItemsarray, accessed via Contextual attributes atcontext.journey.events.event_ID.productListItems. - Q: Can contextual attributes be used before placing the message inside a journey? — No. Contextual attributes are available in the personalization editor only after the message is placed inside a journey that includes the relevant event.
- Q: How do I test the email with cart data? — Turn on the Test toggle in the journey, click Trigger an event, and enter the input values in the Event configuration window, then click Send. The email is sent to the test profile’s address.