在此页面上:遵循购物车放弃用例,该用例使用upperCase、each以及Adobe Journey Optimizer中的辅助函数将电子邮件正文个性化。
在此示例中,您将个性化电子邮件正文。 此消息面向在购物车中遗留商品,但尚未完成购买的客户。
您将使用以下类型的辅助函数:
在开始之前,请确保您知道如何配置这些元素:
执行以下步骤:
步骤1:创建初始事件和相关历程 create-context
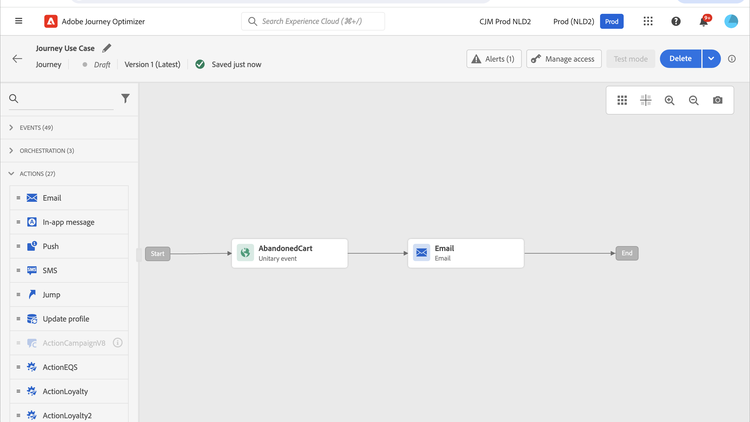
购物车内容是历程中的上下文信息。 因此,您必须先将初始事件和电子邮件添加到历程,然后才能将购物车特定的信息添加到电子邮件。
-
创建其架构包含
productListItems数组的事件。 -
将此数组中的所有字段定义为此事件的有效负荷字段。
在Adobe Experience Platform文档中了解有关产品列表项数据类型的更多信息。
-
创建从此事件开始的历程。
-
向历程添加 电子邮件 活动。
第2步:创建电子邮件 configure-email
-
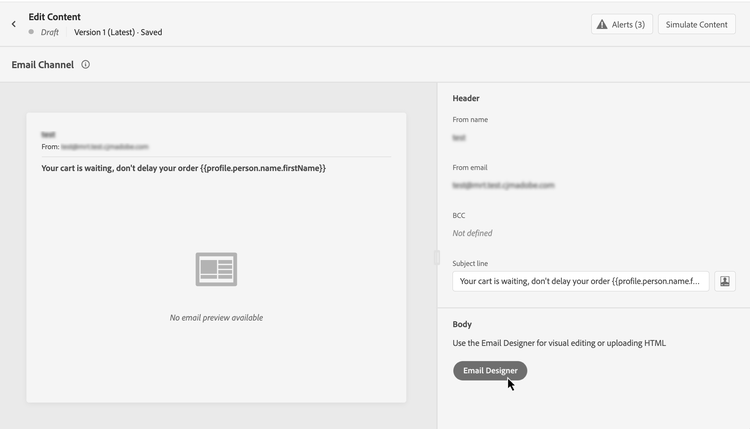
在 电子邮件 活动中,单击编辑内容,然后单击电子邮件Designer。
-
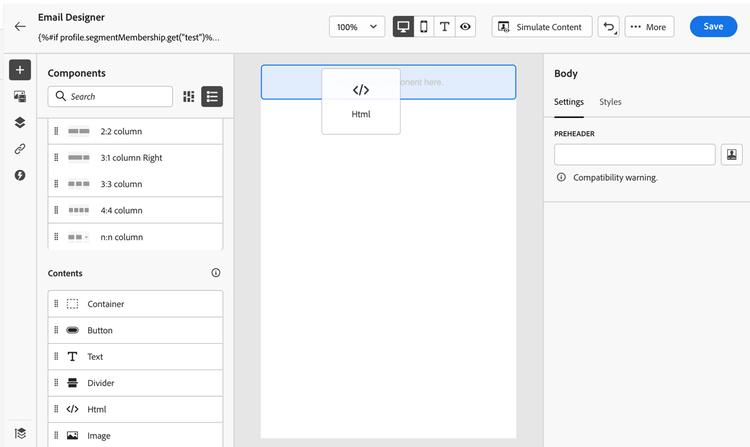
从电子邮件Designer主页的左侧面板中,将三个结构组件拖放到消息正文上。
-
将HTML内容组件拖放到每个新结构组件上。
步骤3:将客户的名字插入大写字母 uppercase-function
-
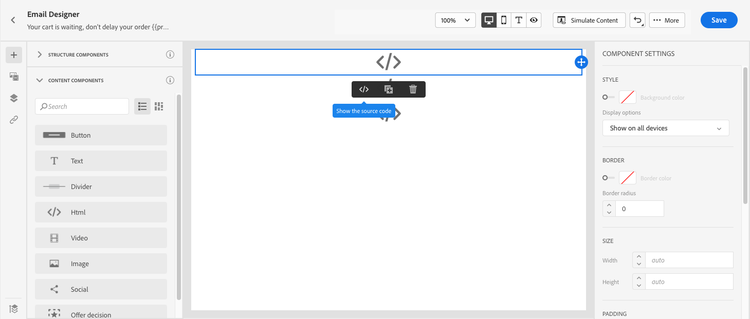
在电子邮件Designer主页上,单击要添加客户名字的HTML组件。
-
在上下文工具栏上,单击显示源代码。
-
在 编辑HTML 窗口中,添加
upperCase字符串函数:-
在左侧菜单中,选择辅助函数。
-
使用搜索字段查找“大写”。
-
从搜索结果中,添加
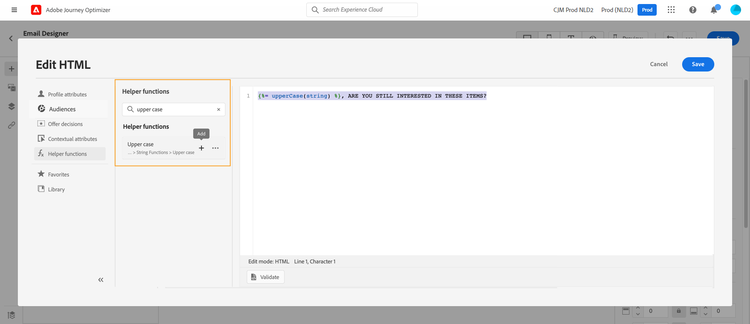
upperCase函数。 为此,请单击{%= upperCase(string) %}: string旁边的加号(+)。表达式编辑器显示此表达式:
code language-handlebars {%= upperCase(string) %}在辅助函数中选择了upperCase函数的
-
-
从表达式中删除“string”占位符。
-
添加名字令牌:
-
在左侧菜单中,选择配置文件属性。
-
选择人员 > 全名。
-
将 名字 令牌添加到表达式中。
表达式编辑器显示此表达式:
code language-handlebars {%= upperCase(profile.person.name.firstName) %}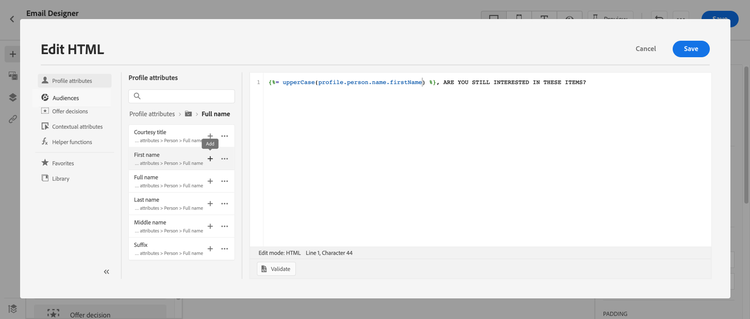
在Adobe Experience Platform文档中了解有关人员名称数据类型的更多信息。
-
-
单击验证,然后单击保存。
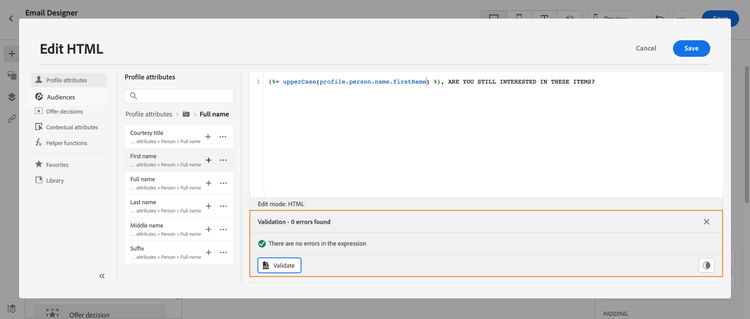
-
保存消息。
第4步:插入购物车中的项目列表 each-helper
此步骤演示对事件数据进行迭代。 有关迭代不同数据源(事件、自定义操作响应和其他上下文数据)的完整示例,请参阅使用Handlebars迭代上下文数据。
-
重新打开消息内容。
-
在电子邮件Designer主页上,单击要列出购物车内容的HTML组件。
-
在上下文工具栏上,单击显示源代码。
-
在 编辑HTML 窗口中,添加
each帮助程序:-
在左侧菜单中,选择辅助函数。
-
使用搜索字段查找“each”。
-
从搜索结果中,添加
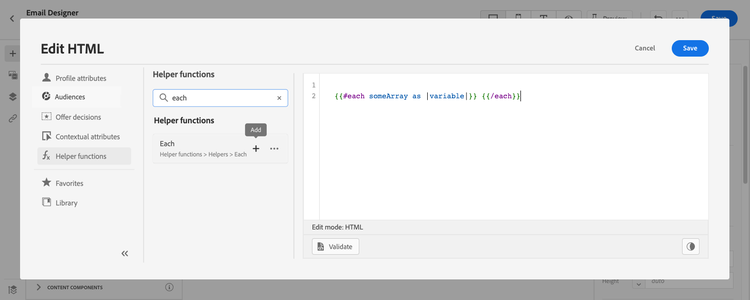
each帮助程序。表达式编辑器显示此表达式:
code language-handlebars {{#each someArray as |variable|}} {{/each}}每个帮助程序模板的
-
-
将
productListItems数组添加到表达式:-
从表达式中删除“someArray”占位符。
-
在左侧菜单中,选择上下文属性。
上下文属性仅在历程上下文已传递到消息后可用。
-
选择Journey Optimizer > Events > event_name,然后展开 productListItems 节点。
在此示例中,event_name表示事件的名称。
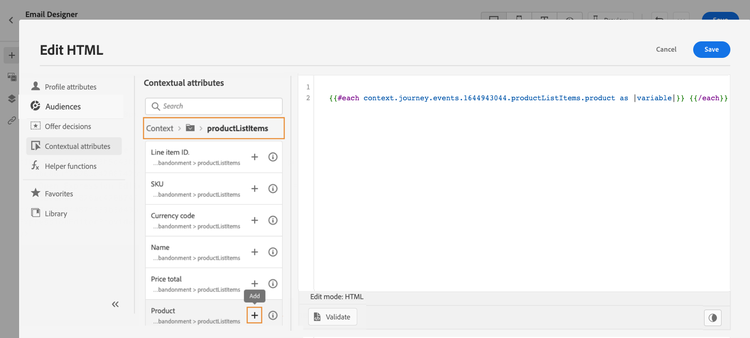
-
将 Product 令牌添加到表达式中。
表达式编辑器显示此表达式:
code language-handlebars {{#each context.journey.events.event_ID.productListItems.product as |variable|}} {{/each}}在此示例中,event_ID表示事件的ID。
在上下文属性中具有productListItems的
-
修改表达式:
- 删除“.product”字符串。
- 将“variable”占位符替换为“product”。
此示例显示了修改后的表达式:
code language-handlebars {{#each context.journey.events.event_ID.productListItems as |product|}}
-
-
将此代码粘贴到开始
{{#each}}标记和结束{{/each}}标记之间:code language-html <table> <tbody> <tr> <td><b>#name</b></td> <td><b>#quantity</b></td> <td><b>$#priceTotal</b></td> </tr> </tbody> </table> -
为项目名称、数量和价格添加个性化令牌:
- 从HTML表中删除占位符“#name”。
- 从上一个搜索结果中,将 Name 令牌添加到表达式中。
重复这些步骤两次:
- 将占位符“#quantity”替换为 数量 令牌。
- 将占位符“#priceTotal”替换为 总价 令牌。
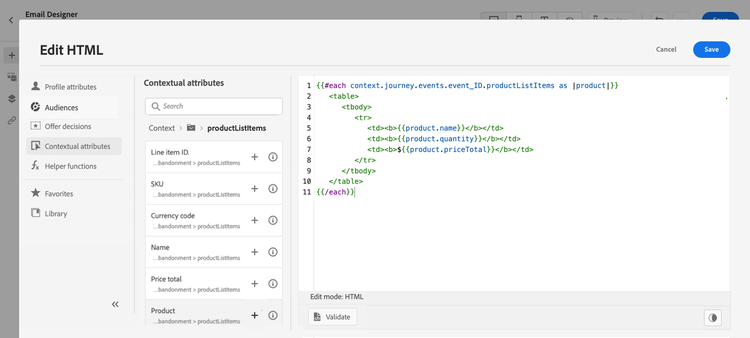
此示例显示了修改后的表达式:
code language-handlebars {{#each context.journey.events.event_ID.productListItems as |product|}} <table> <tbody> <tr> <td><b>{{product.name}}</b></td> <td><b>{{product.quantity}}</b></td> <td><b>${{product.priceTotal}}</b></td> </tr> </tbody> </table> {{/each}} -
单击验证,然后单击保存。
在配置每个块后,使用“验证并保存”的
步骤5:插入特定于产品的说明 if-helper
-
在电子邮件Designer主页上,单击要在其中插入注释的HTML组件。
-
在上下文工具栏上,单击显示源代码。
-
在 编辑HTML 窗口中,添加
if帮助程序:-
在左侧菜单中,选择辅助函数。
-
使用搜索字段查找“if”。
-
从搜索结果中,添加
if帮助程序。表达式编辑器显示此表达式:
code language-handlebars {%#if condition1%} render_1 {%else if condition2%} render_2 {%else%} default_render {%/if%}带有if帮助程序模板的
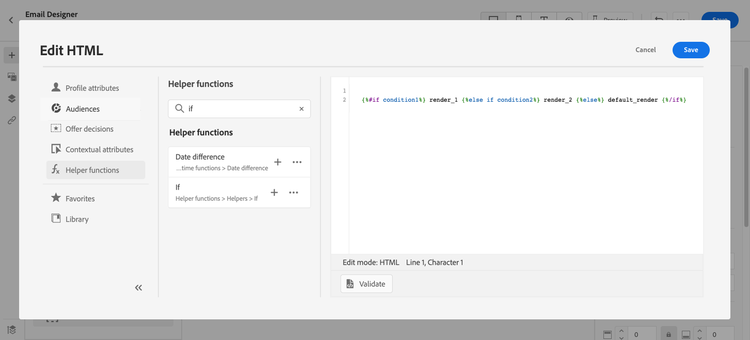
-
-
从表达式中删除此条件:
code language-handlebars {%else if condition2%} render_2此示例显示了修改后的表达式:
code language-handlebars {%#if condition1%} render_1 {%else%} default_render {%/if%} -
将产品名称令牌添加到条件:
-
从表达式中删除“condition1”占位符。
-
在左侧菜单中,选择上下文属性。
-
选择Journey Orchestration > Events > event_name,然后展开 productListItems 节点。
在此示例中,event_name表示事件的名称。
-
将 Name 令牌添加到表达式中。
表达式编辑器显示此表达式:
code language-handlebars {%#if context.journey.events.`event_ID`.productListItems.name%} render_1 {%else%} default_render {%/if%}在if条件中具有productListItems名称令牌的

-
-
修改表达式:
-
在表达式编辑器中,在
name令牌之后指定产品名称。使用以下语法,其中 product_name 表示产品的名称:
code language-javascript = "product_name"在此示例中,产品名称为“Juno Jacket”:
code language-handlebars {%#if context.journey.events.`event_ID`.productListItems.name = "Juno Jacket" %} render_1 {%else%} default_render {%/if%} -
将“render_1”占位符替换为注释文本。
示例:
code language-handlebars {%#if context.journey.events.`event_ID`.productListItems.name = "Juno Jacket" %} Due to longer than usual lead times on the Juno Jacket, please expect item to ship two weeks after purchase. {%else%} default_render {%/if%} -
从表达式中删除“default_render”占位符。
-
-
单击验证,然后单击保存。
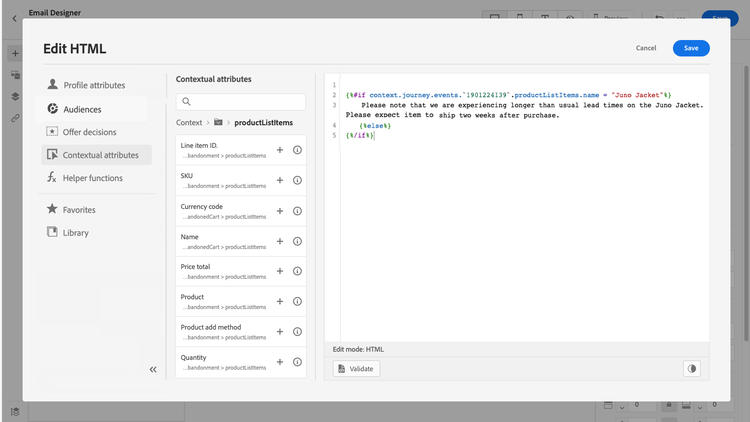
-
保存消息。
步骤6:测试并发布旅程 test-and-publish
-
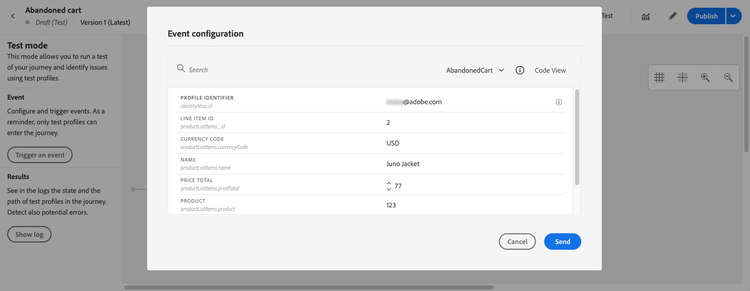
打开 测试 切换开关,然后单击触发事件。

-
在 事件配置 窗口中,输入输入值,然后单击发送。
测试模式仅适用于测试用户档案。
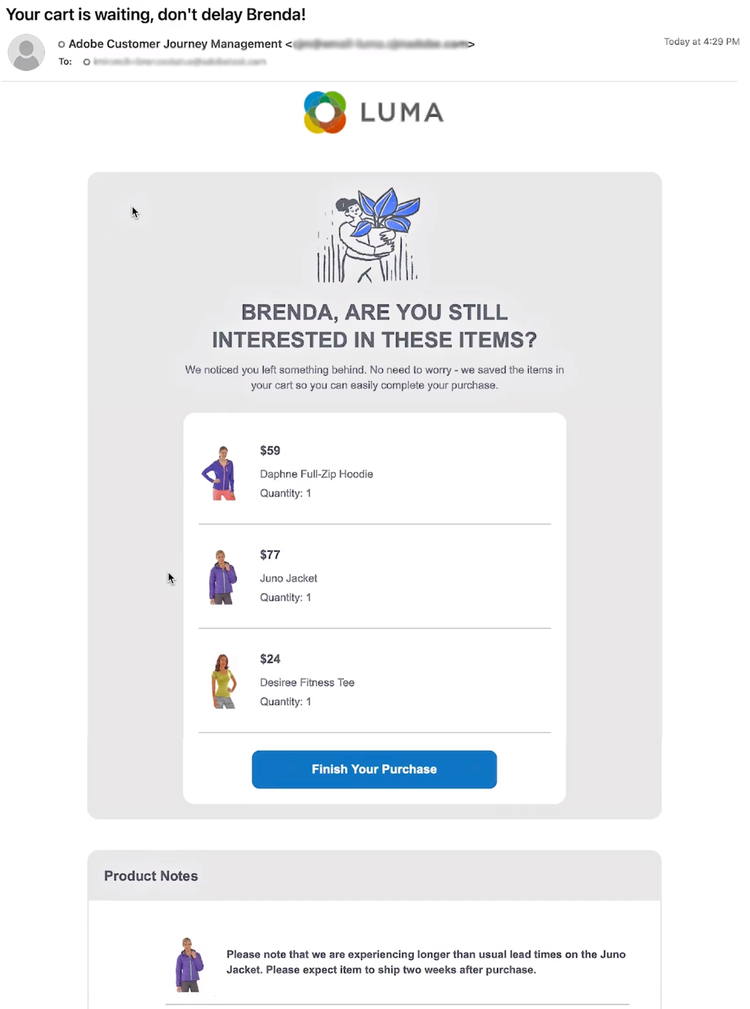
电子邮件将发送到测试用户档案的地址。
在此示例中,电子邮件包含有关Juno Jacket的注释,因为该产品位于购物车中:
-
验证没有错误,然后发布历程。
相关主题 related-topics
Handlebars函数 handlebars
用例 use-case
操作方法视频 video
了解如何使用辅助函数。
This section contains structured knowledge intended to support interpretation, retrieval, and question answering related to this topic.
For complete understanding, this information should be combined with the documentation on this page. Neither source is intended to stand alone; the page describes the feature, while this section provides additional context that helps disambiguate terminology, intent, applicability, and constraints.
- TL;DR: This page walks through a cart abandonment email use case using three helper functions —
upperCase,each, andif— to display a customer’s first name in capitals, list cart items, and insert a product-specific shipping note conditionally.
Intents:
- Create a journey event whose schema includes the
productListItemsarray - Insert a customer’s first name in uppercase using
{%= upperCase(profile.person.name.firstName) %} - List cart items by iterating over
context.journey.events.event_ID.productListItemswith{{#each}} - Display a product-specific note conditionally using
{%#if context.journey.events.\event_ID`.productListItems.name = “product_name” %}` - Test the journey in test mode using a test profile with event payload, then publish
Glossary:
upperCase: A PQL string function that converts a string to uppercase; called with{%= upperCase(string) %}. (product-specific)eachhelper: A Handlebars block helper ({{#each array as |alias|}} ... {{/each}}) that iterates over an array such asproductListItems. (product-specific)ifhelper: A conditional block helper ({%#if condition%} ... {%else%} ... {%/if%}) that renders content only when the specified condition is true.productListItems: A standard XDM array representing cart contents, with fields includingname,quantity, andpriceTotal. (product-specific)- Test mode: A journey feature that enables sending test messages to test profile addresses to verify journey and message behavior before publication. (product-specific)
Guardrails:
- Contextual attributes (including journey event data) are available in the personalization editor only after the message has been placed inside a journey that includes the relevant event.
- Test mode works only with test profiles.
Terminology:
- Canonical name: cart abandonment email — variants: cart abandonment use case
- Do not confuse:
context.journey.events.event_ID.productListItems(event-sourced array, accessed via Contextual attributes) ≠profile.*attributes (profile-sourced, always available)
FAQ:
- Q: What helper functions are used in this use case? — Three:
upperCase(renders first name in capitals),each(iterates over the cart items array), andif(conditionally displays a product-specific shipping note). - Q: Where does the cart item data come from in the personalization expression? — From the journey event’s
productListItemsarray, accessed via Contextual attributes atcontext.journey.events.event_ID.productListItems. - Q: Can contextual attributes be used before placing the message inside a journey? — No. Contextual attributes are available in the personalization editor only after the message is placed inside a journey that includes the relevant event.
- Q: How do I test the email with cart data? — Turn on the Test toggle in the journey, click Trigger an event, and enter the input values in the Event configuration window, then click Send. The email is sent to the test profile’s address.