Create a Live Hub (Beta) session
Use Live Hub to deliver live, instructor-led training within an Adobe Learning Manager course. You can combine Live Hub sessions with self-paced content to create a blended learning experience.
When you add a Virtual Classroom module to a course, select the virtual training tool that will host the live session. You can choose Live Hub, Adobe’s built-in AI-powered virtual training solution, or use an external provider such as Adobe Connect.
When creating a Live Hub course, you can:
-
Add one or more Live Hub sessions to a course.
-
Select Instructors manually or use AI-assisted instructor recommendations.
-
Configure the course with a single default instance or create multiple instances for different schedules or audiences.
This article explains how to create a Live Hub course, assign Instructors, and configure course instances.
Create a Live Hub course
A default instance is created automatically when you add a Virtual Classroom module. This is useful when you want to deliver a single session or a standard schedule for all learners.
To create a Live Hub course:
-
Sign in to Adobe Learning Manager as an Author.
-
Select Create Courses.
-
On the Course Catalog page, select Add, and then enter the following details:
-
Course name
-
Brief description
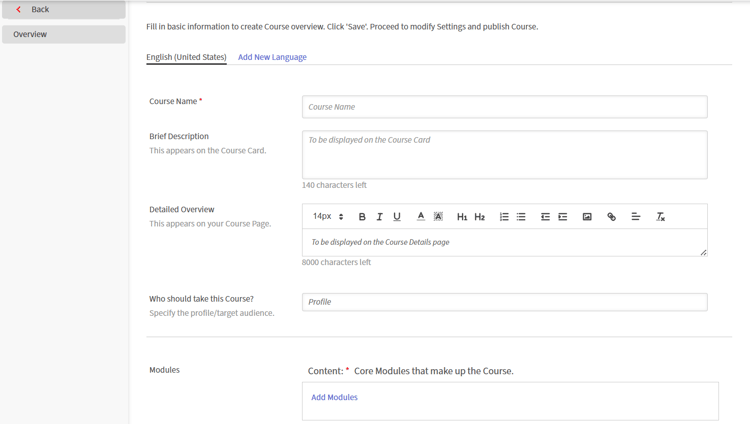
Enter the course name and brief description before adding modules to the course. -
-
Select Content > Add Modules in the Modules section.
The Select Module Type pop-up window appears. -
Select Virtual Classroom and enter the course details, including title, description, timezone, start and end date, and start and end time.
-
Select Live Hub in Live Virtual Training Tools.
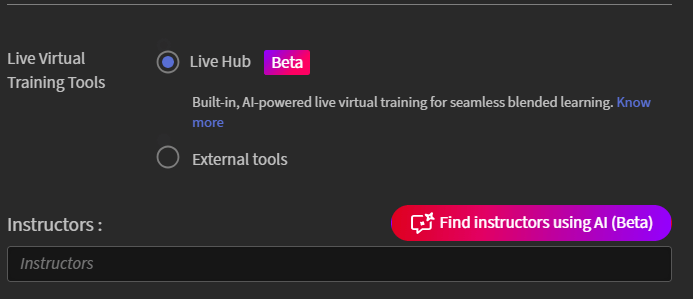
Select Live Hub to enable AI-powered instructor recommendations for the session. -
Add Instructors by using one of the following options:
-
Enter Instructor names in the Instructors field.
-
Select Find instructors using AI to view AI-recommended Instructors. View Add Instructors using Instructor Finder for more information.
-
-
Select Add > Save.
-
Select the required skills in the Course Skills section.
-
Select the Skill Level, and then review or update the Max Credits.
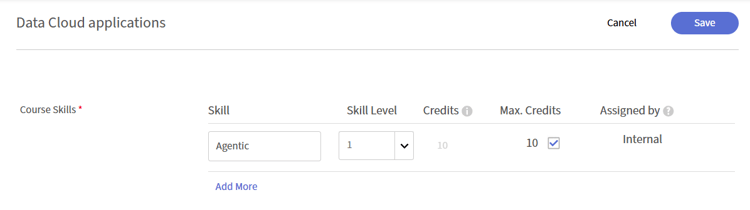
Assign a skill and skill level to define the credits learners earn by completing the course. -
Select Save > Publish. The course is created successfully in Adobe Learning Manager.
Create a course instance
An Administrator can create one or more instances of a course to offer it to different audiences, schedules, or locations. Each instance has its own session details, so you can assign different Instructors, Instructor Finder recommendations, and timings to each instance of the same course.
To create a course instance:
-
Sign in to Adobe Learning Manager as an Author.
-
Open the course, and then select Instances from the left panel.
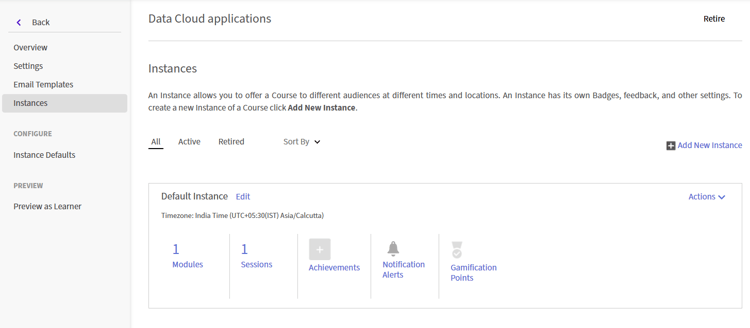
The Default Instance is created automatically when you add a Virtual Classroom module. -
Select Add New Instance.
-
Enter the Instance Name, Start Date, and Completion Deadline. Select Show More Options to configure additional settings.
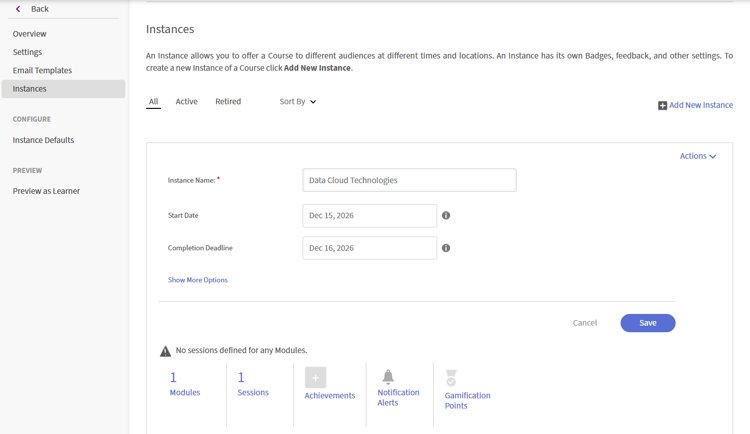
Enter an instance name, start date, and completion deadline to create a new course instance. -
Select Save.
The new instance is added to the Instances list.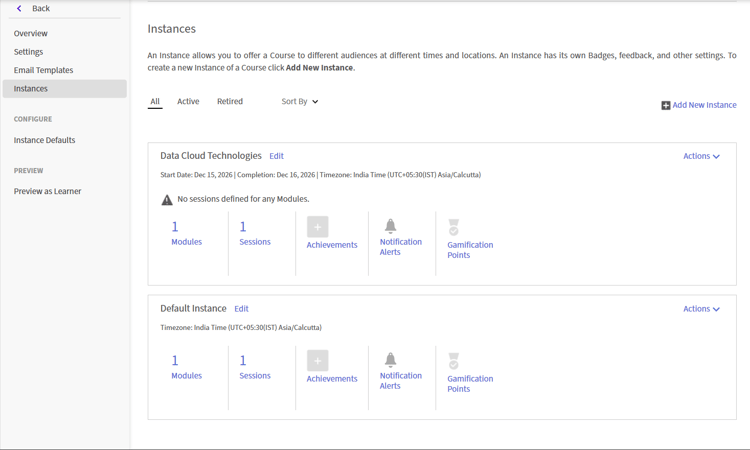
The new instance appears alongside the Default Instance in the Instances list. -
Select the number under Sessions to view the Session Details.
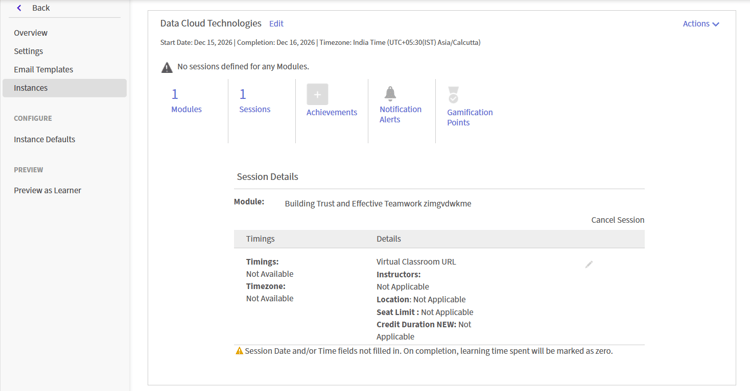
Session details show which timing, instructor, and location fields still need to be configured. -
Select the edit (pencil) icon next to the session details to open the session configuration panel.
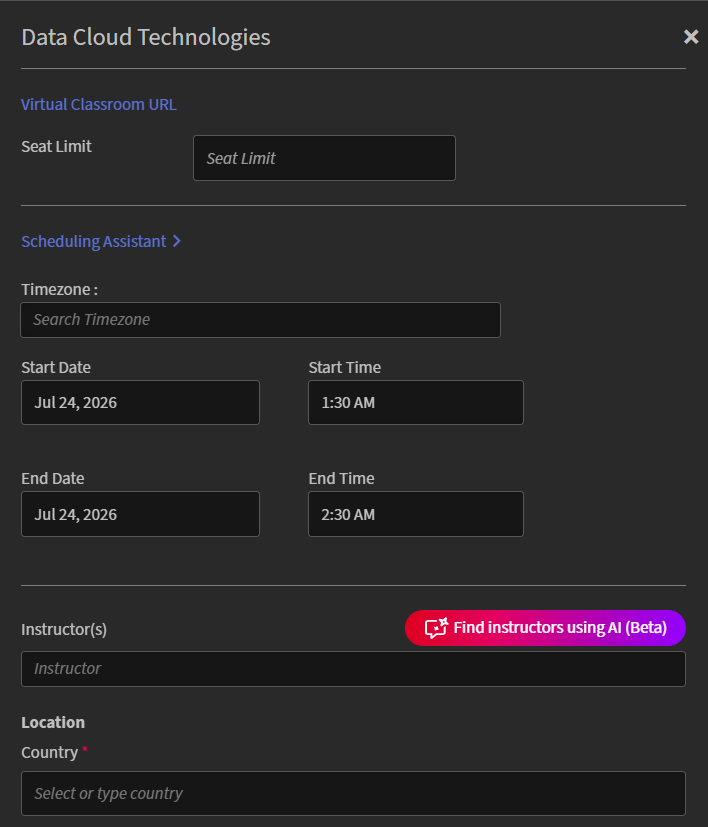
Configure the schedule, instructor, and location for a specific session instance. -
In the Instructors field, enter names manually, or select Find instructors using AI for AI-recommended Instructors. View Add Instructors using Instructor Finder for more information.
-
Enter the Location details, and then select Save. The session is updated with the configured timings, Instructor, and location details.
Add Instructors using Instructor Finder
Instead of searching for and adding Instructors manually, use Instructor Finder to receive AI-powered Instructor recommendations for the session. Instructor Finder matches instructors based on the course details and required skills, while also considering the organization’s holiday calendar, Instructor availability, and Instructor utilization to suggest the most suitable instructors. View Add and manage Instructors for more information.
To add Instructors using Instructor Finder:
-
Navigate to the Instructors section in the Virtual Classroom module.
-
Select Find Instructors using AI.
The AI Assistant panel opens on the right side.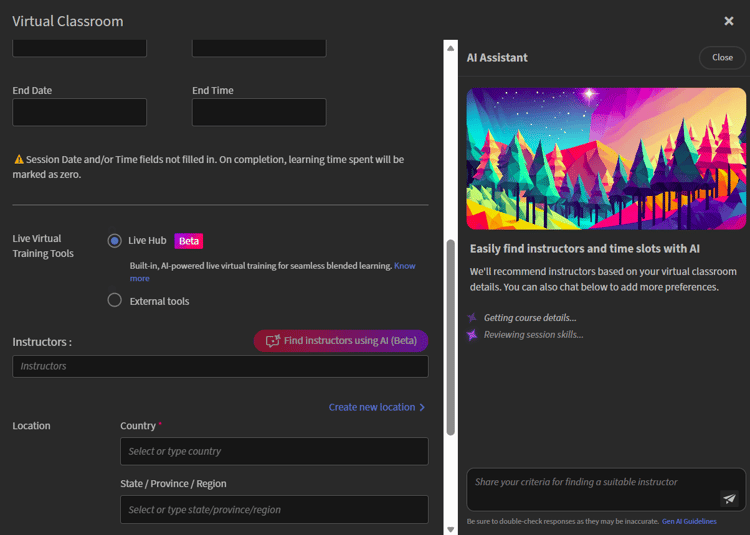
Use the AI Assistant panel to get instructor and time-slot recommendations based on the session’s details. -
Review the list of recommended Instructors.
-
Navigate to the Instructor that you want to assign, and then select Add.
The selected instructor is added to the Instructors field as a tag.
Enroll learners in the course
Learners can be enrolled in a Live Hub course in the following two ways:
-
An Administrator enrolls Learners in the course based on organization requirements. View Create course instances and learning paths for more information.
-
Learners can directly enroll themselves in the course from the Catalog page. If the course is configured for self-enrollment, Learners are enrolled immediately and can access the course from My Learnings. View My Learnings for more information.
After enrollment, Learners are added to the course and receive a notification in their Adobe Learning Manager account. Depending on the account’s email notification settings, Learners may also receive an invitation to join the course via email.
Customize Live Hub room branding
Administrators can customize the appearance of Live Hub rooms to align with your organization’s branding. Use the Themes settings in Adobe Learning Manager to apply brand colors, logos, and visual styling across Live Hub sessions.
Customized branding helps create a consistent learning experience and ensures that live training sessions reflect your organization’s identity.
For more information about configuring themes, view the Color themes article.