Add and manage Instructors
Instructors deliver live sessions and engage learners in Live Hub. To support accurate scheduling and effective course delivery, Administrators can add Instructors, build their profiles, define teaching skills and languages, and configure availability.
The Instructors tab provides a single place to manage this information across your organization. From here, you can add existing Adobe Learning Manager users as Instructors, review and update their profiles, and keep their skills, languages, and availability up to date as teaching needs evolve.
Access the Instructors tab
Follow these steps to view and manage Instructors:
-
Log in to Adobe Learning Manager.
-
Navigate to Admin > Users.
-
Select Instructors in User Groups.
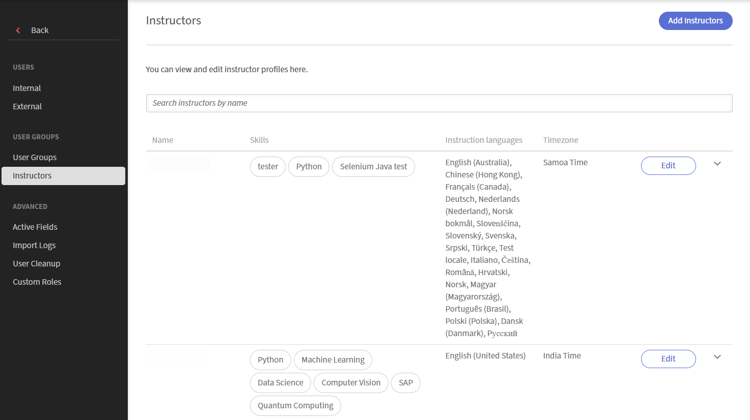
Select Instructors in User Groups to view and manage Instructors.
Add an Instructor
Instructors are created from existing Adobe Learning Manager users. If a user does not yet have Instructor permissions, add them as an Instructor.
To add an Instructor:
-
Select the Instructors tab from User Groups.
-
Select Add Instructors.
A pop-up window of Add Instructors appears.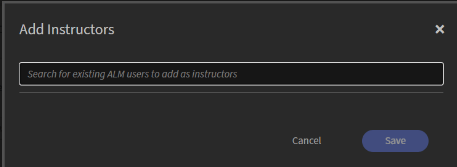
Search for a user by name and select them to assign the Instructor role. -
Search for the user by name and select the user from the search results to assign the Instructor role.
-
Select Save.
The user is now assigned the Instructor role and appears in the Instructors list.
Set up an Instructor profile
An Instructor profile defines the Instructor’s teaching information, languages, skills, utilization, and availability. Completing the profile ensures accurate Instructor matching, efficient scheduling, and alignment with course requirements.
To set up an Instructor profile:
-
Search the Instructor name in the Instructors tab.
-
Select Add skills and other details.
An Edit instructor profile pop-up window appears.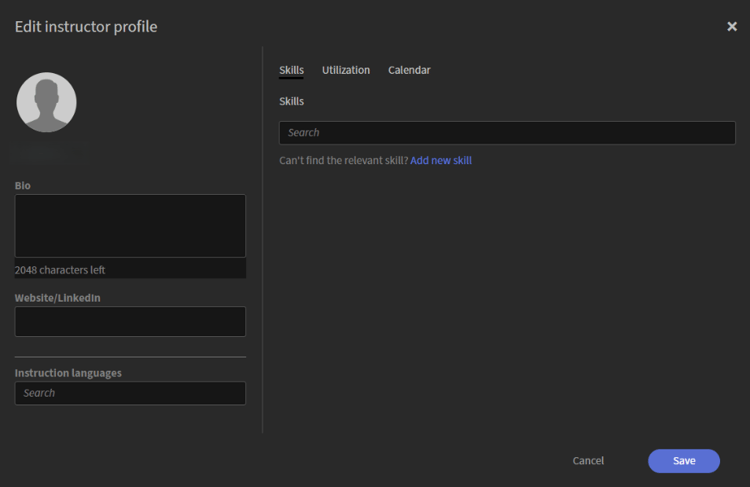
The Edit instructor profile window includes tabs for basic details, skills, utilization, and availability.
Add basic details
Basic details appear in the left panel of the dialog box and are always visible, regardless of which tab is open.
To add the basic details:
-
Navigate to the profile section.
-
Enter the following details:
table 0-row-2 1-row-2 2-row-2 3-row-2 Fields Action Bio Enter a short description of the Instructor (up to 2,048 characters). Website/LinkedIn Enter an external profile or reference link. Instruction languages Search for the languages the Instructor can teach in. The selected languages appear as tags.
Add Instructor skills in the profile
Skills define the subject areas and expertise an Instructor can teach. This plays a key role in matching Instructors to relevant courses and ensuring that the right Instructor is assigned based on course requirements.
To add Instructor skills:
-
Navigate to the Skills tab.
-
Type a skill name in the Search field. This populates a list with the skills.
-
Select skills from the list.
The selected skills appear as tags. -
Select Save.
Create a new skill
If the required skill is not available, you can create it directly from the profile.
To add a new skill:
-
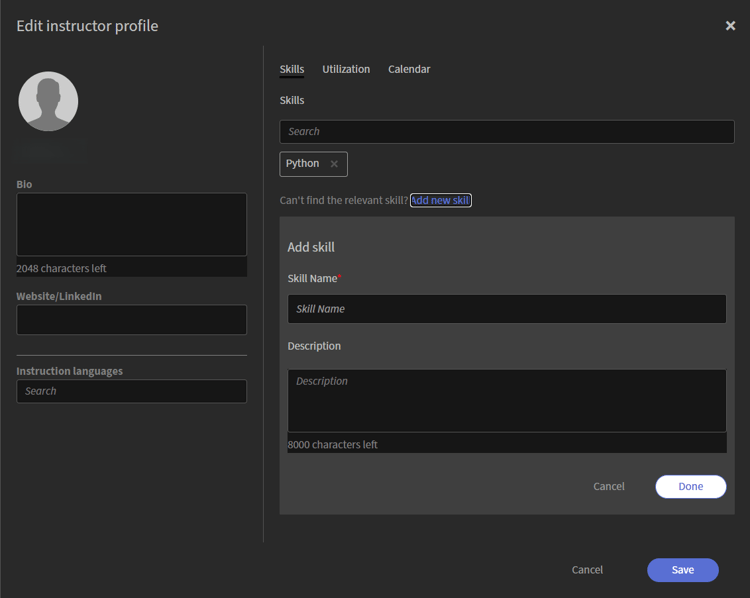
Select Add new skill from the Skills tab. An Add skill panel opens.
-
Enter the following details in the Add skill panel:
-
Skill Name
-
Description
-
-
Select Done.
The new skill has been added and appears as a tag. -
Select Save.
The skills are added to the Instructor profile.
Configure Instructor utilization
Use the Utilization tab to define an Instructor’s teaching capacity and preferred working hours. You can set utilization constraints to establish teaching goals and limits and specify preferred work times to indicate when the Instructor is available to conduct sessions. The displayed time zone is inherited from the Instructor’s user profile.
To configure Instructor utilization:
-
Navigate to the Utilization tab.
-
Enter the Minimum goals and Maximum limits (in hours) for the Monthly period.
-
Enter a Start time and End time for the preferred time slot.
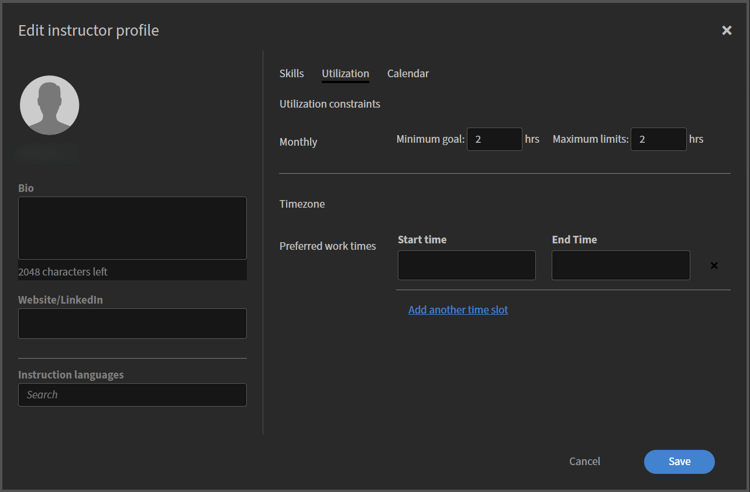
Enter a start time and end time for the Instructor’s preferred working hours. -
(Optional) Select Add another time slot to add additional availability.
-
Select Save. The Instructor’s utilization constraints and preferred work times are updated.
Manage Instructor availability
Use the Calendar tab to add the Instructor’s schedule and mark periods when the Instructor is unavailable. The calendar uses color coding to identify Booked, Holidays, and Unavailable dates.
The Holidays shown on this calendar are configured from Holiday settings. View Manage Holidays for more information.
To mark unavailable days:
-
Navigate to the Calendar tab.
-
Select a start date and an end date in the Add non-available days section.
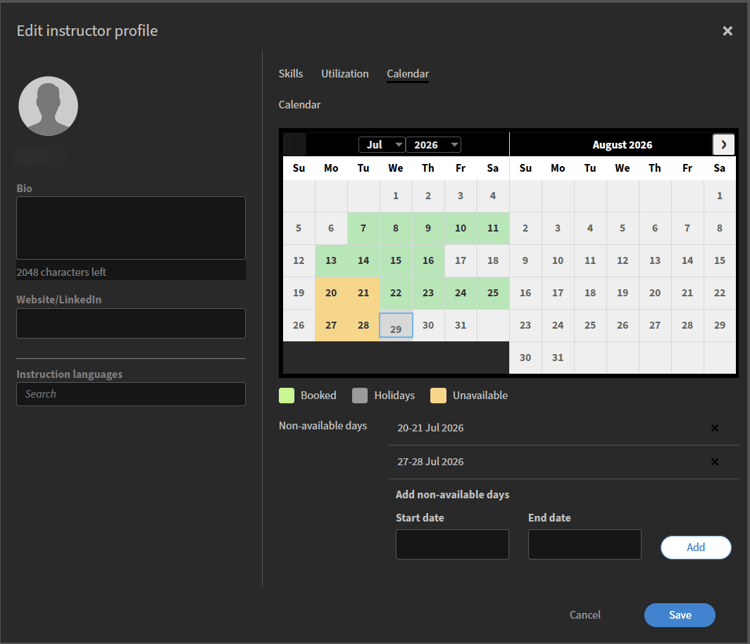
Select a start date and end date to mark a range as unavailable on the Instructor’s calendar. -
Select Add.
The selected date range is marked as unavailable on the calendar. -
Select Save. The Instructor’s availability settings are updated.