On this page: Add and configure a decision policy in your campaign or journey content so you can return and rank the best decision items for each profile across the supported channels.
To present the best dynamic offer and experience to your customers, add a decision policy to your content in a campaign or journey then configure the items to return and the selection strategy to use. To do so, follow the steps below:
- Add a decision policy
- Configure the decision policy - Add a name and, for Email and Direct mail channels, specify the number of items to return.
- Set up a strategy sequence - Select the items to return with the decision policy.
- Select fallback offers (optional) - Select items to display if no items or selection strategies are qualified.
- Review and save the selection strategy
- Assign a placement (Email channel only)
Add a decision policy add
Access a configured channel action in your journey or campaign, and edit the content of your message. Browse the tabs below for more information on how to add the decision policy based on the selected channel.
For code-based experiences, you can add a new decision policy using either the code editor, or the Decisioning menu available in the properties pane.
| accordion |
|---|
| Add a decision policy from the code editor |
|

| accordion |
|---|
| Add a decison policy from the Decisioning menu |
|

| note important |
|---|
| IMPORTANT |
| A single email supports a maximum of 10 decision policies. |
-
Toggle the Enable decisioning option.

note important IMPORTANT Enabling decisioning clears existing email content. If you have already designed your email, be sure to save your content as a template beforehand. -
Add a new decision policy, using either the personalization editor or the Decisioning menu available in the Email designer.
accordion Add a decision policy from the Personalization editor -
Open the personalization editor using the

-
Navigate to the Decision policies menu then click the Add decision policy button.

accordion Add a decison policy from the Decisioning menu -
Open the Email Designer and select any component in the email structure.
-
Click the

-
Click the Add new policy button.

note NOTE The Reuse decision output option lets you reuse a decision policy that has already been created in this email. It is particularly helpful when you want to show the same offer in multiple locations (for example, header and footer). When the same offer can be selected by more than one decision policy in the email body, the engine deduplicates offers: each placement receives a different offer, so the same offer will not appear in both places. To display the same offer in multiple placements, use Reuse decision output to reuse the output of an existing decision policy in this email. -
You can also add decision policies when using the Code your own mode in the Email Designer. To do so, navigate to Decision policies to insert the decision policy code — the placement selection UI will appear, allowing you to choose a placement for the decision policy. Learn how to code your own email content.

| note availability |
|---|
| AVAILABILITY |
| Inserting decision policies in Code your own mode is in Limited Availability. |
| note |
|---|
| NOTE |
| In Code your own mode, you can only return one decision item per policy, because the Repeat Grid component is not available. |
For SMS, you can add a new decision policy using either the personalization editor, or the Decisioning menu available in the properties pane.
| accordion |
|---|
| Add a decision policy from the personalization editor |
|

| accordion |
|---|
| Add a decison policy from the Decisioning menu |
|

For Push notifications, you can add a new decision policy using either the personalization editor, or the Decisioning menu available in the properties pane.
| accordion |
|---|
| Add a decision policy from the personalization editor |
|

| accordion | |||
|---|---|---|---|
| Add a decison policy from the Decisioning menu | |||
|

For direct mail, add a decision policy from the extraction file configuration. Learn how to create a direct mail message.
-
In the Data Fields section, select a column or click Add to create one.
-
In the formatting pane, open the personalization editor using the

-
Navigate to the Decision policies menu then click the Add decision policy button.

-
In the decision policy configuration screen, use the Number of items field to define how many decision items to return for each profile (for example, 2 to export the top 2 eligible offers). Continue with strategy setup and personalization in your extraction file columns.
Configure the decision policy configure
After you have added a new decision policy into your content, the decision policy configuration screen opens. Follow these steps to configure the decision policy:
-
Provide a name for the decision policy and select a catalog (currently limited to the default Offers catalog).

-
The Number of items field allows you to define the number of decision items to return with decision policy. For example, if you select 2, the best 2 eligible offers will be presented for the current configuration.
note NOTE The Number of items field is available for Email, Code-based experience, and Direct mail channels. For SMS and Push channels, only 1 decision item can be returned per action. To return multiple items for the Email channel, you need to add the decision policy within a Repeat Grid component. Expand the section below for more details:
accordion Return multiple decision items in emails -
Drag a Repeat Grid component in your email and configure it as desired using the Settings pane.

-
Click the Decisioning icon in the canvas toolbar or open the Decisioning pane and select Add decision policy.
-
Specify the number of items to return in the Number of items field then configure the decision policy as documented below. The maximum number of items you can select is limited by the number of tiles defined in the Repeat grid component.

-
-
Click Next.
Set up a strategy sequence strategy
The Strategy sequence section allows you to select the decision items and set up selection strategies to present with the decision policy.
-
Click Add and choose the type of object to include in the policy:

-
Selection strategy - Decision strategies leverage collections associated with eligibility constraints and ranking methods to determine the items to be shown. You can select one or multiple existing selection strategy, or create a new one using the Create selection strategy button. Learn how to create selection strategies
-
Decision item - Select single decision items without having to run through a selection strategy. You can only select one decision item at a time. Any eligibility constraints set for the item will apply.
note NOTE A decision policy supports up to 10 selection strategies and decision items combined. Learn more about Decisioning guardrails & limitations -
-
When adding several decision items and/or strategies, they will be evaluated in a specific order. The first object that was added to the sequence will be evaluated first, and so on. To change the default sequence, drag and drop the objects and/or the groups to reorder them as wanted. Expand the section below for more details.
accordion Manage evaluation order in a decision policy Once you have added decision items and selection strategies to your policy, you can arrange their order to determine their evaluation order and combine together selection strategies to evaluate them together.
The sequential order in which items and strategies will be evaluated is indicated with numbers at the left of each object or group of objects. To move the position of a selection strategy (or a group of strategies) within the sequence, drag and drop it to another position.

note NOTE Only selection strategies can be dragged and drop within a sequence. To change the position of a decision item, you need to remove it and add it back using the Add button after adding the other items you want to evaluate before. You can also combine multiple selection strategies into groups so they are evaluated together and not separately. To do this, click the
+button under a selection strategy to combine it with another one. You can also drag and drop a selection strategy on another one to group the two strategies into a group.note NOTE Decision items cannot be grouped together with other items or selection strategies. Multiple strategies and their grouping determine the priority of the strategies and ranking of eligible offers. The first strategy has the highest priority and the strategies combined within the same group have the same priority.
For example, you have two collections, one in strategy A and one in strategy B. The request is for two decision items to be sent back. Let’s say there are two eligible offers from strategy A and three eligible offers from strategy B.
-
If the two strategy are not combined or in sequential order (1 and 2), the top two eligible offers from the first strategy will be returned in the first row. If there are not two eligible offers for the first strategy, the decision engine will move on to the next strategy in sequence to find as many offers are still needed, and ultimately will return a fallback if needed.

-
If the two collections are evaluated at the same time, as there are two eligible offers from strategy A and three eligible offers from strategy B, the five offers will all be stack ranged together based on the value determined by the respective ranking methods. Two offers are requested, therefore the top two eligible offers from these five offers will be returned.

Example with multiple strategies
Now let’s consider an example where you have multiple strategies divided into different groups. You defined three strategies. Strategy 1 and Strategy 2 are combined together in Group 1 and Strategy 3 is independent (Group 2). The eligible offers for each strategy and their priority (used in the ranking function evaluation) are as follows:
-
Group 1:
- Strategy 1 - (Offer 1, Offer 2, Offer 3) - Priority 1
- Strategy 2 - (Offer 3, Offer 4, Offer 5) - Priority 1
-
Group 2:
- Strategy 3 - (Offer 5, Offer 6) - Priority 0
The highest priority strategy offers is evaluated first and added to the ranked offers list.
-
Iteration 1:
Strategy 1 and Strategy 2 offers are evaluated together (Offer 1, Offer 2, Offer 3, Offer 4, Offer 5). Let’s say the result is:
Offer 1 - 10
Offer 2 - 20
Offer 3 - 30 from Strategy 1, 45 from Strategy 2. The highest of both will be considered, so 45 is taken into account.
Offer 4 - 40
Offer 5 - 50The ranked offers are now as follows: Offer 5, Offer 3, Offer 4, Offer 2, Offer 1.
-
Iteration 2:
Strategy 3 offers are evaluated (Offer 5, Offer 6). Let’s say the result is:
- Offer 5 - Will not be evaluated since it already exists in the result above.
- Offer 6 - 60
The ranked offers are now as follows: Offer 5 , Offer 3, Offer 4, Offer 2, Offer 1, Offer 6.
-
-
When your selection strategy is ready, click Next.
Add fallback offers fallback
Once you have selected decision items and/or selection strategies, you can add fallback offers to display if none of the above items or selection strategies are qualified.
You can select any item from the list, which displays all the decision items created on the current sandbox. If no selection strategy is qualified, the fallback is displayed to the user no matter the dates and eligibility constraint applied to the selected item.

Review & save the decision policy review
After configuring a selection strategy and adding fallback offers, click Next to review and save your decision policy then click Create to confirm the policy creation.
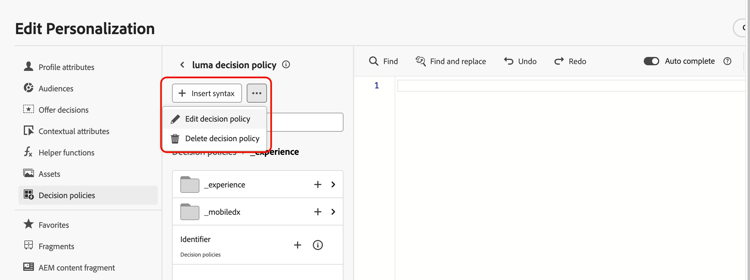
You can edit or delete a decision policy at any time using the ellipsis button in the personalization editor, or in the Decisioning menu within the component properties pane.
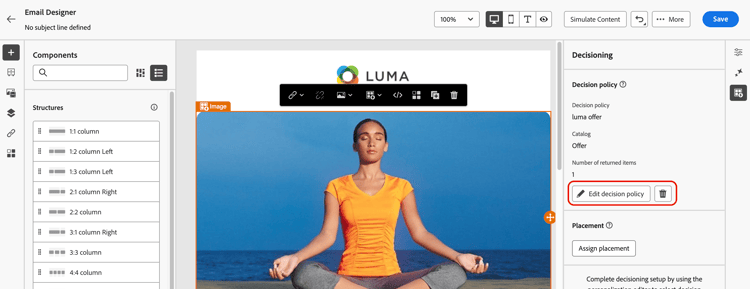
Assign a placement (Email) placement
For emails, you need to define a placement for the component associated to the decision policy. To do so, click the Decisioning button in the component properties pane and select Assign placement. Learn how to work with placements

Next steps next-steps
Now that you understand how to create a decision policy, you’re ready to use it into Journey Optimizer channels to deliver offers.
➡️ Learn how to use decision policies in messages