[Limited Availability]{class="badge informative"}
Use custom metadata in campaigns and journeys custom-metadata
On this page: Learn how to define custom metadata fields for your journeys, Action campaigns and Orchestrated campaigns, so you can track business information such as line of business, product or cost center, and use it for reporting and audience creation.
Custom metadata lets you create your own business fields and display them in the properties of your journeys, Action campaigns and Orchestrated campaigns. Use them to track information that goes beyond what tags and descriptions can capture, such as line of business, promotional region, product line, cost center, or project ID.
The values you enter are recorded in the entity datasets. You can use them for downstream reporting, to export data, or to build audiences from the profiles who received a given journey or campaign.
How custom metadata works how-it-works
Custom metadata fields are defined in the Adobe Experience Platform schemas based on the AJO Entity Class. Currently, Journey Optimizer automatically provisions a record-based schema for each of three entities — Action campaigns, journeys and Orchestrated campaigns:
- AJO Campaign Custom Metadata Schema
- AJO Journey Custom Metadata Schema
- AJO Orchestrated Campaign Custom Metadata Schema
Define your custom metadata fields define-fields
To define custom metadata fields, add them to a custom field group in the schema of the entity type (Action campaigns, journeys, or Orchestrated campaigns) where you want to use them.
You can use a different field group for each entity type, but reusing the same field group in the schemas of other entity types ensures that the same metadata fields are tracked across all your orchestration types.
-
In Adobe Experience Platform, browse to Data Management > Schemas. From the Browse tab, open one of the custom metadata schemas, for example AJO Campaign Custom Metadata Schema.
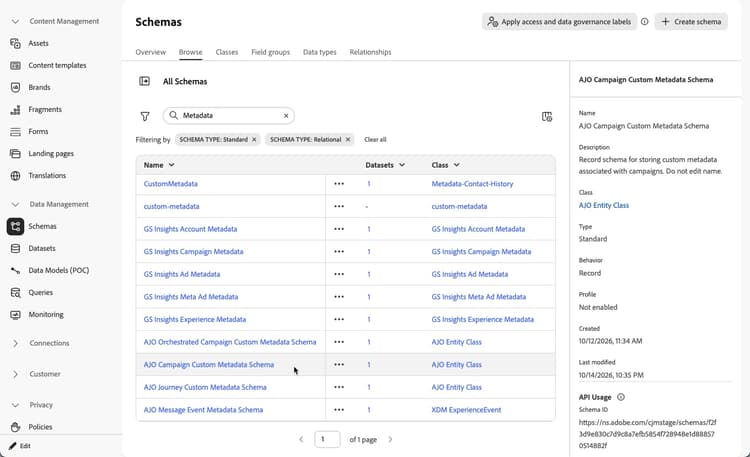
note NOTE Do not edit the name of these schemas. -
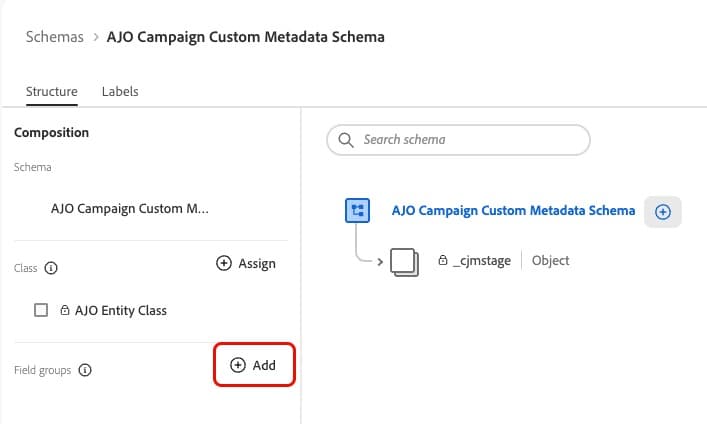
In the schema’s structure, from the Field groups section, click Add.
Select Create new field group. Enter a display name, for example AJO Custom Metadata, and click Add field group. Learn how to add field groups and fields to a schema
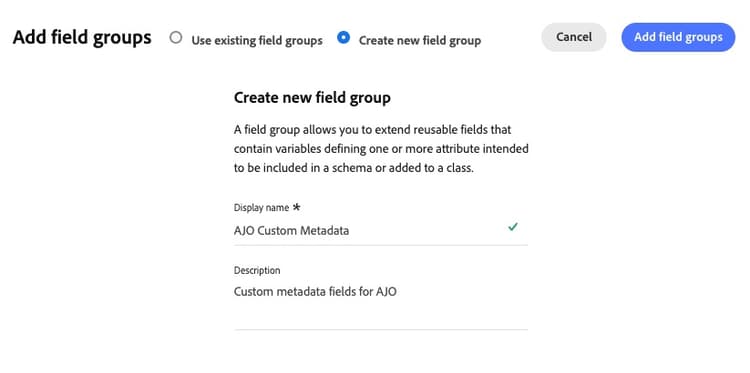
-
Back in the schema’s structure, select the field group you created in the Field groups section. Then click the + icon next to the name of the schema to add a new field.
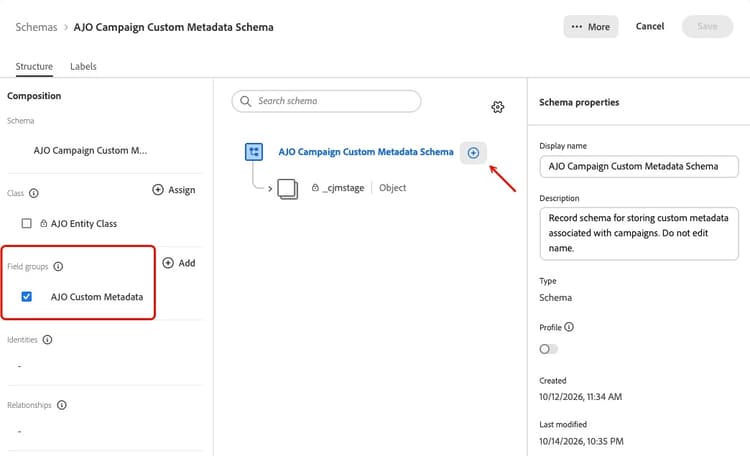
note NOTE You can also select the field group at any time while defining the field from the Field Group drop-down list. 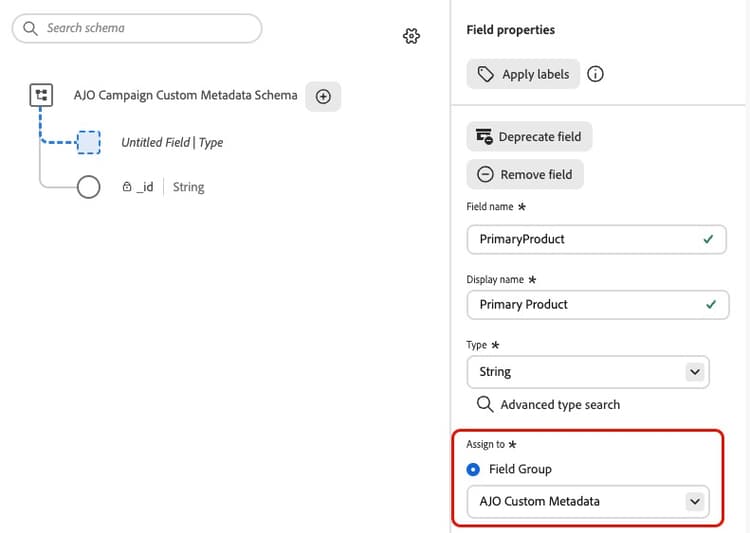
-
For each field:
- Define a name, a display name and, optionally, a description.
- Set the field type to String. Fields of any other type are not available for selection in the Metadata configuration screen.
- To provide a list of values, define the field as an enum and add each value with its display name.
note important IMPORTANT Do not mark fields as required in the schema, as this can cause issues when data is inserted. Instead you can make fields required when you select the fields to display in the properties of your campaigns or journeys. 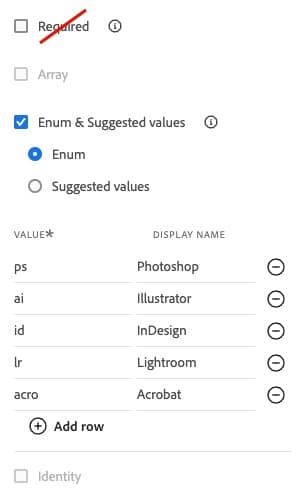
-
Click Apply to save the new field.
-
Repeat these steps to add more fields to your field group and click Save.
-
To use the same fields for other entity types, add the same field group to their schemas.
For example, if you have defined fields for campaigns using the AJO Custom Metadata field group in the AJO Campaign Custom Metadata Schema, you can reuse this field group in the AJO Journey Custom Metadata Schema and in the AJO Orchestrated Campaign Custom Metadata Schema.
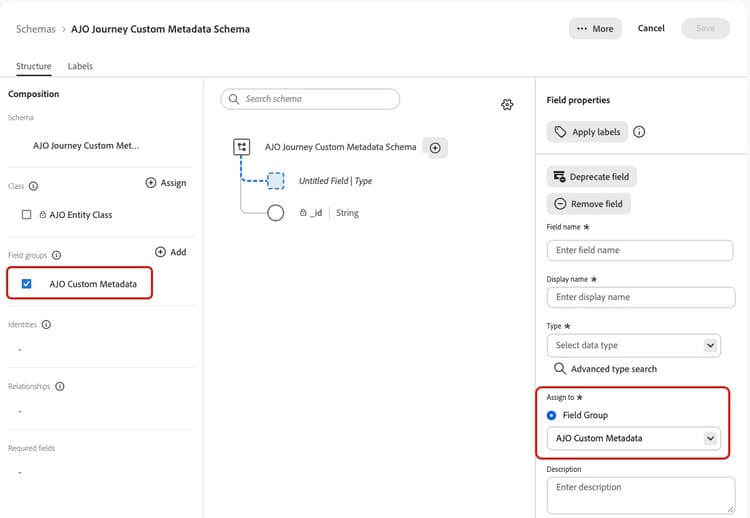
Select it in the Field groups section or from the Field Group drop-down list.
Select the fields to display select-fields
Once your fields are defined in the schemas, use the Metadata configuration screen to choose which fields appear in the properties of your journeys and campaigns, and in which order.
-
In the left navigation, browse to Administration > Configurations, then click Manage in the Metadata card.
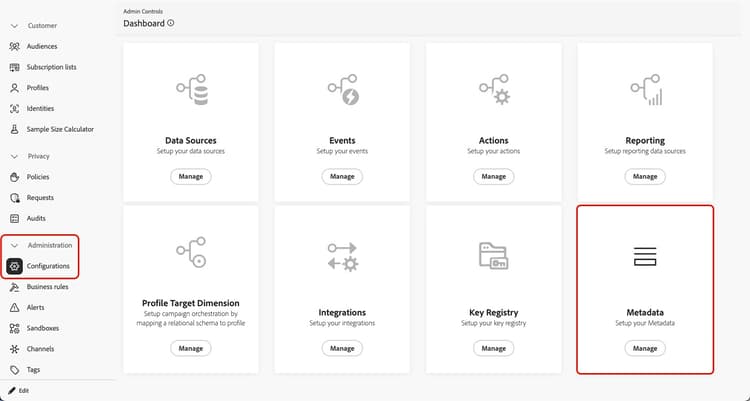
-
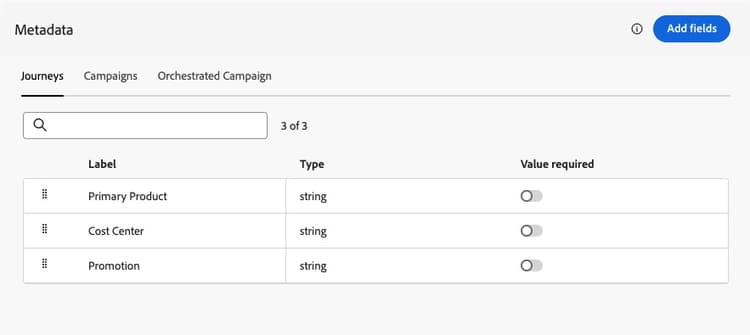
The Metadata configuration screen contains one tab per entity type: Journeys, Campaigns and Orchestrated Campaigns.
-
For each tab, the list is synchronized with the corresponding schema. When you add or change fields or lists of values in the custom metadata schema, the changes are reflected here.
note NOTE It can take a few minutes for schema changes to be displayed. -
You can reorder the selected fields. The fields are displayed in this order in the properties of your journeys and campaigns, so place the most important ones first.
-
Optionally, you can mark fields as required. They are displayed with an asterisk in the campaign or journey properties. If a required field is not filled in, you cannot activate or publish the journey or campaign.
-
To add or remove fields, click the Add fields button and check or uncheck the corresponding fields in the list to update the selection.
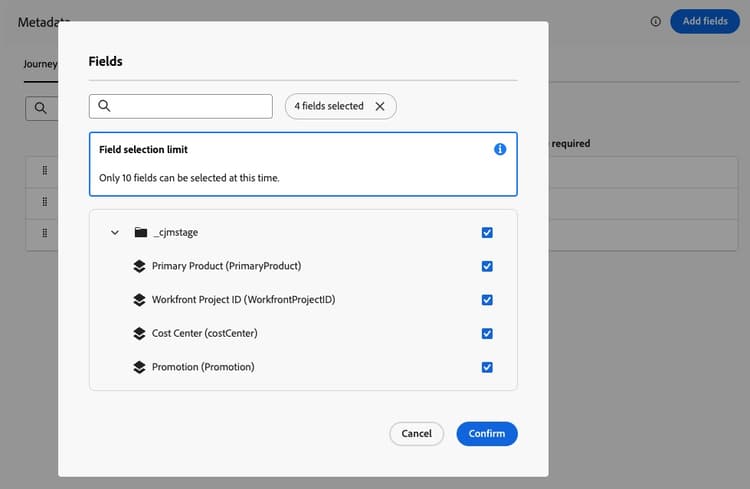
note caution CAUTION You can select up to 10 fields per entity type. If your schema contains more fields, select the 10 you want to display. -
Confirm your selection.
The configuration is independent for each entity type: you can select different fields, in a different order, for journeys, Action campaigns and Orchestrated campaigns.
Fill in metadata values fill-values
Once you have defined the fields and selected them in the Metadata configuration, they appear in the Metadata fields section of the properties of each entity.
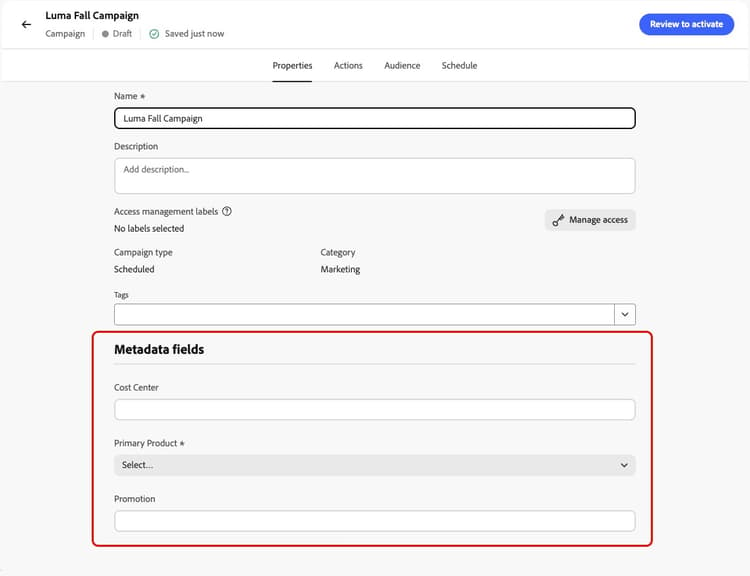
Find where to fill in the fields for each entity type:
The custom fields are displayed in the order you specified when selecting the fields to display.
Enter or select a value for each field, then save your journey or campaign as usual.
Use custom metadata for reporting reporting
When a journey, Action campaign or Orchestrated campaign is activated, its metadata values are sent to the corresponding dataset:
- AJO Campaign Custom Metadata Dataset
- AJO Journey Custom Metadata Dataset
- AJO Orchestrated Campaign Custom Metadata Dataset
Learn more about datasets in this section.
You can use these datasets to export the data for downstream reporting, or to build audiences based on the metadata of the journeys and campaigns that profiles received.