在此页面上:创建和管理命名内容变体,选择要呈现的变体,比较其详细信息和预览,并在发送内容之前检查无效链接。
已重新设计 模拟内容变体 体验,以便更快速、更轻松地测试和比较变体。 变体在可滚动网格中呈现,控件直接在每个卡片和底部操作栏中可用。 您可以渲染所有变体或选择要预览的子集。
若要访问新体验,请在内容中单击 模拟内容 以打开内容模拟屏幕。 如果变体已经可用,则会立即显示预览网格。 如果尚不存在任何变体,则会显示一个空白变体,您可以使用下面描述的任何方法开始创建它们。
如果您更喜欢以前的布局,可随时单击底部操作栏中的旧体验。 经典体验文档位于模拟内容变体(经典体验)。
创建和管理变体 manage-variants
可以通过不同的方式创建变体:逐个手动创建,或通过导入文件、使用人工智能生成变体或选择现有的模拟用户来手动创建。 您最多可以手动或通过文件上传添加30个变体。 在使用AI生成时,根据内容的复杂性,最多可以创建40个变体。
手动添加变体 add-variants
要手动添加空白变体,请单击底部操作栏中的添加。 将添加新的空白变体,您可以直接输入属性值。
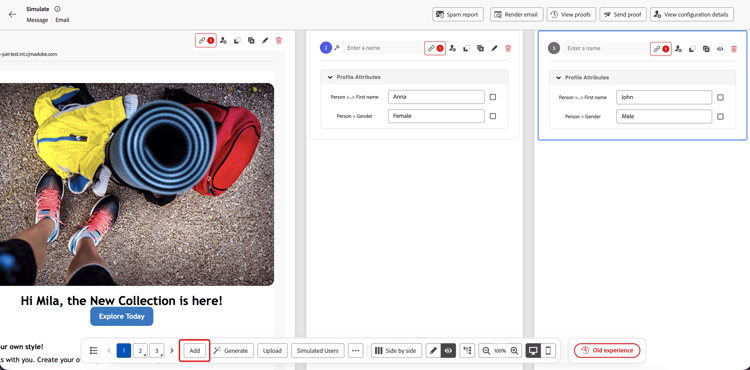
要导入变体,请单击底部操作栏中的上传。 您可以上传CSV、JSON或JSONL(JSON行)文件,其中每个行或条目都成为变量。 从上传对话框下载文件模板以使用正确的格式。 变体名称可以包含在上传的文件中。
自动生成变体 auto-generate
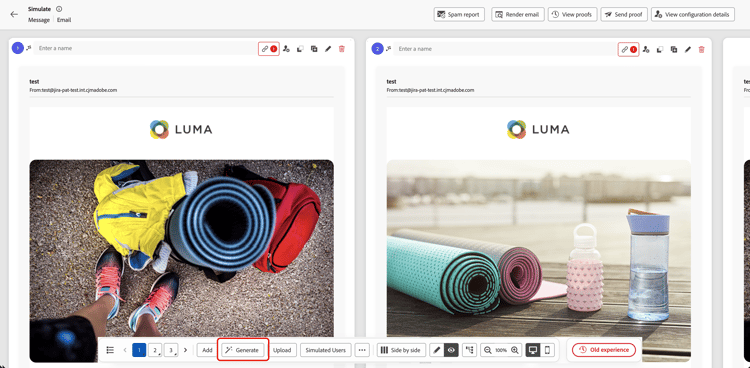
要使用人工智能自动生成变体,请单击底部操作栏中的 生成 按钮。 系统将分析您的内容,标识个性化字段和条件分支,并根据需要生成任意数量的变体以用实际值覆盖它们。 AI生成的变体可以通过其卡片上显示的闪烁图标进行标识。
从模拟用户中选择变体 simulated-users
您的变体可以基于模拟用户,这些模拟用户是可重复使用的、类似个人资料的测试实体,可以跨会话保存并可与其他用户共享。 与手动输入的变体不同,模拟用户会保留在当前浏览器会话之外。
从历程 模拟 功能创建和管理模拟用户。 有关完整过程,请参阅创建和管理模拟用户。
要将模拟用户用作变体,请执行以下操作:
-
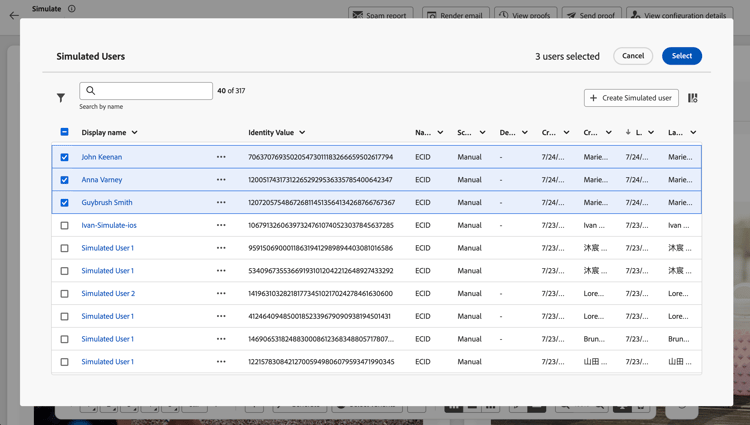
单击底部操作栏中的 模拟用户 按钮。
-
从列表中选择要使用的模拟用户的复选框。
-
单击 选择 以将所选用户添加为变体。
选定的模拟用户将作为变体添加。 您可以在本地编辑变体的属性值以进行测试,但这些更改不会保存回模拟用户记录。
从其卡片管理变体 variant-card-controls
每个变体卡都提供了相应的控件,无需打开底部操作栏的溢出菜单即可管理变体。
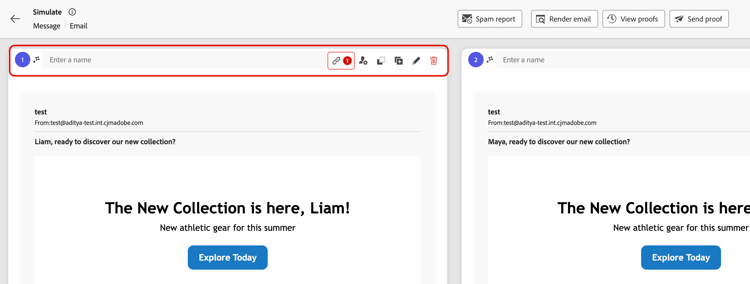
- 命名变体以便将其与其他变体一目了然。 对于从模拟用户创建的变体或通过AI生成的变体,也会显示名称。
- URL检查以验证变体内容中的链接。
- 查看配置详细信息以查看与变体关联的渠道和其他设置(仅限电子邮件)。
- 直接从信息卡复制属性。
- 复制变体以创建现有变体的副本,然后为另一个测试方案编辑其属性值。
- 显示变体详细信息以查看和编辑该变体的属性值。
- 使用变体卡上的控件删除该变体。
导出变体 export-variants
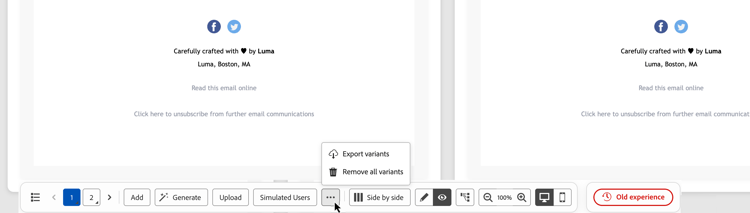
您可以将所有当前变体(无论是手动添加、使用AI生成还是从模拟用户中选择)导出到CSV文件。 单击底部操作栏中的…,然后选择导出变体。
预览变体 preview-grid
选择要渲染的变体 select-variants-to-render
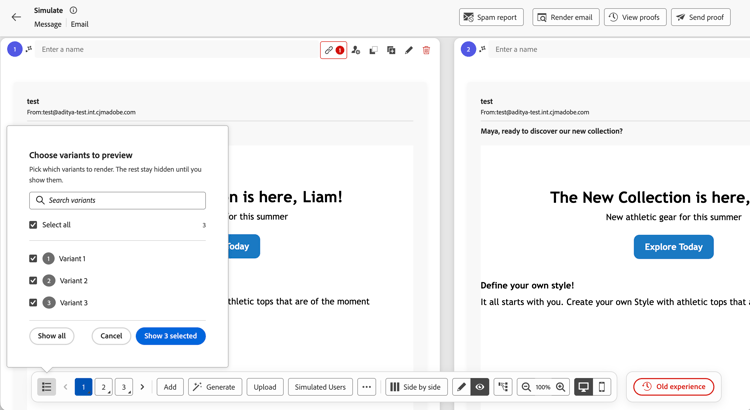
您可以渲染所有变体,也可以仅从完整列表中选择要预览的变体。 未选定的变体将保持隐藏状态,直到您再次显示它们,并且不会将其移除。
-
单击底部操作栏中的变体列表图标。
-
选中要呈现的变体的复选框。 使用 全选 选择或清除完整列表。
要查找特定变体,请使用 搜索变体 字段。
-
单击显示选定变体的数量的蓝色按钮(例如显示选定的3个变体)以应用您的选择。
要再次显示每个变体,请打开面板并单击全部显示。 单击 取消 关闭面板,而不应用您的选择。
在变量之间切换 switch-variants
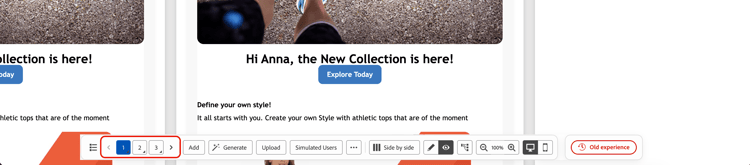
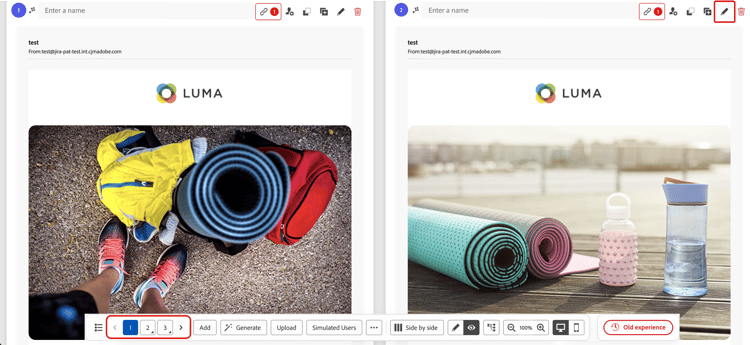
在预览模式下,所有变体将并排呈现,顶部有一个编号指示器。 要在变体之间切换,请单击数字或使用底部操作栏中的 < > 导航按钮。
在预览或编辑模式下显示变体 edit-variants
您可以将变体显示为内容预览或变体详细信息,您可以在其中编辑其属性值。 单击眼睛图标可显示预览,单击铅笔图标可在底部操作栏中显示变体详细信息,以便在两种模式之间一次切换所有变体。
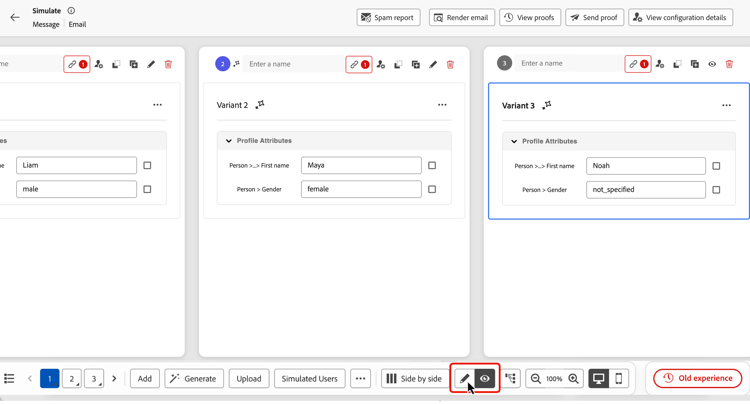
要单独切换单个变体,请单击眼睛图标以显示其预览,或者单击铅笔图标在其卡顶部显示其详细信息。 您还可以在底部操作栏中长按其编号(或使用Alt +向上/向下键)。
显示完整的属性路径 attribute-paths
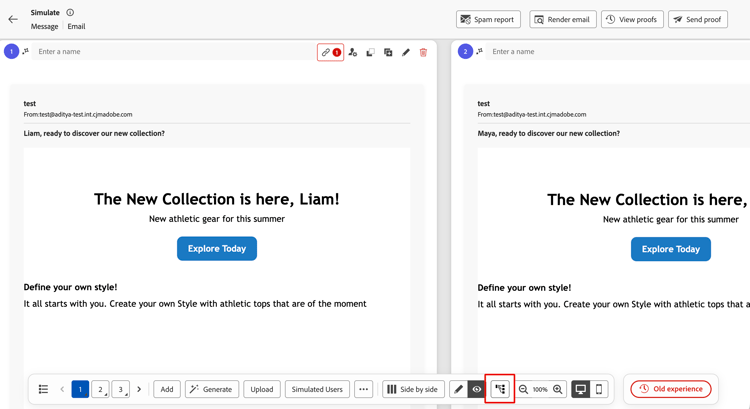
使用底部操作栏中的属性路径切换开关可在变体详细信息中显示或隐藏完整属性路径。 当您需要标识属性在配置文件数据中的位置时,显示完整路径。
更改布局 change-layout
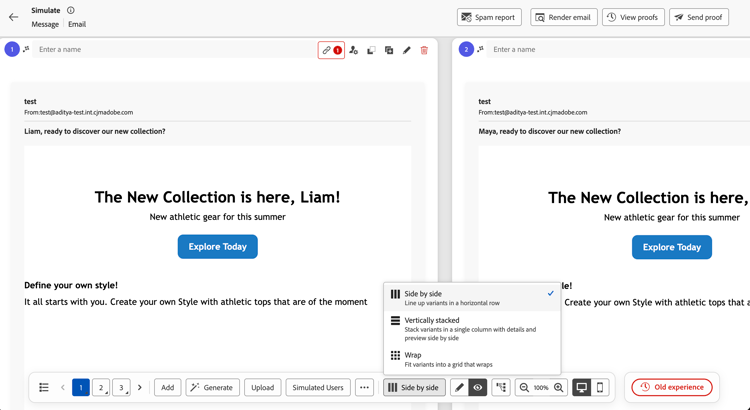
要更改变体的显示方式,请单击底部操作栏中的布局选择器,该选择器可显示当前布局,例如并排。 选择并排、垂直栈叠或折叠。
在 垂直栈叠 布局中,每个变体的详细信息和内容预览会并排显示,以便您可以将属性值与渲染的内容进行比较。
在桌面视图和移动设备视图之间切换 switch-views
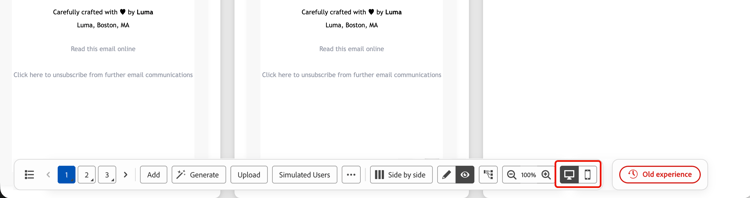
当设备视图控件可用于您的内容时,单击底部操作栏中的桌面或移动设备图标可在两个视图之间切换。 预览网格将更新,以显示变体在选定设备上的外观。
验证链接 validate-links
将自动验证每个呈现的变体的URL。 当找到无效链接时,会在变体卡片上链接图标旁边显示红色无效链接计数。
单击计数以打开 URL验证失败 对话框,该对话框列出了每个无效的 URL 及其原因,例如格式错误的URL。 查看每个链接的原因,确定内容中需要更正的内容。
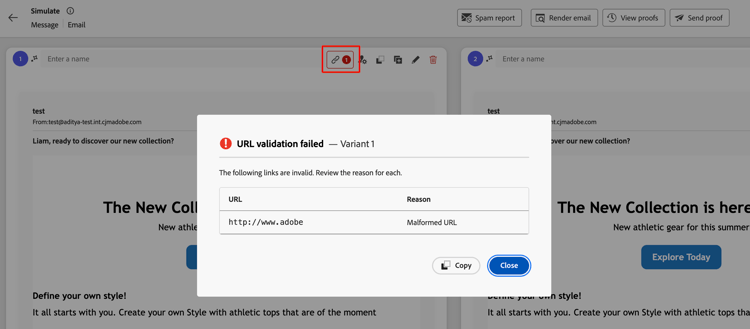
单击 复制 以复制验证详细信息,或单击 关闭 以返回到模拟屏幕。
电子邮件渠道的其他功能 email-capabilities
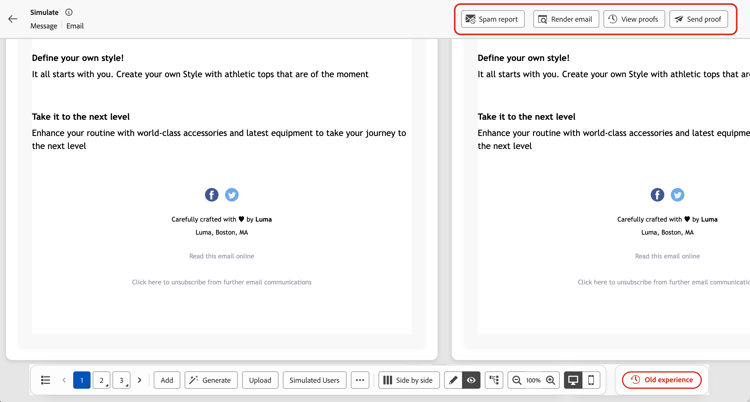
在模拟电子邮件内容时,顶部栏会提供其他特定于电子邮件的工具。
This section contains structured knowledge intended to support interpretation, retrieval, and question answering related to this topic.
For complete understanding, this information should be combined with the documentation on this page. Neither source is intended to stand alone; the page describes the feature, while this section provides additional context that helps disambiguate terminology, intent, applicability, and constraints.
- TL;DR: This page explains the redesigned Simulate content variations experience for creating and managing named variants, selecting variants to render, comparing details with previews, and reviewing automatically detected invalid links.
Intents:
- Open the content simulation screen by clicking Simulate content
- Create variants manually, by uploading a CSV, JSON, or JSONL (JSON Lines) file, by AI generation, or from simulated users
- Name, duplicate, or remove variants, copy attributes, and view configuration details (email only) from their cards
- Select variants to render, preview them or edit their attribute values, show full attribute paths, change the layout, and switch between desktop and mobile views when device-view controls are available
- Export current variants to a CSV file, or use Email-specific tools: Spam report, Render email, and Send proof
- Review invalid-link details for rendered variants or switch back to the classic experience
Glossary:
- Simulate content variations: The redesigned experience that renders all variants or a selected subset in a scrollable grid, with controls on each card and in the bottom action bar. (product-specific)
- Variant: A version of the content with different attribute values, created manually, by file upload, with AI, or from a simulated user. (product-specific)
- Simulated users: Reusable, profile-like test entities that are saved across sessions and can be shared with other users; unlike manually entered variants, they persist beyond the current browser session. (product-specific)
- Generate: The bottom-action-bar button that auto-generates variants with AI; clicking it replaces all existing variants. (product-specific)
- Content previews and variant details: Views for displaying rendered content with the eye icon or editing attribute values with the pencil icon. (product-specific)
- Vertically stacked: The layout where each variant’s details and content preview are displayed side by side. (product-specific)
- Full attribute paths: Paths that identify an attribute’s location in profile data and can be shown or hidden in variant details. (product-specific)
- Invalid-links count: The red count next to the link icon on a variant card when automatic URL validation finds invalid links in that rendered variant. (product-specific)
- URL validation failed: The dialog that lists each invalid URL and its Reason for a variant, such as Malformed URL. (product-specific)
- Send proof: An Email-channel tool that sends a proof of one or more variants to a set of email recipients. (product-specific)
Guardrails:
- You can add up to 30 variants manually or via file upload.
- When using AI generation, up to 40 variants can be created depending on your content’s complexity.
- AI generation and desktop/mobile views are available when their controls are provided for the content.
- Clicking Generate replaces all existing variants, including any added manually or from a file.
- Editing a simulated-user variant’s attribute values is local to testing and is not saved back to the simulated user record.
- Send proof accepts up to 10 recipient addresses.
- URLs are automatically validated for each rendered variant.
- Unselected variants remain hidden until they are shown again; they are not removed.
- The mirror page link is not active in proofs sent for variants; it only activates in the final message.
Terminology:
- Canonical name: Simulate content variations
- Synonyms: “content variants” = “variants”
- Do not confuse: “Simulate content” (the button that opens the simulation screen) ≠ “Simulate content variations” (the experience) ≠ “Old experience” (returns to the classic layout)
- Do not confuse: content previews (eye icon, view rendering) ≠ variant details (pencil icon, edit attribute values)
- Do not confuse: manually entered variants ≠ “simulated users” (saved, reusable across sessions and persistent beyond the current browser session)
- Do not confuse: selecting simulated users to add as variants ≠ selecting which existing variants to render
- Do not confuse: “Send proof” (send variant proofs to email recipients) ≠ “Render email” (preview across email clients and devices) ≠ “Spam report” (deliverability score)
FAQ:
- Q: How do I open the new experience? — From your content, click Simulate content to open the content simulation screen.
- Q: Can I render only some variants? — Yes. Use the variant list icon in the bottom action bar to select the variants to render. Search variants helps find a variant, and Show all displays every variant again.
- Q: Does clicking Generate keep my existing variants? — No. Clicking Generate replaces all existing variants, including any added manually or from a file.
- Q: Can I compare variant details with the preview? — Yes. In the Vertically stacked layout, each variant’s details and content preview are displayed side by side.
- Q: How do I review invalid links? — Click the red invalid-links count on the variant card to open the URL validation failed dialog and review each URL and its Reason. Use Copy to copy the validation details.
- Q: How do I go back to the old layout? — Click Old experience in the bottom action bar.