[Limited Availability]{class="badge informative"}
Configure and manage cloud storage destinations
Use this guide to configure, view, and delete cloud storage destinations from the Activation workspace. Use the Catalog tab to configure destinations, the Destinations tab to manage them, and the Activated audiences tab to review audiences activated to destinations.
After you configure a destination, it becomes available when you activate audiences. To see the full list of supported destinations, refer to the available destinations table.
Prerequisites prerequisites
Before you configure a destination, ensure that:
- You have access to the Activation workspace.
- You have the connection information required by your cloud storage provider.
- If you need to create an account, you have the required credentials or permissions.
- You have reviewed the requirements for your cloud storage destination.
Configure a destination configure-destination
When you configure a destination, you connect a cloud storage account to Real-Time CDP Collaboration and define how audience data is exported to it.
Navigate to Activation > Catalog.
The Catalog tab displays the available destination providers. Each destination appears as a card. Depending on the destination, its card can display configured accounts and actions for viewing additional information.
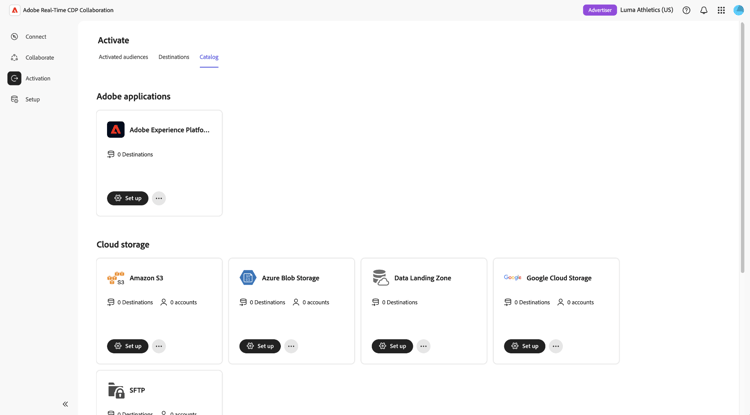
Locate the destination provider that you want to configure and select Set up.
The destination configuration guided setup opens and guides you through four steps: Authenticate, Create destination, Map fields, and Review.
Authenticate authenticate
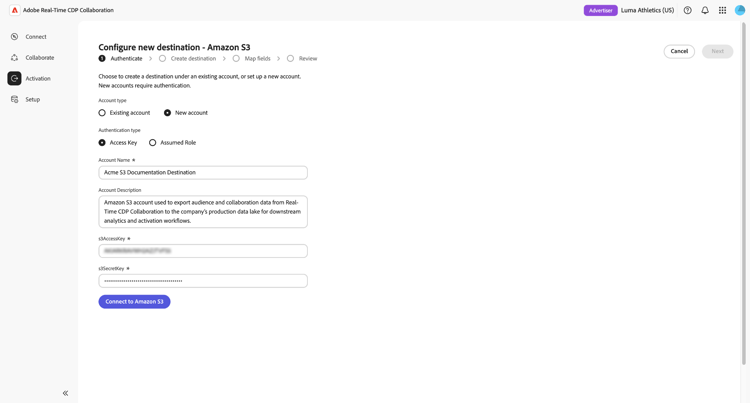
The Authenticate step establishes a connection between Real-Time CDP Collaboration and your destination account.
If an existing account is available, select it from the account selector. To create an account, select New account.
Select an authentication method and provide the required account information. Available authentication methods and fields depend on the selected destination provider. For connector-specific requirements, see Cloud storage destination requirements.
Select Connect to Amazon S3. For other destination providers, the button displays the corresponding provider name.
After the account is validated successfully, select Next.
Create destination create-destination
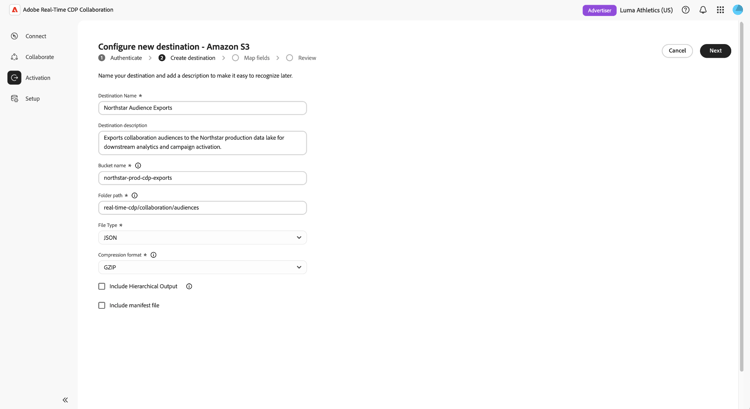
The Create destination step defines where and how audience export files are delivered.
Enter a destination name and complete the required storage and export settings. The available fields depend on the selected destination provider. For definitions and connector-specific requirements, refer to the destination documentation linked from Cloud storage destination requirements.
After you complete all required fields, select Next. The guided setup advances to the field-mapping step.
Map fields map-fields
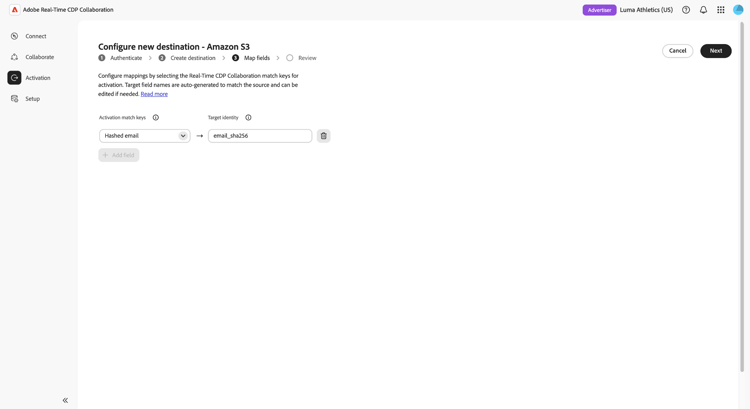
The Map fields step defines how audience match keys are mapped to the identity fields expected by the destination.
Unlike the standard Real-Time CDP destinations workflow, Real-Time CDP Collaboration configures these mappings while the destination is created. Audience match keys appear as source fields. Map each source field to the corresponding target identity so that the destination can recognize the exported identifiers and associate them with the intended users.
Select Add field to add another match-key mapping, or select the delete icon to remove a mapping. Review and configure all required mappings.
When the mappings are complete, select Next. The guided setup advances to the review step.
Review review-destination
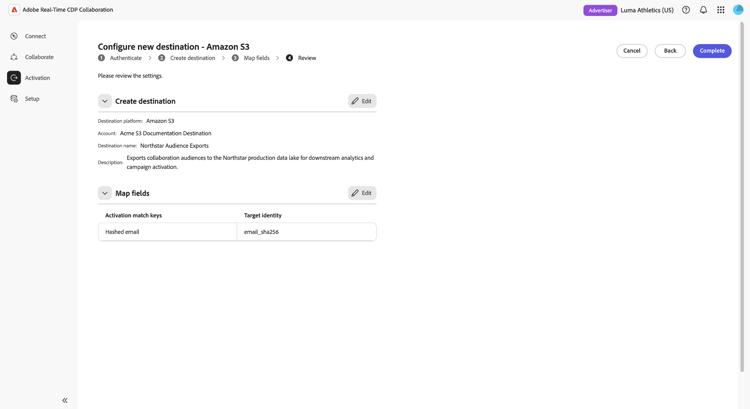
The Review step summarizes the destination configuration before it is created.
Review the destination settings. To make changes, select the pencil icon

When the configuration is correct, select Complete. The destination is created and becomes available for audience activation.
View configured destinations view-configured-destinations
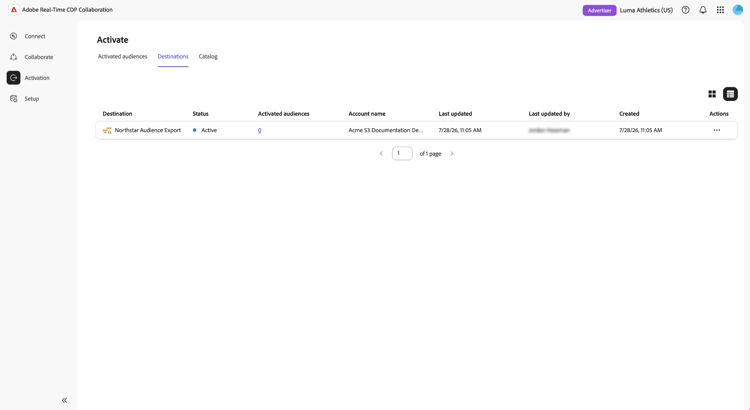
After you configure a destination, it appears in your destination inventory. From the inventory, you can review its status and the audiences activated to it.
Navigate to Activation > Destinations. The Destinations tab displays a table of configured destinations.
Delete a destination delete-destination
Delete a destination when it is no longer required for audience activation. Deleting a destination removes it from your destination inventory and prevents audiences from being activated to it in the future.
Navigate to Activation > Destinations.
Locate the destination that you want to remove, select the ellipsis icon in the Action column, and then select Delete.
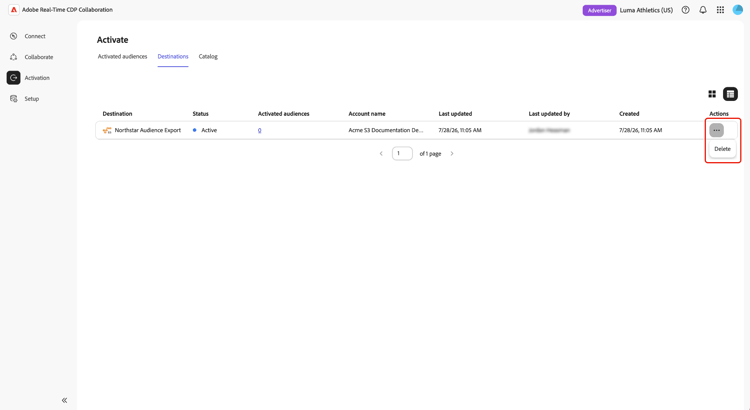
A confirmation dialog appears. Review the destination that will be removed, and then select Delete to confirm.
The destination is removed from your destination inventory and is no longer available for audience activation.
Next steps next-steps
After you configure a destination, you can begin activating audiences within your projects.