On this page: Learn how administrators configure Loyalty Challenges, including global settings, reward providers, event mappings, product inventory, and exclusions.
Overview access-loyalty-admin
Loyalty Challenges configuration connects Journey Optimizer to your external loyalty systems by setting up reward fulfillment, event mapping, product inventory, and exclusions before marketers author challenges.
To open the configuration interface, select the Loyalty configurations menu from the left navigation. The interface is organized into tabs:
- Global settings — Select the Experience Platform identity namespace for your program. Learn how to configure global settings
- Reward providers — Connect the APIs that fulfill rewards when customers make progress or complete challenges. Learn how to configure reward providers.
- Event mapping — Map incoming experience events to activities used in Custom event tasks. Learn how to configure event mappings.
- Product inventory — Upload item-to-group mappings for use in task eligibility rules. Learn how to configure product inventory
- Exclusions — Upload organization-wide item and group exclusions for task configuration. Learn how to configure exclusions
Global settings global-settings
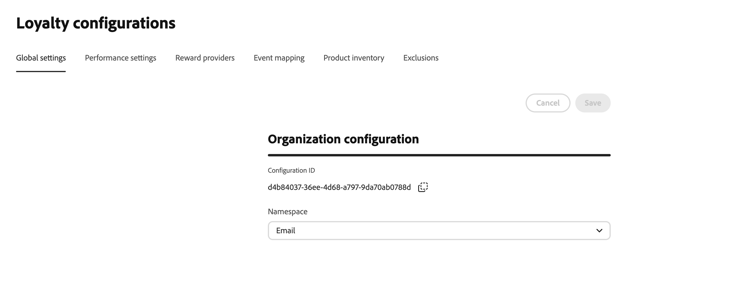
Open the Global settings tab to configure global settings for Loyalty Challenges.
-
In the Organization configuration section, select the Adobe Experience Platform identity namespace for Loyalty Challenges. This namespace must match how member profiles are identified in your data.
-
Use the Reporting section to set your organization’s priority metric for the Loyalty Insights dashboard. This setting determines which insights receive emphasis in your feed, allowing you to focus on the metric that matters most to your business.
Select one of the following KPI options:
- Revenue — Prioritize insights related to monetary transactions and sales performance
- Engagement — Prioritize insights related to member activity and participation
- Redemptions — Prioritize insights related to reward redemption rates and activity
- Conversions — Prioritize insights related to conversion metrics and goal completion
When you select a KPI, insights related to that metric receive a scoring boost, which causes them to rise to the top of the feed. This means the most relevant insights for your selected KPI appear first. No insights are hidden: your complete insight feed continues to display, ranked by significance with your selected KPI prioritized above other metrics. This setting only affects how insights are ranked in the feed and does not modify how your loyalty program operates or how challenges are evaluated. You can change your KPI selection at any time, and the insight feed re-prioritizes on the next refresh cycle to reflect your new priority.
For more information about loyalty insights and performance monitoring, see Explore loyalty performance.
Reward providers reward-providers
A reward provider tells Journey Optimizer where to send fulfillment calls when challenge progress is recorded or a challenge is completed. For example, an API that credits loyalty points or stars to a member account.
Use this section for end-to-end provider setup (connection, proxy, auth token generator, and reward definition resources). For focused guidance on reward definition design and payload strategy, see Reward Definition guide.
To create a reward provider, follow these steps:
-
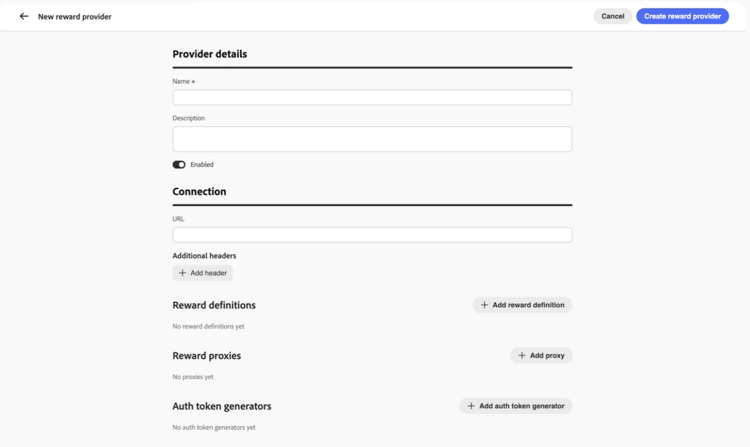
Open the Reward providers tab and select Create reward provider.
-
Enter a Name and Description.
-
In the URL field, enter the API endpoint that receives fulfillment requests.
-
Add Headers as needed for your API (for example, API keys or content types).
-
Configure the resources associated with your reward provider. Expand each section below for field details:
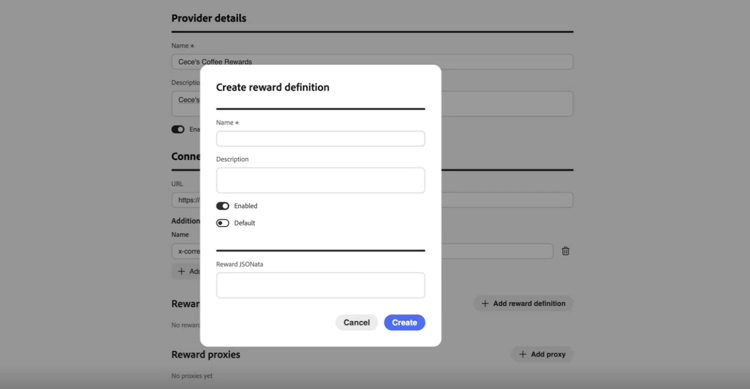
accordion Reward definitions Add one entry per reward type your provider supports (for example, program points, stars, or money credit). For each definition:
- Enter a Name and Description.
- Specify whether the definition is Enabled.
- Toggle Default to mark one definition as the default for this provider.
- Define how the rewards payload will be transformed to the fulfillment payload request, using the JSONata expression.
For more information, see Reward definition guide.
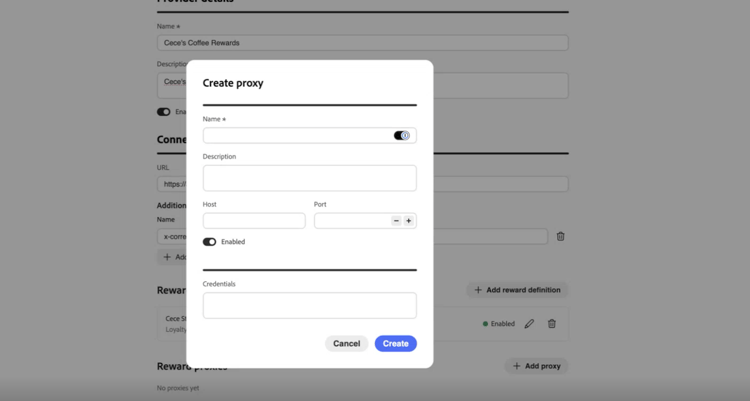
accordion Reward proxy Route fulfillment calls through an intermediate server instead of sending them directly to your endpoint. On the reward provider and Create proxy screens, use the Credentials field for proxy authentication.
-
Enter a Name and Description.
-
Enter Host and Port.
-
Specify whether the proxy is Enabled.
-
In Credentials, enter the proxy username and password as JSON. Credentials value typically looks like:
code language-json { "userName": "test", "password": "xxxx" }
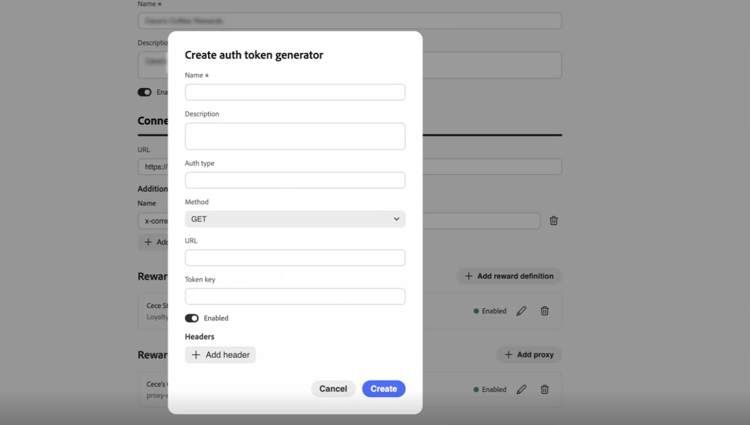
accordion Auth token generator Use when your API requires a bearer token or similar authentication.
- Enter a Name and Description.
- In Auth type, enter the authentication type (for example, Bearer).
- Select the HTTP method (for example, POST).
- Enter the token endpoint URL and the Token key in the response (for example,
access_token). - Specify whether the auth token generator is Enabled.
- Add any headers required by your token endpoint.
Journey Optimizer uses this configuration to obtain a fresh token before each call to your reward API.
-
Select Create reward provider. The provider and all configured resources are saved together.
After you save, the provider appears in the reward providers list. Marketers can select it when configuring challenge rewards. Learn how to configure challenge rewards
To edit a reward provider, open the Reward providers tab, select the provider, and update fields in place. Changes to reward definitions, proxies, and auth token generators are automatically saved when you update them.
Event mappings event-mappings
Event mapping tells Journey Optimizer how to process an incoming Adobe Experience Platform experience event. For example, a purchase or a hotel check-in. Marketers reference these mappings when they create Custom event tasks in the task builder. Events that do not match any mapping are ignored.
Use this section for end-to-end event mapping setup. For focused guidance on transformer authoring, see Event Transformer guide.
To create an event mapping, follow these steps:
-
Open the Event mapping tab and select Create event mapping.
-
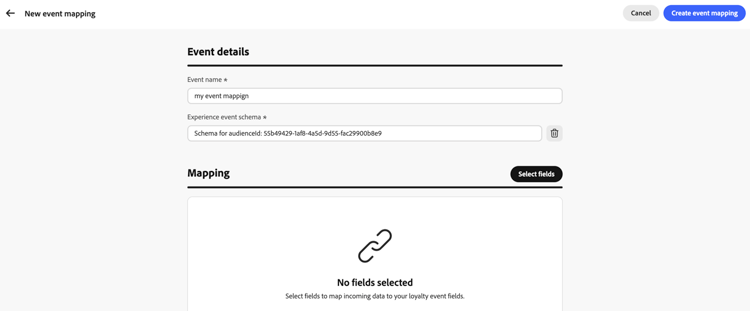
In Event details, enter the required Event name and select the desired Experience event schema.
-
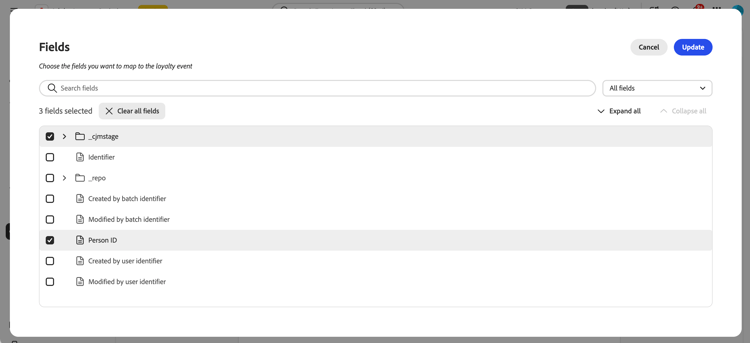
In the Mapping section, click the Select fields button. Search or filter the schema field tree, then select the incoming fields to map.
-
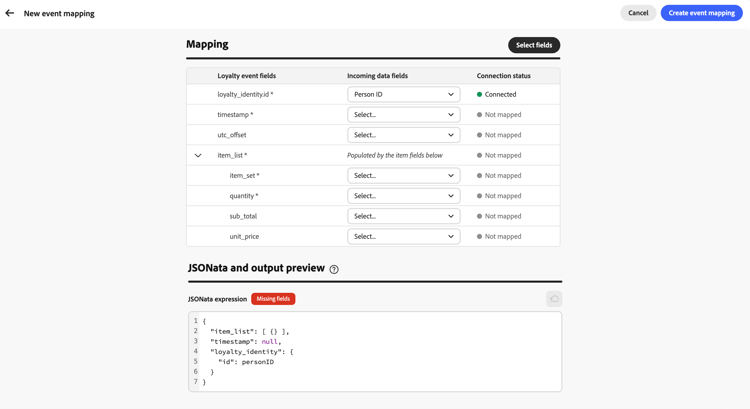
In the mapping table, use the drop-downs in Incoming data fields to connect each field to the corresponding Loyalty event fields.
-
In JSONata and output preview, review the generated JSONata expression in the code editor.
To use a custom expression, edit the JSONata directly. To do so, select the Reset to generated button to return to table-driven mapping. Learn how to write JSONata expressions.
-
Save the mapping. The event mapping appears in the Event mappings list and is available when marketers create Custom event tasks. Learn how to create tasks
Product inventory product-inventory
The Product inventory tab groups catalog items so marketers can target them in tasks without entering every item ID. Upload a CSV file that maps each item identifier to one or more product groups (the same item can belong to several groups). Imported groups are available when configuring task eligibility. Learn how to create tasks
To upload a product inventory file, follow these steps:
-
Prepare a CSV file that maps each item identifier to one or more product groups. Expand the section below to see an example.
accordion Product inventory CSV example 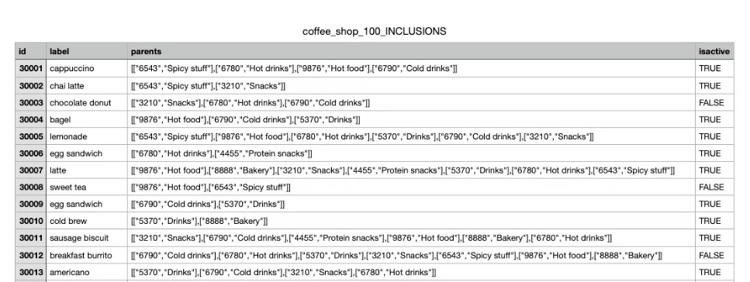
-
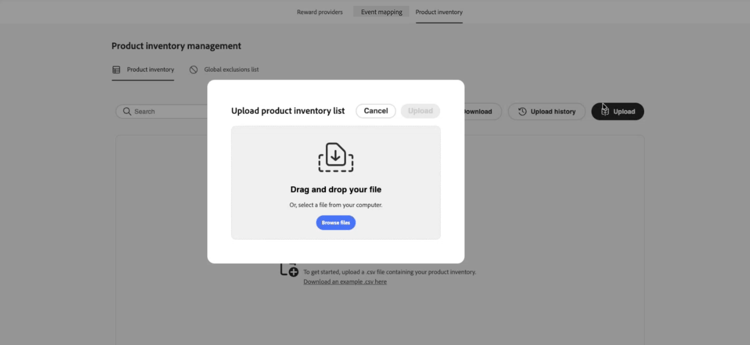
Open the Product inventory tab.
-
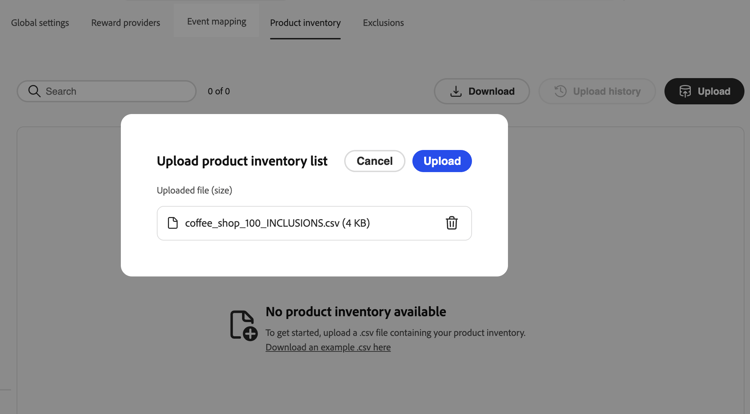
Select Upload and choose your CSV file.
-
Review the imported data in the inventory list. The list shows one row per item. The Groups included in column shows every product group for that item as a pill, or several pills when the item belongs to multiple groups.
-
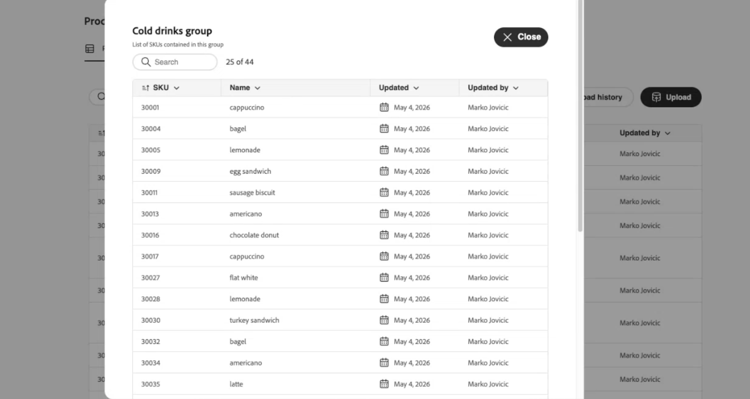
To see all items in a product group, select that group’s pill in the Groups included in column on any row. The group details view lists every item in the group.
-
Open Upload history to view previous CSV uploads.
Exclusions exclusions
The Exclusions tab defines catalog items and groups that are excluded program-wide, so marketers do not have to list the same exclusions on every task. Upload a CSV file that maps each item identifier to one or more exclusion groups (the same item can belong to several groups).
After import, excluded items and groups appear in the task builder when marketers configure Eligible items & exclusions. Learn how to define eligible items and exclusions on tasks
To upload exclusions, follow these steps:
-
Prepare a CSV file that maps each item identifier to one or more exclusion groups. Expand the section below to see an example.
accordion Exclusions CSV example 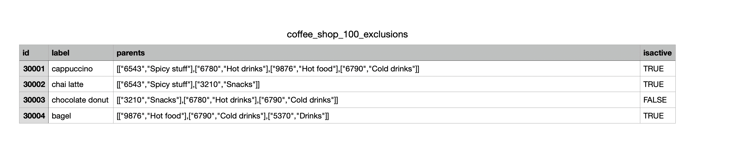
-
Open the Exclusions tab.
-
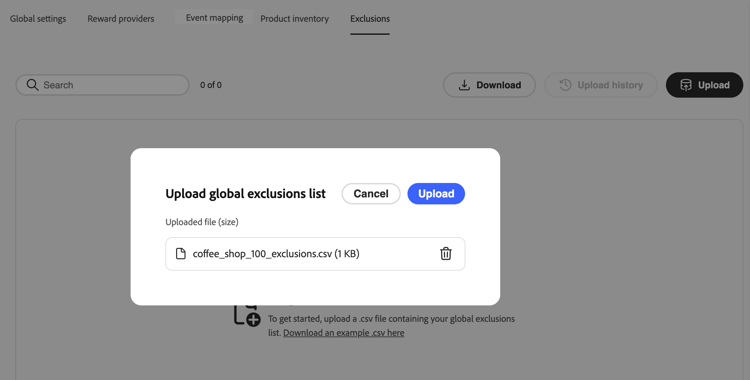
Select Upload and choose your CSV file.
-
Review the imported data in the exclusions list. The list shows one row per item. The Groups included in column s’ows every exclusion group for that item as a pill, or several pills when the item belongs to multiple groups.
- To see all items in an exclusion group, select that group’s pill in the Groups included in column on any row. The group details view lists every item in the group.
- Open Upload history to view previous CSV uploads.