On this page: Learn how administrators configure, test, and activate external integrations that connect Adobe Journey Optimizer to third-party APIs, so marketers can use them to build personalized, dynamic content in outbound channels.
A Standard integration connects Journey Optimizer directly to a third-party API so you can pull external data or content into your outbound channels for personalization.
You can also link a Browsing integration to a Standard integration’s parameter so the value marketers select is automatically passed to the API call.
Create Standard integrations configure
As an administrator, you can set up external integrations by following these steps:
Set up the integration and request
Start by creating the integration and defining how it calls the external API.
-
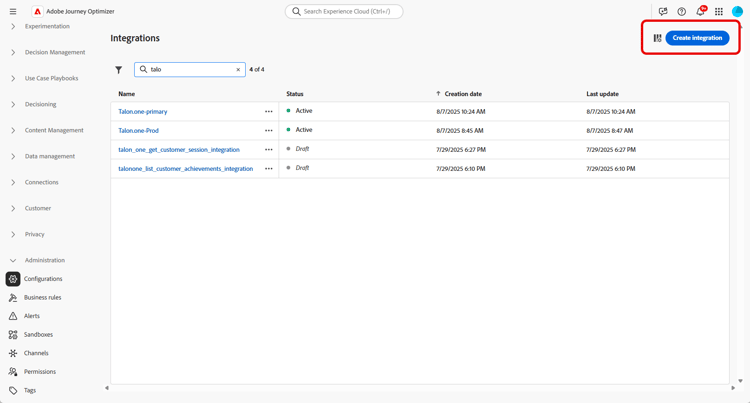
Navigate to the Configurations section in the left menu and click Manage from the Integrations card.
Then, click Create Integration to start a new configuration.
-
Optionally, paste a cURL command to auto-fill the URL, HTTP method, headers, and query parameters.
-
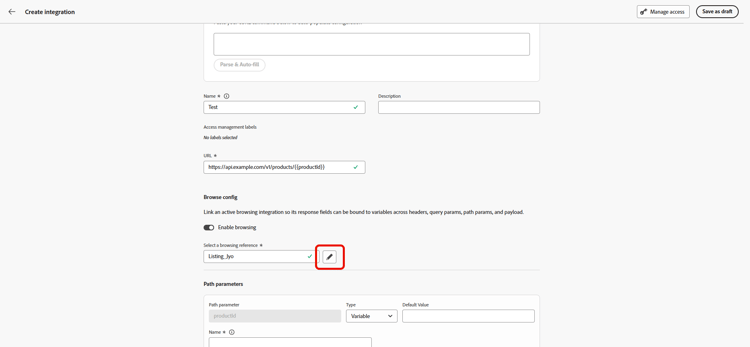
Provide a Name and Description for your integration.
note NOTE Name field cannot contain spaces. -
Enter the API endpoint URL.
For path variables, wrap a label in double curly braces in the URL, for example,
https://api.example.com/v1/products/{{productId}}, then set each placeholder in Path Parameter. -
Select Enable browsing to link an active Browsing integration, so its response fields can be mapped to variables in headers, query and path parameters, and the payload.
➡️ See Create Browsing integrations
-
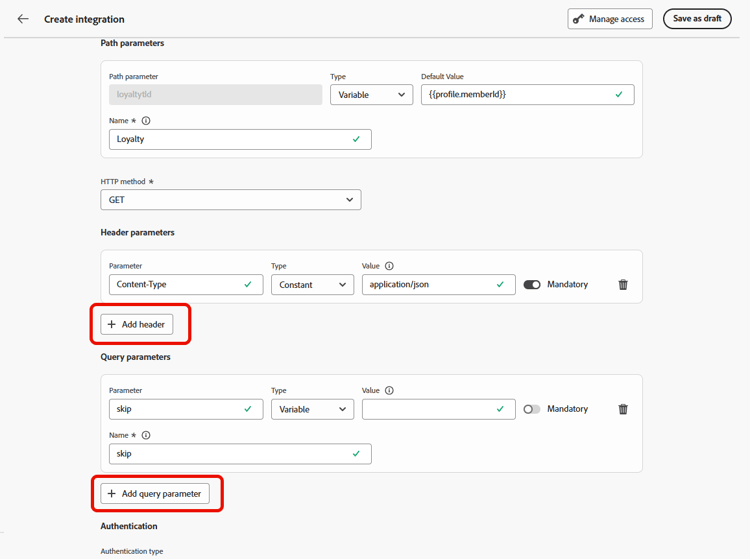
Configure the Path Parameter with Name and Default value for every placeholder you added in the URL.
Note that the Name is a marketer-facing label in the editor only, it is not sent on the API request.

-
Select the HTTP Method between GET and POST.
-
Click Add Header and/or Add Query Parameters as needed for your integration. For each parameter, provide the following details:
-
Parameter: The actual header or query parameter name as expected by the API.
-
Name: A marketer-friendly label for this parameter, authors select it when mapping values in campaigns.
-
Type: Choose Constant for a fixed value or Variable for dynamic input.
-
Value: Enter the value directly for constants, or select a variable mapping.
-
Mandatory: Specify whether this parameter is required. For mandatory Variable parameters, if no value is resolved at runtime and no default is provided, request generation fails with an error and the outbound API call is not made.
-
With the request defined, you are ready to configure authentication, policy, and the response payload.
Configure authentication, policy, and response
After defining the request, configure how it authenticates and behaves, and shape the response used for personalization.
-
Choose an Authentication Type:
-
No Authentication: For open APIs that do not require any credentials.
-
API key: Authenticate requests using a static API key. Enter your API Key Name , API Key Value and specify your Location.
-
Basic Auth: Use standard HTTP Basic Authentication. Enter Username and Password.
-
OAuth 2.0: Authenticate using the OAuth 2.0 protocol. Click the


-
-
Set Policy configuration such as Timeout period for API requests and choose to enable throttling, cache and/or retry.
note NOTE With throttling enabled, supported rates are 50 to 5000 TPS. Limits apply to the integration, not each API endpoint. With retry enabled, other failures retry three times by default, with 200 ms, 400 ms, and 800 ms between attempts. -
For a POST method, configure the Payload by choosing a Body type:
-
JSON: Click the
-
GraphQL: Paste your GraphQL query. Journey Optimizer generates an Operation name automatically and lets you map the corresponding query variables.

-
-
Choose the Response type between JSON and HTML.
-
With the Response payload field, you can decide which fields of the sample output needs to be used for message personalization.
Click the
-
Choose the fields to expose for personalization and specify their corresponding data types.
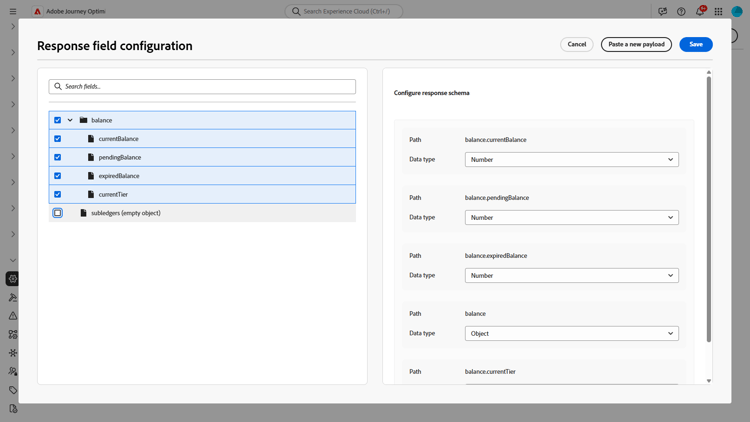
note NOTE The Response payload configuration defines the expected response for authoring including any schema applied in that step. Marketers may reference only exposed fields, tokens for other paths fail validation in the editor.
Once authentication, policy, and response are configured, test your connection before activating.
Test your connection connection
Send test connection validates the endpoint URL, authentication, and request structure against the target API prior to activation, which reduces the risk of runtime failures during message processing.
-
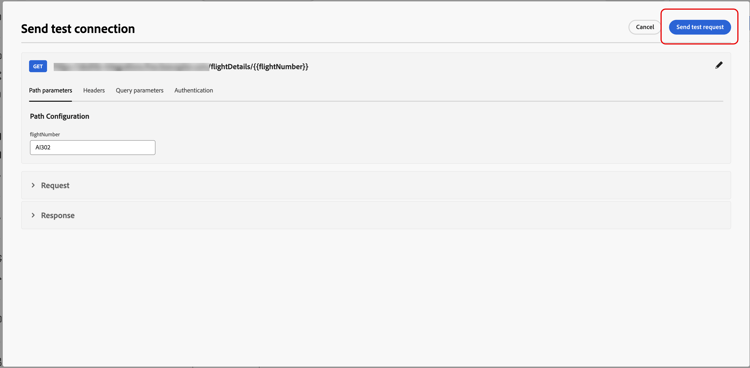
When the URL, HTTP method, headers, and query parameters are defined, click Send test connection to run a connectivity test and confirm the configuration.
-
In the Send test connection dialog, enter default values for any Variable placeholders in the URL path, headers, and query parameters.
Those values are included in the test request. Journey Optimizer invokes the endpoint and reports whether the connection succeeded or failed.
-
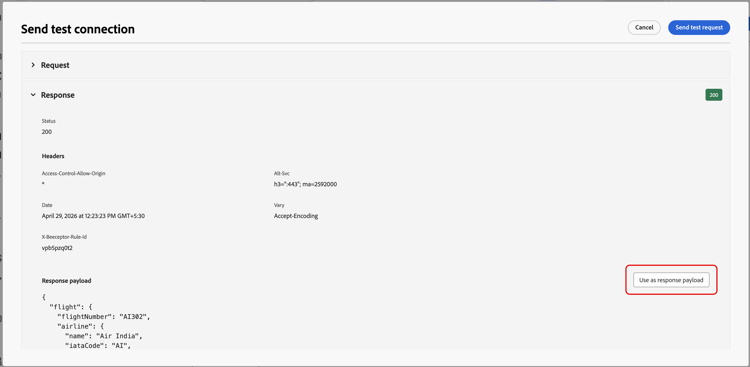
If the test returns a successful response, select Use as response payload to copy the response body into the Response payload field, see step 10 under Configure your Integration, where data types can be detected and fields can be selected for personalization.
-
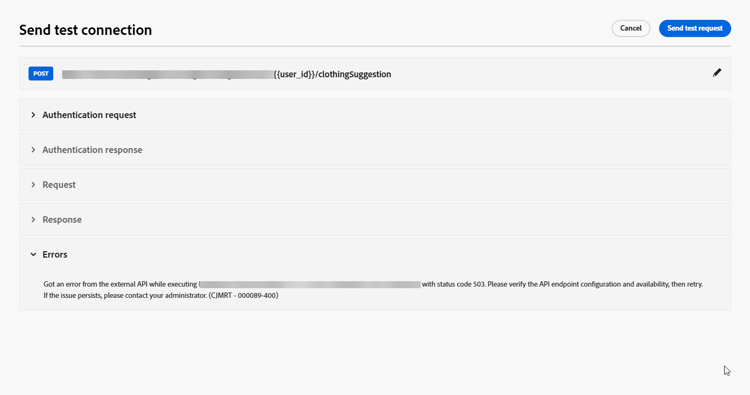
If the test does not succeed, expand the Error drop-down to review the failure details, update the integration configuration as needed, and run Send test connection again.
After the test succeeds, select Activate in the integration configuration.
Manage your integrations
After a successful test, activate the integration, then update or archive it as needed.
-
Once validated, click Activate.
-
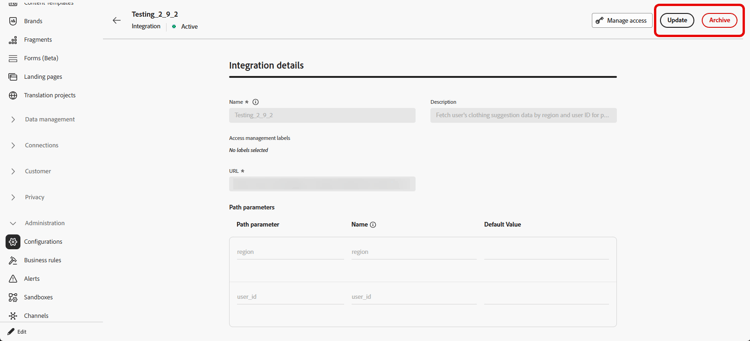
Access your newly created Integration to:
-
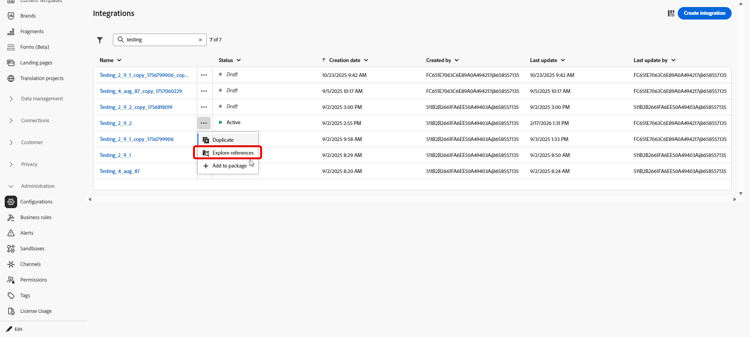
Update: Change Authentication details and Policy configuration only. Updates apply to live journeys and campaigns. Before you save changes, use the Explore references menu to confirm where the integration is used.
-
Archive: Archive an Integration configuration.
-
-
After activation, click the

Once your integration is live, keep the following send-time behavior in mind.
Send-time limits and behavior configure-send-time
At send time, responses from the external API may be up to 4 MB by default. Anything larger is treated as an integration error, and retries are not attempted when the failure is caused by response size.
Calls honor the throttling rate you configured: Journey Optimizer schedules attempts up to that limit even when the external system is down or returning errors. If cache is enabled, only successful responses are stored and reused until the cache TTL you defined expires; failed responses are never cached.
Each queued message also carries a validity window (TTL). If processing falls behind and a message sits past that window, the system discards it and emits a MessageValidityExclusion event so stale work clears from the queue and resources stay available…
See also