On this page: Learn how administrators configure Browsing integrations that let marketers search, browse, and select items from external APIs directly in the authoring experience, and how to link them to Standard integrations.
In addition to Standard integrations, you can create Browsing integrations. A Browsing integration lets marketers search, browse, and paginate through items returned by an external API, then select a specific item directly in the authoring experience instead of manually entering a parameter value.
Create a Browsing integration create-browsing
As an administrator, you create a Browsing integration from the Browsing tab of the Integrations configuration, using the same step-by-step instructions as for Standard integrations.
Once the integration information is provided, configure the following Browsing-specific settings:
-
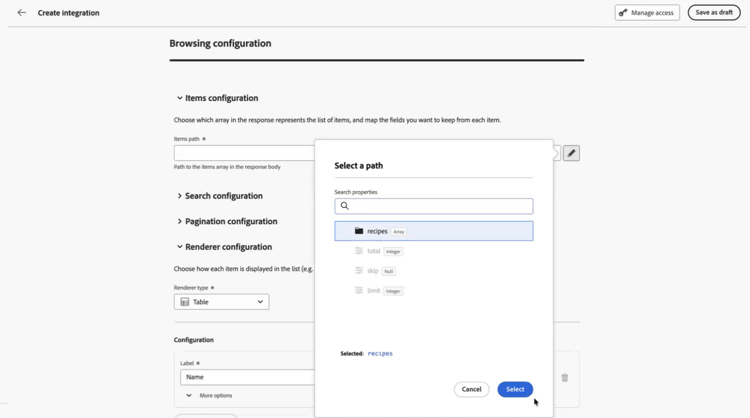
From the Items configuration menu, choose the Items path where the list of items is located.
-
In the Search configuration drop-down, Enable search and select which parameter carries the search query, then provide a description for marketers.

-
In the Pagination configuration menu, enable Pagination and choose a pagination type:
accordion Offset Configure the following fields to set up Offset pagination:
-
Total path: Provide the path to the total result count in the response body.
-
Offset parameter: Specify the request parameter that indicates the number of items to skip.
-
Limit parameter: Specify the request parameter that indicates the number of items to return.
-
Page size: Set the number of items to request per page.

accordion Page Configure the following fields to set up Page pagination:
-
Total path: Provide the path to the total result count in the response body.
-
Page parameter: Specify the request parameter that indicates the page number.
-
Page size parameter: Specify the request parameter that indicates the number of items per page.
-
Page size: Set the number of items to request per page.
-
First page is: Select whether the first page in the sequence is numbered 0 or 1.
-
Total pages path: Provide the path to the total page count in the response body. Optional if you’ve provided the total count path.

accordion Cursor Configure the following fields to set up Cursor pagination:
-
Total path: Provide the path to the total result count in the response body.
-
Cursor parameter: Specify the request parameter that carries the cursor value.
-
Limit parameter: Specify the request parameter that indicates the number of items to return.
-
Page size: Set the number of items to request per page.
-
Next cursor source: Select where the next cursor value is read from in the response.
-
Next cursor path: Provide the path to the next cursor value in the response body.

-
-
From the Render menu, choose how items are displayed to marketers:
accordion Table For each column, choose the Label and the Data path. Optionally, select Quick map to add several fields as columns at once.
You can reorder columns as needed, or select


accordion List Fill in the following details:
- Primary path: Provide the data key for the main label of each item.
- Secondary path: Specify the data key for the subtitle.
- Tag path: Specify the data key for the tag badge.

accordion Avatar Fill in the following details:
- Name path: Specify the data key for the display name shown below the avatar.
- Image path: Specify the data key for the avatar image URL.
- Description path: Provide the data key for the subtitle shown below the name.

-
Click Test browsing to preview the search and pagination behavior with the configured settings.
-
Save the Browsing integration, then click Publish and Activate.
Link a Browsing integration to a Standard integration use-Browsing
Once a Browsing integration is created, you can link it to a parameter on a Standard integration so marketers can select values through the Browsing selector instead of entering them manually.
-
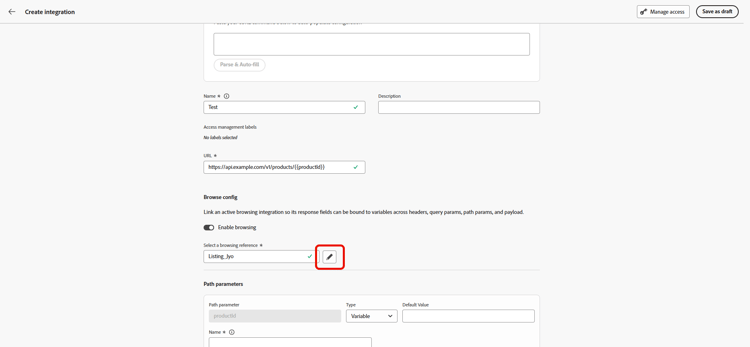
While configuring a parameter on a Standard integration, enable Browsing.
-
Choose the Browsing integration to link.
-
Save and publish the Standard integration.
Select items during authoring select-Browsing-items
When a parameter is linked to a Browsing integration, marketers can pick its value from a selector in the message or journey editor, rather than typing it manually.
-
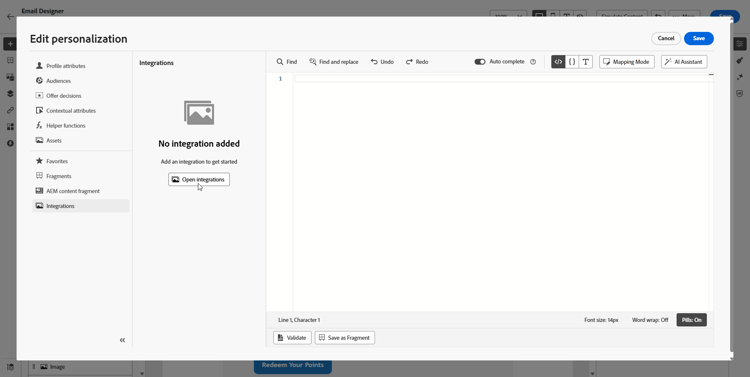
Access your campaign content and click Add personalization from your Text or HTML Components.

-
Navigate to the Integrations section and click Open integrations to view all active integrations.
-
Select an integration.
-
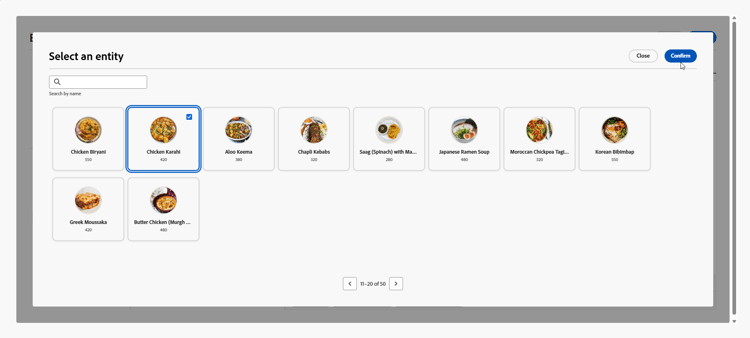
Search and browse the paginated list of items returned by the Browsing integration, then select an entity and confirm your selection.
The corresponding Reference path value is then automatically inserted into the integration parameter.
-
Click Save.
See also