Create and publish an offer create-offer
An offer is an individual proposition with its own eligibility period, target filter, weight, and content. Offers are organized in the offer catalog through categories and are presented to recipients through an offer space.
Before creating an offer, make sure that the offer environment is configured and that at least one offer space is published. Learn more in Configure an offer environment and Create and manage offer spaces.
Access the offer catalog access
To browse and create offers, select Offers from the left navigation rail. The list displays the existing offers. Use the search field, the folder selector, or the query modeler to filter the list.
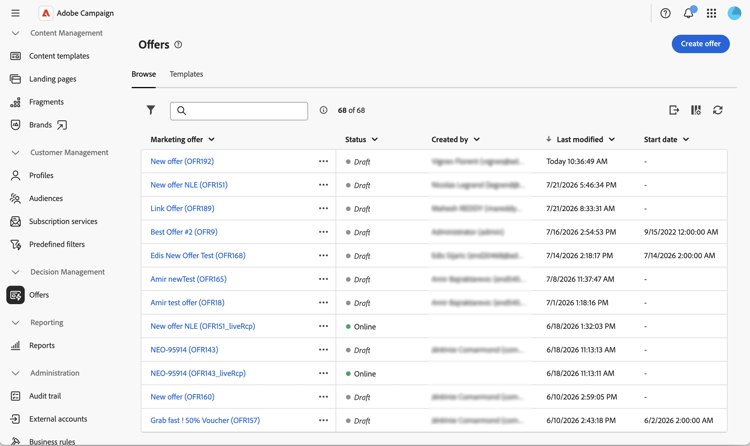
Click an offer name to open it for edition, or use the three dots next to it to Duplicate or Delete it.
Create an offer create
To create a new offer:
-
From the offers list, click Create offer.
-
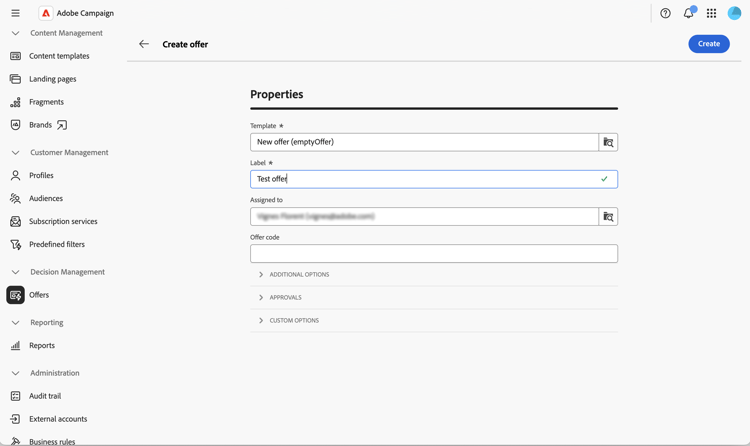
Select the Template to create the offer from (for example, a blank offer or an anonymous offer template).
-
Enter a Label and, optionally, assign the offer to an operator using Assigned to and/or enter an Offer code.
-
Expand Additional options to edit the auto-generated Internal name, select the Category in which the offer is stored, or add a description. This step is optional.
-
Expand Approvals to assign approvers to the Eligibility approval and Content approval groups. This step is optional.
-
Expand Custom options to fill in any additional fields your organization has added to the offer schema. The fields shown in this section vary from one Campaign instance to another. This step is optional.
-
Click Create. The full settings screen displays.
Define the eligibility eligibility
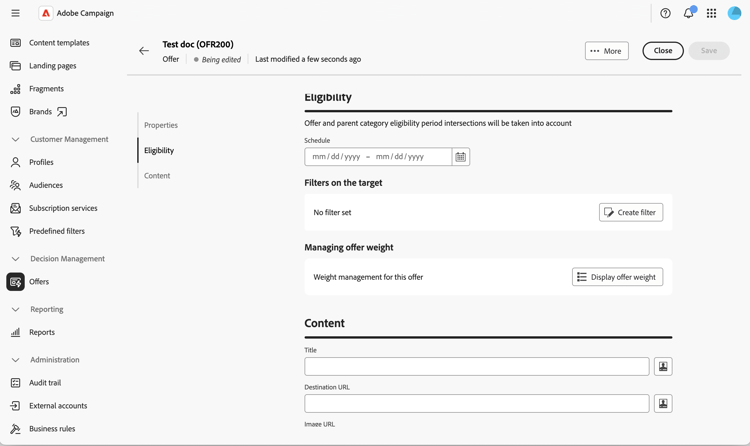
This section allows you to control when and to whom the offer can be presented. The following options are available:
-
Schedule — Set the start and end dates between which the offer can be presented.
note NOTE Eligibility period intersections with the parent category are taken into account: even if the offer’s own schedule is wider, the offer is only presented while its parent category is also eligible. -
Filters on the target — Click Create filter to open the rule builder and restrict the offer to a specific audience. Leave the filter empty to make the offer eligible for the whole environment audience. To reuse a predefined filter declared at platform level, refer to the Campaign v8 documentation. Predefined filters are created from the client console.
-
Managing offer weight — Click Display offer weight, then Add weight to influence the priority of the offer when several offers are eligible at the same time. Each weight has a start date, an end date, and an optional filter.
Define the content content
From the offer, select the Content tab. This tab defines the values that will be exposed by the rendering function.
-
Fill in the out-of-the-box attributes — Title, Destination URL, Image URL and any custom attribute declared in the offer schema.
-
Use the expression editor to personalize the values with profile data, offer attributes, or proposition fields.
-
For the HTML and text payloads, click Edit content to open the content editor. You can design the content from scratch, code your own HTML, or import existing HTML, optionally starting from a sample template.
Preview the offer preview
You can preview the offer before submitting it.
-
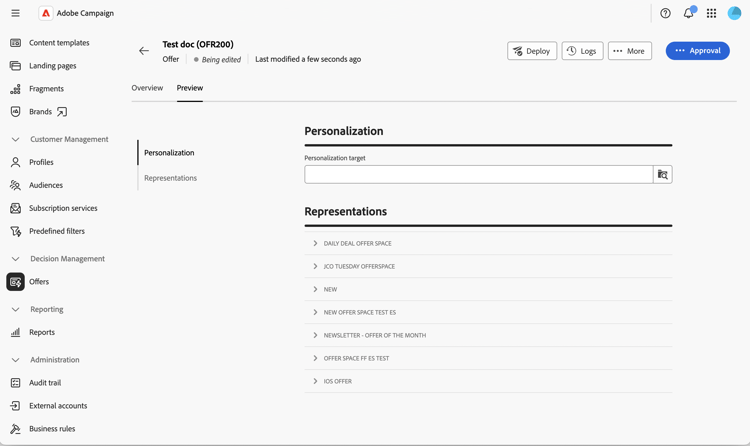
From the offer, select the Preview tab, next to Overview.
-
Select a target profile and, if relevant, the offer space against which the preview should be run.
The rendering function defined on the offer space is applied to the offer content, and the resulting representation is displayed.
Approve and deploy the offer approve-deploy
Offers are not immediately available in deliveries: they go through an approval and deployment cycle.
-
From the offer overview, click Approval.
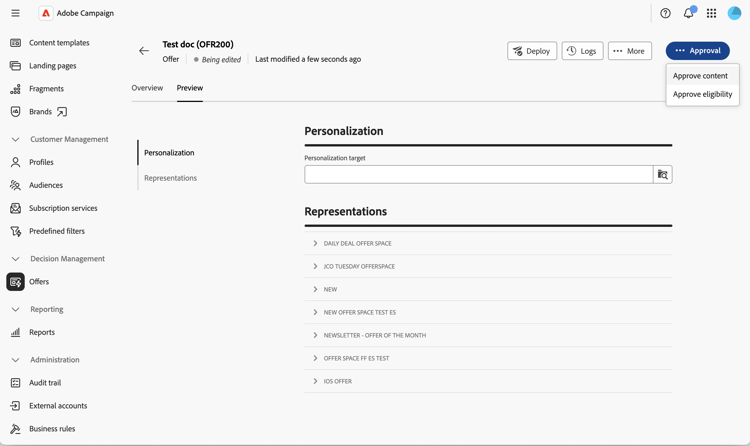
-
Approve the Eligibility and the Content. Content can be approved per offer space, so you can approve it for one offer space while leaving others pending.
-
Once both approvals are granted, click Deploy to publish the offer to the live environment.
-
Refresh the offer view to confirm the Live representation is up to date.
Monitor the offer dashboard dashboard
The offer Overview tab summarizes the offer status in Properties, Content, and Eligibility cards, with a pencil icon on each to jump back into edition. A Representation card lists every offer space the offer is linked to, along with its current design status.
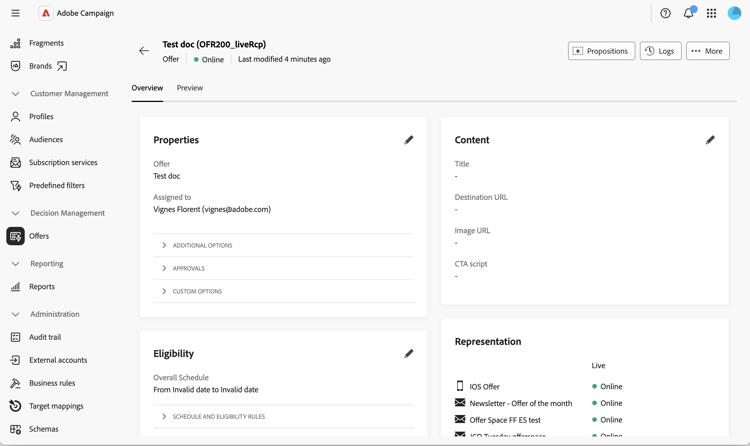
Click Logs to access the deployment logs, or the ··· (More) menu to Duplicate or Delete the offer.
Once an offer is live, modifying any setting switches the design offer back to an editable state. The live representation remains untouched until the next approval and deployment cycle.
Use the offer in a delivery use-in-delivery
When the offer is live, it can be selected from any delivery that targets the matching offer space. Learn how to set up offers in a delivery in Add offers to your messages.
For the full outbound delivery integration, including how the engine call is built and how tracking is applied to offer links, refer to the Campaign v8 documentation offers in outbound deliveries.