Create and manage offer spaces offer-space
An offer space defines where and how an offer is exposed to a contact: which channel it uses (email, direct mail, SMS, inbound web, etc.), which content fields the offer can use, and how the final representation is built. A single environment can contain multiple offer spaces — one for each exposition point.
An offer space is not a channel by itself. It represents a specific location where the offer is displayed on a channel. Two banners on the same web page typically correspond to two different offer spaces. For the full conceptual model, refer to the Campaign v8 documentation.
Create or modify an offer space create-offer-space
Offer spaces are stored under the offer environment folder. To browse the offer spaces available on your platform, open the Explorer, navigate to the offer environment and select the sub-folder that contains them.
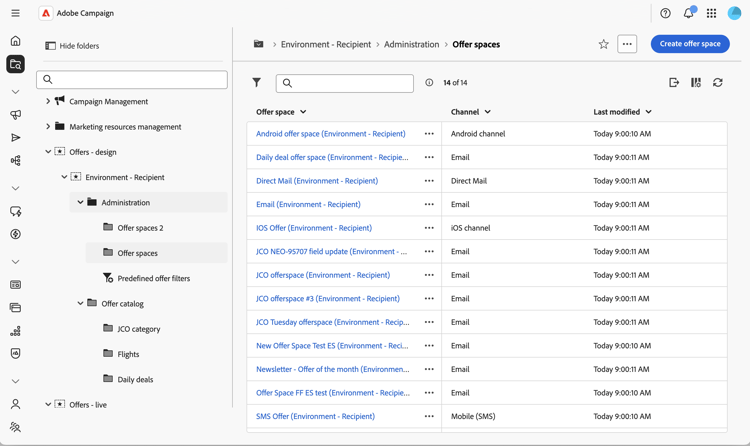
From there, you can open an existing offer space or create a new one by clicking Create offer space.
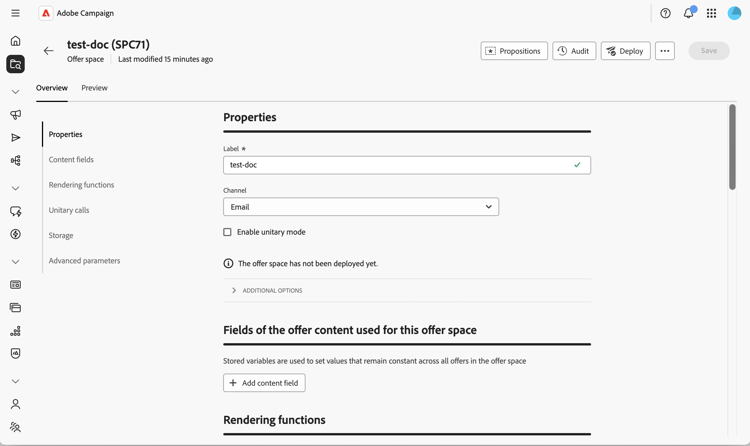
Define the properties properties
This section allows you to:
- Enter a Label for the offer space.
- Select the Channel that matches the exposition point (email, direct mail, SMS, web, etc.).
- Select Enable unitary mode if this offer space must also support unitary (real-time, single-offer) calls to the Offer engine, in addition to bulk delivery calls.
Define the content fields content-fields
The content fields list the attributes that can be edited at offer level and reused by the rendering function. The order in which you add the fields in the offer space drives the order in which they are exposed in the offer Content section.
By default, every offer ships with the following out-of-the-box content fields: Title, Destination URL, Image URL, HTML content, and Text content. You can extend this list with any custom field your rendering needs — for example, a short content, a tracked URL, or any attribute added through schema extension.
Click Add content field, then select the attribute to expose from the offer schema, or click Edit expression to define a custom expression instead.
Configure the rendering functions rendering
The rendering functions build the final offer representation from the content fields. You can choose between the default rendering — which simply outputs the content as is — or a custom function that combines the fields with HTML, XML, or text.
Select the HTML rendering, XML rendering, or Text rendering tab, and enable Overload the rendering function to activate it.
Use the expression editor to write the rendering function. You can reference the content fields defined in the space, the offer attributes, and any function from the expression editor.
Configure the storage and proposition status storage
This section allows you to control how propositions generated through this space are persisted and how their status evolves throughout their lifecycle:
-
Disable the inserting of propositions — Prevents propositions generated through this offer space from being inserted into the proposition storage table.
-
Status on proposition — Status applied to the proposition the moment the Offer engine returns it (typically Presented for outbound deliveries).
-
Status on acceptance — Status applied when the recipient interacts with the offer (typically Accepted).
The available status values match the list used by the Client Console. For more information, refer to Campaign v8 documentation in the console documentation.
Configure advanced settings advanced
This section allows you to define the Target identification. Click Add and select one or several Recipient attributes or click Edit expression to define a custom expression instead. This setting is optional for a basic offer space. For its full reference and behavior, refer to the Campaign v8 documentation.
Offer spaces created on the inbound web channel also require the website to be configured to display the offer and to call the Offer engine. This integration is performed in the Client Console — see Present offers in real time and Configure the Offer engine integration in the Campaign v8 documentation.
Deploy the offer space deploy
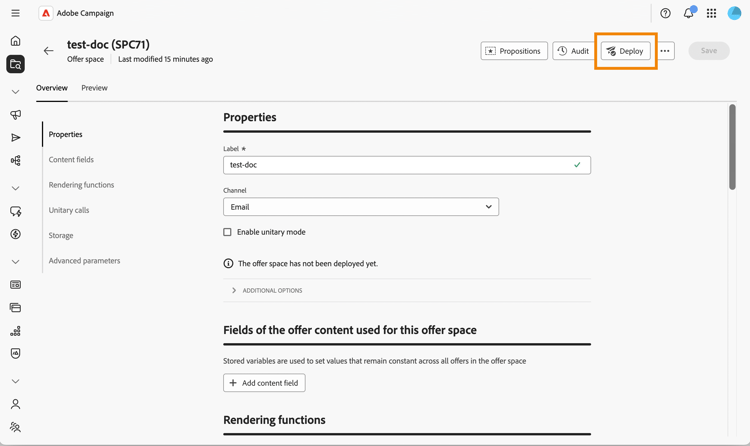
An offer space must be deployed before it can be used in a delivery. Save your offer space, then click Deploy. The status of the deployment is reflected on the offer space.
Preview the offer space preview
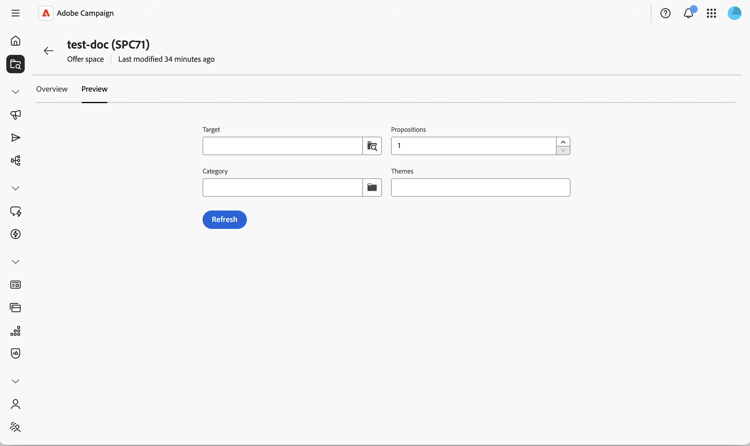
The preview lets you simulate how an offer is selected and rendered for a given target.
-
From the offer space, select the Preview tab, next to Overview.
-
Select a target profile and run the preview. The matching offers are returned with the representation produced by the rendering function.
Next, create an offer in the catalog and assign it to this space.