在此頁面上:建立並管理已命名的內容變體、選取要轉譯的變體、比較其詳細資料和預覽,並在傳送內容之前檢查無效的連結。
模擬內容變體體驗已重新設計,讓測試與比較變體更快速輕鬆。 變體會呈現在可捲動格線中,且控制項會直接顯示在每個卡片和底部的動作列中。 您可以演算所有變體或選取要預覽的子集。
若要存取新體驗,請從您的內容按一下[模擬內容] 以開啟內容模擬畫面。如果變體已經可用,則會立即顯示預覽格線。 如果沒有任何變體存在,則會顯示空白變體,您可以透過以下所述的任何方法開始建立變體。
如果您偏好上一個版面,請隨時按一下底部動作列中的舊體驗。 傳統體驗檔案可在模擬內容變數(傳統體驗)取得。
建立和管理變體 manage-variants
變體可透過不同方式建立:逐一手動或匯入檔案、透過AI產生變體,或選取現有的模擬使用者。 您可以手動或透過檔案上傳新增最多30種變體。 使用AI產生時,根據內容的複雜性,最多可以建立40個變體。
手動新增變體 add-variants
若要手動新增空白變體,請按一下底部動作列中的[新增]。 會新增一個空白變體,您可以直接輸入屬性值。
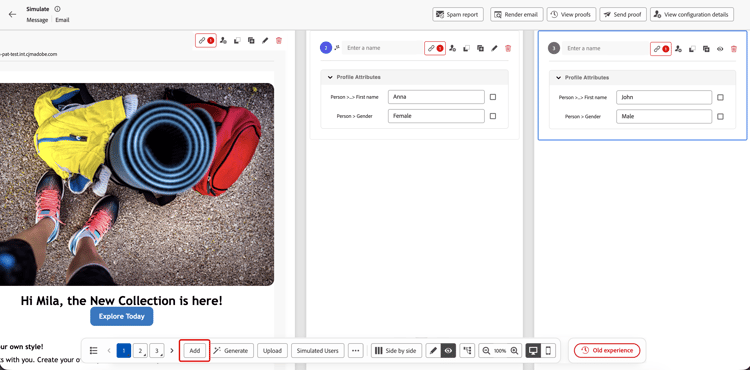
若要匯入變體,請按一下底部動作列中的[上傳]。 您可以上傳CSV、JSON或JSONL (JSON行)檔案,其中每一列或專案會變成變體。 從上傳對話方塊下載檔案範本以使用正確格式。 變體名稱可包含在上傳的檔案中。
自動產生變體 auto-generate
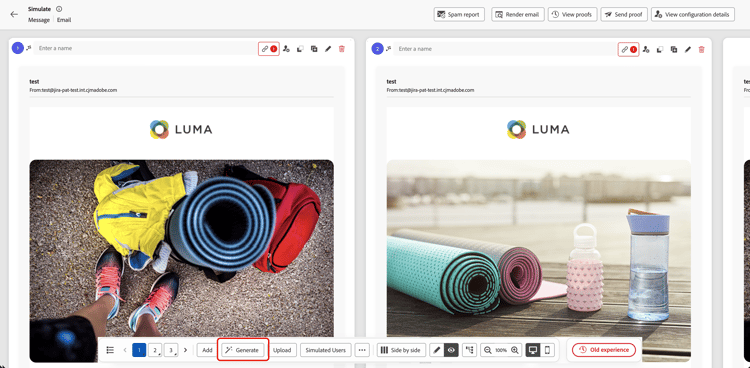
若要使用AI自動產生變體,請按一下底部動作列中的 產生 按鈕。 系統會分析您的內容、識別個人化欄位和條件式分支,並視需要產生許多變體,以真實的值加以涵蓋。 AI產生的變體可透過卡片上顯示的耀眼圖示來識別。
從模擬的使用者中選取變體 simulated-users
您可以讓變體以 模擬使用者 為基礎,這些使用者是可重複使用的、類似設定檔的測試實體,可跨工作階段儲存並可與其他使用者共用。 和手動輸入的變體不同,模擬的使用者會儲存超過目前的瀏覽器作業階段。
從歷程 模擬 功能建立和管理模擬使用者。 如需完整程式,請參閱建立和管理模擬的使用者。
若要使用模擬使用者做為變體:
-
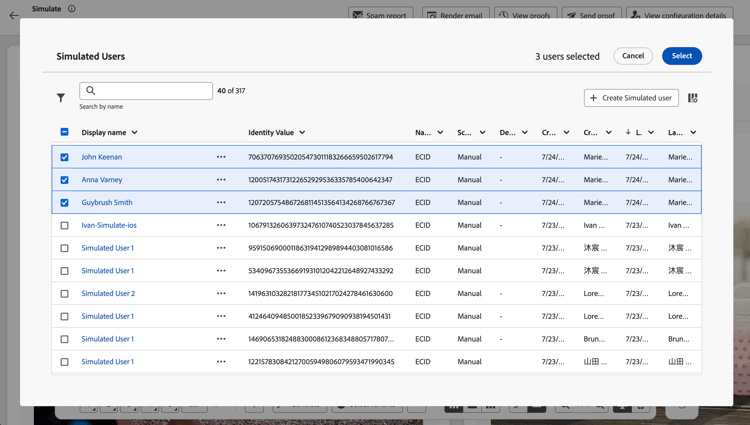
按一下底部動作列中的 模擬使用者 按鈕。
-
從清單中選取您要使用的模擬使用者的核取方塊。
-
按一下選取,將選取的使用者新增為變體。
選取的模擬使用者會新增為變體。 您可以在本機編輯變體的屬性值以進行測試,但是這些變更不會儲存回模擬的使用者記錄。
從卡片管理變體 variant-card-controls
每個變體卡都提供控制項,無需開啟底部動作列的溢位功能表即可管理變體。
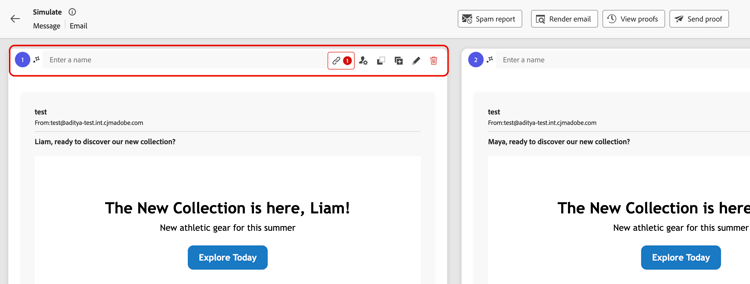
- 為變體命名,以便與其他變體一目瞭然。 也會針對從模擬使用者建立或使用AI產生的變體顯示名稱。
- URL檢查以驗證變體內容中的連結。
- 檢視設定詳細資料以檢視與變體相關的頻道和其他設定(僅限電子郵件)。
- 直接從卡片複製屬性。
- 複製變體以建立現有變體的復本,然後為另一個測試案例編輯其屬性值。
- 顯示變體詳細資料以檢視並編輯該變體的屬性值。
- 使用變體卡上的控制項移除變體。
匯出變體 export-variants
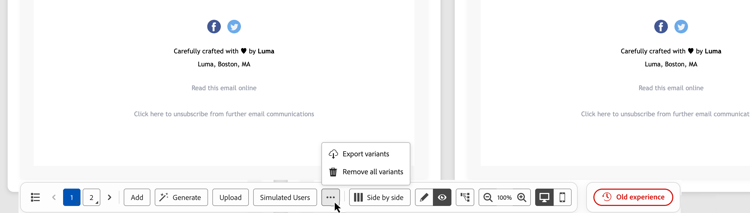
您可以將所有目前的變體(不論是手動新增、透過AI產生,還是從模擬使用者中選取)匯出至CSV檔案。 按一下底部動作列中的…,然後選取匯出變體。
預覽變體 preview-grid
選取要呈現的變體 select-variants-to-render
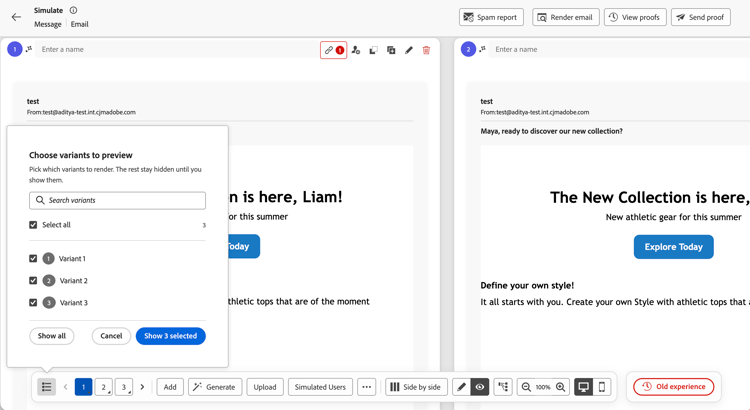
您可以轉譯所有變體,或從完整清單中僅選取您要預覽的變體。 未選取的變體會保持隱藏狀態,直到您再次顯示它們為止,它們不會移除。
-
按一下底部動作列中的變體清單圖示。
-
選取您要呈現之變體的核取方塊。 使用 全選 以選取或清除完整清單。
若要尋找特定變體,請使用 搜尋變體 欄位。
-
按一下藍色按鈕,顯示選取的變體數目,例如Show 3 selected,以套用您的選取專案。
若要再次顯示每個變體,請開啟面板並按一下[全部顯示]。 按一下 取消 關閉面板而不套用您的選取專案。
在變數之間切換 switch-variants
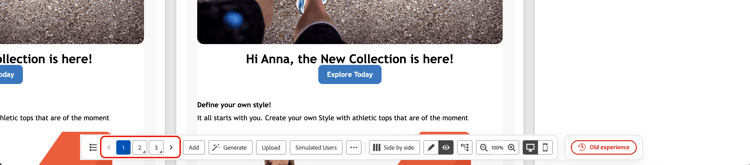
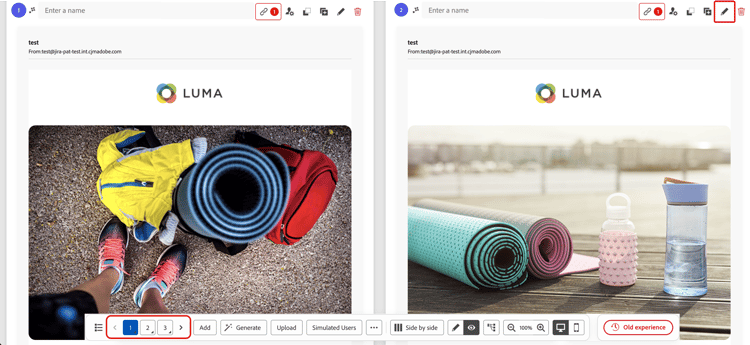
在預覽模式中,所有變體都會並排呈現,頂端會有編號指示器。 若要在變體之間切換,請按一下數字,或使用底部動作列中的 < > 導覽按鈕。
在預覽或編輯模式中顯示變體 edit-variants
您可以將變體顯示為內容預覽或變體詳細資訊,以便編輯其屬性值。 按一下眼睛圖示以顯示預覽,或按一下鉛筆圖示以在底部動作列中顯示變體詳細資訊,以便在兩種模式之間一次切換所有變體。
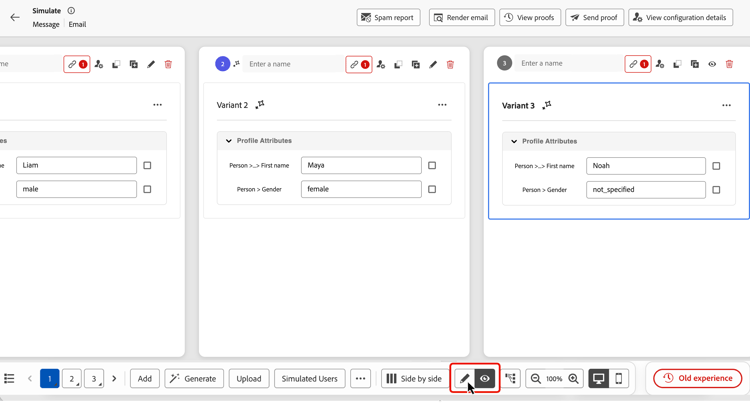
若要個別切換單一變體,請按一下眼睛圖示以顯示其預覽,或按一下鉛筆圖示以顯示其卡片頂端的詳細資料。 您也可以在底部的動作列中長按其數字(或使用Alt +向上/向下鍵)。
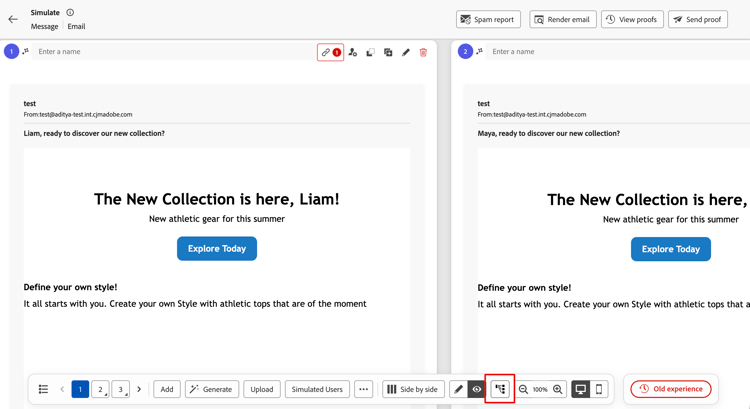
顯示完整的屬性路徑 attribute-paths
使用底部動作列中的屬性路徑切換,在變體詳細資訊中顯示或隱藏完整屬性路徑。 當您需要識別設定檔資料中的屬性位置時,顯示完整路徑。
變更版面 change-layout
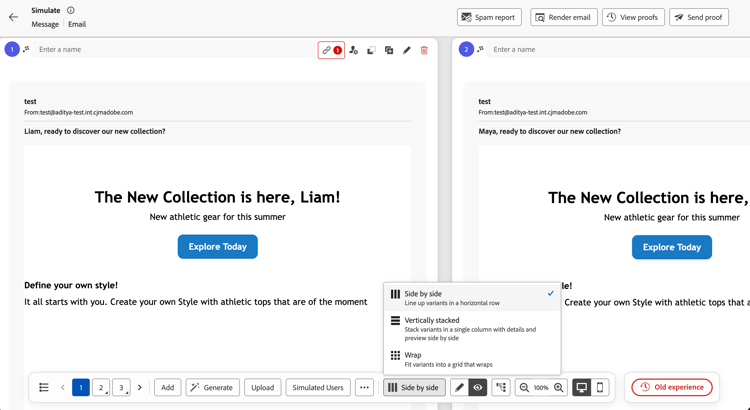
若要變更變體的顯示方式,請按一下底部動作列中的版面配置選取器,這會顯示目前的版面,例如並排。 選取並排、垂直棧疊或換行。
在 垂直棧疊 版面配置中,每個變體的詳細資料和內容預覽會並排顯示,因此您可以將屬性值與呈現的內容進行比較。
在桌上型電腦和行動檢視之間切換 switch-views
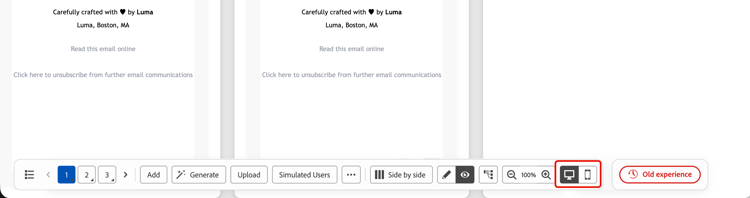
當您的內容可使用裝置檢視控制項時,請按一下底部動作列中的案頭或行動圖示,以在這兩個檢視之間切換。 預覽格線會更新,以顯示變體在選取裝置上的外觀。
驗證連結 validate-links
系統會自動針對每個轉譯的變體驗證URL。 當找到無效連結時,紅色無效連結計數會顯示在變體卡片上的連結圖示旁。
按一下計數以開啟 URL驗證失敗 對話方塊,其中列出每個無效的 URL 及其原因,例如格式錯誤的URL。 檢閱每個連結的原因,以識別內容中需要更正的內容。
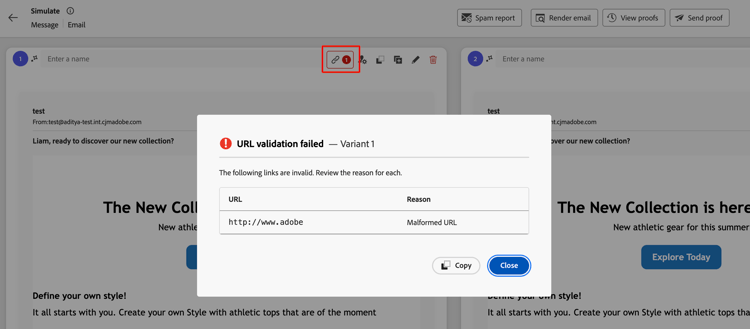
按一下 複製 以複製驗證詳細資料,或按一下 關閉 以返回模擬畫面。
電子郵件通道的其他功能 email-capabilities
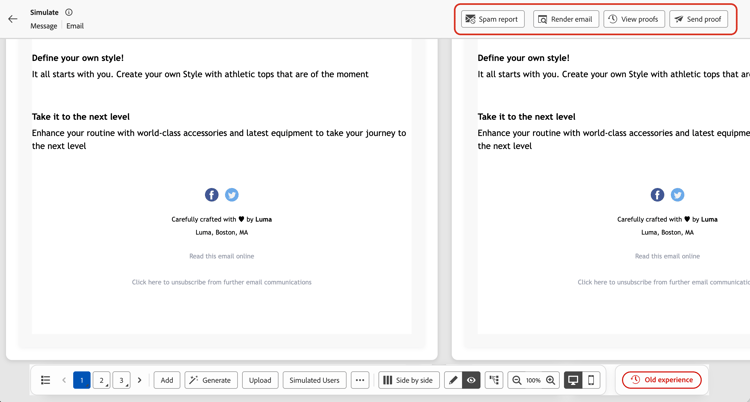
類比電子郵件內容時,頂端列會提供其他電子郵件專用工具。
This section contains structured knowledge intended to support interpretation, retrieval, and question answering related to this topic.
For complete understanding, this information should be combined with the documentation on this page. Neither source is intended to stand alone; the page describes the feature, while this section provides additional context that helps disambiguate terminology, intent, applicability, and constraints.
- TL;DR: This page explains the redesigned Simulate content variations experience for creating and managing named variants, selecting variants to render, comparing details with previews, and reviewing automatically detected invalid links.
Intents:
- Open the content simulation screen by clicking Simulate content
- Create variants manually, by uploading a CSV, JSON, or JSONL (JSON Lines) file, by AI generation, or from simulated users
- Name, duplicate, or remove variants, copy attributes, and view configuration details (email only) from their cards
- Select variants to render, preview them or edit their attribute values, show full attribute paths, change the layout, and switch between desktop and mobile views when device-view controls are available
- Export current variants to a CSV file, or use Email-specific tools: Spam report, Render email, and Send proof
- Review invalid-link details for rendered variants or switch back to the classic experience
Glossary:
- Simulate content variations: The redesigned experience that renders all variants or a selected subset in a scrollable grid, with controls on each card and in the bottom action bar. (product-specific)
- Variant: A version of the content with different attribute values, created manually, by file upload, with AI, or from a simulated user. (product-specific)
- Simulated users: Reusable, profile-like test entities that are saved across sessions and can be shared with other users; unlike manually entered variants, they persist beyond the current browser session. (product-specific)
- Generate: The bottom-action-bar button that auto-generates variants with AI; clicking it replaces all existing variants. (product-specific)
- Content previews and variant details: Views for displaying rendered content with the eye icon or editing attribute values with the pencil icon. (product-specific)
- Vertically stacked: The layout where each variant’s details and content preview are displayed side by side. (product-specific)
- Full attribute paths: Paths that identify an attribute’s location in profile data and can be shown or hidden in variant details. (product-specific)
- Invalid-links count: The red count next to the link icon on a variant card when automatic URL validation finds invalid links in that rendered variant. (product-specific)
- URL validation failed: The dialog that lists each invalid URL and its Reason for a variant, such as Malformed URL. (product-specific)
- Send proof: An Email-channel tool that sends a proof of one or more variants to a set of email recipients. (product-specific)
Guardrails:
- You can add up to 30 variants manually or via file upload.
- When using AI generation, up to 40 variants can be created depending on your content’s complexity.
- AI generation and desktop/mobile views are available when their controls are provided for the content.
- Clicking Generate replaces all existing variants, including any added manually or from a file.
- Editing a simulated-user variant’s attribute values is local to testing and is not saved back to the simulated user record.
- Send proof accepts up to 10 recipient addresses.
- URLs are automatically validated for each rendered variant.
- Unselected variants remain hidden until they are shown again; they are not removed.
- The mirror page link is not active in proofs sent for variants; it only activates in the final message.
Terminology:
- Canonical name: Simulate content variations
- Synonyms: “content variants” = “variants”
- Do not confuse: “Simulate content” (the button that opens the simulation screen) ≠ “Simulate content variations” (the experience) ≠ “Old experience” (returns to the classic layout)
- Do not confuse: content previews (eye icon, view rendering) ≠ variant details (pencil icon, edit attribute values)
- Do not confuse: manually entered variants ≠ “simulated users” (saved, reusable across sessions and persistent beyond the current browser session)
- Do not confuse: selecting simulated users to add as variants ≠ selecting which existing variants to render
- Do not confuse: “Send proof” (send variant proofs to email recipients) ≠ “Render email” (preview across email clients and devices) ≠ “Spam report” (deliverability score)
FAQ:
- Q: How do I open the new experience? — From your content, click Simulate content to open the content simulation screen.
- Q: Can I render only some variants? — Yes. Use the variant list icon in the bottom action bar to select the variants to render. Search variants helps find a variant, and Show all displays every variant again.
- Q: Does clicking Generate keep my existing variants? — No. Clicking Generate replaces all existing variants, including any added manually or from a file.
- Q: Can I compare variant details with the preview? — Yes. In the Vertically stacked layout, each variant’s details and content preview are displayed side by side.
- Q: How do I review invalid links? — Click the red invalid-links count on the variant card to open the URL validation failed dialog and review each URL and its Reason. Use Copy to copy the validation details.
- Q: How do I go back to the old layout? — Click Old experience in the bottom action bar.