이 페이지에서: 명명된 콘텐츠 변형을 만들고 관리하며, 콘텐츠를 보내기 전에 렌더링할 변형을 선택하고, 세부 정보와 미리 보기를 비교하며, 잘못된 링크가 있는지 확인하십시오.
콘텐츠 변형 시뮬레이션 경험은 변형을 더 빠르고 쉽게 테스트하고 비교할 수 있도록 새롭게 디자인되었습니다. 각 카드 및 맨 아래 작업 표시줄에서 바로 사용할 수 있는 컨트롤과 함께 스크롤 가능한 그리드에서 변형이 렌더링됩니다. 모든 변형을 렌더링하거나 미리 볼 하위 집합을 선택할 수 있습니다.
새 경험에 액세스하려면 콘텐츠에서 콘텐츠 시뮬레이션을 클릭하여 콘텐츠 시뮬레이션 화면을 엽니다. 변형을 이미 사용할 수 있는 경우 미리보기 격자가 즉시 표시됩니다. 아직 존재하지 않는 경우 빈 변형이 표시되며, 아래에 설명된 방법 중 하나를 사용하여 변형을 만들 수 있습니다.
이전 레이아웃을 선호하는 경우 언제든지 맨 아래 작업 표시줄에서 이전 경험을 클릭하세요. 클래식 경험 설명서는 콘텐츠 변형 시뮬레이션(클래식 경험)에서 사용할 수 있습니다.
변형 만들기 및 관리 manage-variants
변형은 수동으로 하나씩 또는 파일을 가져오거나 AI를 사용하여 생성하거나 기존 시뮬레이션된 사용자를 선택하여 만들 수 있습니다. 수동으로 또는 파일 업로드를 통해 최대 30개의 변형을 추가할 수 있습니다. AI 생성을 사용할 때 콘텐츠의 복잡성에 따라 최대 40개의 변형을 만들 수 있습니다.
수동으로 변형 추가 add-variants
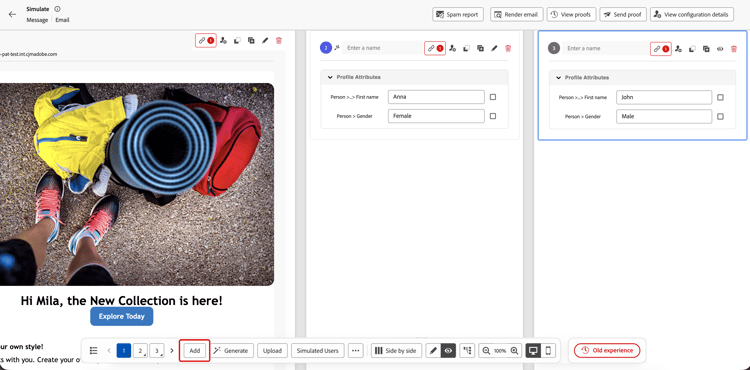
빈 변형을 수동으로 추가하려면 맨 아래 작업 표시줄에서 추가를 클릭하십시오. 빈 변형이 새로 추가되고 속성 값을 직접 입력할 수 있습니다.
변형을 가져오려면 맨 아래 작업 표시줄에서 업로드를 클릭합니다. 각 행 또는 항목이 변형이 되는 CSV, JSON 또는 JSONL(JSON Lines) 파일을 업로드할 수 있습니다. 업로드 대화 상자에서 파일 템플릿을 다운로드하여 올바른 형식을 사용합니다. 변형 이름은 업로드된 파일에 포함될 수 있습니다.
변형 자동 생성 auto-generate
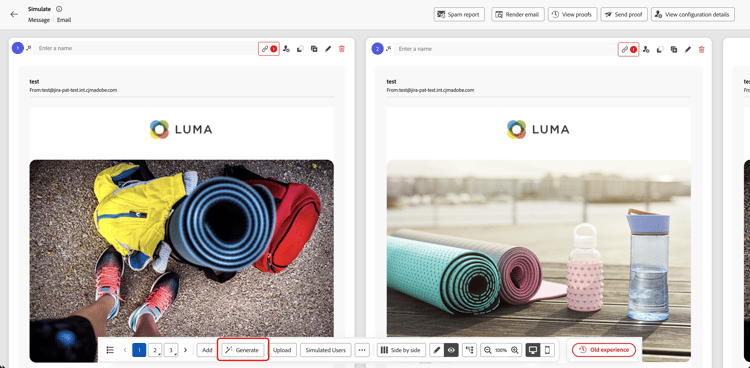
AI를 사용하여 변형을 자동으로 생성하려면 맨 아래의 작업 표시줄에서 생성 단추를 클릭하십시오. 시스템은 콘텐츠를 분석하고 개인화 필드 및 조건부 분기를 식별하며 실제 값으로 해당 필드를 포함하는 데 필요한 수만큼 변형을 생성합니다. AI에서 생성한 변형은 카드에 표시된 스파클 아이콘으로 식별할 수 있습니다.
시뮬레이션된 사용자의 변형 선택 simulated-users
여러 세션에 저장되고 다른 사용자와 공유할 수 있는 재사용 가능한 프로필과 유사한 테스트 엔터티인 시뮬레이션된 사용자를 기준으로 변형을 만들 수 있습니다. 수동으로 입력한 변형과 달리, 시뮬레이션된 사용자는 현재 브라우저 세션 이후에도 유지됩니다.
시뮬레이션된 사용자는 여정 시뮬레이션 기능에서 만들고 관리합니다. 전체 절차는 시뮬레이션된 사용자 만들기 및 관리를 참조하십시오.
시뮬레이트된 사용자를 변형으로 사용하려면
-
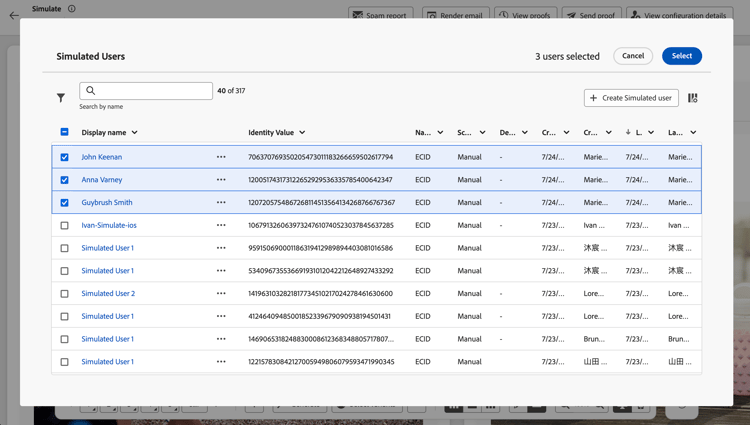
아래쪽 작업 표시줄에서 시뮬레이션된 사용자 단추를 클릭합니다.
-
목록에서 사용할 시뮬레이션된 사용자의 확인란을 선택합니다.
-
선택한 사용자를 변형으로 추가하려면 선택을 클릭합니다.
선택한 시뮬레이션된 사용자가 변형으로 추가됩니다. 테스트를 위해 변형의 속성 값을 로컬로 편집할 수 있지만 이러한 변경 사항은 시뮬레이션된 사용자 레코드에 다시 저장되지 않습니다.
카드에서 변형 관리 variant-card-controls
각 변형 카드는 맨 아래 작업 표시줄의 오버플로 메뉴를 열지 않고도 변형을 관리할 수 있는 컨트롤을 제공합니다.
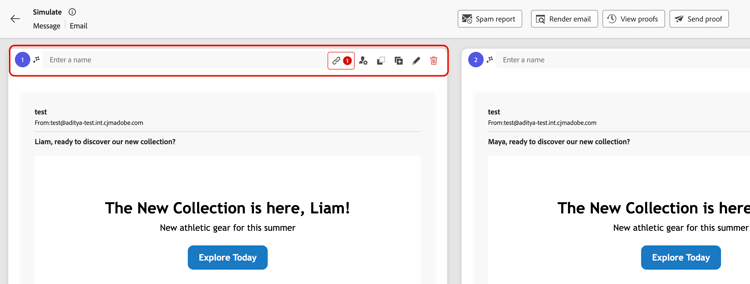
- 다른 변형과 구별하기 위해 이름을로 지정합니다. 시뮬레이션 사용자에서 생성되거나 AI로 생성된 변형에 대해서도 이름이 표시됩니다.
- 변형 콘텐츠의 링크를 확인하려면 URL 확인을 하세요.
- 채널 및 변형과 관련된 기타 설정을 보려면 구성 세부 정보를 봅니다(전자 메일 전용).
- 카드에서 직접 특성 복사.
- 변형을 복제하여 기존 변형의 복사본을 만든 다음 다른 테스트 시나리오에 대해 해당 특성 값을 편집합니다.
- 해당 변형의 특성 값을 보고 편집하려면 변형 세부 정보를 표시하십시오.
- 카드에서 컨트롤을 사용하여 변형을 제거합니다.
변형 내보내기 export-variants
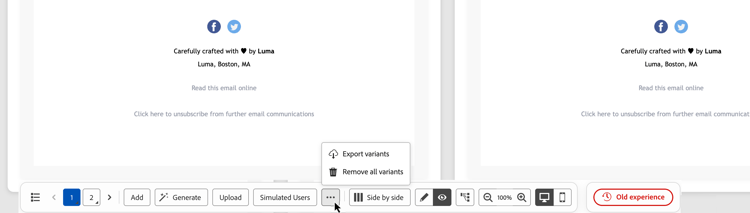
수동으로 추가하든, AI로 생성하든, 시뮬레이션된 사용자에서 선택하든 관계없이 현재 변형을 모두 CSV 파일로 내보낼 수 있습니다. 아래쪽 작업 표시줄에서 …을(를) 클릭한 다음 변형 내보내기를 선택합니다.
변형 미리 보기 preview-grid
렌더링할 변형 선택 select-variants-to-render
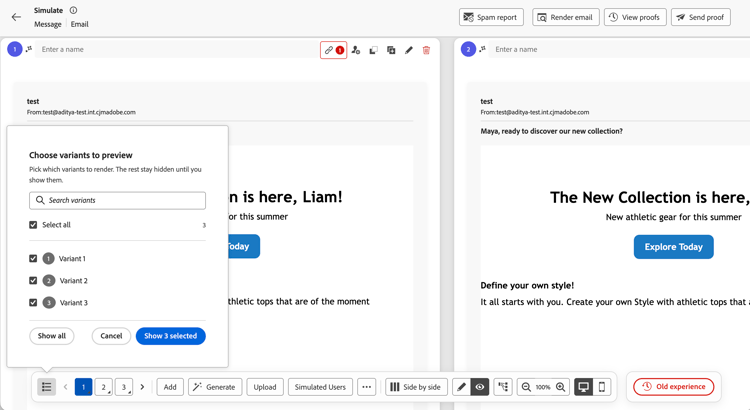
모든 변형을 렌더링하거나 전체 목록에서 미리 보려는 변형만 선택할 수 있습니다. 선택하지 않은 변형은 다시 표시할 때까지 숨겨진 상태로 유지되며 제거되지 않습니다.
-
하단 작업 표시줄에서 변형 목록 아이콘을 클릭합니다.
-
렌더링할 변형의 확인란을 선택합니다. 모두 선택을 사용하여 전체 목록을 선택하거나 지웁니다.
특정 변형을 찾으려면 변형 검색 필드를 사용하십시오.
-
선택한 변형의 수를 표시하는 파란색 단추(예: 선택한 3개 표시)를 클릭하여 선택 항목을 적용합니다.
모든 변형을 다시 표시하려면 패널을 열고 모두 표시를 클릭합니다. 선택 내용을 적용하지 않고 패널을 닫으려면 취소를 클릭하십시오.
변형 간 전환 switch-variants
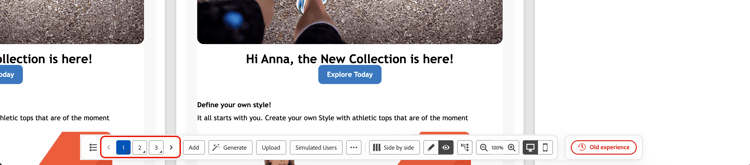
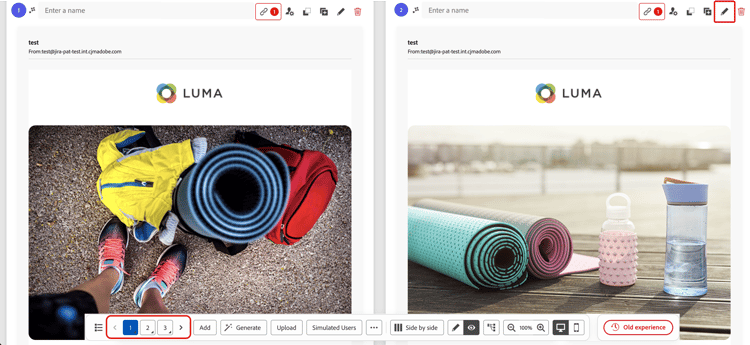
미리 보기 모드에서는 모든 변형이 맨 위에 번호가 매겨진 표시기와 나란히 렌더링됩니다. 변형 간에 전환하려면 숫자를 클릭하거나 맨 아래 작업 표시줄의 < > 탐색 단추를 사용하십시오.
미리보기 또는 편집 모드로 변형 표시 edit-variants
변형을 콘텐츠 미리보기 또는 변형 세부 정보로 표시하여 해당 속성 값을 편집할 수 있습니다. 미리 보기를 표시하려면 눈 아이콘을 클릭하고 맨 아래 작업 막대에 변형 세부 정보를 표시하려면 연필 아이콘을 클릭하여 두 모드 간에 모든 변형을 한 번에 전환합니다.
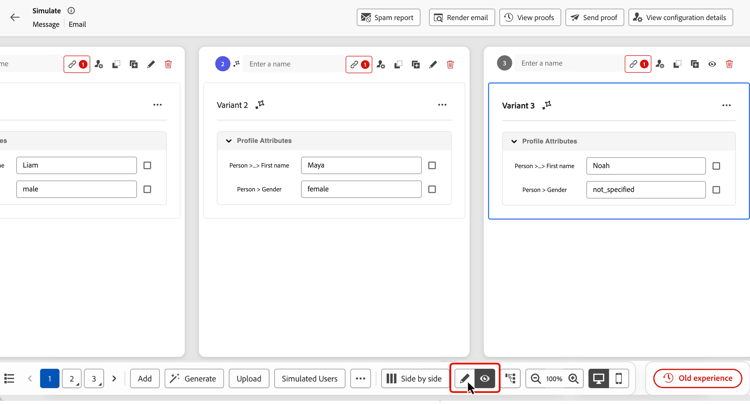
단일 변형을 개별적으로 전환하려면 눈 모양 아이콘을 클릭하여 미리보기를 표시하거나 연필 모양 아이콘을 클릭하여 카드 상단에 세부 정보를 표시합니다. 하단 작업 표시줄에서 해당 번호를 길게 누르거나 Alt + 위쪽/아래쪽 화살표를 사용할 수도 있습니다.
전체 속성 경로 표시 attribute-paths
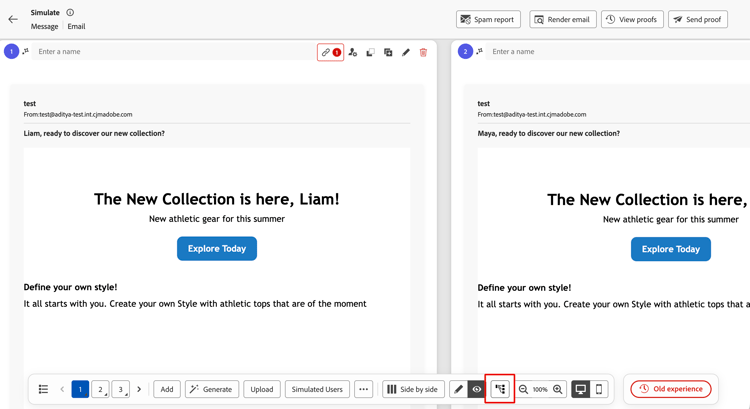
하단 작업 표시줄의 특성-경로 토글을 사용하여 변형 세부 정보에서 전체 특성 경로를 표시하거나 숨깁니다. 프로필 데이터에서 속성의 위치를 식별해야 할 때 전체 경로를 표시합니다.
레이아웃 변경 change-layout
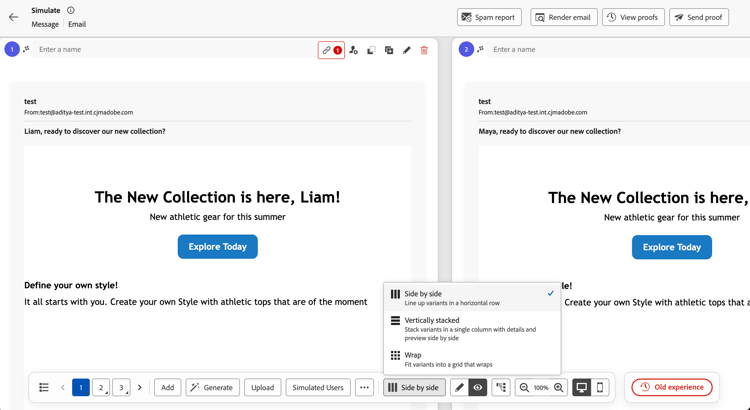
변형이 표시되는 방식을 변경하려면 현재 레이아웃을 표시하는 맨 아래 작업 표시줄에서 레이아웃 선택기를 클릭합니다(예: 나란히). 나란히, 세로 스택 또는 줄바꿈을 선택하십시오.
세로로 스택 레이아웃에서는 각 변형의 세부 정보와 콘텐츠 미리 보기가 나란히 표시되므로 속성 값을 렌더링된 콘텐츠와 비교할 수 있습니다.
데스크탑 보기와 모바일 보기 간 전환 switch-views
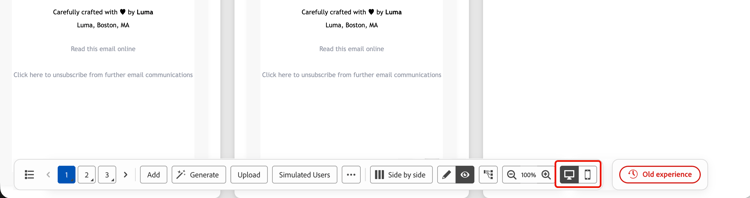
콘텐츠에 장치 보기 컨트롤을 사용할 수 있는 경우 맨 아래 작업 표시줄의 바탕 화면 또는 모바일 아이콘을 클릭하여 두 보기 간에 전환합니다. 미리보기 그리드가 업데이트되어 선택한 디바이스에서 변형이 어떻게 표시되는지 보여 줍니다.
링크 유효성 검사 validate-links
렌더링된 각 변형에 대해 URL의 유효성이 자동으로 검사됩니다. 잘못된 링크가 발견되면 변형 카드의 링크 아이콘 옆에 빨간색 invalid-links 카운트가 표시됩니다.
잘못된 URL 및 이유(예: 잘못된 URL)를 나열하는 URL 유효성 검사 실패 대화 상자를 열려면 개수를 클릭하십시오. 각 링크에 대한 이유를 검토하여 콘텐츠에서 수정해야 하는 사항을 확인하십시오.
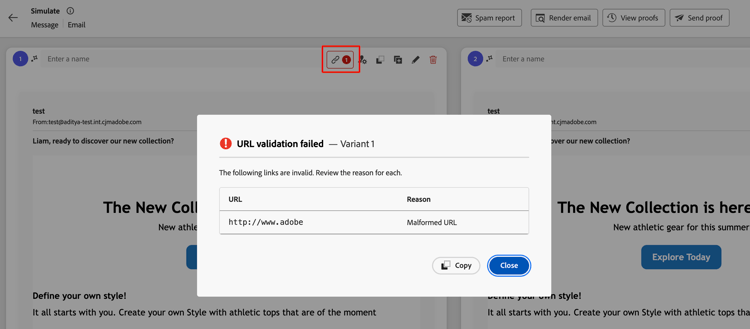
복사를 클릭하여 유효성 검사 세부 정보를 복사하거나 닫기를 클릭하여 시뮬레이션 화면으로 돌아갑니다.
이메일 채널을 위한 추가 기능 email-capabilities
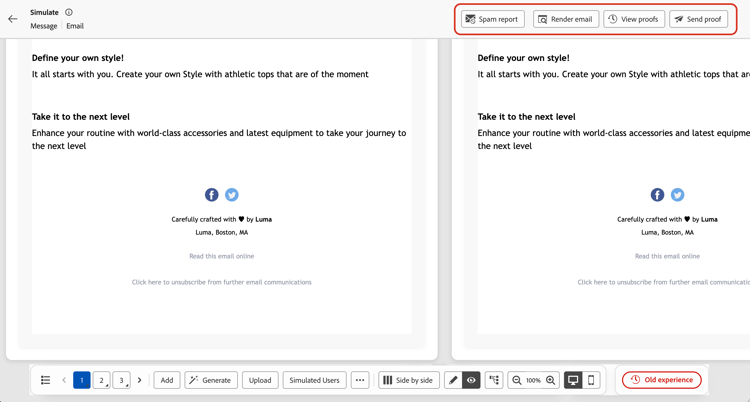
이메일 콘텐츠를 시뮬레이션할 때 상단 표시줄에 추가 이메일 관련 도구가 제공됩니다.
This section contains structured knowledge intended to support interpretation, retrieval, and question answering related to this topic.
For complete understanding, this information should be combined with the documentation on this page. Neither source is intended to stand alone; the page describes the feature, while this section provides additional context that helps disambiguate terminology, intent, applicability, and constraints.
- TL;DR: This page explains the redesigned Simulate content variations experience for creating and managing named variants, selecting variants to render, comparing details with previews, and reviewing automatically detected invalid links.
Intents:
- Open the content simulation screen by clicking Simulate content
- Create variants manually, by uploading a CSV, JSON, or JSONL (JSON Lines) file, by AI generation, or from simulated users
- Name, duplicate, or remove variants, copy attributes, and view configuration details (email only) from their cards
- Select variants to render, preview them or edit their attribute values, show full attribute paths, change the layout, and switch between desktop and mobile views when device-view controls are available
- Export current variants to a CSV file, or use Email-specific tools: Spam report, Render email, and Send proof
- Review invalid-link details for rendered variants or switch back to the classic experience
Glossary:
- Simulate content variations: The redesigned experience that renders all variants or a selected subset in a scrollable grid, with controls on each card and in the bottom action bar. (product-specific)
- Variant: A version of the content with different attribute values, created manually, by file upload, with AI, or from a simulated user. (product-specific)
- Simulated users: Reusable, profile-like test entities that are saved across sessions and can be shared with other users; unlike manually entered variants, they persist beyond the current browser session. (product-specific)
- Generate: The bottom-action-bar button that auto-generates variants with AI; clicking it replaces all existing variants. (product-specific)
- Content previews and variant details: Views for displaying rendered content with the eye icon or editing attribute values with the pencil icon. (product-specific)
- Vertically stacked: The layout where each variant’s details and content preview are displayed side by side. (product-specific)
- Full attribute paths: Paths that identify an attribute’s location in profile data and can be shown or hidden in variant details. (product-specific)
- Invalid-links count: The red count next to the link icon on a variant card when automatic URL validation finds invalid links in that rendered variant. (product-specific)
- URL validation failed: The dialog that lists each invalid URL and its Reason for a variant, such as Malformed URL. (product-specific)
- Send proof: An Email-channel tool that sends a proof of one or more variants to a set of email recipients. (product-specific)
Guardrails:
- You can add up to 30 variants manually or via file upload.
- When using AI generation, up to 40 variants can be created depending on your content’s complexity.
- AI generation and desktop/mobile views are available when their controls are provided for the content.
- Clicking Generate replaces all existing variants, including any added manually or from a file.
- Editing a simulated-user variant’s attribute values is local to testing and is not saved back to the simulated user record.
- Send proof accepts up to 10 recipient addresses.
- URLs are automatically validated for each rendered variant.
- Unselected variants remain hidden until they are shown again; they are not removed.
- The mirror page link is not active in proofs sent for variants; it only activates in the final message.
Terminology:
- Canonical name: Simulate content variations
- Synonyms: “content variants” = “variants”
- Do not confuse: “Simulate content” (the button that opens the simulation screen) ≠ “Simulate content variations” (the experience) ≠ “Old experience” (returns to the classic layout)
- Do not confuse: content previews (eye icon, view rendering) ≠ variant details (pencil icon, edit attribute values)
- Do not confuse: manually entered variants ≠ “simulated users” (saved, reusable across sessions and persistent beyond the current browser session)
- Do not confuse: selecting simulated users to add as variants ≠ selecting which existing variants to render
- Do not confuse: “Send proof” (send variant proofs to email recipients) ≠ “Render email” (preview across email clients and devices) ≠ “Spam report” (deliverability score)
FAQ:
- Q: How do I open the new experience? — From your content, click Simulate content to open the content simulation screen.
- Q: Can I render only some variants? — Yes. Use the variant list icon in the bottom action bar to select the variants to render. Search variants helps find a variant, and Show all displays every variant again.
- Q: Does clicking Generate keep my existing variants? — No. Clicking Generate replaces all existing variants, including any added manually or from a file.
- Q: Can I compare variant details with the preview? — Yes. In the Vertically stacked layout, each variant’s details and content preview are displayed side by side.
- Q: How do I review invalid links? — Click the red invalid-links count on the variant card to open the URL validation failed dialog and review each URL and its Reason. Use Copy to copy the validation details.
- Q: How do I go back to the old layout? — Click Old experience in the bottom action bar.