Create and manage support cases
To submit a support case in Experience League, you need to have the Support admin role assigned by a System Administrator. For support entitlements and role requirements, see Support entitled roles needed for case submission.
Create a support case with the new user interface
To create a support case in Experience League, follow the steps below:
-
On the Home page, select Get Started on the Open a support case card, or select Open Case in the left navigation panel.

-
The Open Ticket page opens in the redesigned Experience League support portal.
Fill out the support case
After you select Open Case or Get Started, the case creation form appears.
The form uses a guided, multi-step workflow. You can move through the following sections and update information before submitting the case:
- Product Selection
- Problem Description
- System Information
- Priority and Business Impact
- Contact Information and Watchers List
- Review and Submit
Follow these steps to create a support case in the classic form:
-
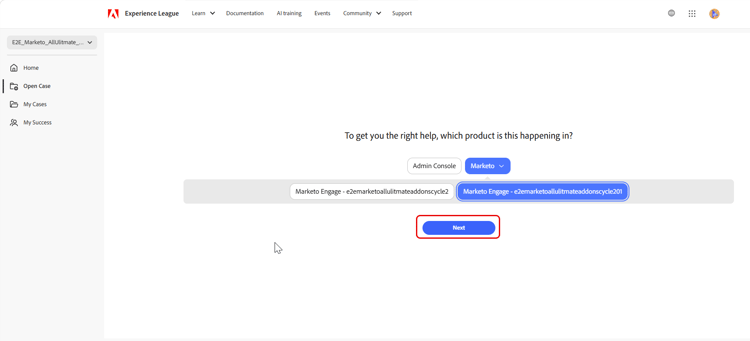
Select the product category and product instance, and then select Next.
-
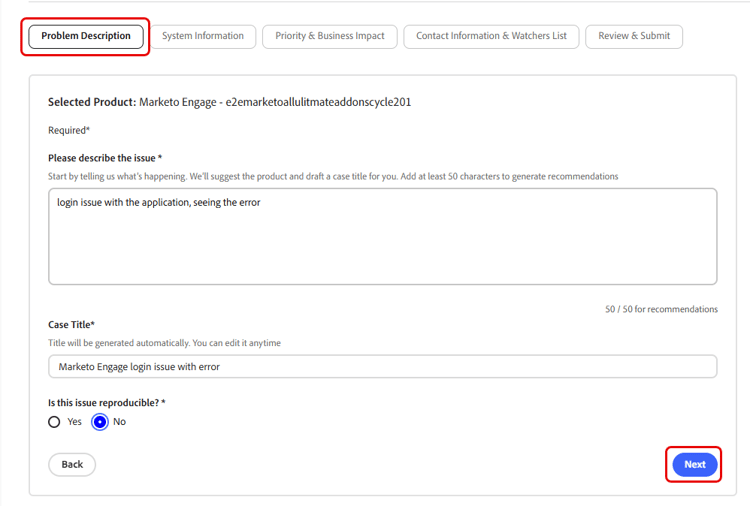
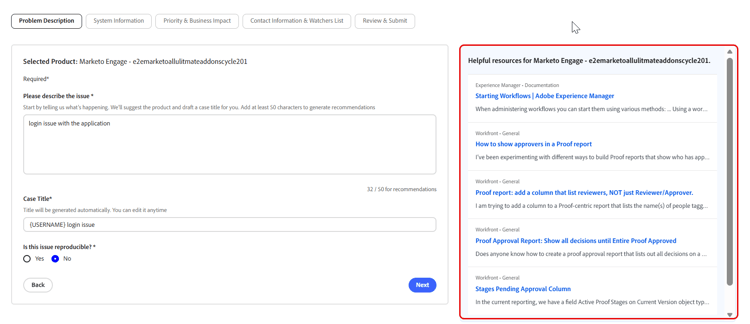
In the Problem Description section, enter a description of the issue. The case title is automatically generated based on the issue description. You can edit the title if needed. Confirm whether the issue can be reproduced. Select Yes if the issue is reproducible. A text box appears where you can describe the steps required to reproduce the issue. Select No if the issue cannot be consistently reproduced, and click Next.
Include details such as:
- What you’re trying to do
- What isn’t working as expected
- Steps you have already taken
- Whether the issue is reproducible
As you enter the problem description, Experience League displays AI-powered recommendations in a panel next to the form. These recommendations:
- Suggest relevant documentation or known solutions
- Help you confirm if the issue is already addressed
- Reduce the need to submit a case for common issues
The recommendation panel adapts to the level of detail in the issue description and appears without interrupting case creation. You can review recommendations at any time and continue submitting the case. When the issue description exceeds 50 characters, the system generates AI-powered recommendations tailored to the issue.
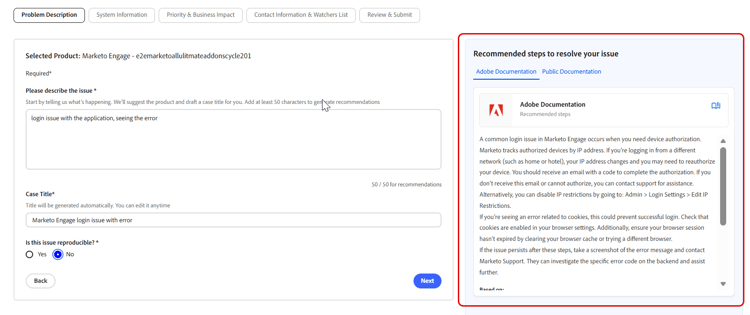
When the description contains fewer than 50 characters, the system displays recommended articles for guidance. A built-in character counter tracks the minimum requirement in real time.
As you enter issue details, the System Insights panel appears on the right side of the screen, below the AI-powered recommendations section. System Insights are currently available for Adobe Commerce only. For more information, see System Insights.
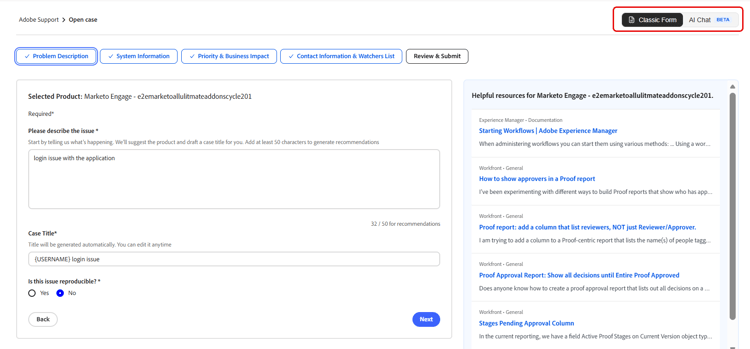
Select Classic Form or AI Chat in the upper-right corner to switch the case creation experience. For AI chat details, see AI chat in the case creation experience.
-
In the System Information section, complete the required fields for your product and indicate whether any recent changes were made to the environment. Select Yes to provide additional details about the changes. Select No if no changes were made and select Next.
note NOTE Based on the selected product, additional fields may appear. These fields include details about the environment where the issue occurs. 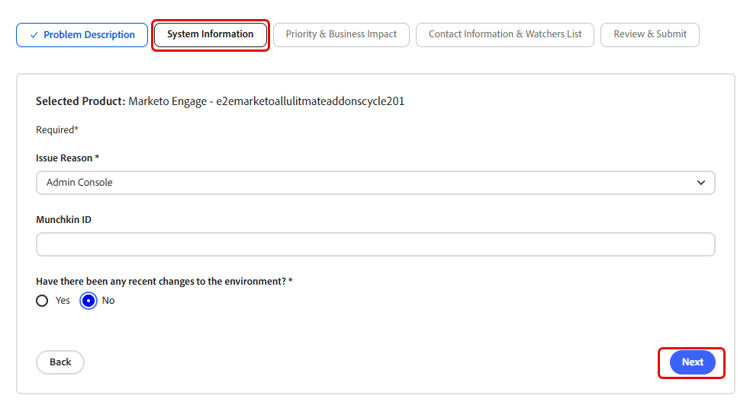
-
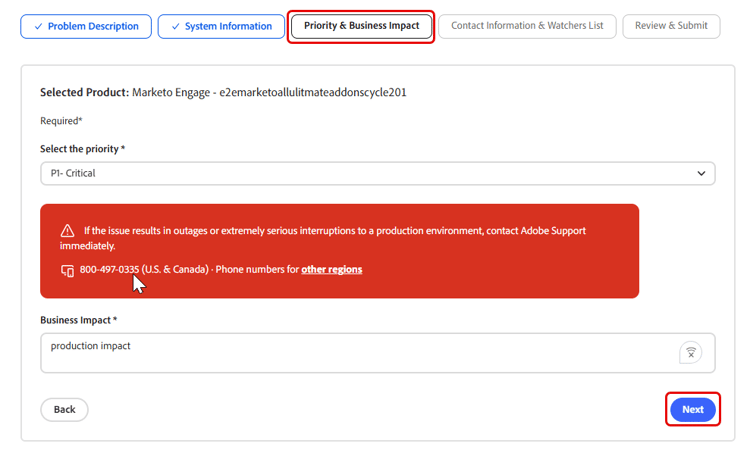
In the Priority & Business Impact section, select the case priority (P4 - Minor, P3 - Important, P2 - Urgent, P1 - Critical). Provide the Business Impact details when the selected priority is P1 – Critical, and then select Next.
For details on how case priority and business impact affect support response times, see Targeted Initial Response Times for Support.
-
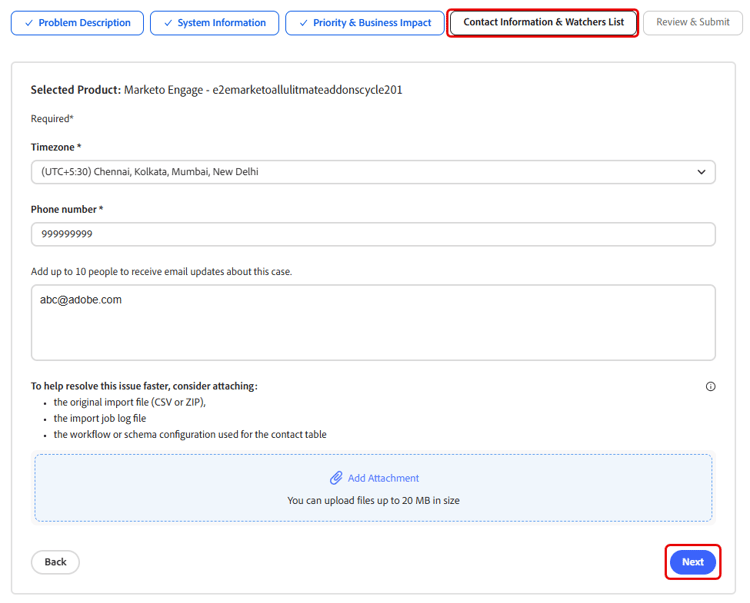
In the Contact Information & Watchers List section, select the time zone, enter your phone number, add watchers, attach any files if needed, and then select Next.
-
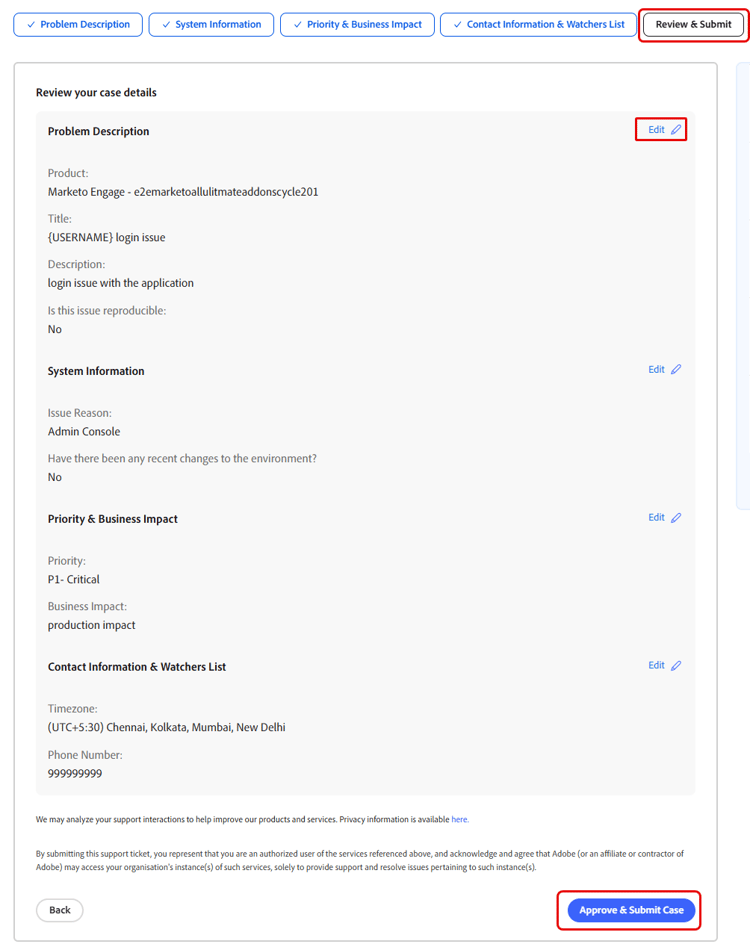
In the Review & Submit section, review your case details, select Edit to make edits if needed, and select Approve & Submit Case.
After submission:
- The case is logged in Experience League
- You can track updates and communicate with Support through the portal
- Adobe Support responds based on the priority and impact you provided
View and manage your cases with the redesigned portal
You can view and manage support cases from the redesigned Experience League support portal. To view and manage your cases, follow the steps below:
- Select My Cases in the left navigation panel. Or
- Select Go now on the View and manage your cases card on Home page.

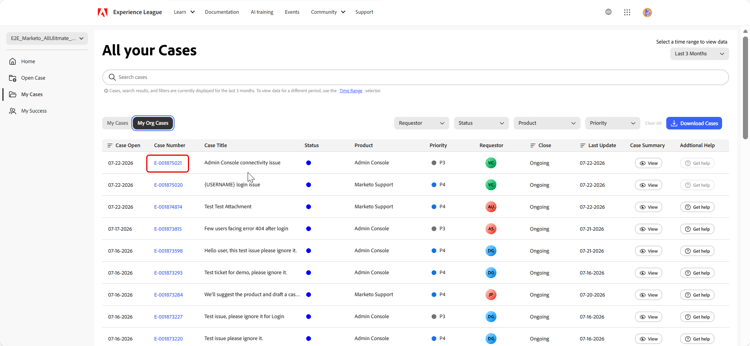
The All your Cases page opens. Select My Cases to view your cases, or select My Org Cases to view cases across your organization. Use Search cases to search within the selected time range.
In the upper-right corner, select a time range to view cases from the last 3, 6, 12, 18, 24 months, or All time. By default, the case list, search results, and filters display data from the last 3 months.
To view the complete case history, including cases older than 24 months, select the All Time option from the dropdown.
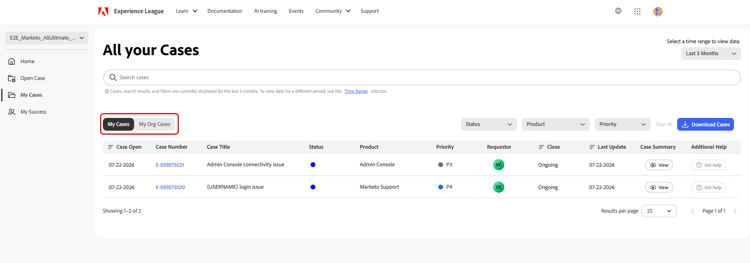
You can filter cases using Status, Product, and Priority. The Requestor filter is available only when My Org Cases is selected and lets you filter cases by the person who created the case. Select Clear All to reset all filters. Select Download Cases to download the case list.
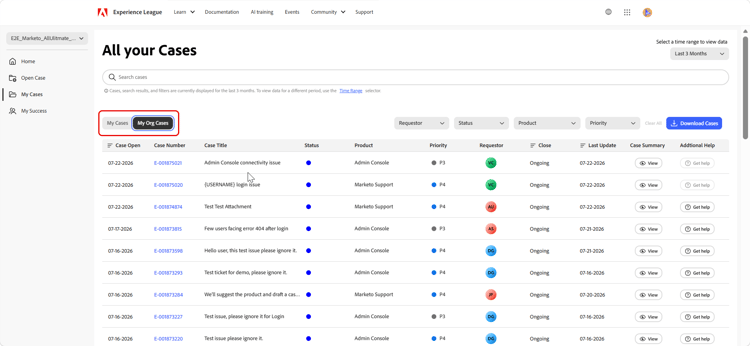
Filter options include:
- Status — Awaiting Assignment, In Progress, Issue Obsolete, Resolution Confirmed, Resolution Irrelevant
- Product — products assigned to your organization
- Priority — P4 - Minor, P3 - Important, P2 - Urgent, P1 - Critical
The cases table displays Case Open, Case Number, Case Title, Status, Product, Priority, Requestor, Close, Last Update, Case Summary, and Additional Help. Select View in the Case Summary column to open an AI-generated case summary. Select Get help for additional assistance on a case. You can select a Case Number to open the case details page.
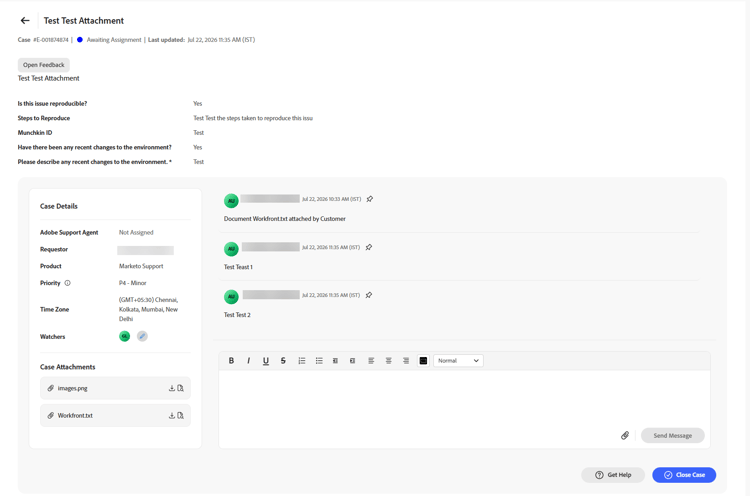
The case details page displays the case title, Case ID, status, last updated date, case description, and reproducibility. The details panel includes the Adobe Support Agent, Requestor, Product, Priority, Time Zone, Watchers, and Case Attachments. To add a comment, enter your message in the comment editor and select Send Message. You can attach files using the attachment icon and delete attachments in the portal. Select the pin icon on a comment to pin it to the case. You can pin and unpin multiple comments.