Scoring Studio
Scoring Studio includes a model list, an editable canvas for each model, and the Coworker chat interface. Use the canvas to review or adjust dimensions and signals directly, while Coworker continues to propose changes in natural language alongside you. For information about building a model from a prompt, see Create custom scoring models.
- View B2B Labs - Required to view the Labs features that are available and enabled.
- Manage B2B Labs - Required to enable and configure Labs features.
Model list model-list
The model list is the landing view for Scoring Studio. It shows every scoring model in your Marketo Optimizer instance as rows in a table, or as cards if you switch to grid view.
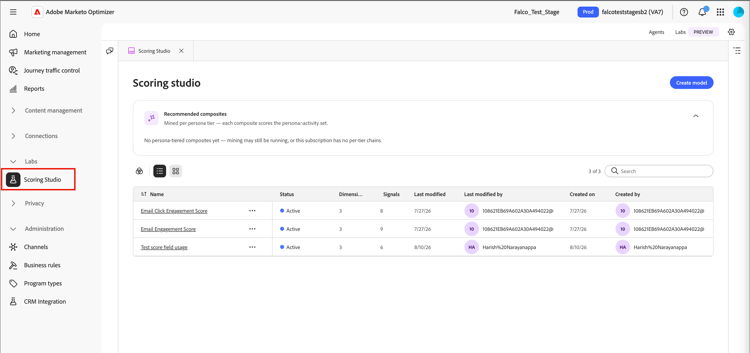
Use the search field to find a model by name, or filter the list by status. Select a row’s More menu to Edit, Duplicate, Archive, or Delete a model.
An active model is read-only. To change it, duplicate it and edit the duplicate. Then, archive the original and publish the modified copy.
Model canvas model-canvas
Selecting a model name opens it on the canvas. Each open model appears as its own tab, so you can work across multiple models. The canvas is organized into tabs, including Rules and Lead.
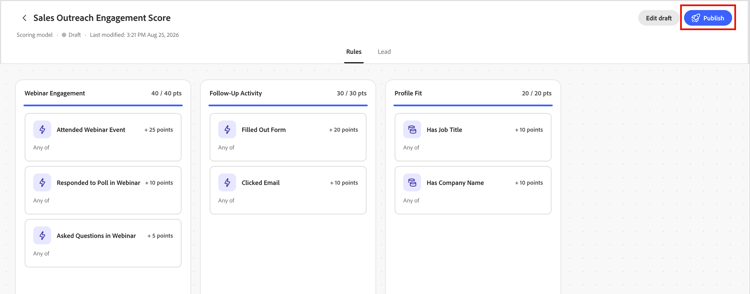
On the Rules tab, every dimension in the model is a column on the canvas. Each column header shows the dimension name and its point total against its cap, for example 20 / 30 pts, with a progress bar that fills as its signals contribute points.
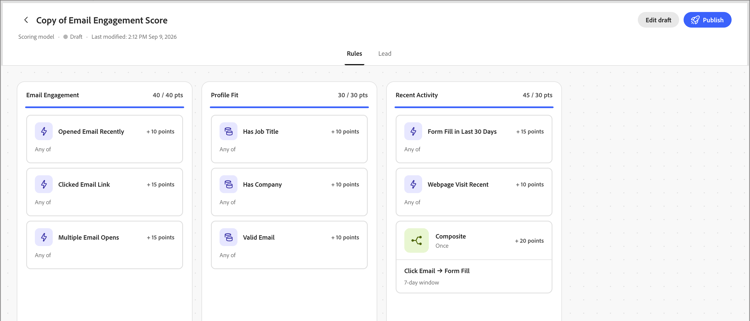
Inside each dimension, every signal appears as a card showing its name, its point value, and either its matching frequency (for example, 1 time / day) or Static for attribute-based signals that do not depend on activity.
When Coworker detects a pattern across multiple activities, it can combine them into a single composite signal card that summarizes every condition.
Configure a signal configure-signal
To review or change a signal, follow these steps.
-
Select Edit draft.
-
Select a signal card on the canvas.
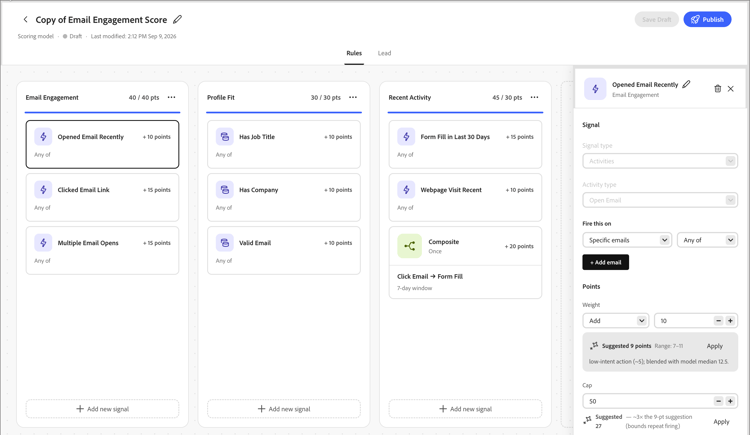
The properties panel opens on the right side of the canvas.
-
Select the Edit icon (

-
Under Signal, confirm the signal type (an activity or an attribute) and which specific activity or attribute it scores.
-
Under Fire this on, set the conditions that must match.
Add the items to use, such as specific pages, and whether Any of or All of the conditions must be true.
-
Under Points, set how many points the signal contributes.
Optionally, set a Cap to limit how many points it can contribute per person. Coworker shows a suggested point range based on the other signals in the model.
-
For activity-based signals, set the Frequency required before the signal awards points.
Optionally, set a Decay percentage that reduces the signal’s points after a set number of days.
-
Enable the Avoid scoring the same actions twice option to award points only once per person, no matter how many times the activity happens.
Disable the option to award points every time the activity happens instead. This setting is on by default.
-
-
Select Save to apply your changes and return to the canvas.
Lead segment lead-segment
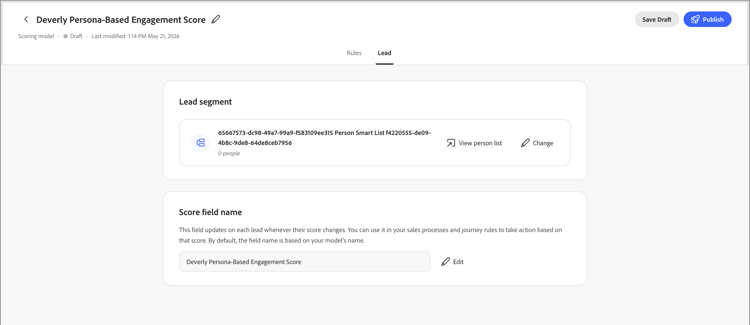
Every scoring model scores one lead segment, a reference to an existing person list rather than rules you define inside Scoring Studio. When Coworker creates a model, it selects a matching list or creates a new one.
To change the list, select the Lead tab, then select Change next to the lead segment.
A lead segment uses one of two list types:
- Static list — a fixed set of people captured when the list was created.
- Smart list — a list that re-evaluates its membership rules every time the model runs, so the segment always reflects the list criteria.
The model preview shows the segment name, its member count, and a View person list link that opens the list directly. For more information about managing lists, see People lists.
If the referenced list is empty or later removed, the model stops scoring instead of falling back to your entire audience. No leads are scored until you assign a valid, non-empty list.
Below the lead segment, the Score field name card shows the lead attribute that the model writes its score to. By default, the field name matches the model’s name. Select Edit to rename it.
Publish and schedule publish-schedule
When your model is ready, click Publish.
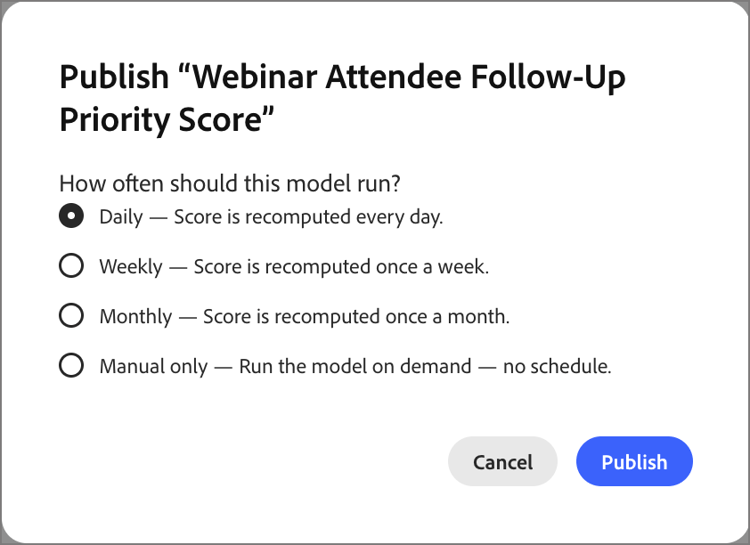
Choose how often the model scores your audience: daily, weekly, or monthly. You can also choose a manual option to run the model.
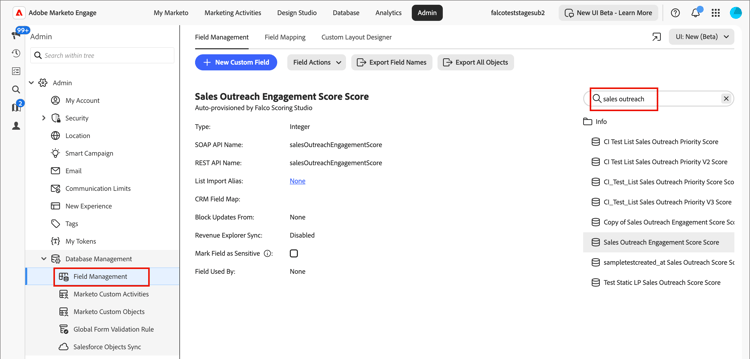
For the full publish process using the Coworker chat interface, including how Marketo Optimizer provisions a scoring field automatically, see Publish a scoring model.
The latest scores are stored in a provisioned field that is synced to your Marketo Engage instance.
Use scores in filters filter-score
After you publish a model, you can use its resulting score as a filter when building event-based audiences and Listen for an event nodes, as a split path condition, or for people list membership.
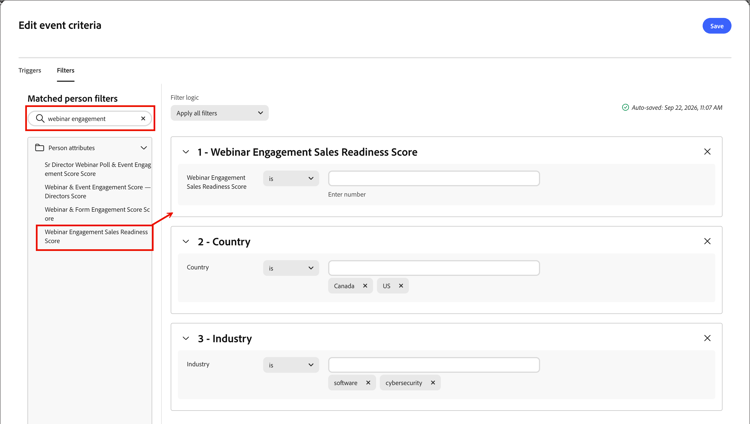
The score appears in the filter panel under the Person attributes category, labeled with the model name or the custom Score field name you assigned it. Enter that name into the filter panel’s search field to locate the score, then drag it onto the canvas and define your criteria.
Event-based audiences and nodes scoring-model-event-audience
To use a scoring model result to filter for an event-based audience or Listen for an event node:
-
Click Add event criteria.
-
In the Edit event criteria dialog, select the Filters tab.
-
Enter the model name into the search field, then drag the score onto the canvas.
-
Set the operator and value to match the scores you want to target.
-
Click Save.
Split path conditions split-path-conditions
To use a scoring model result to define path conditions for a Split paths node:
-
Click Edit condition for the node path.
-
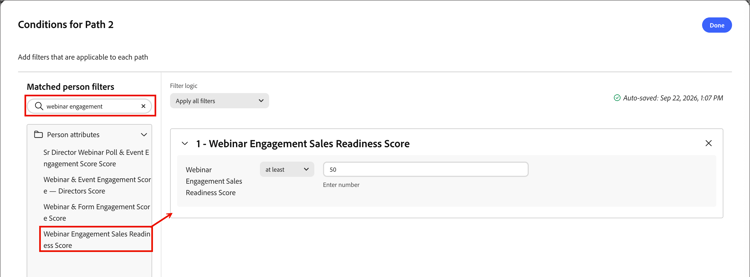
In the Conditions dialog, enter the model name into the search field, then drag the matching score onto the canvas.
-
Set the operator and value to match the scores you want to target.
-
Click Done to save the condition for the path.
People list membership scoring-model-people-lists
To manage people list membership using a scoring model result:
Static list — Add members
-
Open the static list and click Add people.
-
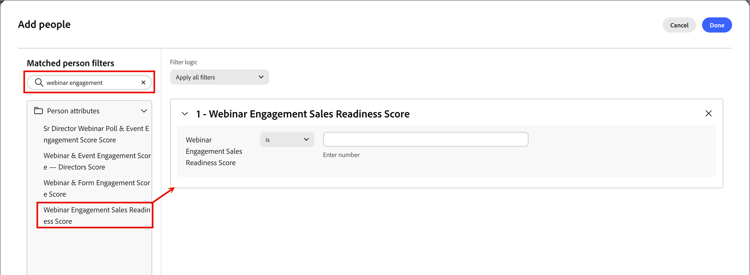
In the Add people dialog, enter the model name into the search field, then drag the matching score onto the canvas.
-
Set the operator and value to match the scores you want to target.
-
Click Done to apply the filter and qualify matching people into the list.
Dynamic list — Set membership rules
-
Open the dynamic list and select the Rules tab.
-
Click Edit rules.
-
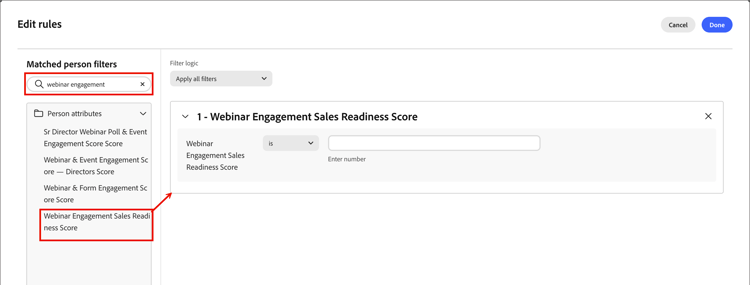
In the Edit rules dialog, enter the model name into the search field, then drag the score item onto the canvas.
-
Set the operator and value to match the scores you want to target.
-
Click Done to save the rule.
Membership is updated automatically as person records are evaluated against the rule.