Fragments
A fragment is a reusable component that can be referenced in one or more emails and email templates across Marketo Optimizer. It is usually a block of content (text, image, or both) that can be pre-created and quickly inserted into an email or email template. With this functionality, you can prebuild multiple custom content blocks for use by your marketing team members to assemble email content for an improved design process. Common use cases include header/footer content blocks for email, event invite banners, and seasonal greetings.
Visual fragments
Visual fragments are pre-defined visual blocks built using the visual design tools that you can reuse across multiple emails or email templates. The current scope of Marketo Optimizer and this documentation includes visual fragments only.
To make the best use of fragments in your workflows:
- Create your own fragments - Create visual fragments, either from scratch or by saving content as a fragment from the visual content design space.
- Reuse fragments - Use them as many times as needed in your email or email template content.
Access and manage fragments access-manage-fragments
To access visual fragments in Marketo Optimizer, go to the left navigation and expand Content Management. Then, select Fragments. This action opens a listing page with all the fragments created in the instance listed in a table.
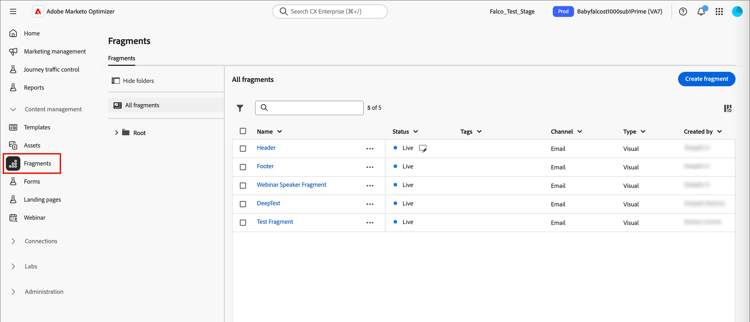
The table is sorted by the Modified column, with the most recently updated fragments at the top by default. Click the column title to change between ascending and descending.
The folder structure on the left allows you to organize fragments. By default, all fragments are displayed. When you select a folder, only the fragments and subfolders included in the selected folder are displayed.
Fragment status fragment-status
The fragment status determines its availability for use in an email or email template, and the changes that you can make to it.
When you create a fragment, it is in draft status. It remains in this status as you define or edit the visual design space until you publish it for use in an email or email template. Available actions:
- Edit all details
- Edit in visual design space
- Publish
- Duplicate
- Delete
When you publish a fragment, it becomes available for use in an email or email template. Published fragment content cannot be modified in the visual design space. Available actions:
- Edit description
- Add to an email or template
- Create draft version
- Duplicate
- Delete (if not in-use)
When you create a draft from a live fragment, the live version remains available for use in an email or email template, and the draft content can be modified in the visual design space. If you publish the draft version, it replaces the current live version and the content is updated in the emails and email templates where it is in use. Available actions:
- Edit description
- Add to an email or template
- Edit draft version in the visual design space
- Publish draft version
- Duplicate
- Delete (if not in-use)
Filter the fragments list filter-list
To search for a fragment by name, enter a text string into the search bar for a match. When a folder is selected, the search applies to all fragments or folders in the first level of hierarchy of that folder.

Click the Filter icon (

Customize the column display column-display
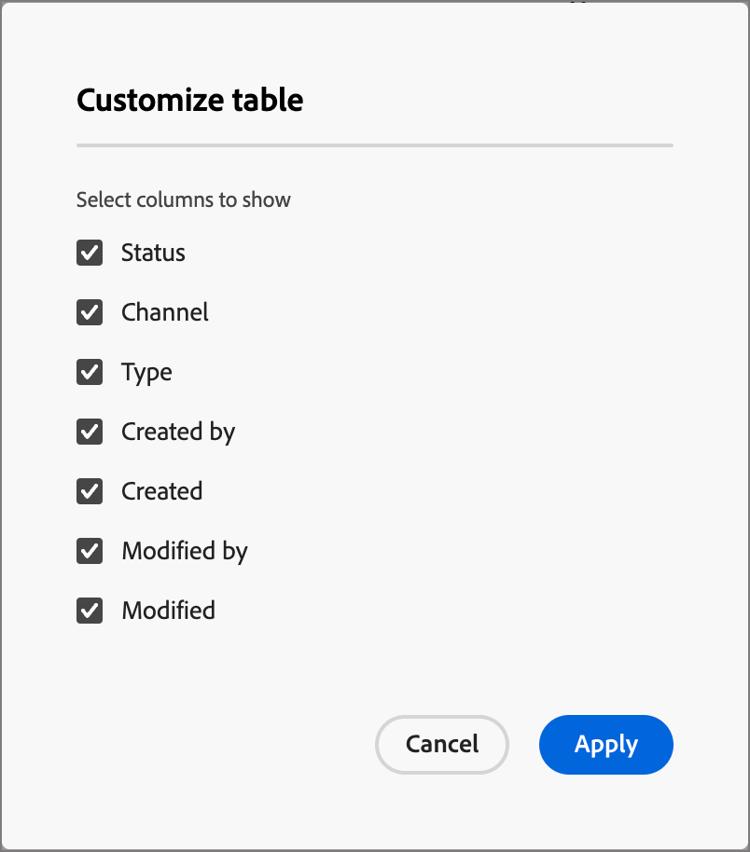
Customize the columns that you want to display in the table by clicking the Customize table icon (

In the dialog, select the columns to display and click Apply.
Bulk actions bulk-actions
You can select multiple fragments using the checkboxes and apply bulk operations to all of them. The available actions are displayed in a bulk action bar at the bottom of the list page. The following operations are available:
- Move to folder - Move selected fragments into a folder.
- Archive - Archive selected fragments.
You can also sort the fragment list by clicking any column header, and resize columns by dragging the column border to fit the data you need.
Create fragments create-fragments
You can create new visual fragments in Marketo Optimizer by clicking Create fragment at the top right.
-
In the Create fragment page, enter a useful Name (required) and Description (optional).
-
Name - Maximum of 100 characters, must be unique, case-insensitive
-
Description - Maximum of 300 characters
-
Alpha, numeric, and special characters are allowed
-
Reserved characters are not allowed:
\ / : * ? " < > |

-
-
Click Create.
The visual design space opens with an empty canvas.
-
Use the content design tools to create the visual fragment content:
-
Click Save at any time to save the draft fragment.
-
When you are ready to make the fragment available for use in an email or email template, click Publish.
View fragment details view-details
Click the name of any fragment in the list page to open the fragment details page. You can choose to edit the fragment, rename the fragment, or update the fragment description. Make updates and click outside of the name or description field to auto-save changes.

Click Edit fragment to open the fragment in the visual content editor.
Exit the view at any time by clicking the Back arrow at the top left, which returns you to the Fragments list page.
View fragment references references
For a Live fragment, you can view a list of assets that currently reference (use) the fragment.
-
Within the fragment details page, click the More (…) icon at the top right.
-
Select Explore references.
The Fragment usage page displays a list of assets where the fragment is currently used within Marketo Optimizer, across emails and email templates.
note important IMPORTANT Any fragment that is currently in use by any email or email template cannot be deleted. References are displayed according to category: Email or Email template. Every email in Marketo Optimizer is defined within a Send Email action node of a person journey, so the parent journey of the email that uses the fragment is displayed in references.
-
Click the link to open the corresponding email or email template where the fragment is used.
Use folders to manage fragments folders
To easily navigate your fragments, you can use folders to organize them more effectively into a structured hierarchy. This enables you to categorize and manage the items according to your organization needs.
Select the Root folder to display all fragments, including those located in all subfolders. Select any folder in the structure to display its contents. With a folder selected, click Create fragment to create a new fragment in that folder.
Create folders folders-create
-
With the parent folder selected (Root or another folder), click Create folder at the top right.
-
Enter a Name for the new folder and click Save.
The new folder appears on top of the list inside the selected parent folder.
You can click the More menu ( … ) icon to rename, move, or delete the folder.
Move folders folders-move
-
Click the More menu (…) icon next to the name of the fragment that you want to move.
-
Choose Move to folder.
-
In the dialog, navigate the folder structure and select the folder where you want to move the fragment.
-
Click Move.
Delete folders folders-delete
-
In the folder structure, select the parent for the folder that you want to delete.
-
Click the More menu (…) icon next to the name of the displayed subfolder that you want to delete.
-
Choose Delete folder.
Edit fragments edit-fragments
Edits to a fragment depend on its current status:
- When a fragment is in Draft status, you can edit any of its details and the visual content.
- When a fragment is in Live status, you can edit the fragment description, but not the name. You cannot edit the visual content unless you create a draft.
- When a fragment is in Live status with an existing draft, editing the details is limited to the description. You can also edit the visual content for the draft version.
-
From the Fragments listing page, click the fragment name to open it.
A preview of the visual content is displayed.
-
Modify the description, if needed.

-
To make changes to the content in the visual design space, click Edit at the top right.
Use the visual design tools as needed:
- Add structure and content
- Add assets
- Navigate the layers, settings, and styles
- Personalize content
- Edit linked URL tracking
Click Save, or Save & close to return to the fragment details.
-
When the fragment meets your criteria and you want to make it available for use in an email or email template, click Publish.
-
From the Fragments listing page, click the fragment name to open it.
A preview of the visual content is displayed, with the fragment details on the right.
-
Modify the description, if needed.
-
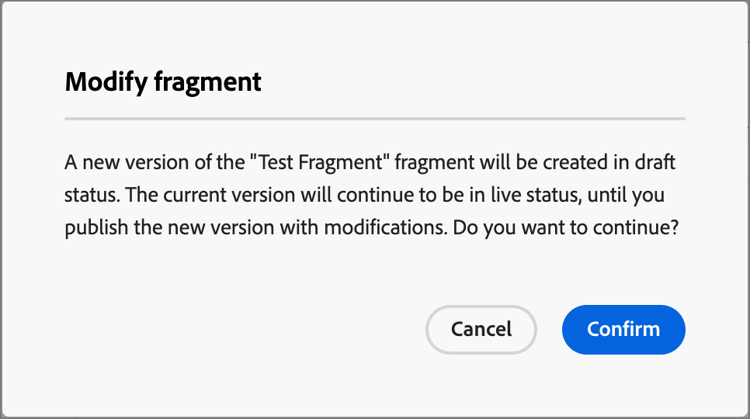
If you want to update the content, click Modify at the top right.
-
In the dialog, click Confirm to create a draft version of the fragment.
-
Click Edit at the top right.
-
Use the visual design tools as needed to update the content in the draft:
- Add structure and content
- Add assets
- Navigate the layers, settings, and styles
- Personalize content
- Edit linked URL tracking
Click Save, or Save & close to return to the fragment details.
-
When the draft fragment meets your criteria and you want to make the changes available for use in an email or email template, click Publish.
When you publish the draft version, it replaces the current live version and the content is updated in the emails and email templates where it is already in use.
There are two ways to open the draft version for editing from the Fragments listing page:
-
Click the Draft icon (

-
Click the fragment name to open it. Then, click the More menu (…) icon at the top right and choose Open draft version.
A preview of the visual content for the draft version is displayed.
To update the draft content:
-
Click Edit at the top right.
-
Use the visual design tools as needed:
- Add structure and content
- Add assets
- Navigate the layers, settings, and styles
- Personalize content
- Edit linked URL tracking
Click Save, or Save & close to return to the fragment details.
-
When the draft fragment meets your criteria and you want to make the changes available for use in an email or email template, click Publish.
When you publish the draft version, it replaces the current published version and the content is updated in the emails and email templates where it is already in use.
Duplicate fragments duplicate-fragments
You can duplicate a fragment using either of the following methods:
- From the Fragments listing page, click the More icon (…) next to the fragment name and choose Duplicate.
- At the top right of the fragment details page, click the More (…) icon and choose Duplicate.
In the dialog, enter a useful name (unique) and description. Click Duplicate to complete the action.
The duplicated (new) fragment then appears in the Fragments listing, located in the same folder.
Add visual fragments to your email or template content add-to-content
Fragments are designed for reuse and can be inserted for email and email template authoring. You can add up to 30 fragments in an email or template. Fragments can be nested up to one level only.
-
Navigate to a person journey and open an existing Send Email action node or add a new one.
-
Click Edit email body to open or continue authoring the email content.
-
Drag and drop an item from the Structures menu to provide a structure for the fragment.
-
To open the listing of published fragments, click the Fragments icon.
You can:
- Sort the listing.
- Browse, search, and filter the listing.
- Switch between card (thumbnail) and list views.
- Refresh the list to reflect any of the recently created fragments.

-
Drag and drop any of the fragments into the structure component placeholder.
The editor renders the fragment within the section/element of the email structure.
The content of the fragment is dynamically updated within the structure to render a visual of how the content appears in the email.
| note tip |
|---|
| TIP |
| If you want the fragment to occupy the entire horizontal layout within the email, add a 1:1 column structure and then drag and drop the fragment into it. |
After the email is saved, it appears in the fragment details page when the Used By tab is selected. Fragments added to an email are not editable within the email or template – the published source fragment defines the content.
-
From the left navigation, expand Content Management and select Templates.
-
Create a new template, or open an existing email template.
-
In the template properties panel on the right, click Edit email body.
-
Drag and drop an item from the Structures menu to provide a containing structure for the fragment.
-
To open the fragments listing, click the Fragments icon on the left.
You can:
- Sort the listing.
- Browse, search, and filter the listing.
- Switch between card (thumbnail) and list views.
- Refresh the list to reflect any of the recently created fragments.
-
Drag and drop a fragment into the structure component.
The editor renders the fragment within the section/element of the email template structure.
| note tip |
|---|
| TIP |
| If you want the fragment to occupy the entire horizontal layout within the email template, add a 1:1 column structure and then drag and drop the fragment into it. |
After the email template is saved, it appears in the fragment details page when the Used By tab is selected. Fragments added to an email template are not editable within the template – the published source fragment defines the content.
Fragment actions during email and template authoring fragment-actions
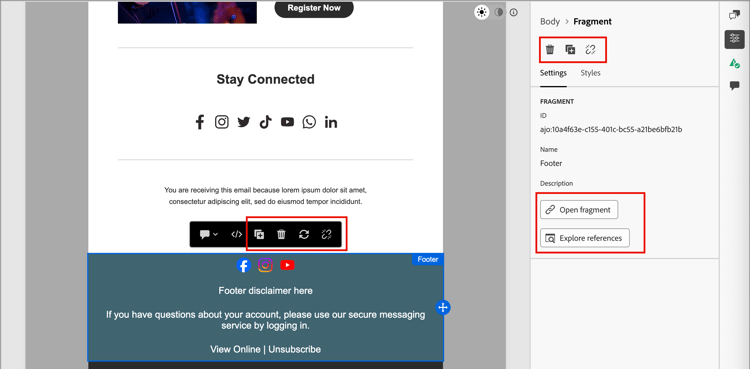
When a fragment is added to an email or email template, the fragment content cannot be edited within the email or template. However, you can apply the following actions:
- Delete - This action removes the fragment from the current email or email template content (the fragment source is unaffected).
- Refresh - This action refreshes the content of the fragment in the current email or email template. Refreshing is useful when you want to reflect any recent edits to the fragment after the addition to the email or email template.
- Duplicate - This action duplicates the fragment within the same email or email template within the editor, with the same dimensions and added just below it.
- Open fragment - This action opens a new browser tab with the fragment editor page and details.
- Explore references - This action opens the Fragment usage page, where you can view usage for the fragment by type.
- Break inheritance - This action breaks the inheritance of the fragment (and its changes) from the source. Use this action to make the fragment content available as independent and editable content within the email or email template. This action also removes the email or email template from the Used By reference for the original fragment.
When you select the fragment on the editor page, these actions are available from the context toolbar and the properties panel on the right.