On this page: Follow an order status use case that combines profile, offer decision, and contextual journey data to personalize a push notification in Adobe Journey Optimizer.
In this use case, you will see how to use multiple types of personalization in a single push notification message. Three types of personalization will be used:
- Profile: message personalization based on a profile field
- Offer decision: personalization based on decision management variables
- Context: personalization based on contextual data from the journey
The goal of this example is to push an event to Journey Optimizer every time a customer order is updated. A push notification is then sent to the customer with information on the order and a personalized offer.
For this use case, the following prerequisites are needed:
➡️ Discover a similar use case in video
Step 1 - Create the journey create-journey
-
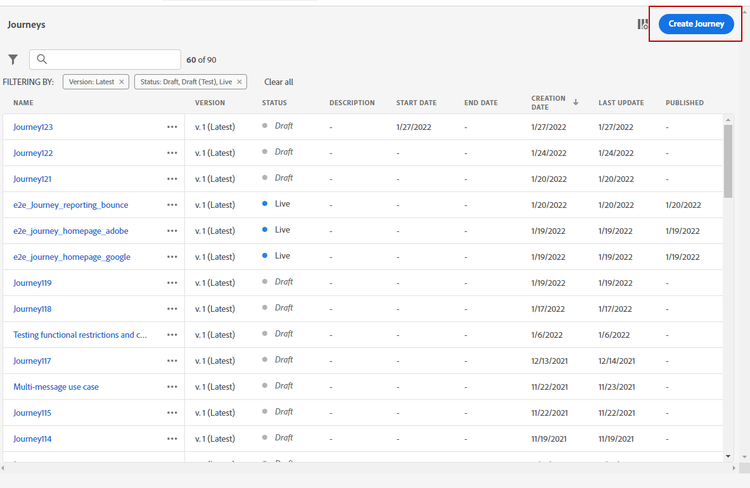
Click the Journeys menu and create a new journey.
-
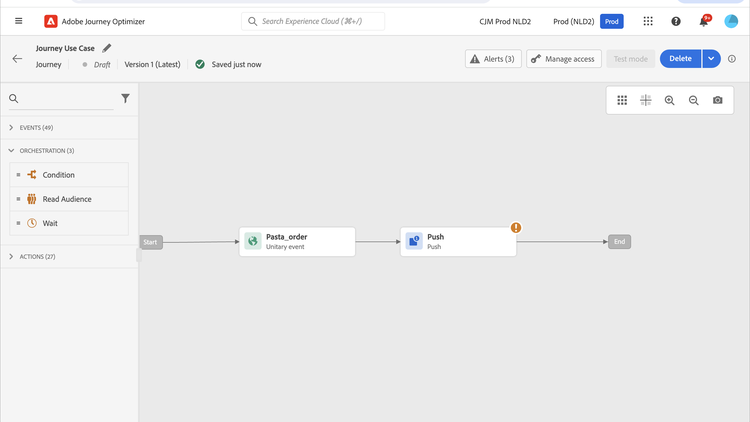
Add your entry event, and a Push action activity.
-
Configure and design your push notification message. Refer to this section.
Step 2 - Add personalization on profile add-perso
-
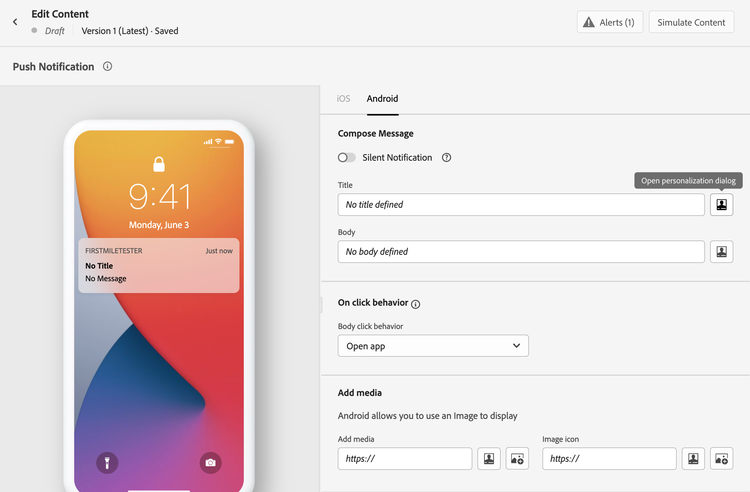
In the Push activity, click Edit content.
-
Click the Title field.
-
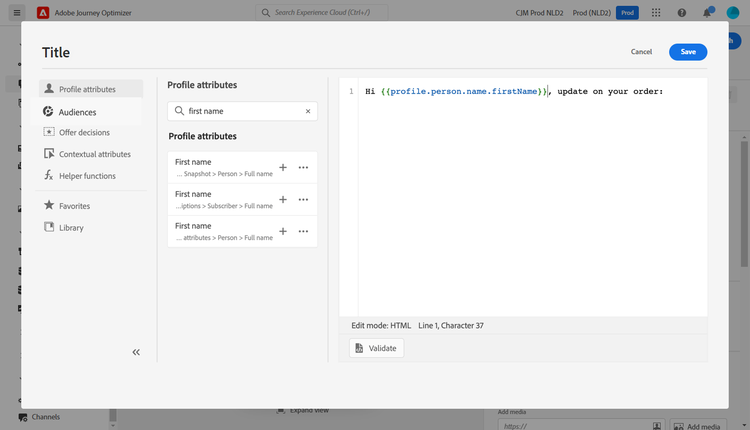
Enter the subject and add profile personalization. Use the search bar to find the profile’s first name field. In the subject text, place the cursor where you want to insert the personalization field, and click the + icon. Click Save.
Step 3 - Add personalization on contextual data add-perso-contextual-data
-
In the Push activity, click Edit content and click the Title field.

-
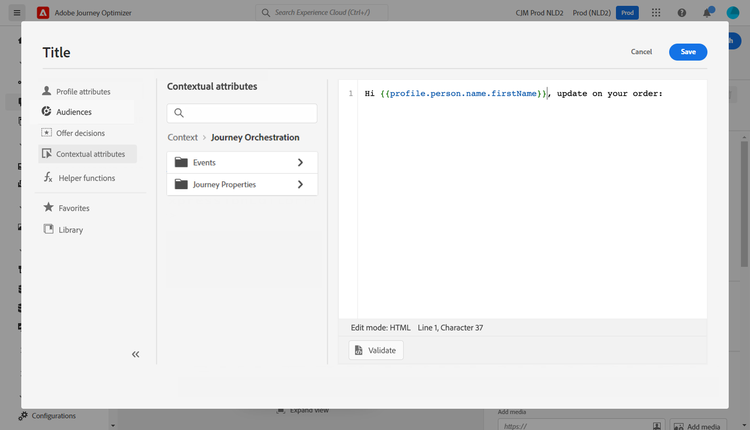
Select the Contextual attributes menu. Contextual attributes are only available if a journey has passed contextual data to the message. Click Journey Orchestration. The following contextual information appears:
- Events: this category regroups all fields from the event(s) placed before the channel action activity in the journey.
- Journey Properties: the technical fields related to the journey for a given profile, for example the journey ID or the specific errors encountered. Learn more in Journey Orchestration documentation.
-
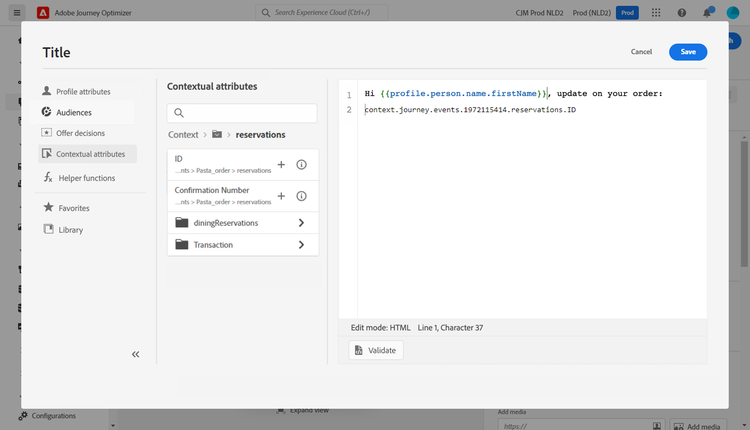
Expand the Events item, and look for the order number field related to your event. You can also use the search box. Click the + icon to insert the personalization field in the subject text. Click Save.
-
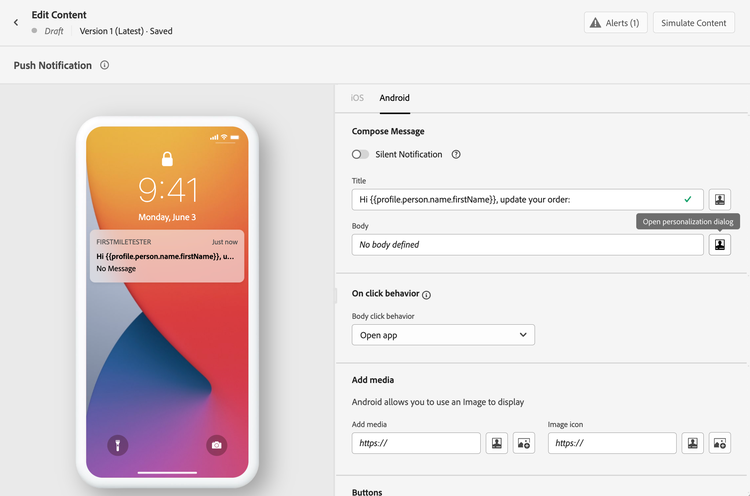
Now click the Body field.
-
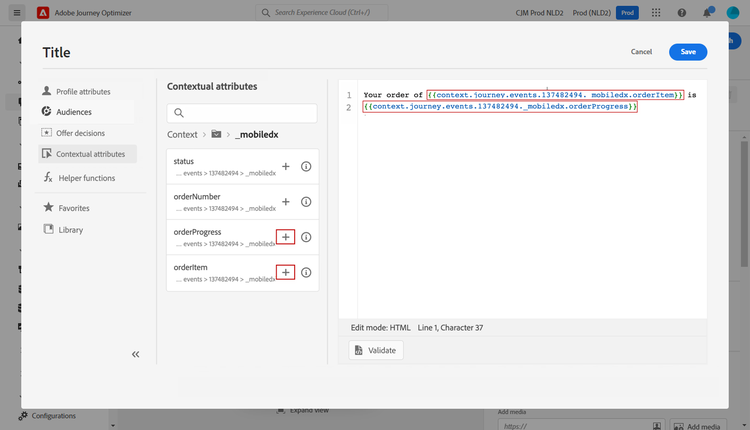
Type the message and insert, from the Contextual attributes menu, the order item name and the order progress.
-
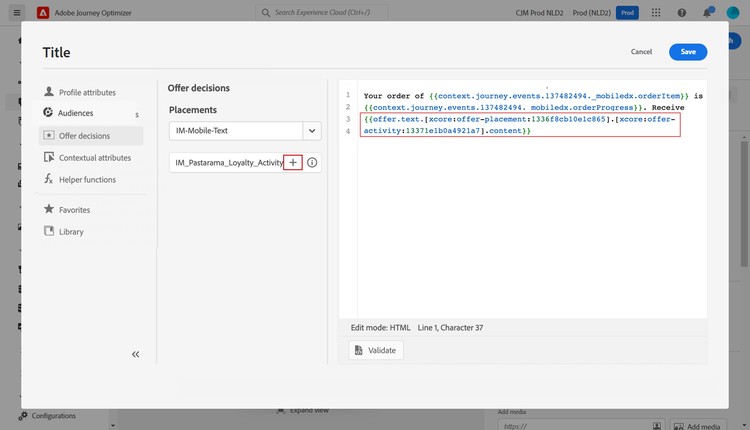
From the left menu, select Offer decisions to insert a decisioning variable. Select the placement and click the + icon next to the decision to add it to the body.
-
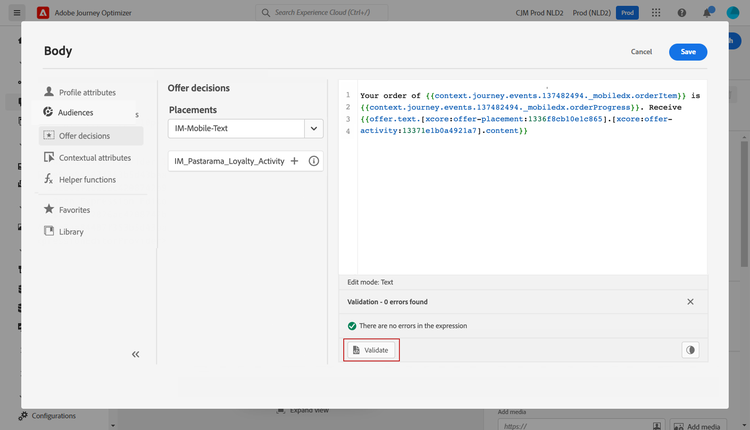
Click validate to make sure that there are no errors, and click Save.
Step 4 - Test and publish the journey test-publish
-
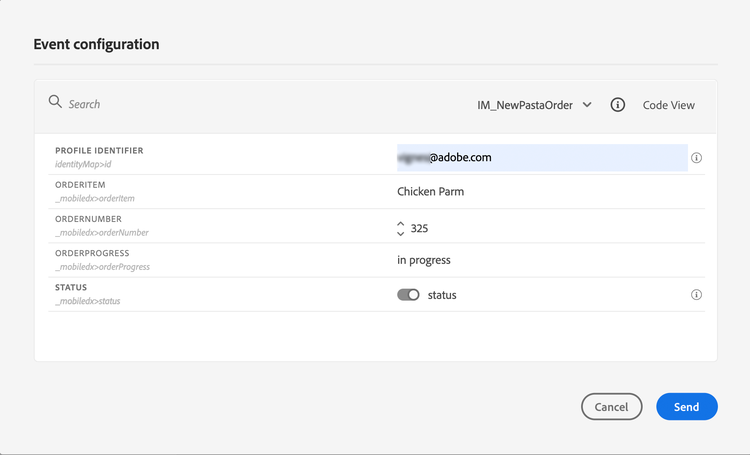
Click the Test button, then click Trigger an event.

-
Enter the different values to pass in the test. Test mode only works with test profiles. The profile identifier needs to correspond to a test profile. Click Send.
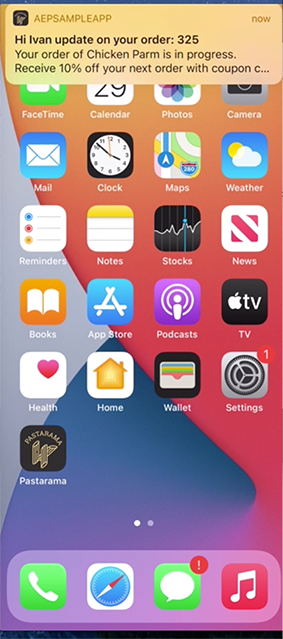
The push notification is sent and displayed on the test profile’s mobile phone.
-
Verify that there is no error and publish the journey.
How-to video video
The video below shows a similar use case leveraging contextual data from a journey to personalize an email.
This section contains structured knowledge intended to support interpretation, retrieval, and question answering related to this topic.
For complete understanding, this information should be combined with the documentation on this page. Neither source is intended to stand alone; the page describes the feature, while this section provides additional context that helps disambiguate terminology, intent, applicability, and constraints.
- TL;DR: This page walks through an order status push notification use case combining three types of personalization — profile field, offer decision, and contextual journey data — in a single message.
Intents:
- Create a journey with an order event and an Action activity with the Push channel
- Add profile-based personalization (customer’s first name) to the push title
- Add contextual data personalization (order number, item name, order progress) from the journey event
- Add offer decision personalization to the push body
- Test the journey in test mode and publish
Glossary:
- Profile personalization: Message personalization based on a profile field such as the first name. (product-specific)
- Offer decision: Personalization based on decision management variables; inserted from the Offer decisions menu in the personalization editor. (product-specific)
- Context personalization: Personalization based on contextual data from the journey — event fields (e.g., order number, item name, order progress) and journey properties (e.g., journey ID, errors). Available only when a journey has passed contextual data to the message. (product-specific)
- Journey Properties: Technical fields related to the journey for a given profile — such as journey ID or errors encountered — accessible under Contextual attributes > Journey Orchestration. (product-specific)
Guardrails:
- Contextual attributes are available in the personalization editor only if a journey has passed contextual data to the message.
- Test mode works only with test profiles; the profile identifier entered in the event configuration must correspond to an existing test profile.
Terminology:
- Canonical name: Context personalization (listed on the page as “Context”) — the three types are Profile, Offer decision, and Context
- Do not confuse: Profile personalization (based on a profile field) ≠ Context personalization (journey event and properties data, only available if a journey has passed contextual data to the message) ≠ Offer decision personalization (decision management variables)
FAQ:
- Q: What three types of personalization are combined in this use case? — Profile personalization (customer’s first name from a profile field), contextual data personalization (order number, item name, and order progress from the journey event), and offer decision personalization (a decision management offer inserted in the body).
- Q: Where do contextual attributes come from in the personalization editor? — Contextual attributes come from events placed before the Action activity in the journey, and from journey technical properties. They appear in the personalization editor under Contextual attributes > Journey Orchestration > Events (event fields) or Journey Properties (journey metadata).
- Q: What are the prerequisites for this use case? — An order event must be configured with order number, status, and item name fields, and a decision must exist in decision management.
- Q: How do I test the push notification in this use case? — Click the Test button in the journey, then click “Trigger an event” and enter the event values in the Event configuration window. Test mode only works with test profiles; the profile identifier must correspond to an existing test profile.