Next best path node
The Next best path node brings AI-driven split path decisioning directly into the journey canvas. Instead of configuring filter conditions on a split paths node, you describe your intent in natural language and let the system determine the most relevant path for each person.
In B2B buying, a profile may appear to be one type of buyer, but their behavior, firmographic data, and engagement context reveal a more nuanced story. The next best path node evaluates that context to make an intelligent routing decision, while letting you review, modify, or override any AI recommendation before activating the journey.
The AI evaluates each person against your defined path prompts using a combination of inputs:
- Engagement history – Email opens, link clicks, web page visits, and other behavioral signals from the current and prior journeys
- Real-time signals – High-intent events such as form fills and pricing page visits
- Profile attributes – Demographics, job title, persona, and firmographic data
- Account attributes – Firmographic and technographic data associated with the person’s account
When a person reaches the node, the system fetches profile context, applies constraints, and uses an LLM to select the best-fit path. Each decision is logged with a confidence score and natural-language reasoning for transparency and observability.
If no path is a strong match, or if the prompt references data not available for a profile, the person is routed to the default fallback path.
Add a next best path node add-next-best-path-node
-
Open the person journey and navigate to the journey map.
-
Click the plus ( + ) icon on a path and choose Next best path.
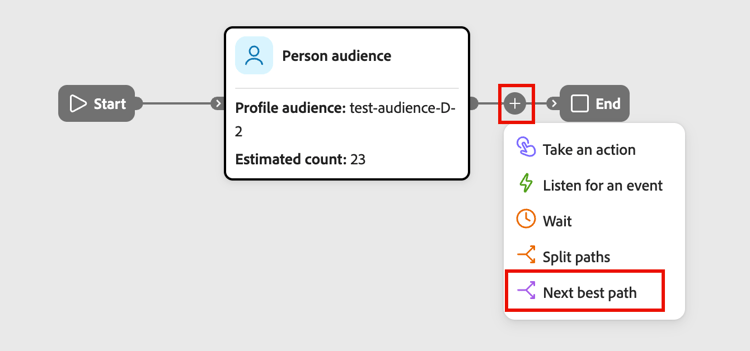
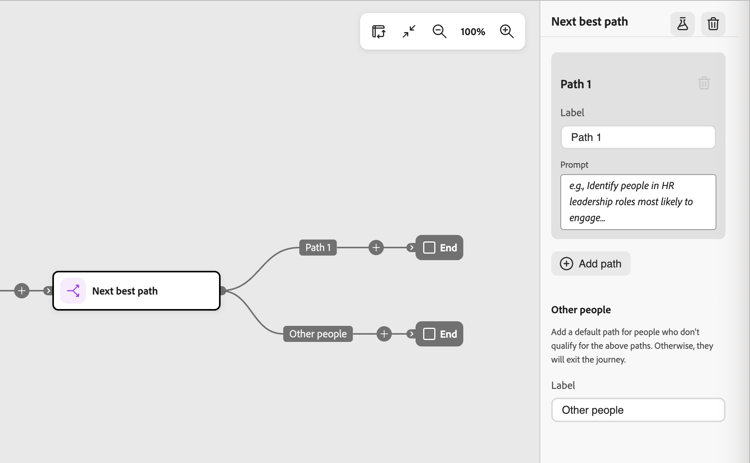
The node is added to the canvas and the AI split configuration panel is displayed on the right. It starts with one path and a default Other people path to route people who do not qualify for any of the defined paths.
Configure paths configure-paths
For each path, define a name and a natural language prompt that describes who should be routed there. Prompt input replaces the filter condition UI entirely; there are no attribute conditions to configure.
-
Click Add path for each additional path that you want to include for the node.
To remove a path, click the Delete (

-
For each path card in the right panel:
-
Enter a Label that reflects the audience or intent for that segment.
-
Enter a Prompt in natural language describing who belongs on this path. Focus on intent and outcome, not specific attribute values.
Example prompts for a three-path split:
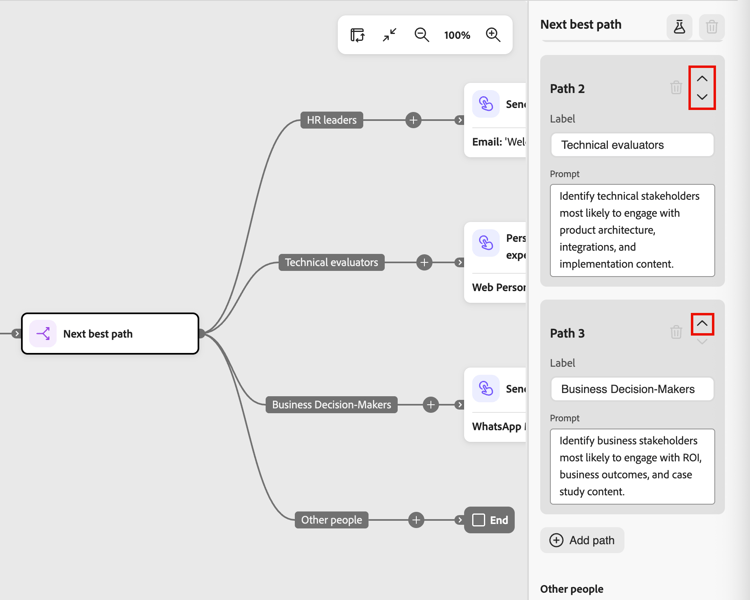
- Path 1 – HR Leaders: Identify people in HR leadership roles most likely to engage with talent management and employee experience content.
- Path 2 – Technical Evaluators: Identify technical stakeholders most likely to engage with product architecture, integrations, and implementation content.
- Path 3 – Business Decision-Makers: Identify business stakeholders most likely to engage with ROI, business outcomes, and case study content.
-
-
If needed, reorder paths to set the priority order for matching.
Path filtering is evaluated in top-down order. Each person proceeds along the first path that matches.
Click the up and down arrows at the top right of each path card to move it higher or lower in the list of paths.
-
Review the default path (last in the path list) and change the label if needed.
The default path is used when the AI cannot confidently assign a person to any defined path or when the relevant data is unavailable. When a prompt references data that does not exist in the dataset for a given profile, the system routes that profile to the default path and flags the data gap.
Human-in-the-loop controls human-in-the-loop
AI recommendations are non-binding. Before activating the journey, you can:
- Edit any path prompt to refine the routing logic.
- Add, remove, or reorder paths.
- Override AI suggestions with custom conditions as needed.
AI-driven path assignments do not take effect until you publish the journey.
Prompt examples by use case examples
The following examples show how to write effective path prompts across common B2B marketing use cases. Use them as starting points and adapt the language to match your journey context and audience data.
Active research and buying signals active-research
Churn and retention risk churn-retention
Education to evaluation gaps education-evaluation
Email engagement sequences email-engagement
Trial and conversion patterns trial-conversion
Multi-channel buyers multi-channel
Regional buying signals regional-buying
Behavioral timing signals behavioral-timing
Simulate decisioning before publishing simulate
Use simulation to test how the AI evaluates your prompts against a real audience before the journey goes live. It is available only while the journey is in Draft status and has no effect on any published journey. Use it to validate routing logic and build confidence in the AI recommendations.
Run a simulation run-simulation
-
Select the next best path node and click the Simulate (

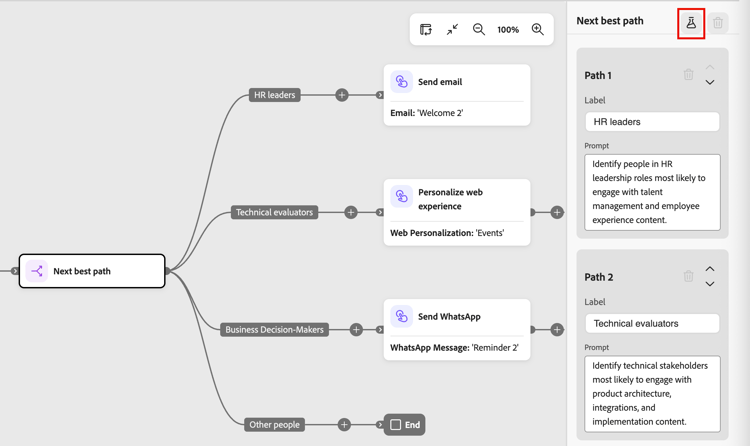
-
In the dialog, choose the audience to use for the simulation:
- Original person lists – Use the audience from the audience node. Specify a sample size when the full audience exceeds the simulation threshold.
- Dynamic and static lists – Use a static or dynamic people list.
- Test records – Use AI-suggested test profiles.
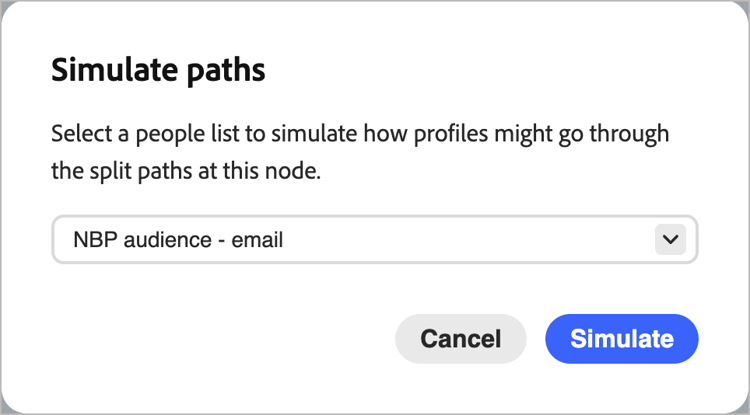
note NOTE If the selected audience exceeds the simulation threshold, the system runs the simulation on a 100-profile sample. An indicator in the UI shows that results are sample-based. If the selected audience is not yet materialized, simulation is blocked. An inline warning directs you to materialize the audience first. -
Click Simulate.
Review simulation results review-simulation-results
After the simulation runs, the right panel displays how profiles were distributed across each path and the AI reasoning behind those assignments:
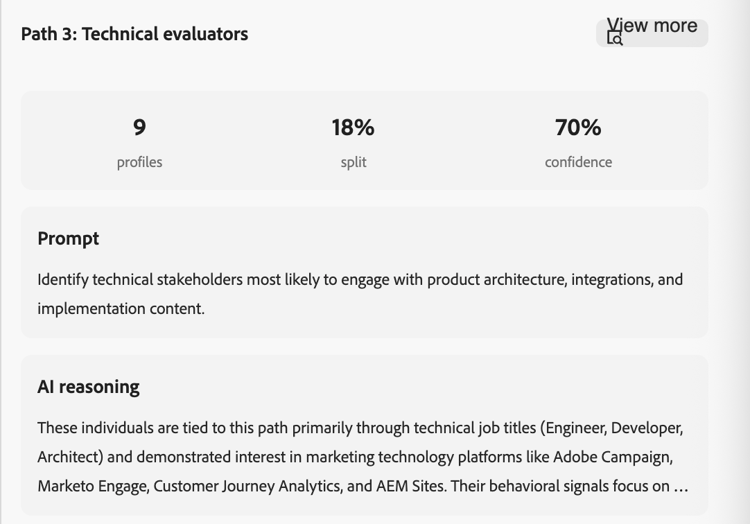
Use the results to refine prompts and confirm that the routing reflects your intended outcome. You can modify path prompts and re-run the simulation as many times as needed before publishing.
Publish and monitor the journey publish-and-monitor
After validating the simulation results:
-
Connect the people audience to the journey entry node.
After the journey is live, the next best path node runs at execution time. As each person reaches the node, the AI evaluates them in real time using the latest signals and routes them to the most relevant path.
For a published journey, open the journey map and select the next best path node to view the Live results section in the right panel. Live results show:
- The percentage distribution of profiles across each path
- The confidence score for each path assignment
- Path-level and profile-level reasoning, with expandable detail for individual profiles
Live results are also available in the Journey Console and through the Journey Observability skill in the AI Hub.