Add an email to your journey

Use Adobe Journey Optimizer B2B Edition to send email messages to your customers through account journeys. You can choose to create, personalize, and preview messages in the email design space. After emails are live in journeys, monitor send, delivery, and engagement in the Email performance report.

NOTE
If you are sending an email for the first time, make sure that the email channel is configured. To learn more, see Protocols for tracking and email delivery.
For details about how email consent preferences are evaluated at delivery time, see Consent preferences.

Add a send email action node send-email-node

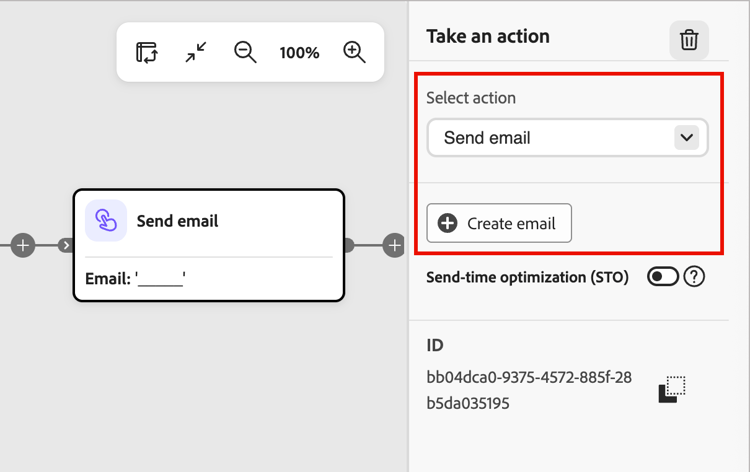
You can set up email deliveries in a journey when you add a Take an action node and do the following:

  1. (Account journeys only) For the Action on target, choose People.

  2. For the action, choose Send email.

  3. Click Create email.

    Take an action - send an email {width="500"}

  4. In the Create new email dialog, choose to create a new email content asset or duplicate an existing email content asset.

    • Choose the New email option when you want to create an email using an empty canvas or an email template.
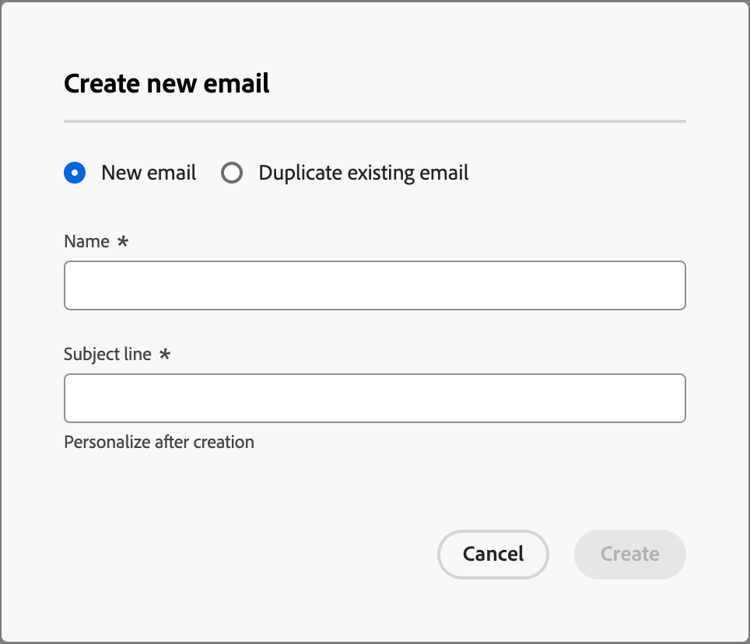
      Create new email dialog - new email {width="400"}

      • Enter a unique Name for the email and a Subject line.

      • Click Create.

    • Choose the Duplicate existing email option when you want to create an email using an existing email from the current journey or from another journey.

      You can make changes to the duplicated email according to your objective for the journey node.

      • For Existing email to duplicate, click the Selection icon ( Selection icon ) and select the email that you want to duplicate and use for the journey node.

        You can filter the list of emails by entering a text string in the search field to match the email name. Select the checkbox for the email that you want to duplicate and click Select.
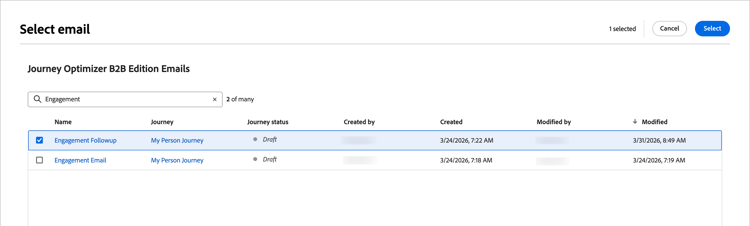
        Select email {width="600" modal="regular"}

      • Enter a unique Name for the email and a Subject line.
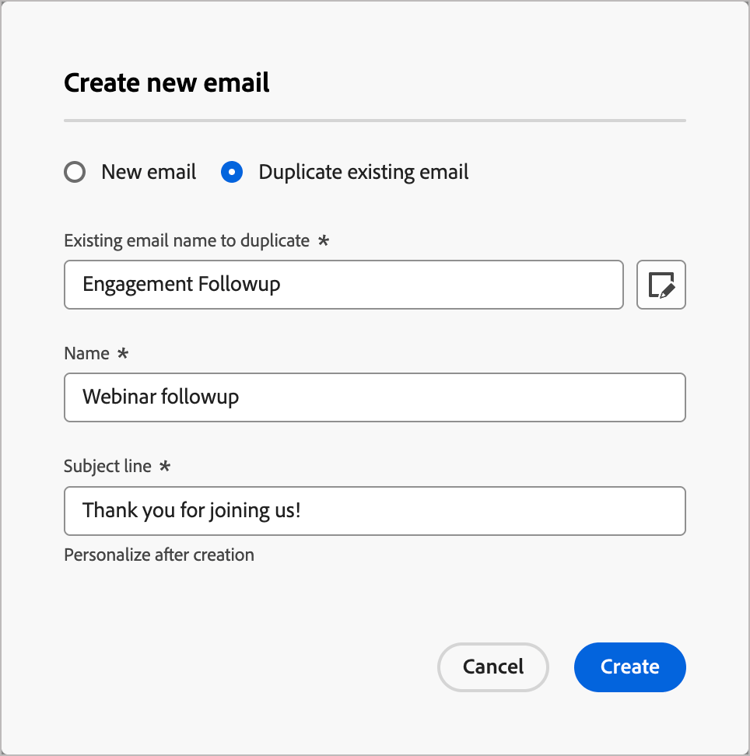
        Create new email dialog - duplicate existing email {width="400"}

      • Click Create.

  5. Click Edit email to define the email settings and content.
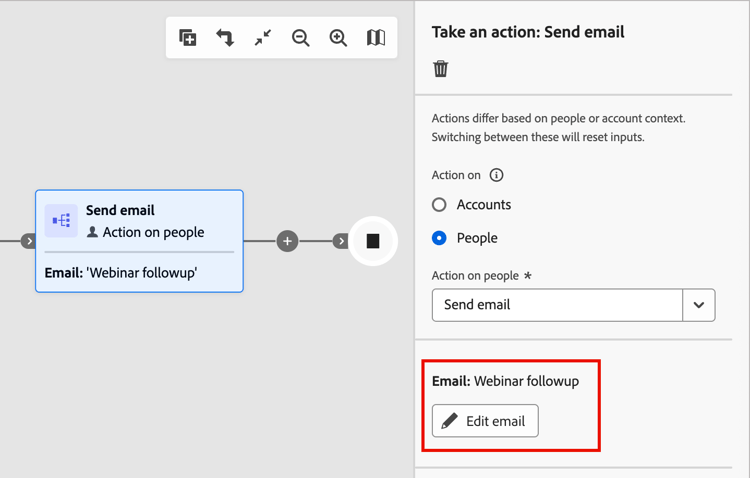
    Send email journey node - edit email {width="500"}

Define the email settings email-settings

With the Details tab selected in the Summary panel on the right, scroll to the bottom to view and define the email settings.
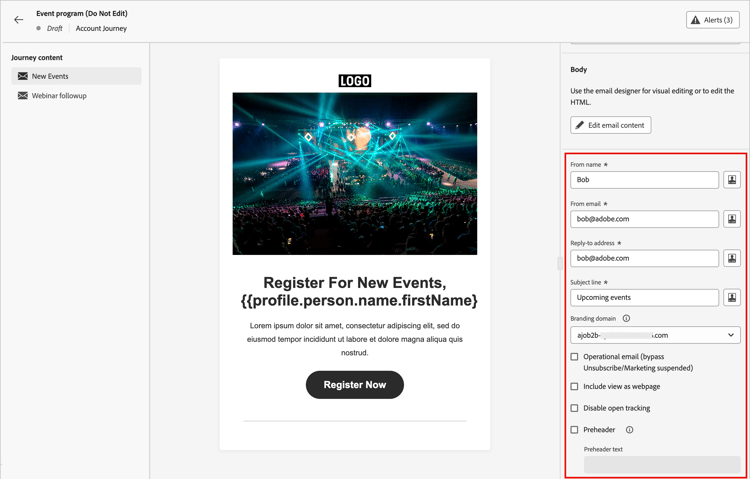
Email settings {width="700" modal="regular"}

Option
Description
From name
The sender name used in the email header. Enter the name of the sender as you want it to appear to the recipient. Click the Personalize icon ( Personalize icon ) to use a personalization token in the field.
From email
The sender address used in the email header. The default value is populated from the email channel delivery settings. Click the Personalize icon ( Personalize icon ) to use a personalization token in the field.
Reply-to address
The sender address used in the email header. The default value is populated from the email channel delivery settings (From Label). Enter the email address that you want to populate if the recipient uses the reply function (it can be different or the same as the sender address). Click the Personalize icon ( Personalize icon ) to use a personalization token in the field.
Subject line
The text displayed in the subject field for the email. The default value is populated from the text that you entered in the Create new email dialog. You can change the text if needed. Click the Personalize icon ( Personalize icon ) to use a personalization token in the field.
Branding domain
If you have more than one branding domain defined in the system, select the branding domain to use for sending the email. Use a specific branding domain to send emails that appear to be coming from your brand instead of the company as a whole. It builds trust with the brand, personalizes the email experience, and increases open and response rates.
Operational email
Select the checkbox if you want to designate the email as operational. Operational emails are excluded from opt-out/unsubscribe lists, and from communication limits. Select this option only when the recipient cannot consider the email message to be an unsolicited commercial message (SPAM).
Include view as web page
Select the checkbox to include a link to a web page that is generated from the email message content. Email messages have more limited capabilities than web pages, so it is useful for JavaScript, extended CSS, and forms. The text used to generate the link is configured in the email channel delivery settings (View as web page HTML and View as web page text).
Disable open tracking
Select the checkbox when you do not want to track email open activity. With the function disabled, email open activity counts are incremented only when a unique person opens the email. You can manage email content link tracking when you design the email body content.
Preheader
Select the checkbox to include a preheader. A preheader is the short summary text that is displayed after the subject line in some email clients. It usually provides a short summary of the email, and is typically a single sentence. Enter the summary text in the field.

Check alerts check-alerts

As you define your email settings and content, alerts are displayed in the interface (top-right of the page) when key settings are missing. If you do not see this button, there are no detected issues.
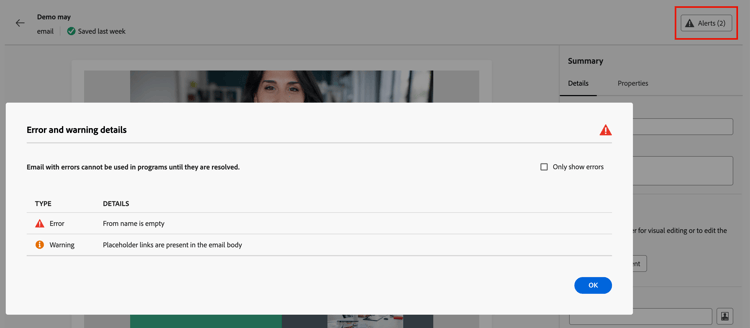
Email alerts {width="600" modal="regular"}

There are two types of alerts:

  • Warnings that refer to recommendations and best practices, such as:

    • The opt-out link is not present in the email body: Adding an unsubscribe link to your email body is a best practice.

      note
      NOTE
      Marketing-style email messages must include an opt-out link, which is not required for transactional messages.
    • Text version of HTML is empty: Define a text version of your email body, which is used when HTML content cannot be displayed.

    • Empty link is present in email body: Check that all the links in your email are correct.

    • Email size has exceeded the limit of 100KB: For optimal delivery, make sure that the size of your email does not exceed 100KB.

  • Errors that prevent you from testing or activating the journey/campaign as long as they are not resolved, such as:

    • From name is empty: The email From field (required) is not defined.

    • The subject line is missing: The email subject line (required) is not defined.

    • The email version of the message is empty: The email content is not defined.

recommendation-more-help
journey-optimizer-b2b-help-user