Audience Builder UI Guide
Audience Builder provides a rich workspace that lets you interact with Profile data elements. The workspace provides intuitive controls for building and editing your audience’s rules.
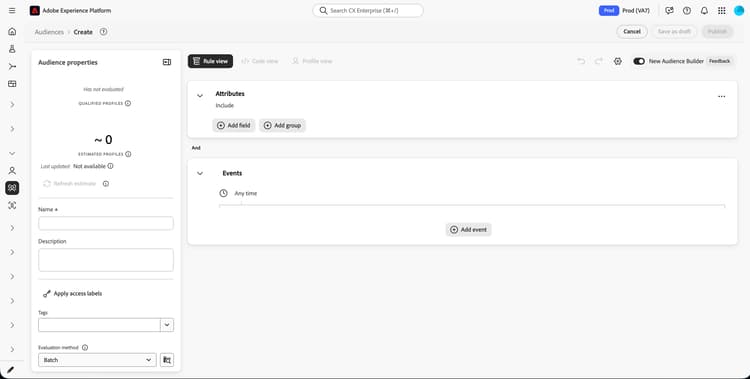
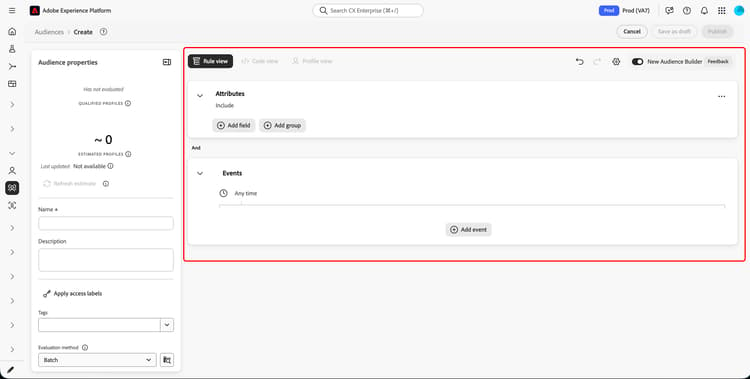
The Audience Builder UI is comprised of two sections: the Audience Properties panel and the Audience Builder canvas.
Audience properties audience-properties
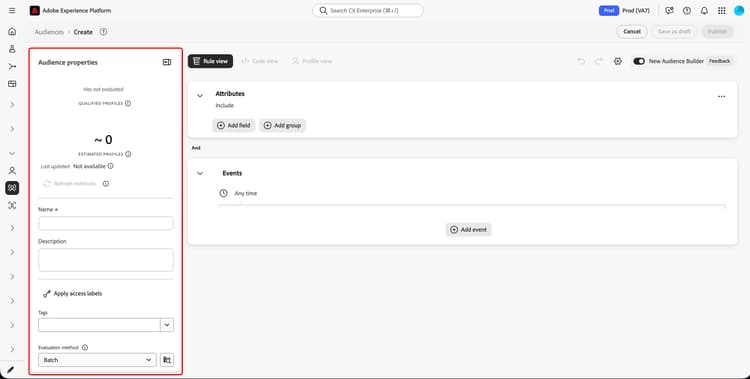
The Audience Properties panel on the left-hand side of the workspace shows you estimates information for your audience and lets you provide details about your audience, including name, description, and evaluation method.
You can select the

Estimates estimates
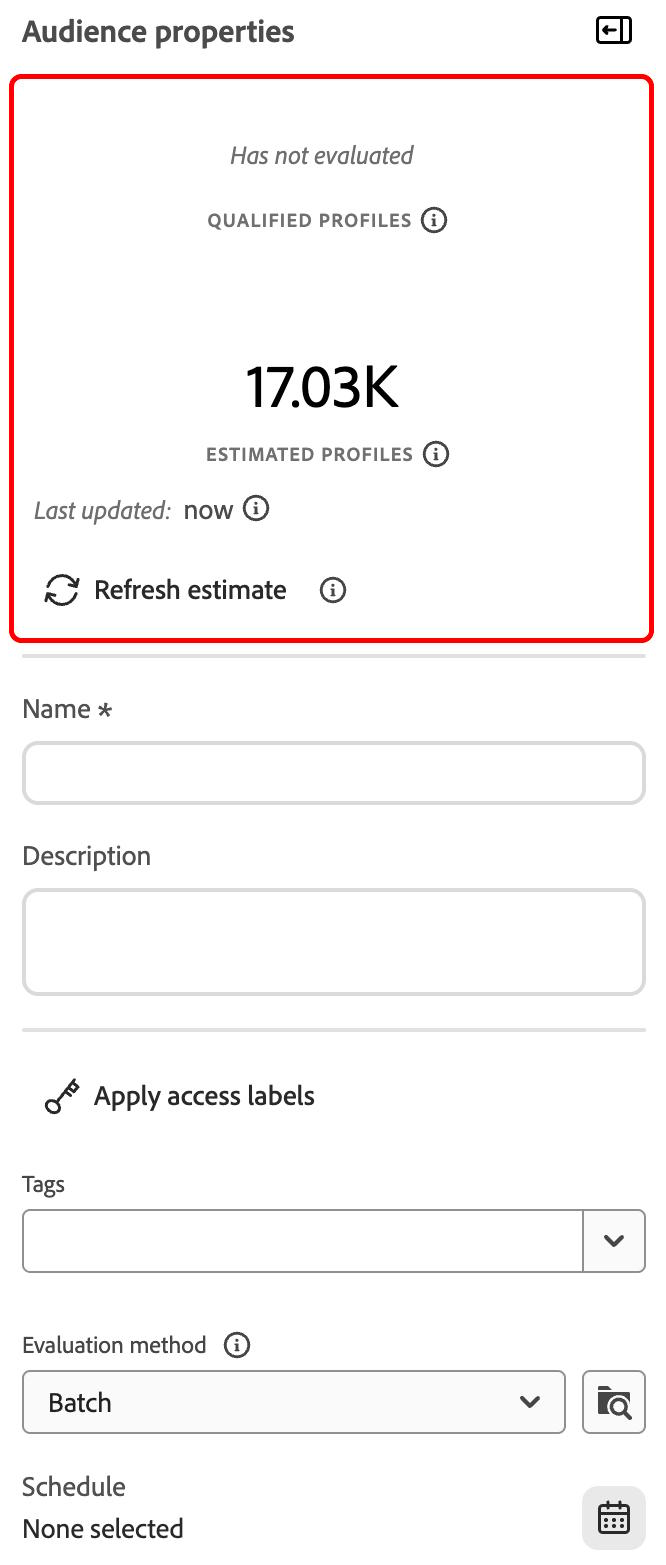
The audience estimates section shows both the qualified and estimated profiles.
Qualified Profiles indicates the actual number of profiles that match the segment definition’s rules. This number updates every 24 hours, after the segment evaluation job has ran.
The timestamp for qualified profiles indicates the most recent batch segment evaluation job and is not displayed for segment definitions evaluated using streaming or edge segmentation. If you edit the segment definition, the number of qualified profiles will remain the same until the next segment evaluation job is run.
Estimated Profiles indicates an approximate range of profiles, based off of the sample job. This means the sample data is projected on the larger profile set, resulting in an estimated number that may differ from the actual number of qualified profiles. The estimated profile sample has a 95% confidence interval.
When you make changes to the audience’s rules, you can select the Refresh estimate button to see an updated count of estimated profiles. However, this number is still based off of the previous sample job. The sample job is updated when there is a greater than 3% change in customer data or the last sample job is older than three days.
Selecting the information bubble gives the date and time the last sample job was run.
Properties properties
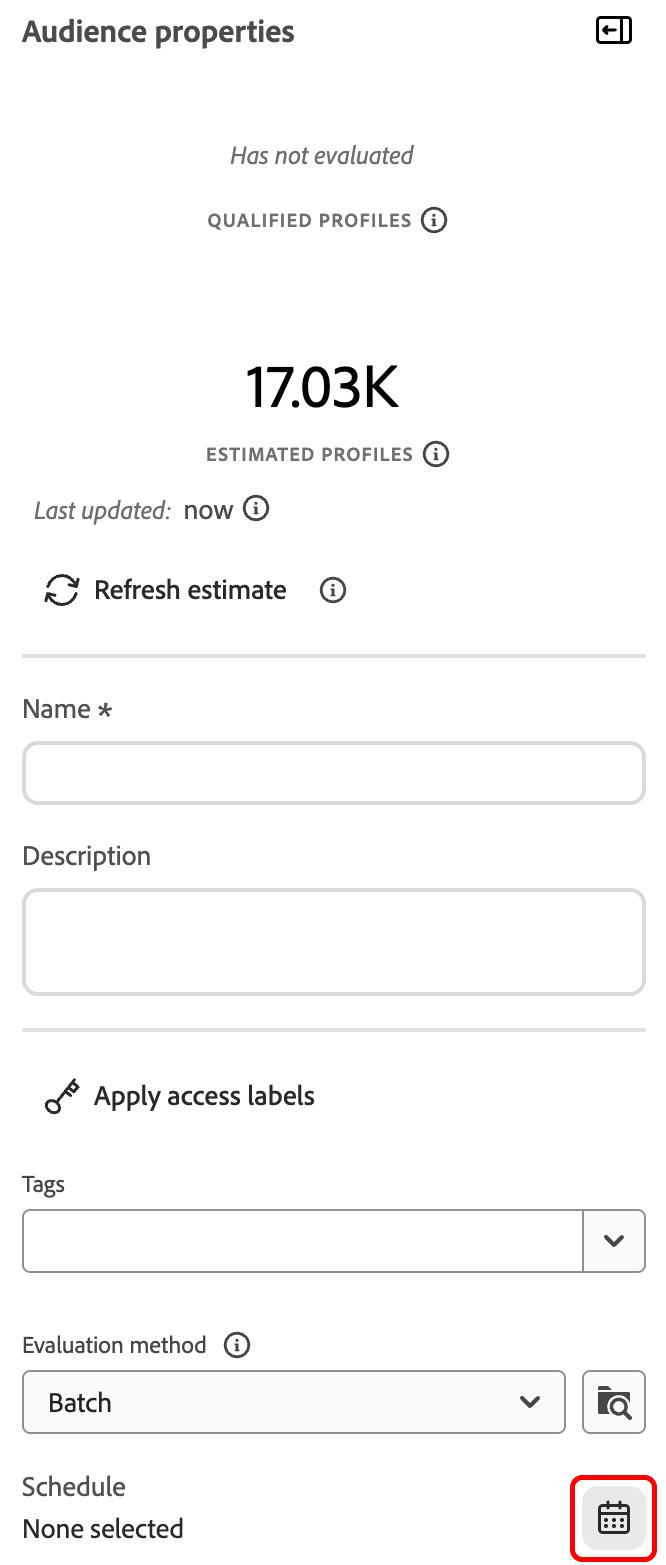
You can also specify important information about your audience within the Audience Properties panel. This includes your audience’s name, description, access labels, tags, evaluation type, and schedule.
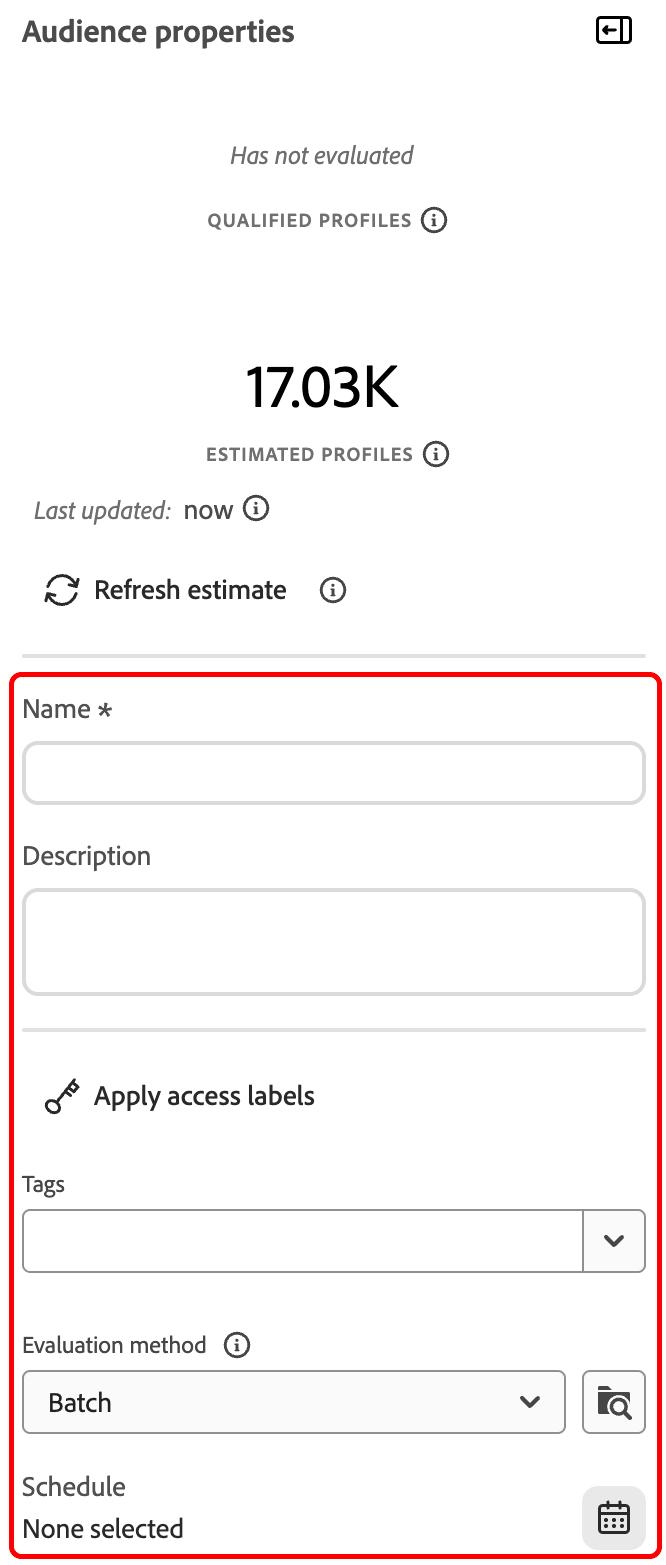
To apply access labels to your audience, select Apply access labels.
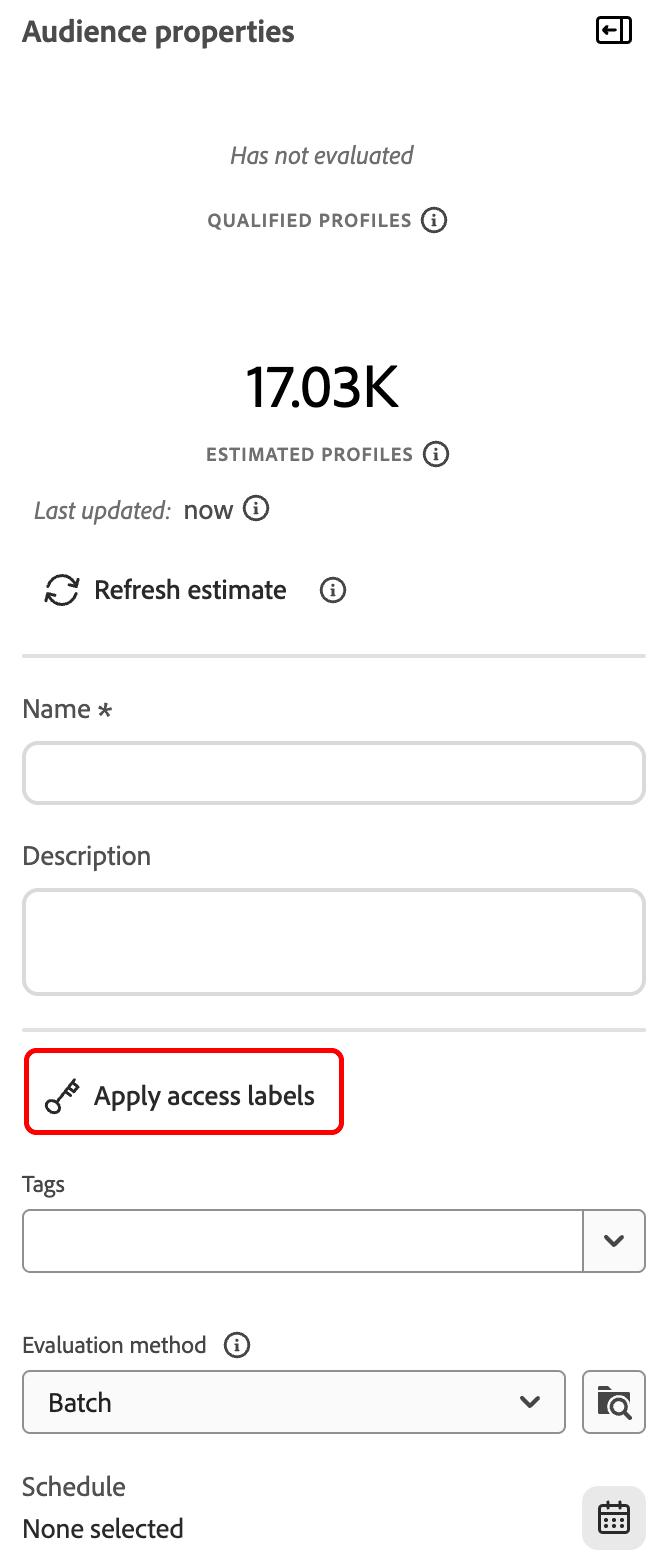
The Apply access and data governance labels popover appears. This popover displays a list of available labels for your audience. For more detailed information about applying access and data governance labels, read the permissions guide. To learn more about the available access and data governance labels, read the data usage labels glossary.
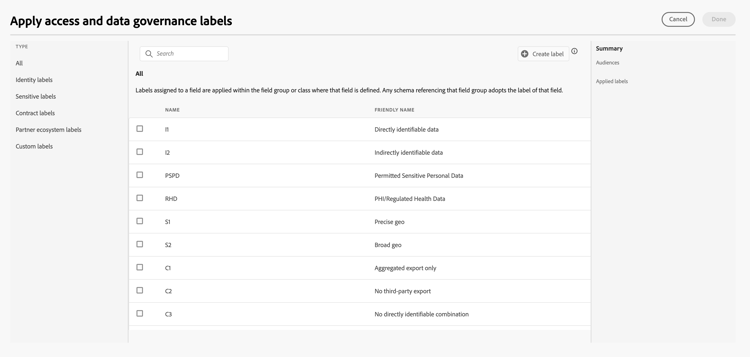
To apply tags to your audience, select the dropdown. A list of the available tags for your audience appears. You can select as many tags as you want to apply to the audience.
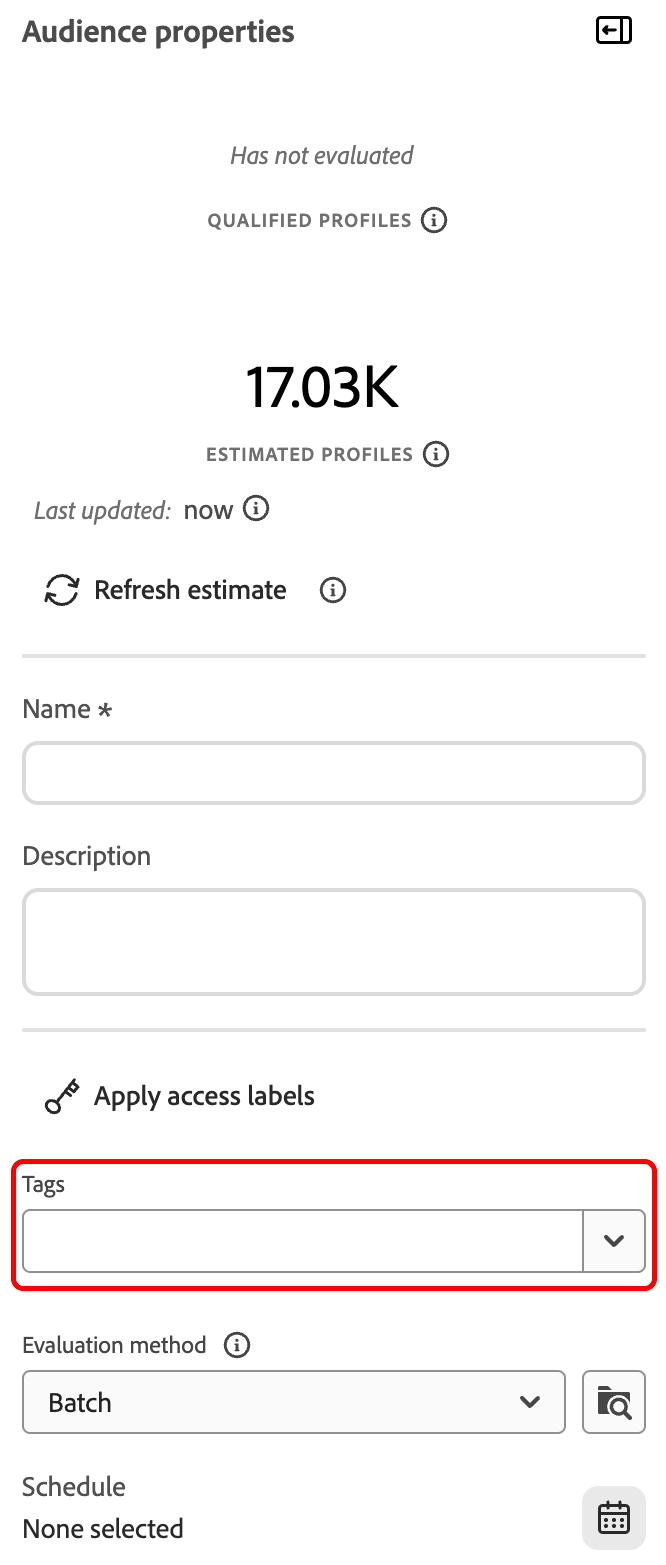
To choose your evaluation method, select the the browse icon

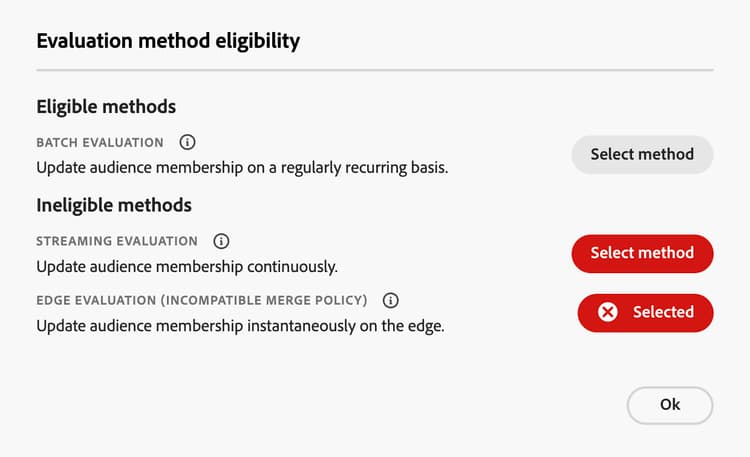
The Evaluation method eligibility popover appears. This popover displays the available evaluation methods, which are batch, streaming, and edge. The popover shows which evaluation methods are eligible and ineligible.
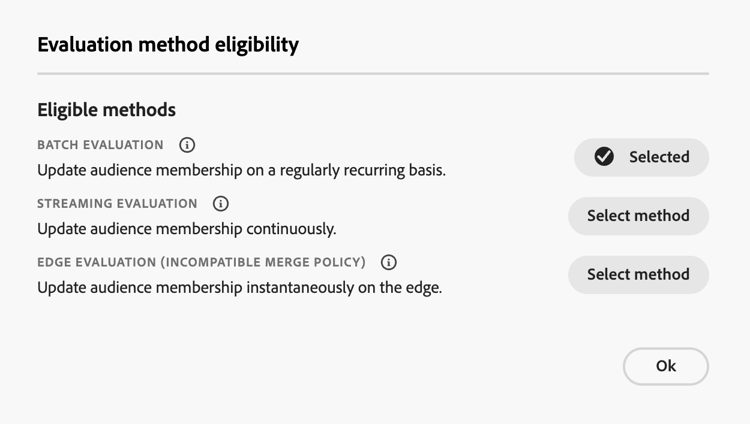
If you already know which evaluation method you want to use, you can select the desired evaluation method either using the dropdown list.
Once you’ve selected an evaluation method for your audience, you can still change the evaluation method of the audience. However, if you change the evaluation method from Edge or Streaming to Batch, you will not be able to change it back to Edge or Streaming. The change to the evaluation method will only take effect once you select Save in the popover. Cancelling the dialog will maintain the original evaluation method.
If you select an invalid evaluation method, you will be prompted to either change your audience’s rules or change the evaluation method.
More information about the different audience evaluation methods can be found in the segmentation overview.
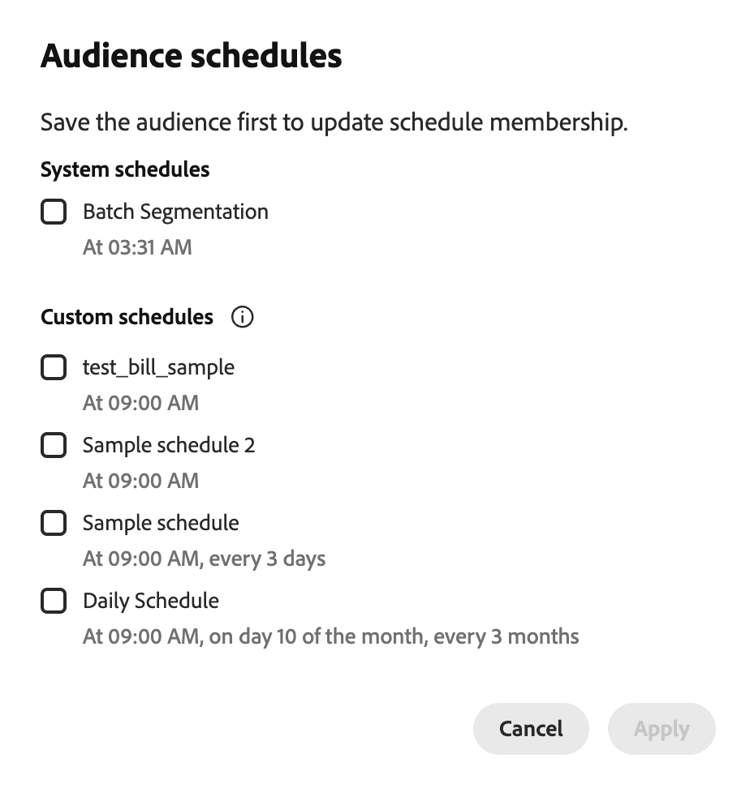
If your audience is evaluated using batch evaluation, you can choose a schedule for the audience to be evaluated with. Select the

The Audience schedules popover appears. On this popover, you can select the schedules you want the audience to be evaluated using.
Audience canvas audience-canvas
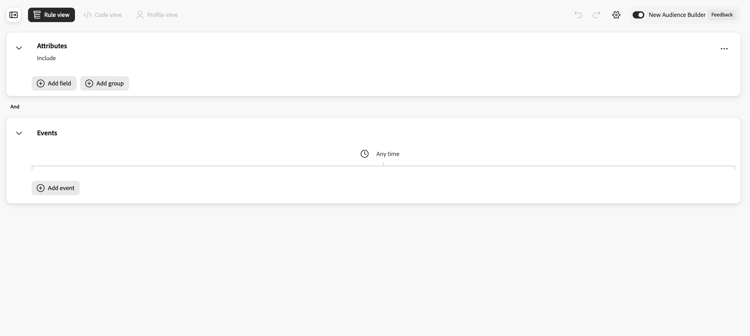
The Audience Builder canvas provides three different types of views: Rule view, Code view, and Profile view.
- Rule view: Lets you create the rules to define your audience.
- Code view: Lets you view the PQL that defines your audience. This view is only visible once you have defined a rule for your audience.
- Profile view: Lets you view a sample of profiles that would qualify for you audience. This view is only visible once an estimate job has run.
Rule view rule-view
In the rule view canvas, you can add either attributes or events to the rule building canvas. Attributes let you add either Profile attributes that belong to the XDM Individual Profile class or other previously created audiences, while events let you add actions or events that take place using XDM ExperienceEvent data elements.
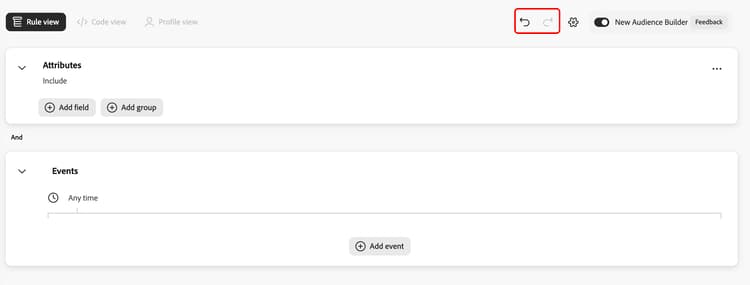
Within the rule view, you can use the undo and redo buttons to revert changes you didn’t want to make or re-apply changes you wanted to make.
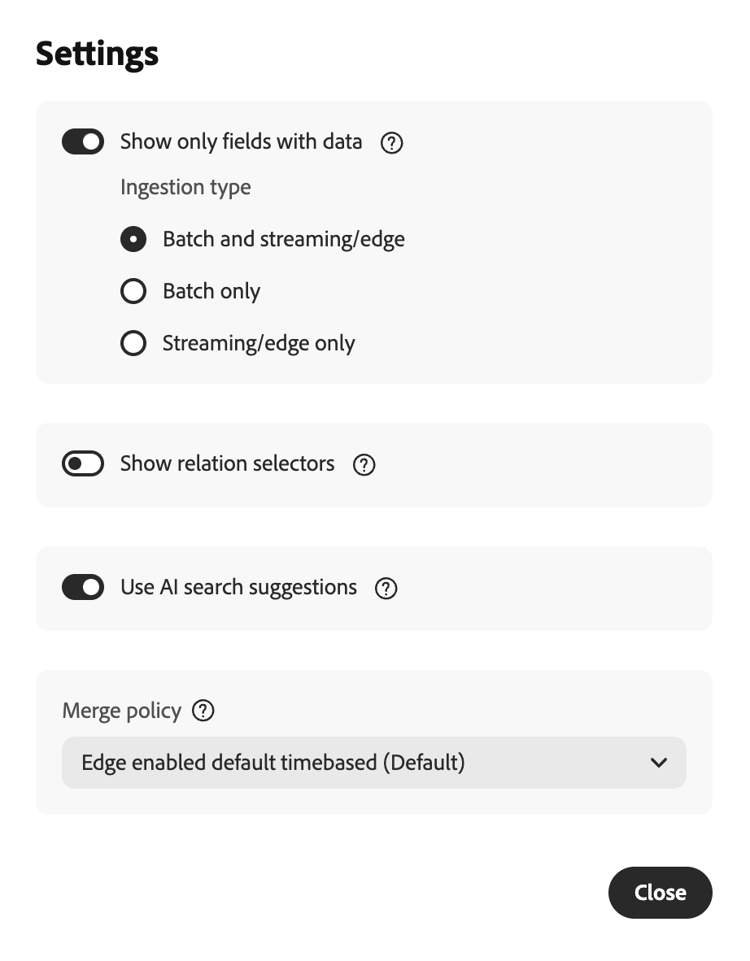
You can also adjust the settings of the visible fields by selecting

The Show fields only with data setting determines if you see all fields, or only fields that contain data.
For Data sources, you can filter to show attributes that come from the specified ingestion types. Supported values include Batch and streaming/edge, Batch only, and Streaming/edge only.
The Show relation selectors setting determines if you use the standard relations for your organization or if the relation selectors are shown.
The Use AI search suggestions setting determines if the AI will be used to suggest relevant fields and audiences based on your query.
For Merge policy, you can choose which merge policy the fields belong to.
Attributes attributes
The Attributes section lets you browse Profile attributes belonging to the XDM Individual Profile class.
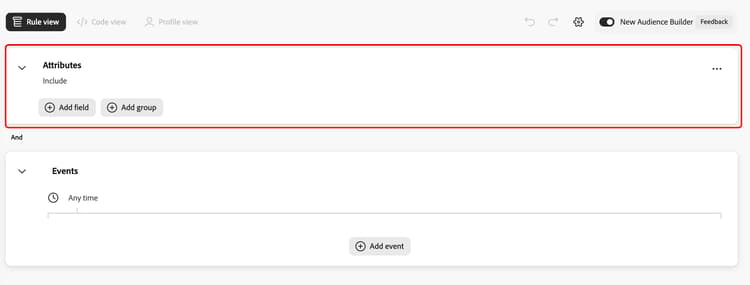
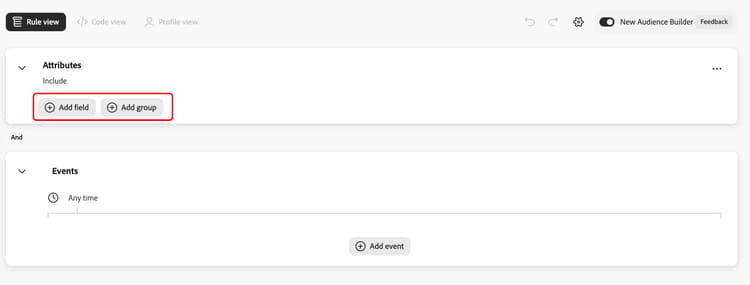
You can select Add field to add an attribute or audience to the rule building canvas or you can select Add group to add a container to the canvas. More information about groups can be found in the Groups section.
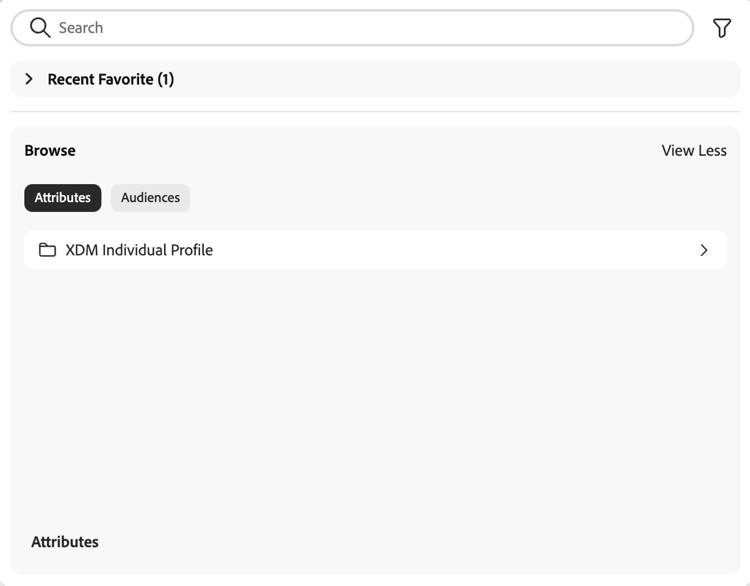
If you select Add field, the Discovery Panel appears. This panel lets you search for the field you want to add, and will automatically search as you type.
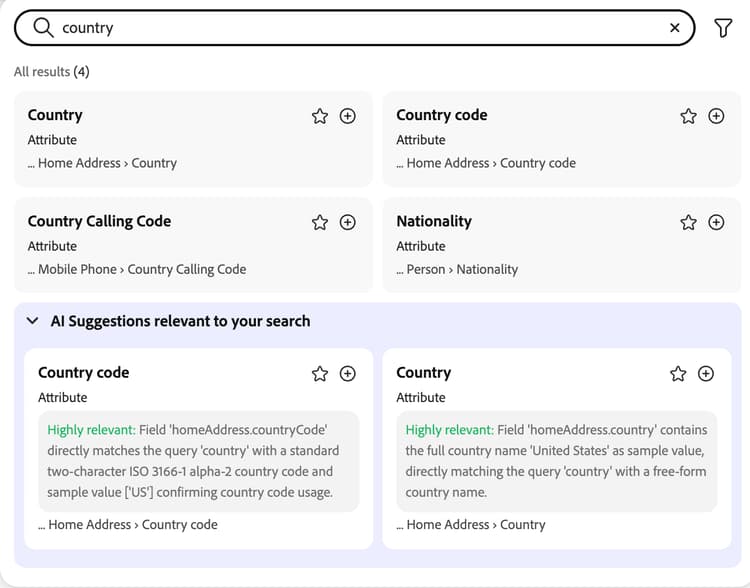
If you have Use AI search suggestions enabled, the Discovery Panel will intelligently display AI-powered suggestions based on the searched field.
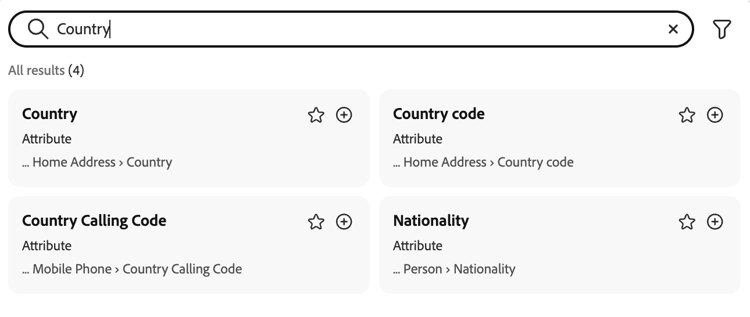
If you do not have Use AI search suggestions enabled, the Discovery Panel will display fields based off of the searched criterion.
You can select

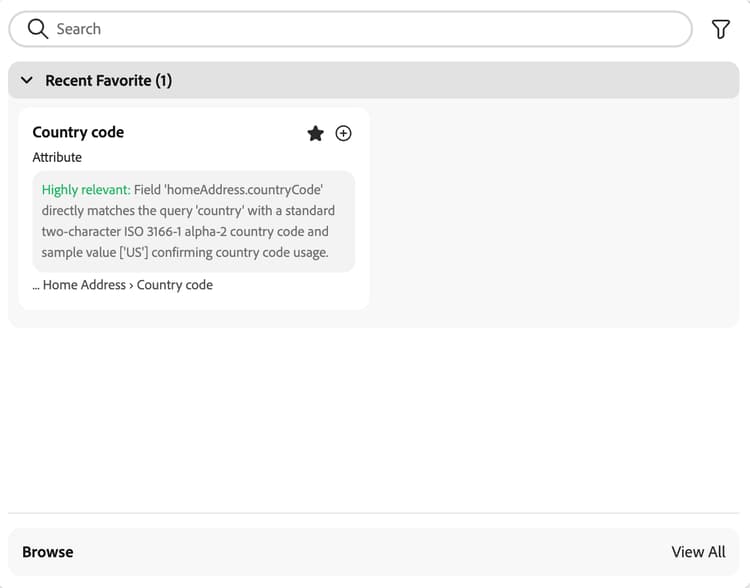
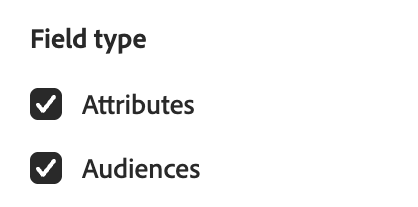
You can select

For the Field types, you can show Attributes or Audiences.
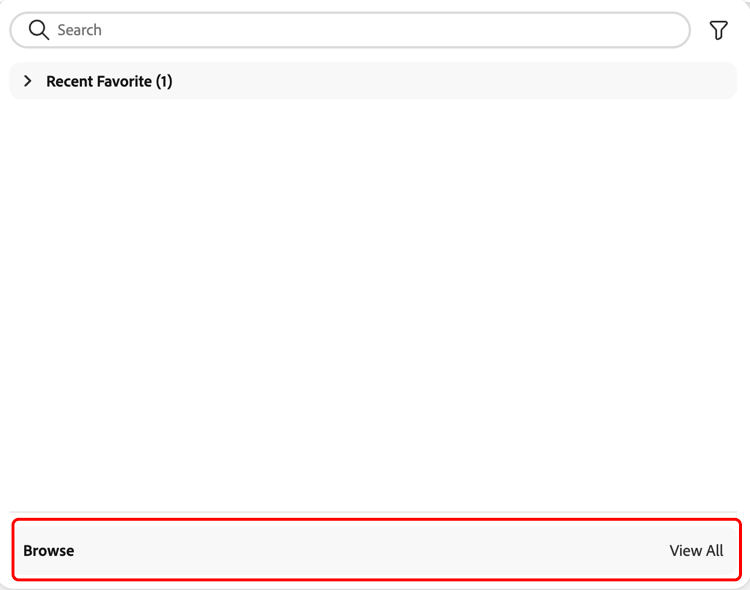
Alternatively, you can view all the available fields for your audience by selecting View All in the Browse area.
In the Browse area, you can select between Attributes or Audiences.
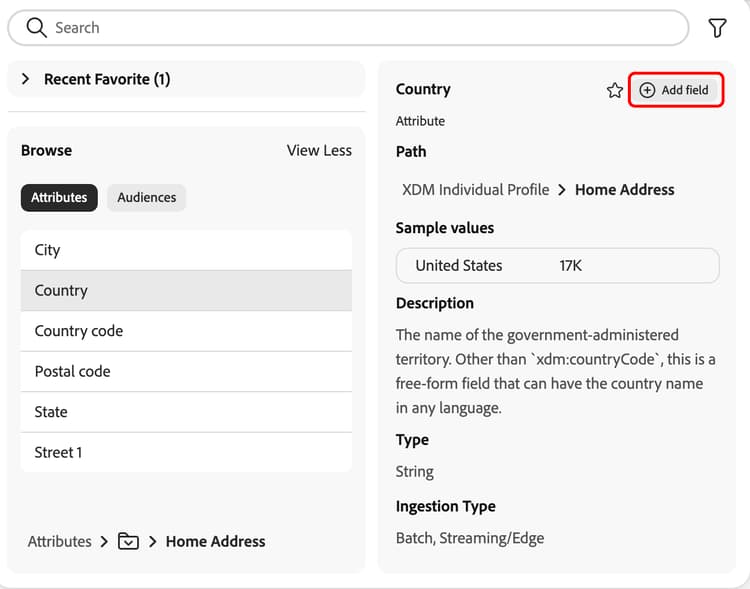
If you select Attributes, a full list of the available XDM Individual Profile attributes appears. Additionally, you can see custom added attributes that belong to your sandbox.
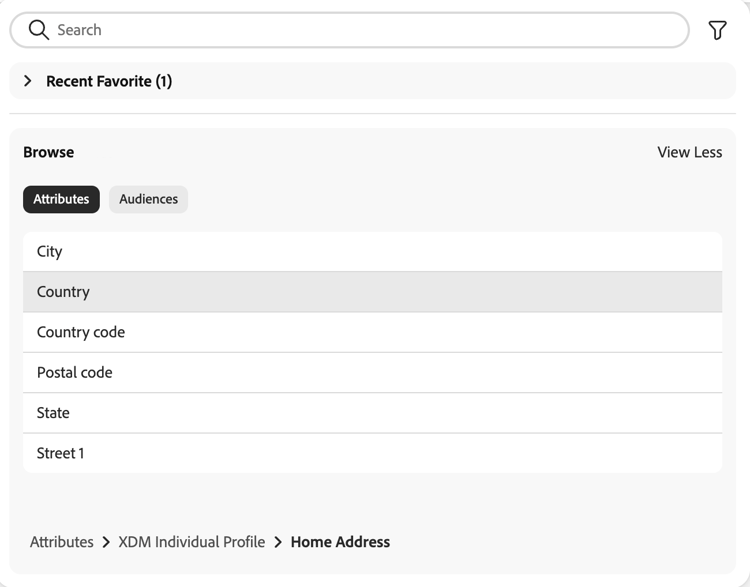
To add an attribute to the rule-building canvas, select the name of the attribute you want to add. You may need to navigate through the folder structure of the XDM schema in order to find the attribute.
After selecting the attribute, details of the attribute appear. This includes information such as the path of the attribute, sample values, description, type, and ingestion type. You can select the star icon to favorite the attribute or Add field to add the attribute to your audience’s rules.

| note |
|---|
| NOTE |
| The samples values are only displayed if the field does not contain too many different values and if those field’s values are commonly repeated. Additionally, this summary data is updated on a daily basis. |
If you select Audiences, a full list of previously created audiences for your sandbox and merge policy appears.
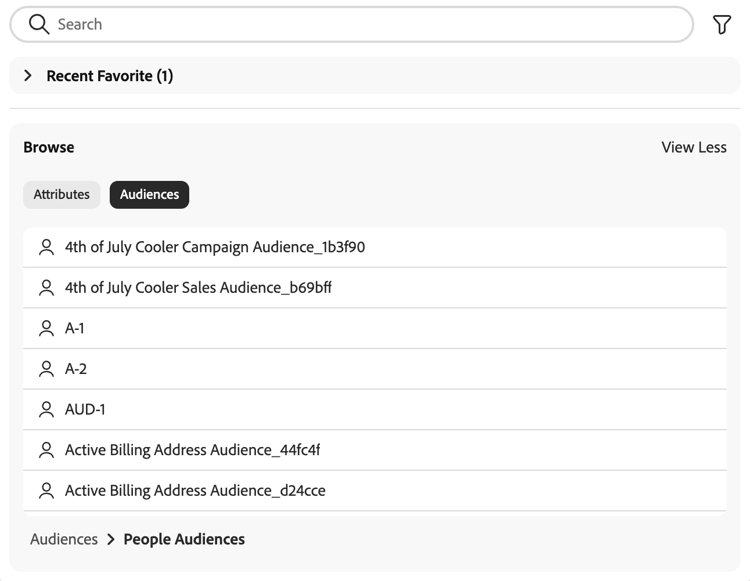
To add an audience to the rule-building canvas, select the name of the audience you want to add.
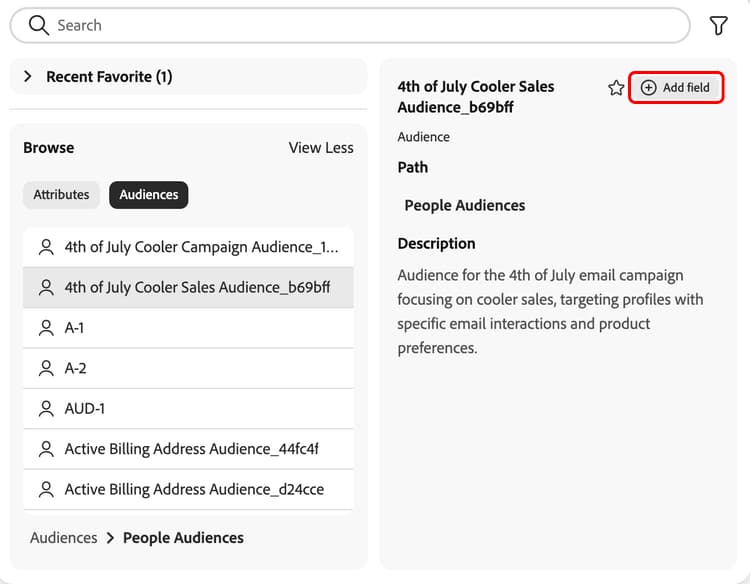
After selecting the audience, details of the audience appear. This includes the name and description of the audience. You can select the the star icon to favorite the audience or Add field to add the audience your audience’s rules.
After adding your attribute, you can select


You can use the following condition types for your attributes:
| table 0-row-2 1-row-2 2-row-2 3-row-2 4-row-2 | |
|---|---|
| Condition type | Description |
| Compare to input | Compares the attribute value to the specified input value. This is the default option when choosing an attribute. |
| Compare to another attribute | Compares the attribute value to the value of another attribute. You can choose the attribute you want to compare using the Discovery Panel. |
| Exists | Checks to see if the attribute exists. This is equivalent to seeing if the attribute has a value. |
| Does not exist | Checks to see if the attribute does not exist. This is equivalent to seeing if the attribute doesn’t have a value. |
If you select Compare to input, you can choose one of the additional options:
- Allow multiple inputs
- Case sensitive
If you select Allow multiple inputs, the Multiple inputs popover is displayed. On this popover, you can add the values to compare the attribute to.
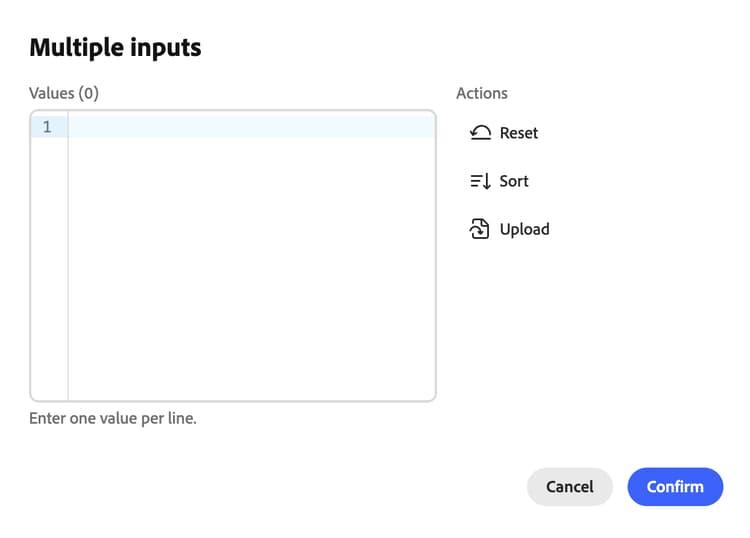
You can either add the values on a line-by-line basis in the Values box, or choose the values from the Suggested values section.
The popover also provides the following available actions. If you select


Alternatively, you can select


If you select Case sensitive, the attribute’s value must match the exact casing of specified input value.
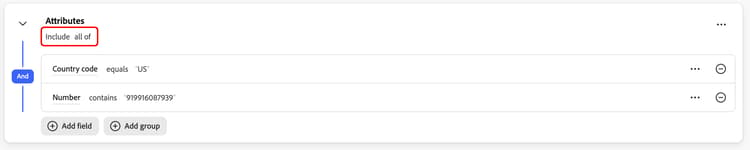
You can add additional attributes to the audience by selecting Add field. If you add an additional attribute, you can choose if the audience requires all of the added attributes or if the audience requires one of the added attributes.
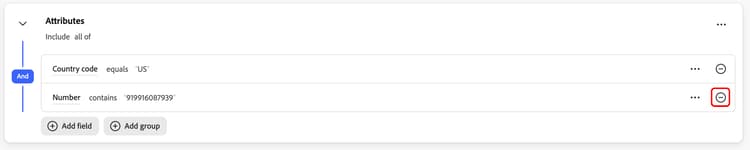
If you want to remove an attribute you’ve added, select

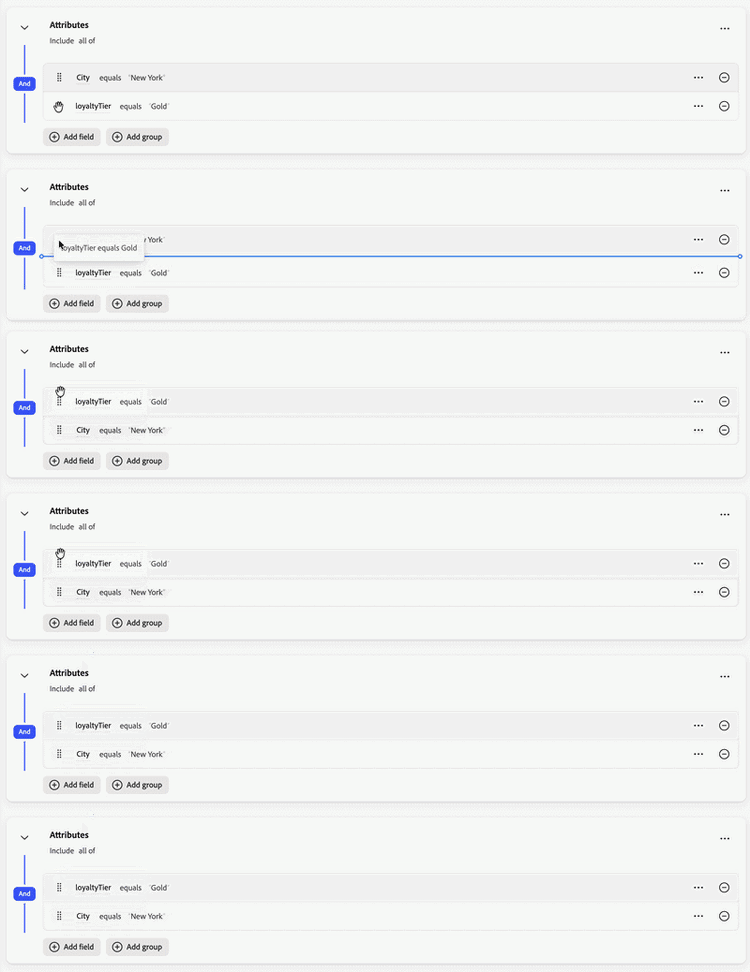
Additionally, you can move an attribute around by selecting the

Computed attributes computed-attributes
Computed attributes are fields that are calculated from other attributes using aggregations or formulas. You can use computed attributes if you need aggregated data such as sums, counts, or averages across multiple events or if you are building frequently-used audiences that require complex calculations.
For more information on computed attributes, including how to create them, what functions you can use within them, and how to manage them, read the computed attributes overview.
Events events
The Events section lets you add ExperienceEvents to your audience’s rules.
Select Add event to add an ExperienceEvent that you can add to your audience.
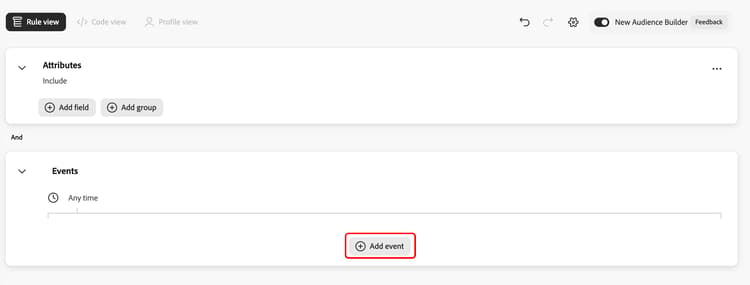
The Discovery Panel appears. This panel displays both Events and Event types.
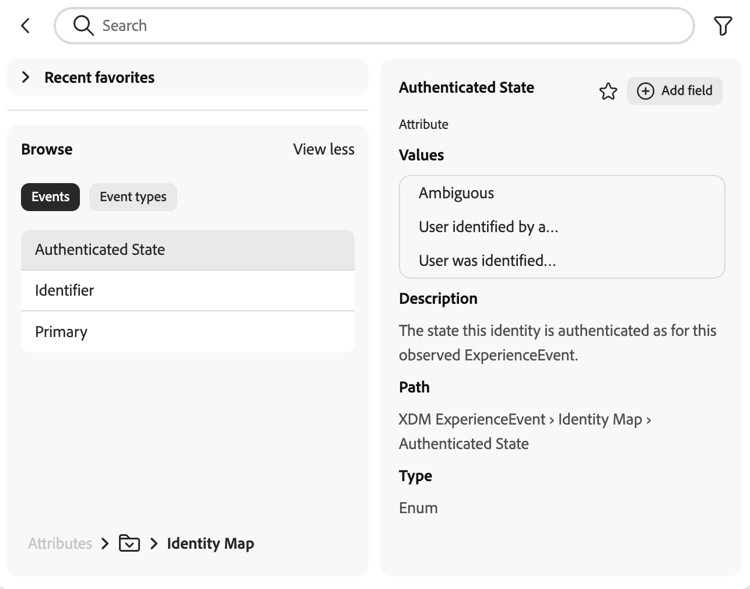
If you select Events, you can choose events that belong to your organization. If you select Event types, you can choose from a collection of commonly used events in Experience Platform.
After adding an event to your canvas, you can add additional events to the timeline. These events can be added before, after, above, or below the already selected event.
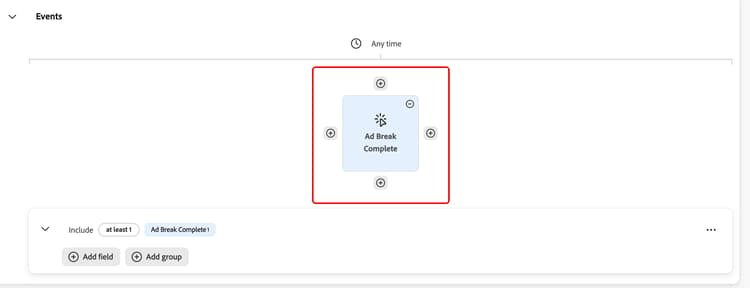
If you add an event before, the event must take place before the initial event. If you add an event after, the event must take place after the initial event.
You can add a time constraint at a canvas-level or event-level. Time constraints let you set specified temporal limitations for your events. For more information, read the time constraints section.
You can edit settings related to the event by selecting the event, followed by the bubble that contains “Include” that appears.
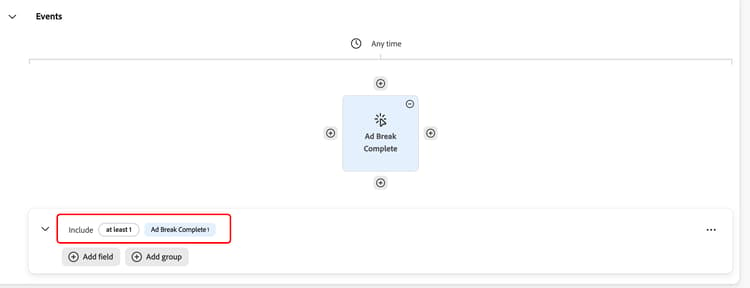
Once you’ve selected the bubble, you can choose if the event should be or should not be included as well as modify the count function. Count functions are used to look for the specified event and count the number of times they’re done.
You can select
If you select Remove event type, you remove the event from the audience.
If you select Aggregate, you can add an aggregation function to the event. An aggregation is a calculation on a group of XDM attributes whose data type is a number (either a double or an integer). The four supported aggregation functions are count, sum, average, min, and max.
Groups groups
You can add groups of either attributes or events within Audience Builder. Groups let you control the order of execution through the use of nested queries.
When you add a group, it automatically appears as a child of the the first group. You can adjust the hierarchy by dragging and moving the rules within the container.
By default, the group will include all the attributes, events, or audiences within the group. You can change this by selecting the dropdown at the top of the group.
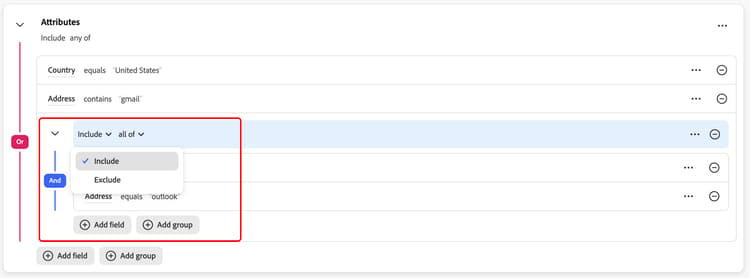
When you select the dropdowns on the top of the group, you are presented with the following options:
You can also select additional options for the group by selecting the ellipses icon. Available options include Add group, Delete group, and Name group.
If you select Add group, you add another group as a child of the currently selected group. If you select Delete group, the currently selected group will be removed. If you select Name group, you can give a name to the currently selected group.
Time constraints time-constraints
Time constraints let you apply time restrictions on time-based attributes, events, and the sequence between the events.
The list of available time constraints are as follows:
| note |
|---|
| NOTE |
| All time constraints are based off of UTC. |
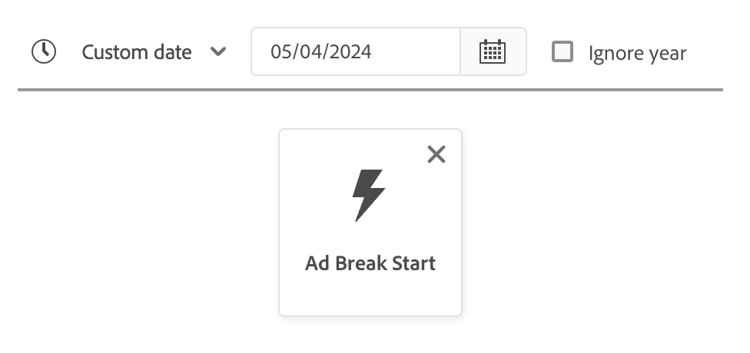
| Additionally, if the Ignore year checkbox is enabled, the year will not be compared as part of the segment definition evaluation. |
| table 0-row-4 1-row-4 2-row-4 3-row-4 4-row-4 5-row-4 6-row-4 7-row-4 8-row-4 9-row-4 10-row-4 11-row-4 12-row-4 13-row-4 14-row-4 15-row-4 16-row-4 | |||
|---|---|---|---|
| Time constraint | Description | Can enable ignore year | Example |
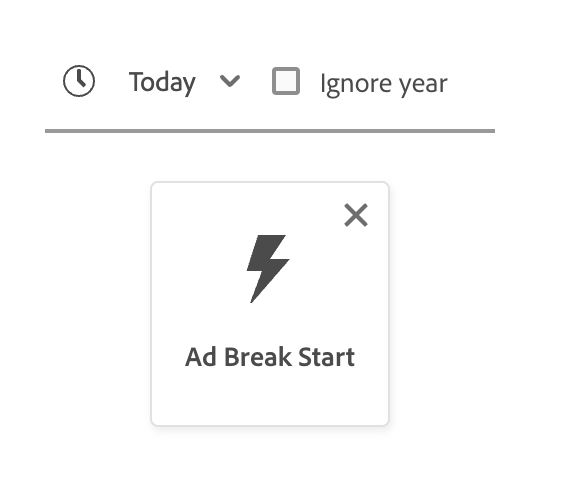
| Today | The attribute or event being compared must occur today. This is the default time constraint selected. | Yes |
|
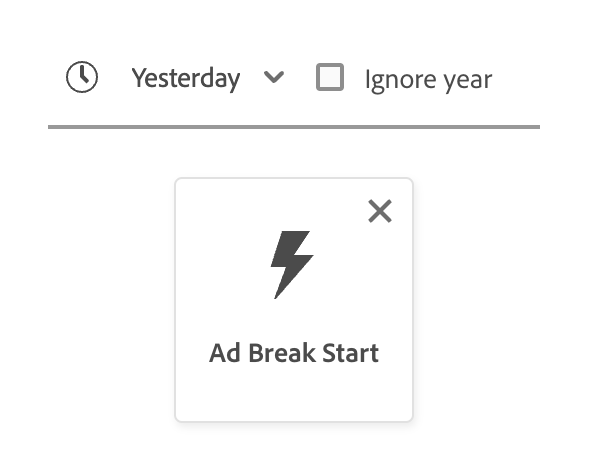
| Yesterday | The attribute or event being compared must occur yesterday. | Yes |
|
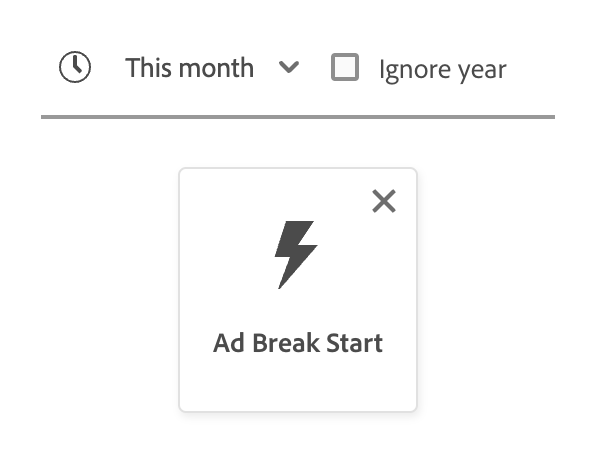
| This month | The attribute or event being compared must occur this calendar month. | Yes |
|
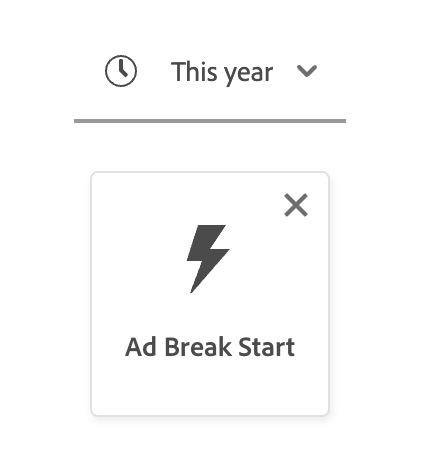
| This year | The attribute or event being compared must occur this calendar year. | No |
|
| Custom date | The attribute or event being compared must occur on the date given. | Yes |
|
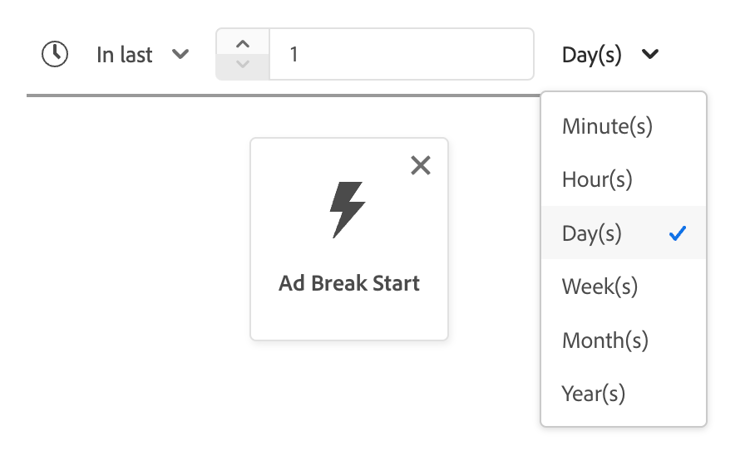
| In last | The attribute or event being compared must occur within the last period of time chosen. This period of time is inclusive until the evaluation time. | No |
|
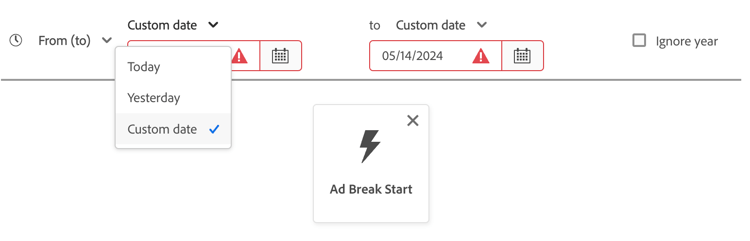
| From (to) | The attribute or event being compared must occur within the two calendar dates chosen. This period of time is inclusive of both dates. | Yes, if custom date |
|
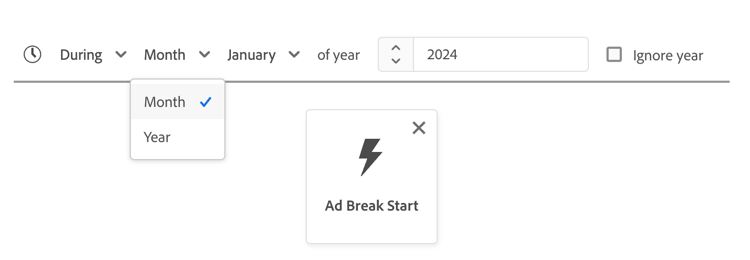
| During | The attribute or event being compared must occur within the selected month or year. If a month is selected, you need to choose both the month and a year that the attribute or event took place in. If a year is selected, you need to just choose the year that the attribute or event took place in. If you select a month, you can also enable the Ignore year checkbox. | Yes |
|
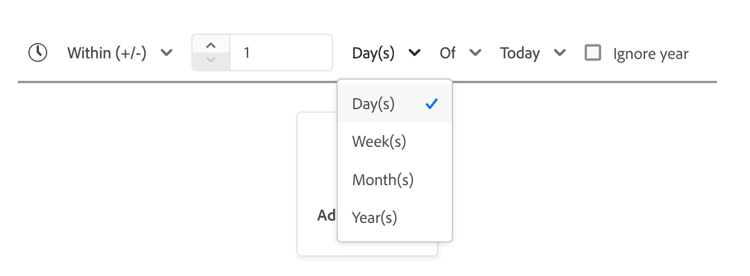
| Within (+/-) | The attribute or event being compared must occur within days, weeks, months, or years of the selected date. This period of time is inclusive of both dates. The selected date can be today, yesterday, or another custom date of your choosing. | Yes |
|
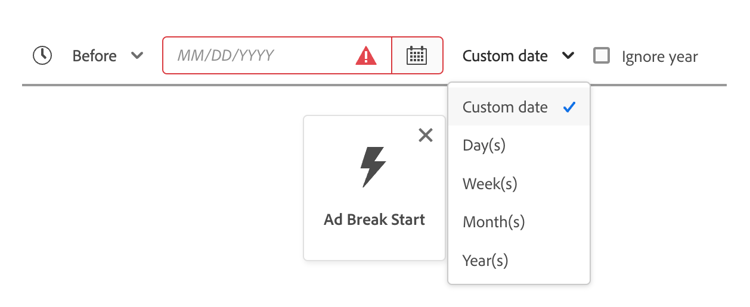
| Before | The attribute or event being compared must occur before the selected date. The selected date can be a custom date of your choosing, or a selection between days, weeks, months, or years ago. | Yes |
|
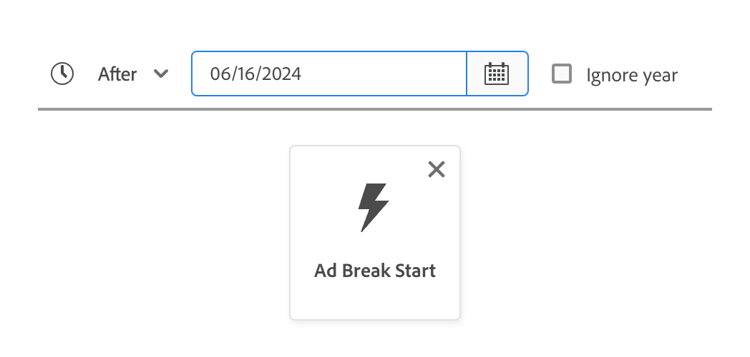
| After | The attribute or event being compared must occur after the selected date. The selected date can be a custom date of your choosing, or a selection between days, weeks, months, or years ago. | Yes |
|
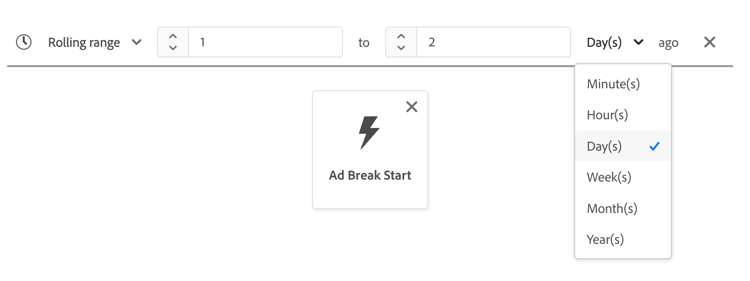
| Rolling range | The attribute or event being compared must occur between the two relative dates. The dates can be represented in seconds, minutes, hours, days, weeks, months, or years. | No |
|
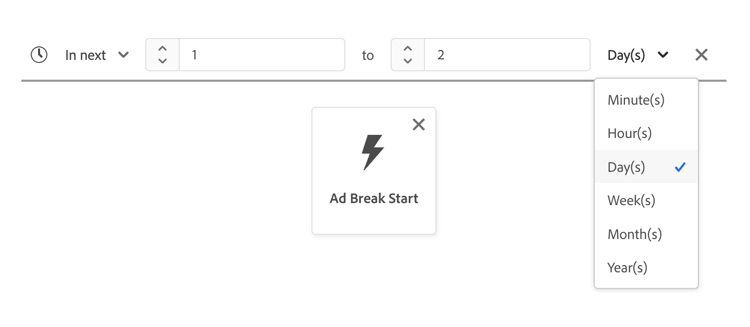
| In next | The attribute or event being compared must occur within the next period of time selected. The selected periods of time include minutes, hours, days, weeks, months, and years. | No |
|
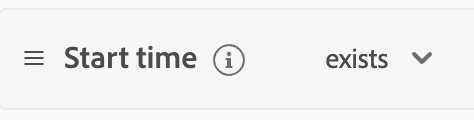
| Exists | The attribute exists. | No |
|
| Does not exist | The attribute does not exist. | No |

|
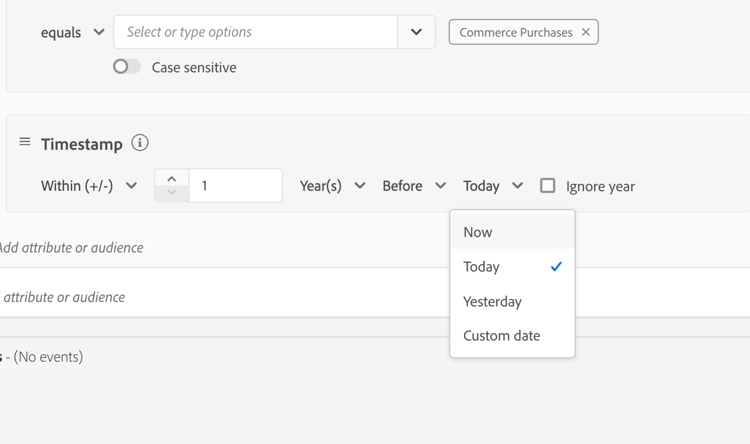
| Now | The attribute or event being compared must occur right when the audience is evaluated. This time constraint can only be used as a secondary-level option, within time constraints such as “Before” or “After”. | Yes |
|
| note tip |
|---|
| TIP |
| The difference between the “Today” time constraint and “Now” time constraint is subtle, but significant. |
|
| However, there’s one major exception - if you’re using “Today” as a top-level time constraint, that means you’re checking if the attribute or event occurred at any point today. |
Canvas-level constraint
You can add a canvas-level constraint by selecting


When you apply a time constraint on the canvas-level, this applies the time constraint to all events in the audience.
Event-level constraint
To apply an event-level constraint, select the event you want to apply the time constraint on, followed by
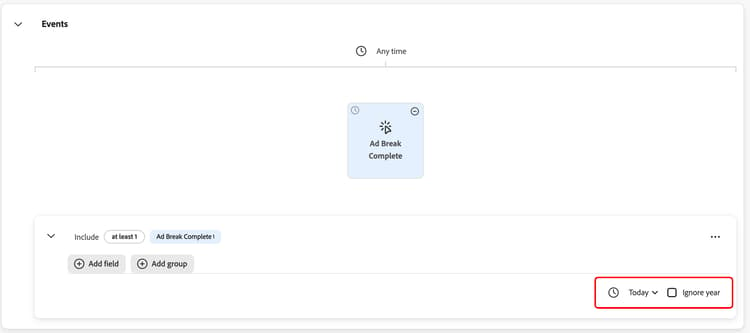
When you apply a time constraint on the event-level, this applies the time constraint on the specified event in the audience.
Between events constraint
To apply a time constraint between events, select
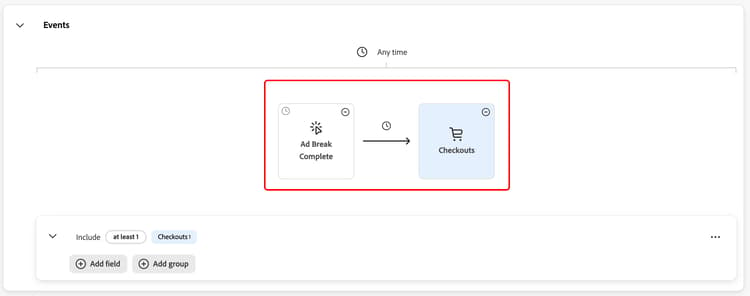
When you apply a time constraint between the event, this applies the time constraint to the time between the events.
The list of available time constraints for this operation differs from the main list of time constraints, and are as follows:
| table 0-row-2 1-row-2 2-row-2 | |
|---|---|
| Time constraint | Description |
| After | The latter event must at least take place after the prior event. |
| Within | The two events must take place during the time period listed within the time constraint. |
| note |
|---|
| NOTE |
| When using the “After” time constraint, the latter event can take place more than the amount of time listed within the time constraint. > For example, if you have a Page View event and a Checkout event, and you put the “After 1 hour” time constraint between these two events, a segment definition with a Checkout event 2 hours after the Page View event would qualify. |
| Additionally, these two time constraints can be used in coordination with each other. |
| For example, if you have a Page View event and a Checkout event, and you put both the “After 1 hour” and “Within 24 hours” time constraints, a segment definition with a Checkout event 12 hours after the Page View event would qualify, but a segment definition with a Checkout event 36 hours after the Page View event would not qualify. |
Code view code-view
Code view displays a code-based version of the audience created in Audience Builder. Once you’ve created your rule within the rule builder canvas, select Code view to see your audience as PQL.
Code view provides a button that allows you to copy the value of the audience to use in API calls. To get the latest version of the audience, make sure you have saved your latest changes to the audience.
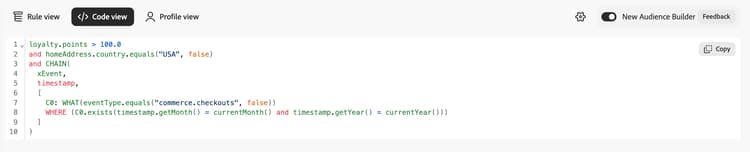
Profile view profile-view
Profile view displays a sampling of profiles that would qualify for the audience, based on its current rules. Once you’ve generated at least one estimate for the audience, select Profile view to see the sample profiles.
A selection of profiles is displayed. This includes information such as ID, first name, last name and audience membership.
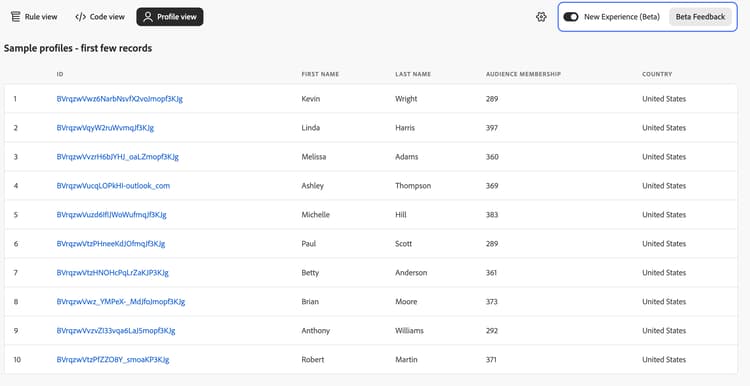
Audience validation audience-validation
Audience Builder automatically analyzes and validates your audience definition to ensure you adhere to audience definition best practices. The validations run inline within the Audience Builder and appear as you build your audience. These best practices can be set into two categories: critical validation and performance optimization.
If an audience definition breaks a critical validation best practice, you will not be able to save your changes in order to keep your sandbox stable. If an audience definition breaks a performance optimization best practice, you will be able to save your changes, but it is highly recommended to update your audience definition to avoid performance issues.
For more information on how audience validation works, read the audience validation guide.
Next steps next-steps
Audience Builder provides a rich workflow letting you create audiences from Profile data. After reading this guide, you should now be able to:
- Create audiences using a combination of attributes, events, and existing audiences as building blocks.
- Use the rule builder canvas and containers to control the order in which rules are executed
- View estimates for your prospective audience, letting you adjust your audience’s rules as necessary.
To learn more about Segmentation Service, please continue reading the documentation and supplement your learning by watching the related videos. To learn more about the other parts of the Segmentation Service UI, please read the Segmentation Service user guide.