Control batch audience evaluation with Flexible Batch Schedules
Batch segmentation is an evaluation method that lets you move profile data all at once to create a corresponding audience. Previously, these batch audiences relied on a single, fixed segmentation job that ran once a day.
With Flexible Batch Schedules, you control when your audiences are evaluated, giving you more flexibility to prioritize your evaluation timings so you can better scale to larger audience volumes.
Create a schedule create-schedule
To use Flexible Batch Schedules, you’ll first need to create a schedule for the audiences. You can create a schedule using either the Experience Platform UI or API.
To create a schedule using the Experience Platform UI, you’ll first need to access the Evaluation section within the Segmentation Service workspace.
Select Audiences within the Customer section, followed by Evaluation.
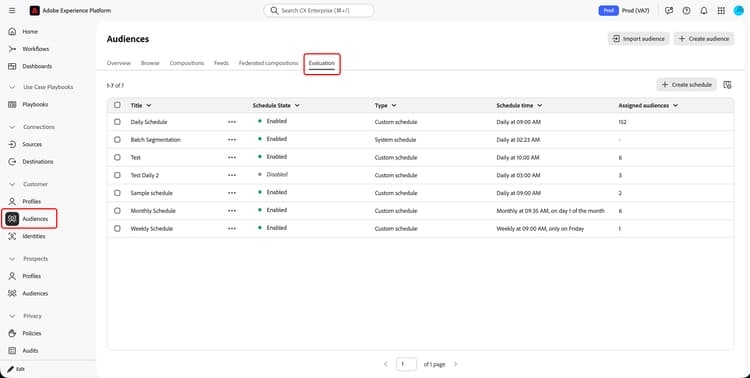
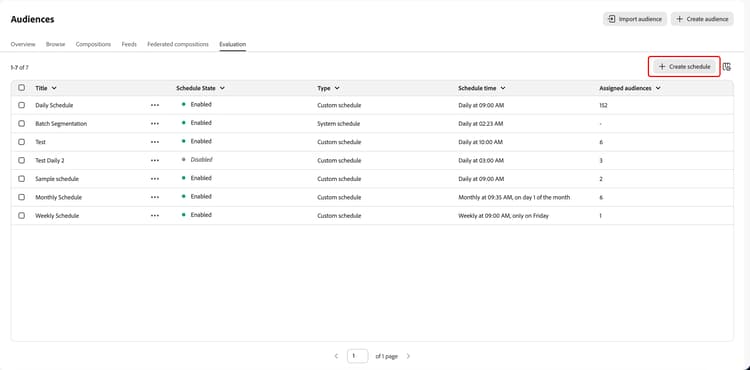
The Evaluation page appears, which displays all the currently available schedules in your organization. Select Create schedule to begin creating the schedule.
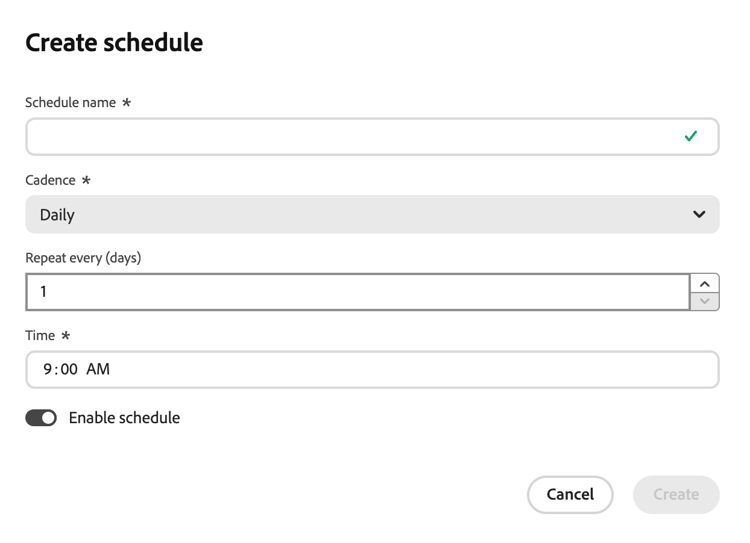
The Create schedule popover appears. On this popover, you can fill in details of your schedule, including the name, cadence, and time of day you want the schedule to run. After inputting all the required details, select Create to continue.
To create a schedule using the Experience Platform API, you’ll need to make a POST request to the /schedules endpoint.
API format
| code language-http |
|---|
|
Request
| accordion | ||
|---|---|---|
| A sample request to create a schedule. | ||
When you create a schedule, you’ll need to provide a name, type, schedule, the audiences that belong to it, as well as its state. For more detailed information about creating a schedule using the API, read the schedules endpoint guide. |
Response
| accordion | ||
|---|---|---|
| A sample response when creating a schedule. | ||
A successful response returns HTTP status 200 with information about your newly created schedule. The |
Assign audiences to a schedule assign-audience
After you create a schedule, you can assign additional audiences to the previously schedule. You can assign audiences using either the Experience Platform UI or API.
To assign audiences to a schedules using the Experience Platform UI, select the

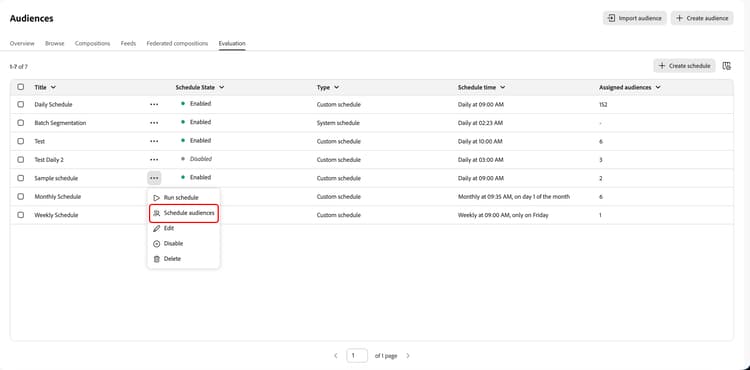
The Schedule audiences popover is displayed. Select the audiences you want to add to the schedule, followed by Schedule to confirm your scheduling changes.
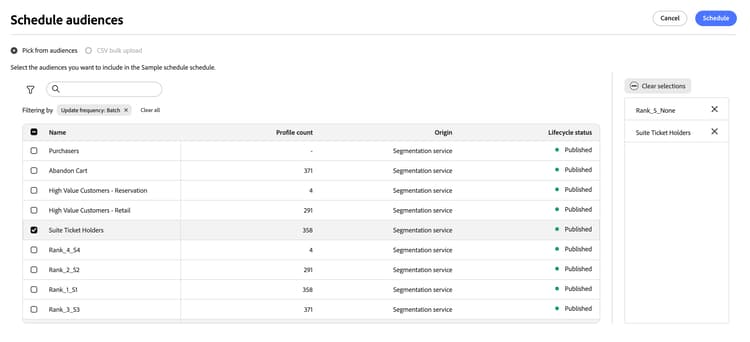
To assign audiences to a schedule using the Experience Platform API, you’ll need to make a POST request to the /schedules/add-audiences endpoint.
API format
| code language-http |
|---|
|
Request
| accordion | ||
|---|---|---|
| A sample request to add audiences to a schedule. | ||
When you add audiences to a schedule, you need to provide the schedule ID as well as the IDs of the audiences you want to add to the schedule. For more detailed information about adding audiences to a schedule, read the schedules endpoint guide. |
Response
| accordion | ||
|---|---|---|
| A successful response when adding audiences to a schedule. | ||
A successful response returns HTTP status 200 with information about the added audiences to the schedule. |
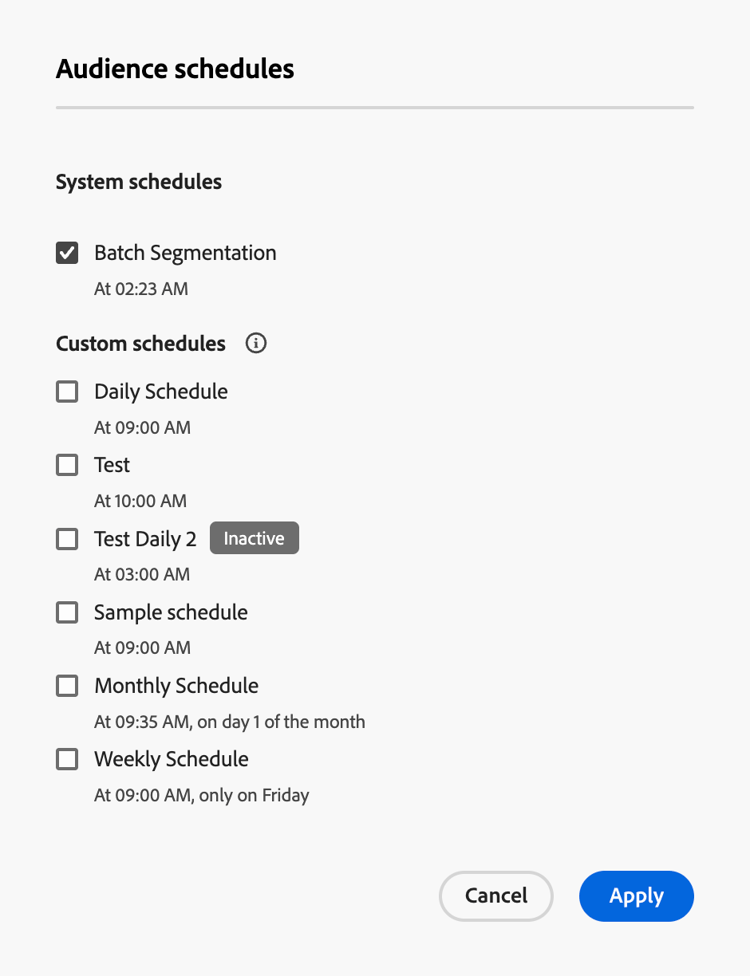
Alternatively, you can assign a schedule to an audience during audience creation. Within Audience Builder, after saving your audience, go to the Schedule section in the audience properties section and select the

The Audience schedules popover appears. On this popover, you can assign which schedules the audience should belong to.
View an audience’s schedule view-audience-schedule
You can see which schedules an audience belongs to either using the Experience Platform UI or API.
| note |
|---|
| NOTE |
| You can only view the schedules for audiences created using Audience Builder. |
To view the schedules an audience belongs to using the Experience Platform UI, go to Audience Portal and select the audience, followed by Edit audience.
Within Audience Builder, select the
To view the schedules an audience belongs to using the Experience Platform API, make a POST request to the /schedules/audience-map endpoint.
API format
| code language-http |
|---|
|
Request
| accordion | ||
|---|---|---|
| A sample request to see which schedules the listed audiences belong to. | ||
To use this endpoint, you need to provide the IDs of the audiences that you want to view the schedules for. For more detailed information about viewing the schedules an audience belongs to, read the schedules endpoint guide. |
Response
| accordion | ||
|---|---|---|
| A successful response when retrieving schedules for the audiences. | ||
A successful response returns HTTP status 200 with detailed information about the schedules the requested audiences belong to. |
Remove audiences from a schedule remove-audience
If you want to remove audiences from an already created schedule, you can use either the Experience Platform UI or API.
To remove audiences from a schedule using the Experience Platform UI, select the
The Schedule audiences popover is displayed. Select the audiences you want to remove from the schedule, followed by Schedule to confirm your scheduling changes.
To remove audiences from a schedule, you’ll need to make a POST request to the /schedules/remove-audiences endpoint.
API format
| code language-http |
|---|
|
Request
| accordion | ||
|---|---|---|
| A sample request to remove audiences from a schedule | ||
When you remove audiences from a schedule, you need to provide the schedule ID as well as the IDs of the audiences you want to remove from the schedule. For more detailed information about removing audiences to a schedule, read the schedules endpoint guide. |
Response
| accordion | ||
|---|---|---|
| A successful response when removing audiences from a schedule. | ||
|
Run a schedule manually run-manually
Instead of waiting for the schedule to run, you can manually trigger an existing schedule to run using either the Experience Platform UI or API.
To manually run a schedule in the Experience Platform UI, select the
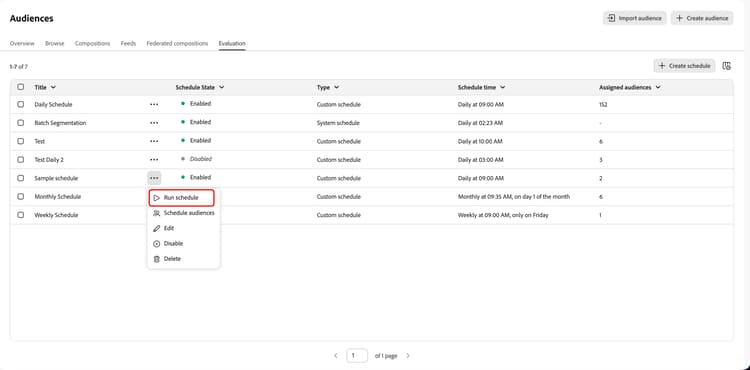
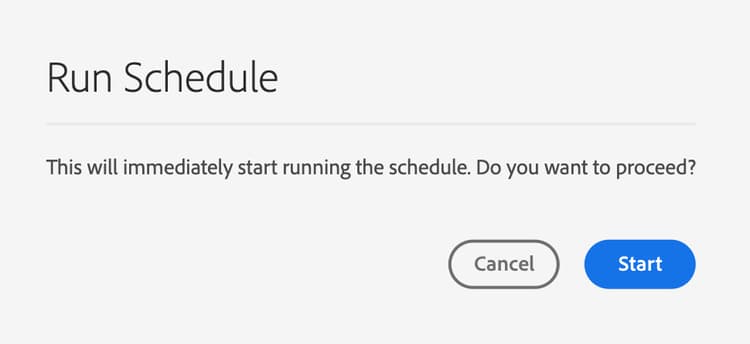
A confirmation popup appears. Select Start to immediately begin the schedule run.
To manually run a schedule in the Experience Platform API, you’ll need to make a POST request to the /schedules/trigger endpoint.
API format
| code language-http |
|---|
|
Request
| accordion | ||
|---|---|---|
| A sample request to trigger a schedule's evaluation. | ||
When you trigger a schedule evaluation, you need to provide the ID of the schedule you want to evaluate. You can only evaluate one schedule at a time. For more detailed information about triggering a schedule evaluation, read the schedules endpoint guide. |
Response
A successful response returns HTTP status 200 with no content.
Enable or disable a schedule
You can enable or disable a schedule using either the Experience Platform UI or API.
To enable or disable a schedule using the Experience Platform UI, select the
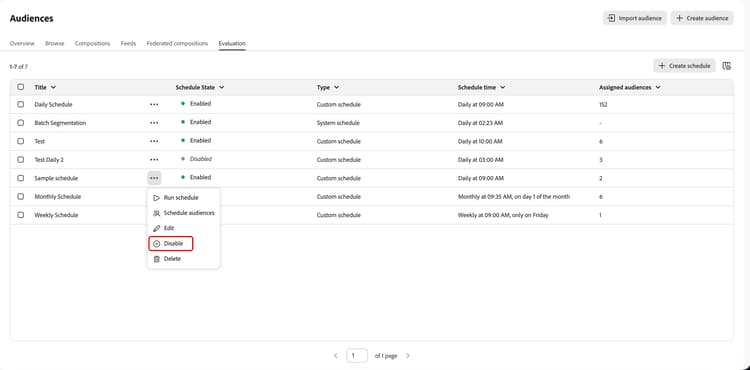
To enable or disable a schedule using the Experience Platform API, you’ll need to make a PATCH request to the /schedules endpoint, providing the ID of the schedule you want to update.
API format
| code language-http |
|---|
|
Request
| accordion | ||
|---|---|---|
| A sample request to update a schedule | ||
When you update your schedule, you need to provide the operation, path, and value for the schedule. If you want to enable a disabled schedule, you’ll need to set |
Response
A successful response returns HTTP status 204 with no content.
Next steps
After reading this guide, you now know how to use Flexible Batch Schedules either using the Experience Platform API or UI. For more information on the Flexible Batch Schedules UI, read the segmentation service UI overview. For more information on the schedules API, read the schedules endpoint guide. To learn how Flexible Batch Schedules works with your capacity and credits, read the license usage and capacities overview.
Video video
The following video shows how to use flexible batch schedules, outlining how to create custom schedules, monitor segmentation jobs, and manage credits within the Evaluation tab.
Appendix appendix
The following appendix lists how cross-schedule dependencies work and frequently asked questions about flexible batch schedules.
Cross-schedule dependencies cross-schedule-dependencies
If one audience refers to another audience as a dependency, that dependency can pull that audience into a schedule it doesn’t belong to.
Consider the following four audiences and two schedules:
Schedule A: Audience 1, Audience 4
Schedule B: Audience 2, Audience 3
Audience 1 refers to Audience 2 through a dependency, so Audience 1 needs Audience 2’s evaluated membership to compute its own.
When Schedule A runs, Audience 1 and Audience 4 evaluate, as expected. However, Audience 2 also runs, since it’s a dependency of Audience 1.
When Schedule B runs, Audience 2 and Audience 3 evaluate, as expected. In this scenario, Audience 1 does not get evaluated, since Audience 2 does not depend on Audience 1.
As a result, this means audiences that are dependents of other audiences (such as Audience 2 in the above scenario) may evaluate more than once a day - once as part of its own scheduled evaluation, and once as part of the schedule of the audience that depends on the other audience.
Frequently asked questions faq
Do I need to do anything to keep using the daily evaluation I currently have?
Can an audience be assigned to more than one custom schedule?
Can streaming or edge audiences use custom schedules?
Can I assign an audience composition to a custom schedule?
How many schedules can I run?
Do I need Flexible Batch Schedules to have more than 4,000 batch audiences?
Does creating a custom schedule cost anything?
How can I see if my schedule ran?
