Getting Started - Developer Tutorial
In today’s digital age, creating user-friendly forms is essential for any organization. Edge Delivery Services for AEM Forms lets you create forms using familiar tools like Google Docs and Microsoft Office.
These forms submit data directly to a Microsoft Excel or Google Sheets file, enabling you to use vibrant ecosystem and robust APIs of Google Sheets, Microsoft Excel, and Microsoft SharePoint to easily process submitted data or to initiate an existing business workflow.
AEM Forms provide a block, known as Adaptive Forms Block, to help you easily create forms to capture and store captured data. You can create a new AEM project pre-configured with Adaptive Forms Block .
This AEM Forms tutorial guides you through creating, previewing, and publishing your own custom form with a new Adobe Experience Manager (AEM) Forms project.
Prerequisites
- You have a GitHub account, and understand Git basics.
- You have a Google or Microsoft SharePoint account.
- You understand the basics of HTML, CSS, and JavaScript.
- You have Node/npm installed for local development.
Heads up! This tutorial uses macOS, Chrome, and Visual Studio Code. While the steps can be adapted for other setups, the screenshots and specific UI elements might differ based on your chosen operating system, browser, and code editor.
Create a new AEM project pre-configured with Adaptive Forms Block
The AEM Forms Boilerplate template gets you started quickly with an AEM project pre-configured with the Adaptive Forms Block. It’s the quickest and easiest way to follow AEM best practices and jump right into building your forms.
Get started with the AEM Forms boilerplate repository template
-
Create a GitHub repository for your AEM Project. To create repository:
-
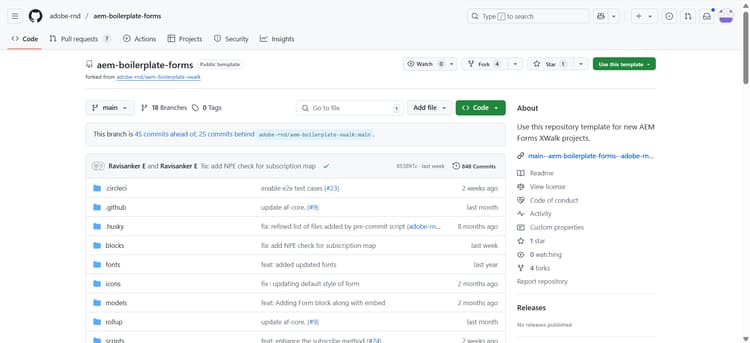
Go to https://github.com/adobe-rnd/aem-boilerplate-forms.
-
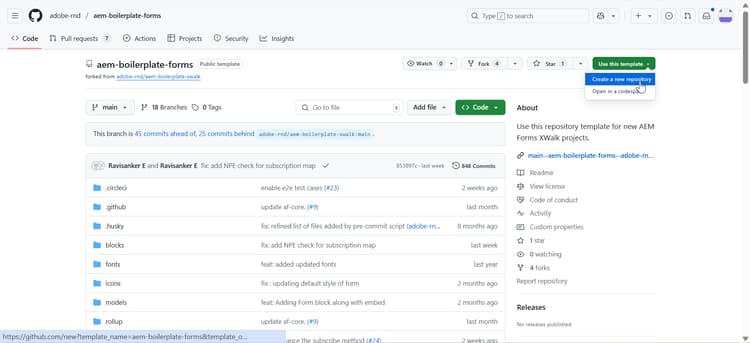
Click the Use this template option and select the Create a new repository option. The create a new repository screen opens.
-
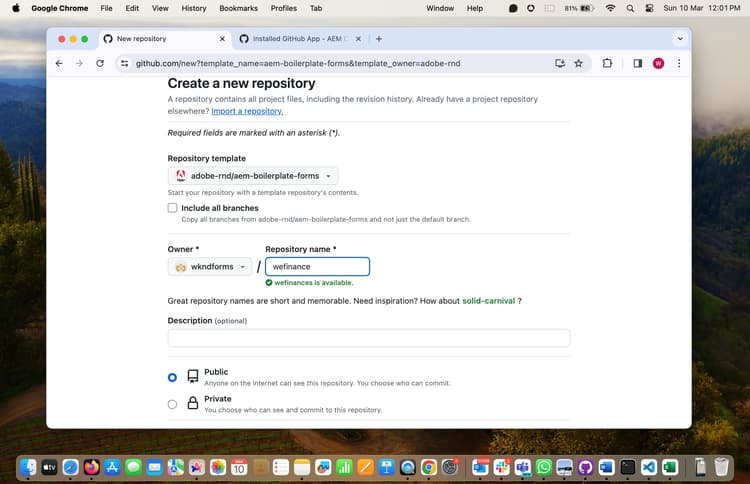
On the create a new repository screen, select the owner, and specify Repository name . Adobe recommends that the repository is set to Public. So, select the public option, and click Create Repository.
-
-
Install the AEM Code Sync GitHub App on your repository. To install:
- Go to https://github.com/apps/aem-code-sync/installations/new.
- On the Install AEM Code Sync screen, select the Only select Repositories option and select your newly created repository. Click Save.

note NOTE If you are using GitHub Enterprise with IP filtering, you can add the following IP to the allowlist: 3.227.118.73 Congratulations! You have a new website running on
https://<branch>--<repo>--<owner>.aem.page/.<branch>refers to the branch of your GitHub repository.<repository>denotes your GitHub repository.<owner>refers to username of your GitHub account that hosts your GitHub repository.
For example, if the branch name is
main, repository iswefinance, and owner iswkndforms, the website would be up and running athttps://main--wefinance--wkndforms.aem.page
Link your own content source
To copy the sample content to your own content folder and point your GitHub repository to your own content folder:
-
Create a new folder specifically for your AEM content in Google Drive or Microsoft SharePoint. This document uses a folder created on Microsoft SharePoint.
-
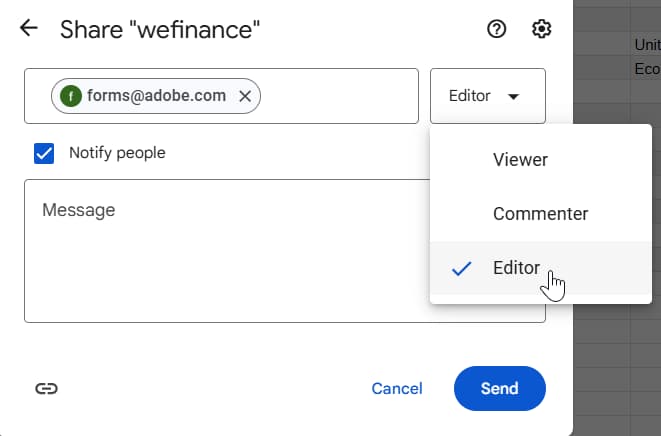
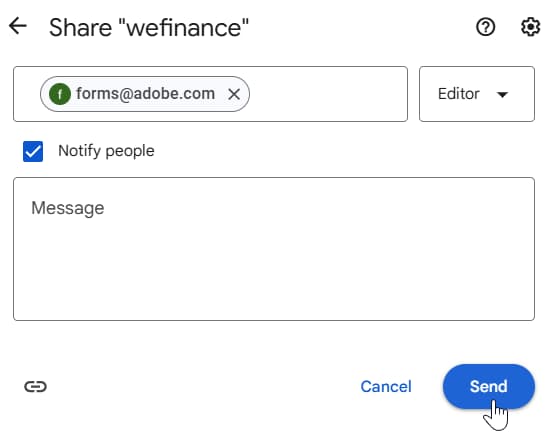
Share the folder with the Adobe Experience Manager user (forms@adobe.com).
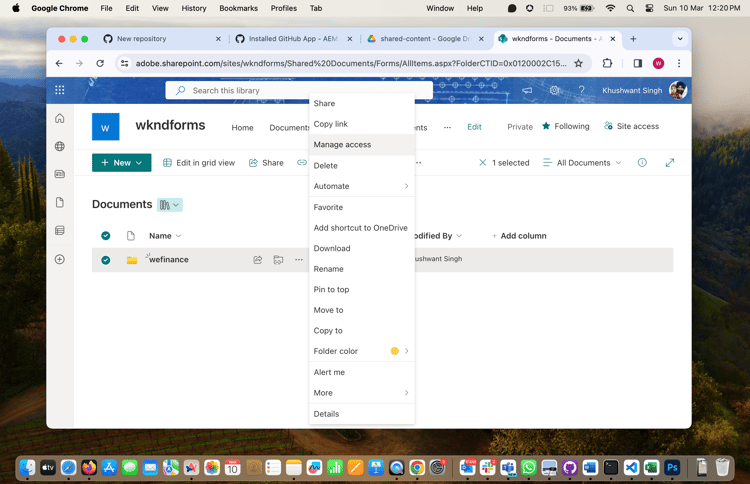
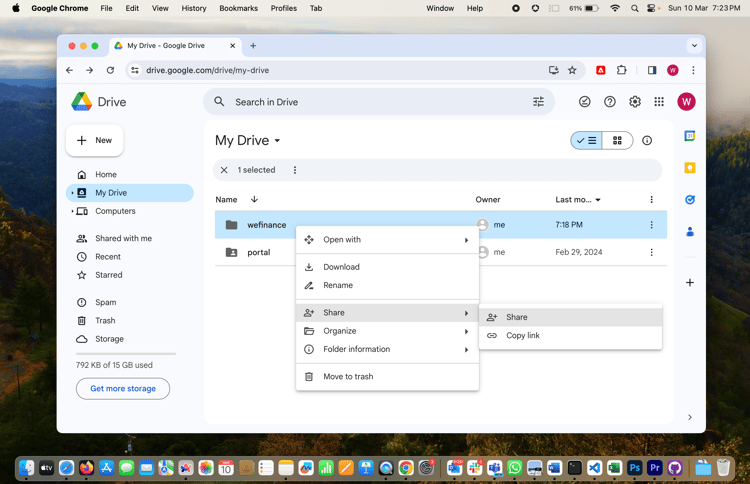
Ensure that you have provided editing rights on the folder to the Adobe Experience Manager user.
-
Copy the example content to your folder. To copy:
-
Unzip the downloaded folder and copy the content.
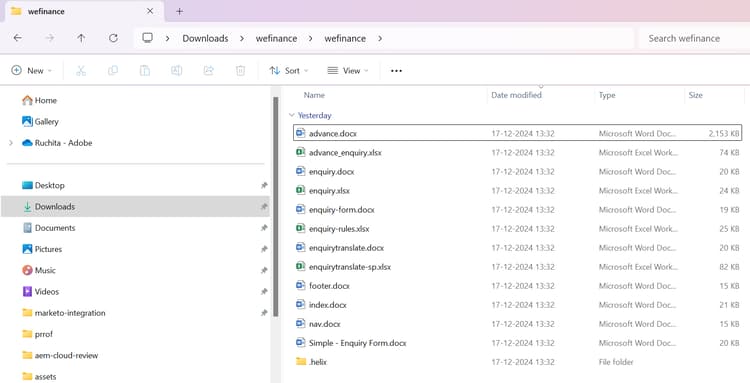
The
navandfooterfiles define the basic layout of your pages and rarely change throughout a project. They also have a specific structure that’s different from most other content files. By examining these files, you’ll get a feel for how content is organized in AEM Projects. -
Upload these files to Microsoft SharePoint or Google Drive folder.

Ensure that you copy the
enquirysheet from the sample content to your folder on Google Drive or Microsoft SharePoint. It contains structure for a sample form.
-
-
Now that you have your content folder set up, it’s time to link it to your project on GitHub that you created using AEM Forms Boilerplate earlier. To connect:
-
Go to the GitHub repository that you created eariler using AEM Forms Boilerplate.
-
Add the
fstab.yamlfile in the root folder. -
Add the reference with the path to the folder that you shared with the AEM user (forms@adobe.com).
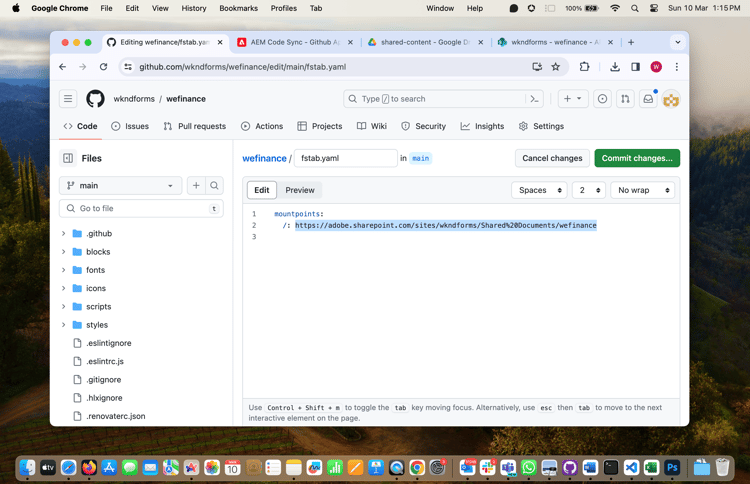
If you use the Microsoft SharePoint, the folder path uses the following format:
code language-html https://<tenant>.SharePoint.com/sites/<sp-site>/Shared%20Documents/<folder-name>For example,
code language-html https://adobe.SharePoint.com/sites/wkndforms/Shared%20Documents/wefinanceFor more information on managing files with Microsoft SharePoint, see How to use Adobe SharePoint.
-
Commit the
fsatb.yamlfile, once you’ve added the reference and everything looks good. If you encounter any build issues, see Troubleshooting GitHub build issues.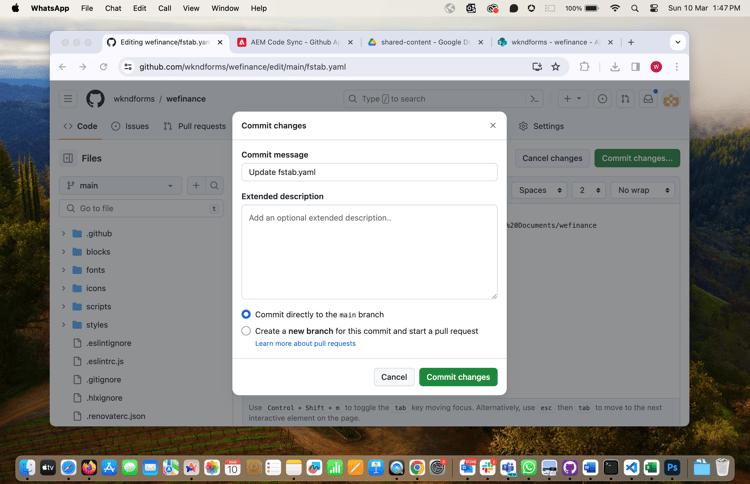
This connects your content folder to your website. After updating the reference, you might experience “404 Not Found” errors initially. This is because your content is not been previewed yet. The next section explains how to start authoring and previewing your content.
-
Preview and publish your content
After completing the last step, your new content source isn’t empty, but it won’t be visible on your website until it’s promoted to the preview or live stages. Currently, this might cause 404 errors.
To preview unpublished content:
-
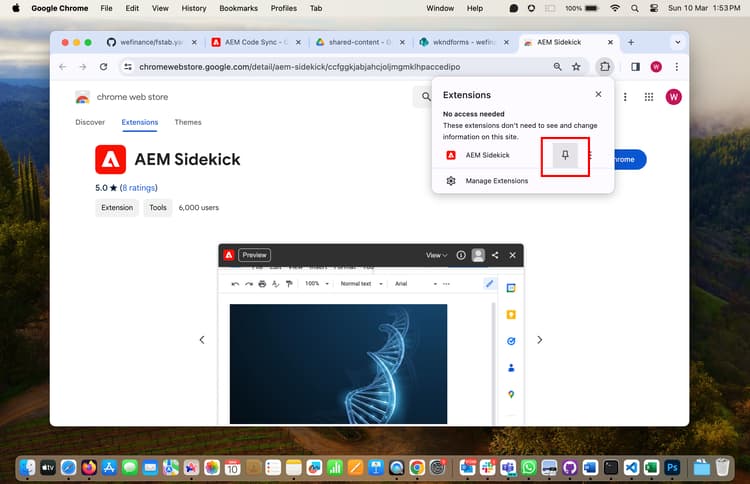
Install the Chrome extension called AEM Sidekick.

After installing the extension to Chrome, don’t forget to pin it, this makes it easier to find it.
-
To set up the Sidekick Chrome extension, go to your previously shared Google Drive or Microsoft SharePoint folder and right-click the extension icon in the browser toolbar and select
Add this project.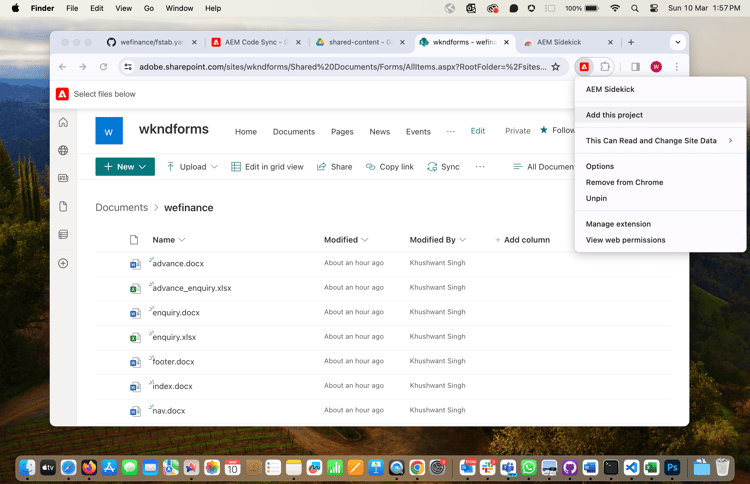
When the extension is installed and your project is added, you are ready to preview and publish your content from your Google Drive.
-
Select all the documents in the Microsoft SharePoint or Google Drive folder. You can choose multiple documents by holding down the Ctrl key (Windows/Linux) or Cmd key (Mac) while clicking.

-
Click the AEM Sidekick icon pinned to your Chrome extension bar. A toolbar appears on your screen. You can choose to preview or publish your content.
If you copied over
index,nav,footerandenquiryfiles, all these are separate documents with their own preview and publish cycles, so make sure you preview (and publish) all of them.Upon previewing the files, new browser tabs display the documents. To preview the sample form, go to the following URL:
code language-html https://<branch>--<repository>--<owner>.aem.live<branch>refers to the branch of your GitHub repository.<repository>denotes your GitHub repository.<owner>refers to username of your GitHub account that hosts your GitHub repository.
https://<branch>--<repo>--<owner>.aem.page/enquiryURL.For example, if your project’s repository is named “wefinance”, it’s located under the account owner “wkndform”, and you’re using the “main” branch and form name as
enquiry, the URL is:https://main--wefinance--wkndform.aem.live/enquiry.
Create a form
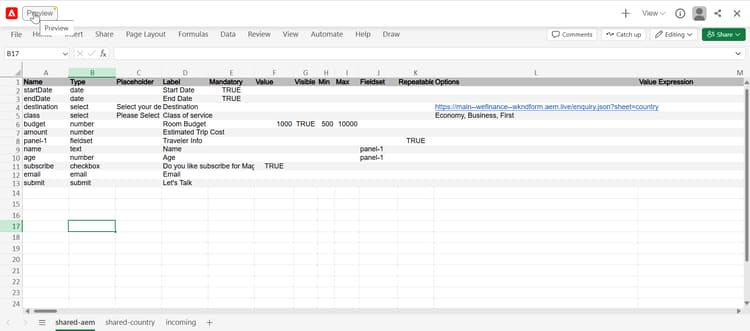
The sample content includes an “enquiry” sheet that serves as a template for the “enquiry” form. Each row of the sheet represents a form field, and the column headers define the field properties. This sample form gives you a head start on building your form.
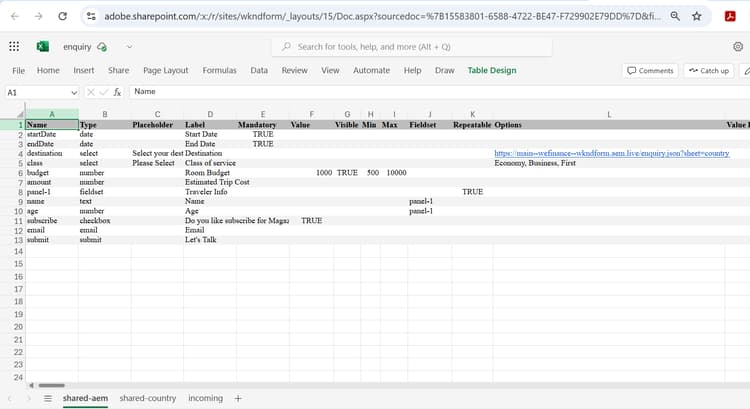
helix-default and shared-aem can be used as sheet names.Let’s start with updating a field label. Open the ‘enquiry’ sheet for editing, change the label of submit button to Let's Talk and use AEM Sidekick to preview and publish the file.
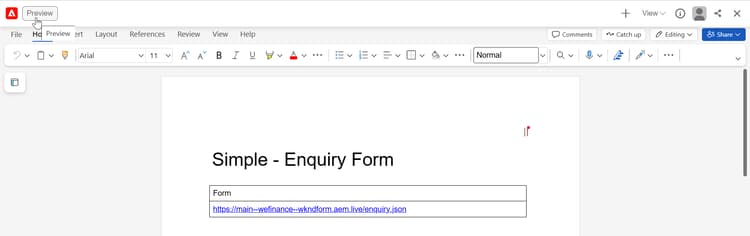
When you preview or publish the file, a JSON version of the file appears in a new tab. Copy the preview (.aem.page) or publish (.aem.live) URL of the file.

Open the enquiry file, and replace the URL in the form block with URL of file copied in the previous step. Ensure that the URL is a hyper link.

Use AEM Sidekick to preview and publish the enquiry document.
To preview the updated enquiry form go to the following URL:
https://<branch>--<repository>--<owner>.aem.page/enquiry
The label of the submit button is updated to Let's Talk.
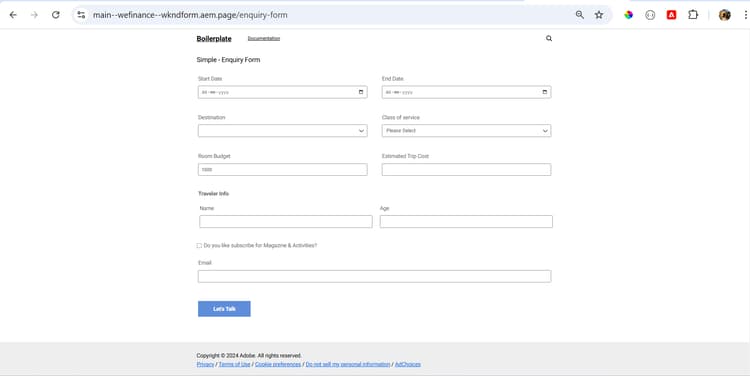
URL: https://main--wefinance--wkndform.aem.live/enquiry
For detailed information about creating and publishing a new form, head over to the create a form guide.
Start developing styling and functionality
To be up and running with a local AEM development environment in no time:
-
Install the AEM CLI: The AEM CLI simplifies development tasks. Let’s install it globally using npm:
code language-bash npm install -g @adobe/aem-cli -
Clone your GitHub project: Clone your project repository from GitHub using the following command, replacing
<owner>with the repository owner and<repo>with the repository name:code language-none git clone https://github.com/<owner>/<repo> -
Start Your Local Environment: Navigate to your project directory and fire up your local AEM instance with a single command:
code language-none cd <repo> aem up
The Adaptive Forms Block blocks/form folder is your playground for styling and code for your forms! Edit any .css or .js files within this directory, and you’ll see the changes reflected instantly in your browser.
Ready to showcase your creation? Use Git to commit and push your changes. This updates your preview and production environments accessible at these URLs (replace placeholders with your project details):
Preview: https://<branch>--<repo>--<owner>.aem.page/
Production: https://<branch>--<repo>--<owner>.aem.live/
Congratulations! You’ve successfully set up your local development environment and deployed your changes.
Add Adaptive Forms Block to your existing AEM project
If you have an existing AEM Project, you can integrate the Adaptive Forms Block into your current project to get started on form creation.
To integrate:
-
Navigate to the AEM Project repository folder on your local system.
-
Copy and paste the following folders and files from the AEM Forms Boilerplate into your AEM Project:
- form block folder
- form-editor-support.js file
- form-editor-support.css file
-
Navigate to the
/scripts/editor-support.jsfile in your AEM Project and update it with the editor-support.js file in the AEM Forms Boilerplate -
Navigate to the
/models/_section.jsonin your AEM Project and append “form” and “embed-adaptive-form” to the components array of thefiltersobject:code language-none "filters": [ { "id": "section", "components": [ . . . "form", "embed-adaptive-form" ] }] -
(Optional) Navigate to
/.eslintignorein your AEM Project and add below lines of code:code language-none blocks/form/rules/formula/* blocks/form/rules/model/* blocks/form/rules/functions.js scripts/editor-support.js scripts/editor-support-rte.js -
(Optional) Navigate to
/.eslintrc.jsin your AEM Project and add below lines of code in therulesobject:code language-none 'xwalk/max-cells': ['error', { '*': 4, // default limit for all models form: 15, wizard: 12, 'form-button': 7, 'checkbox-group': 20, checkbox: 19, 'date-input': 21, 'drop-down': 19, email: 22, 'file-input': 20, 'form-fragment': 15, 'form-image': 7, 'multiline-input': 23, 'number-input': 22, panel: 17, 'radio-group': 20, 'form-reset-button': 7, 'form-submit-button': 7, 'telephone-input': 20, 'text-input': 23, accordion: 14, modal: 11, rating: 18, password: 20, tnc: 12, }], 'xwalk/no-orphan-collapsible-fields': 'off', // Disable until enhancement is done for Forms properties -
Open the terminal and run the below commands:
code language-none npm i npm run build:jsonnote NOTE Before pushing the changes to your AEM Project repository on GitHub, ensure that the component-definition.json,component-models.json, andcomponent-filters.jsonfiles located at the root level of the AEM project are updated with the form-related objects. -
Commit and push these changes to your AEM Project repository on GitHub.
That’s it! The Adaptive Forms Block is now part of your AEM project. You can start creating and adding forms to your AEM pages.
Troubleshooting GitHub build issues
Ensure a smooth GitHub build process by addressing potential issues:
-
Resolve Module Path Error:
If you encounter the error "Unable to resolve path to module “‘/scripts/lib-franklin.js’”, navigate to the [EDS Project]/blocks/forms/form.js file. Update the import statement by replacing the lib-franklin.js file with the aem.js file. -
Handle Linting Errors:
Should you come across any linting errors, you can bypass them. Open the [EDS Project]/package.json file and modify the “lint” script from"lint": "npm run lint:js && npm run lint:css"to"lint": "echo 'skipping linting for now'". Save the file and commit the changes to your GitHub project.