Nesta página: saiba como gravar eventos de jornada personalizados no Adobe Experience Platform a partir de suas jornadas usando ações personalizadas e chamadas de API autenticadas.
Este caso de uso explica como gravar eventos personalizados no Adobe Experience Platform a partir do Jornada usando Ações Personalizadas e Chamadas Autenticadas.
Configurar um projeto do desenvolvedor custom-action-aep-IO
-
Na Adobe Developer Console, clique em Projeto e abra seu projeto IO.
-
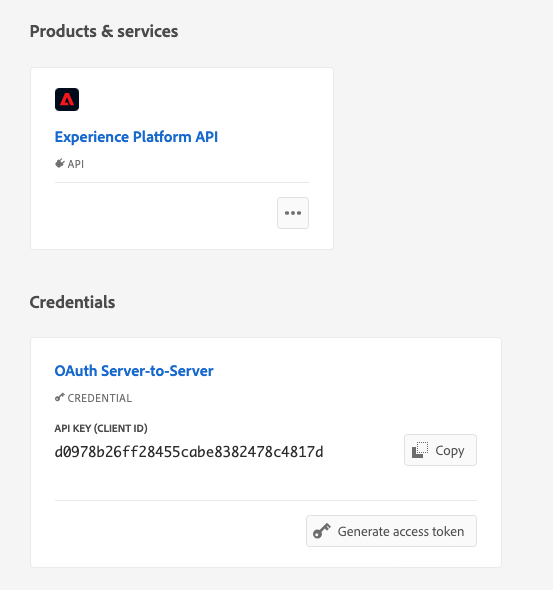
Na seção Credenciais, clique em Servidor para Servidor OAuth.
-
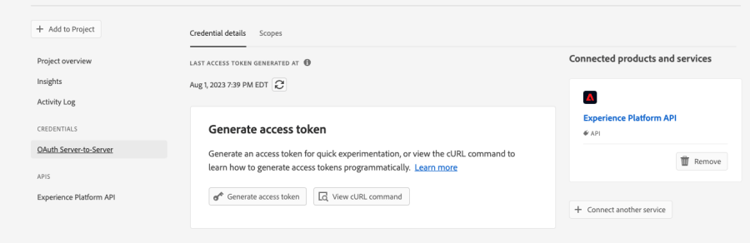
Clique em Exibir comando cURL.
-
Copie o comando cURL e armazene client_id, client_secret, grant_type e scope.
curl -X POST 'https://ims-na1.adobelogin.com/ims/token/v3' -H 'Content-Type: application/x-www-form-urlencoded' -d 'grant_type=client_credentials&client_id=1234&client_secret=5678&scope=openid,AdobeID,read_organizations,additional_info.projectedProductContext,session'
Configurar a fonte usando a entrada da API HTTP
-
Crie um ponto de extremidade em Adobe Experience Platform para gravar os dados do jornada.
-
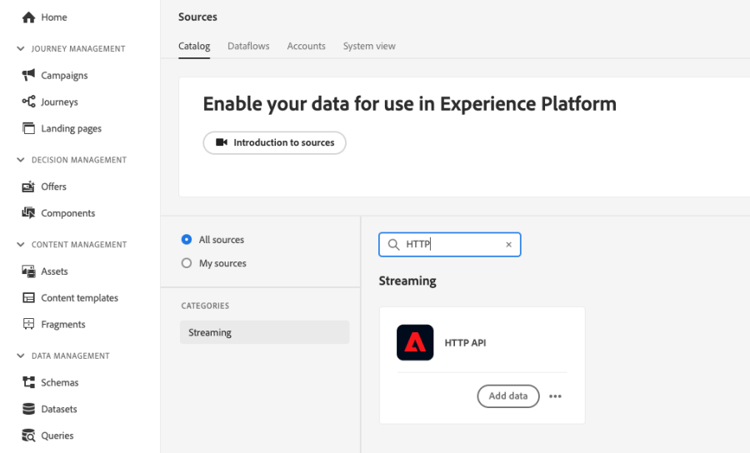
Em Adobe Experience Platform, clique em Fontes, em Conexões, no menu esquerdo. Em API HTTP, clique em Adicionar dados.
-
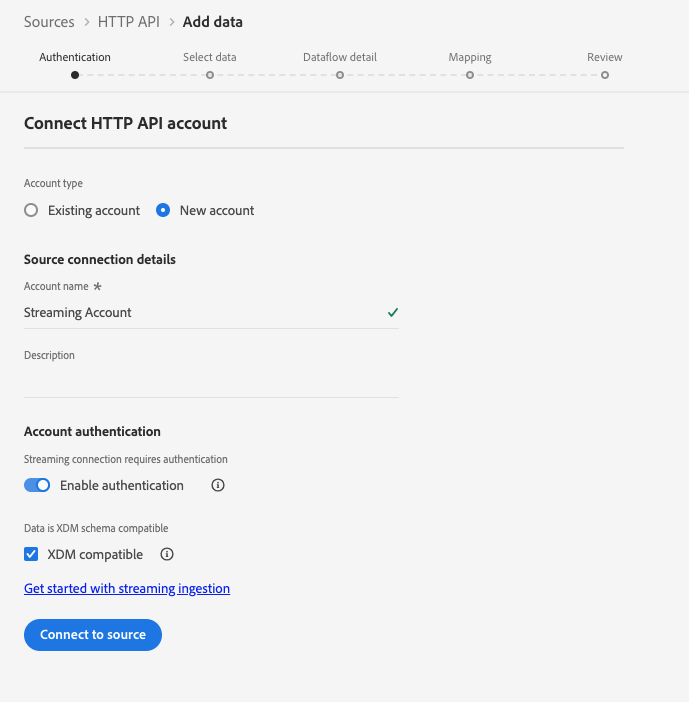
Selecione Nova conta e habilite a autenticação. Selecione Conectar ao Source.
-
Selecione Avançar e o Conjunto de Dados no qual você deseja gravar os dados. Clique em Avançar e Concluir.
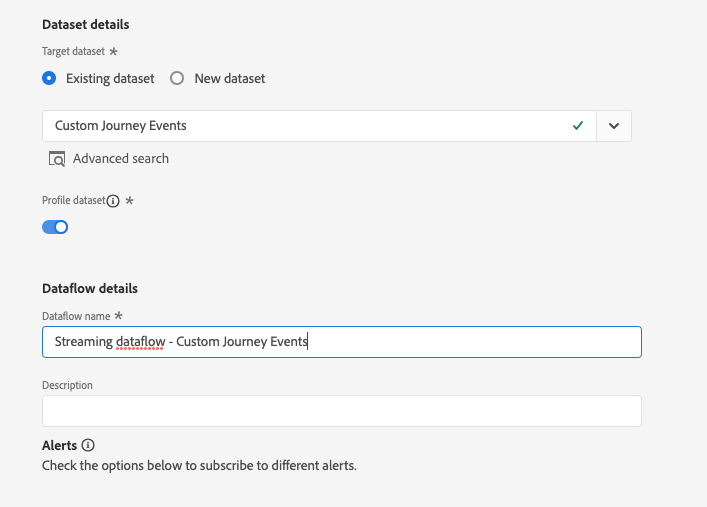
-
Abra o fluxo de dados recém-criado. Copie a carga do esquema e salve-a no bloco de notas.
{
"header": {
"schemaRef": {
"id": "https://ns.adobe.com/<your_org>/schemas/<schema_id>",
"contentType": "application/vnd.adobe.xed-full+json;version=1.0"
},
"imsOrgId": "<org_id>",
"datasetId": "<dataset_id>",
"source": {
"name": "Custom Journey Events"
}
},
"body": {
"xdmMeta": {
"schemaRef": {
"id": "https://ns.adobe.com/<your_org>/schemas/<schema_id>",
"contentType": "application/vnd.adobe.xed-full+json;version=1.0"
}
},
"xdmEntity": {
"_id": "test1",
"<your_org>": {
"journeyVersionId": "",
"nodeId": "", "customer_Id":""
},
"eventMergeId": "",
"eventType": "",
"producedBy": "self",
"timestamp": "2018-11-12T20:20:39+00:00"
}
}
}
Configurar a ação personalizada custom-action-config
A configuração de ação personalizada está detalhada em esta página.
Para este exemplo, siga estas etapas:
-
Abra Adobe Journey Optimizer e clique em Configurações, em Administração, no menu esquerdo. Em Ações, clique em Gerenciar e em Criar Ação.
-
Defina o URL e selecione o método Post.
https://dcs.adobedc.net/collection/<collection_id>?syncValidation=false -
Verifique se os Cabeçalhos (Tipo de conteúdo, Conjunto de caracteres, nome da sandbox) estão configurados.
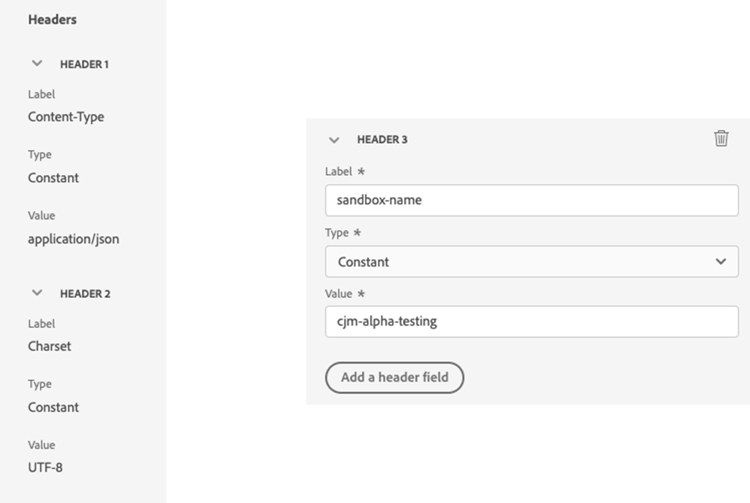
Configurar a autenticação custom-action-aep-authentication
-
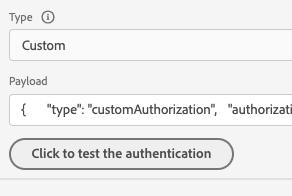
Selecione o Tipo como Personalizado com a seguinte carga.
-
Cole client_secret, client_id, scope e grant_type (da carga útil do projeto IO usada anteriormente).
code language-none { "type": "customAuthorization", "authorizationType": "Bearer", "endpoint": "https://ims-na1.adobelogin.com/ims/token/v3", "method": "POST", "headers": {}, "body": { "bodyType": "form", "bodyParams": { "grant_type": "client_credentials", "client_secret": "********", "client_id": "<client_id>", "scope": "openid,AdobeID,read_organizations,additional_info.projectedProductContext,session" } }, "tokenInResponse": "json://access_token", "cacheDuration": { "duration": 28000, "timeUnit": "seconds" } } -
Use o botão Clique para testar a autenticação para testar a conexão.
Configurar o conteúdo custom-action-aep-payload
-
Nos campos Solicitação e Resposta, cole a carga da conexão de origem usada anteriormente.
code language-none { "xdmMeta": { "schemaRef": { "id": "https://ns.adobe.com/<your_org>/schemas/<schema_id>", "contentType": "application/vnd.adobe.xed-full+json;version=1.0" } }, "xdmEntity": { "_id": "/uri-reference", "<your_org>": { "journeyVersionId": "Sample value", "nodeId": "Sample value", "customer_Id":"" }, "eventMergeId": "Sample value", "eventType": "advertising.completes, "producedBy": "self", "timestamp": "2018-11-12T20:20:39+00:00" } } -
Altere a Configuração de Campo de Constante para Variável para campos que serão preenchidos dinamicamente.
-
Salve a ação personalizada.
Jornada
-
Por fim, use essa ação personalizada em uma jornada para gravar os eventos de jornada personalizados.
-
Preencha a ID da versão do Jornada, a ID do nó, o Nome do nó e outros atributos de acordo com o caso de uso.
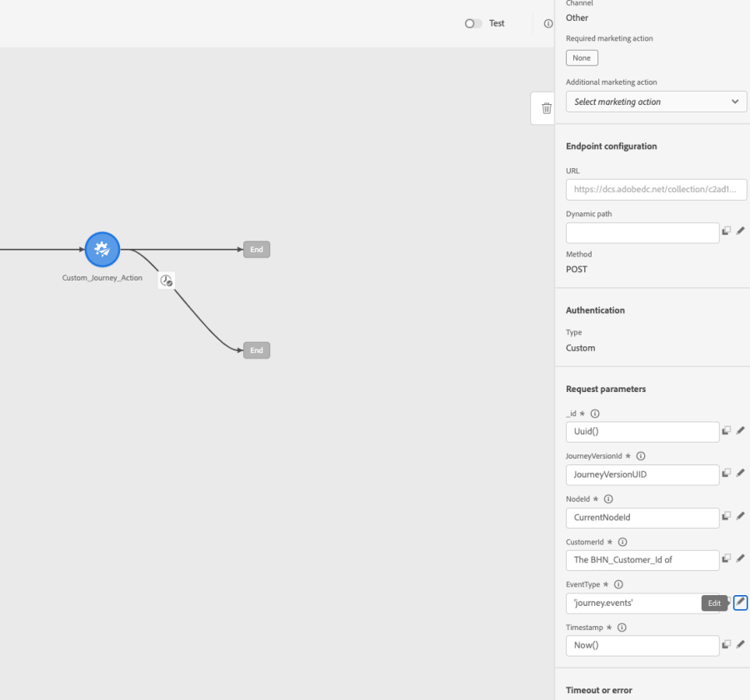
This section contains structured knowledge intended to support interpretation, retrieval, and question answering related to this topic.
For complete understanding, this information should be combined with the documentation on this page. Neither source is intended to stand alone; the page describes the feature, while this section provides additional context that helps disambiguate terminology, intent, applicability, and constraints.
- TL;DR: This use case explains how to configure a custom action in Journey Optimizer that writes journey event data into Adobe Experience Platform using an HTTP API inlet and OAuth Server-to-Server authenticated calls.
Intents:
- Set up an Adobe Developer Console IO project with OAuth Server-to-Server credentials for AEP API authentication
- Create an HTTP API inlet source in Adobe Experience Platform to receive streaming journey event data
- Configure a custom action in Journey Optimizer with the correct URL, headers, and custom Bearer token authentication
- Map journey fields (journey version ID, node ID, customer ID) dynamically as variables in the custom action payload
- Use the custom action in a journey to write custom events to an AEP dataset
Glossary:
- HTTP API Inlet: An Adobe Experience Platform source connector that creates a streaming endpoint for ingesting data via HTTP POST requests (product-specific)
- OAuth Server-to-Server: An authentication credential type in Adobe Developer Console that generates Bearer tokens for server-to-server API calls without user interaction (product-specific)
- Custom authorization: A Journey Optimizer custom action authentication type that fetches a Bearer token from a specified endpoint and caches it for a configured duration (product-specific)
- XDM entity: The data payload structure conforming to the Experience Data Model schema, used as the body when writing events to AEP via the HTTP API inlet (product-specific)
- cacheDuration: The token cache setting in custom authorization configuration that controls how long the fetched Bearer token is reused before a new one is requested (product-specific)
Guardrails:
- After creating the Adobe Developer Console project, developer and API access control permissions must be explicitly granted before the credentials can be used
- The HTTP API inlet source must be created with authentication enabled; the connection endpoint URL and schema payload must be copied and stored for use in the custom action configuration
- Custom action headers must include Content-Type, Charset, and sandbox-name
- Fields intended to be populated dynamically at runtime must be changed from Constant to Variable in the custom action payload configuration
Terminology:
- Canonical name: Custom action — Acronym: none — variants: custom action configuration, Journey Optimizer custom action
- Canonical name: Adobe Experience Platform — Acronym: AEP — variants: Experience Platform, Platform
- Synonyms: “HTTP API Inlet” = “streaming endpoint” = “DCS collection endpoint”
- Do not confuse: “OAuth Server-to-Server” ≠ “OAuth user authentication” (Server-to-Server does not require a user login; it uses client credentials)
FAQ:
- Q: What type of authentication is used to call the AEP HTTP API Inlet from a Journey Optimizer custom action? — Custom Bearer token authentication using OAuth Server-to-Server client credentials fetched from the Adobe IMS token endpoint.
- Q: Where do I find the client_id, client_secret, grant_type, and scope values? — From the OAuth Server-to-Server credentials section of your Adobe Developer Console IO project, by clicking “View cURL command.”
- Q: How do I make journey-specific fields (e.g., journeyVersionId, nodeId) dynamic in the payload? — Change their field configuration from Constant to Variable in the custom action payload setup so they are populated from the journey context at runtime.
- Q: What permissions are required on the Adobe Developer Console project? — Developer and API access control must be granted with the right permissions after the project is created, as described in the AEP API authentication documentation.
- Q: What is the purpose of the cacheDuration setting in the authentication payload? — It controls how long the fetched Bearer token is cached and reused (28,000 seconds in the example) before the custom action requests a new token.