Utilizzare azioni personalizzate per scrivere eventi del percorso in Experience Platform custom-action-aep
In questa pagina: Scopri come scrivere eventi di percorso personalizzati in Adobe Experience Platform dai tuoi percorsi utilizzando azioni personalizzate e chiamate API autenticate.
Questo caso d’uso spiega come scrivere eventi personalizzati in Adobe Experience Platform da Percorsi utilizzando Azioni personalizzate e chiamate autenticate.
Configurare un progetto per sviluppatori custom-action-aep-IO
-
Da Adobe Developer Console, fai clic su Progetto e apri il progetto di I/O.
-
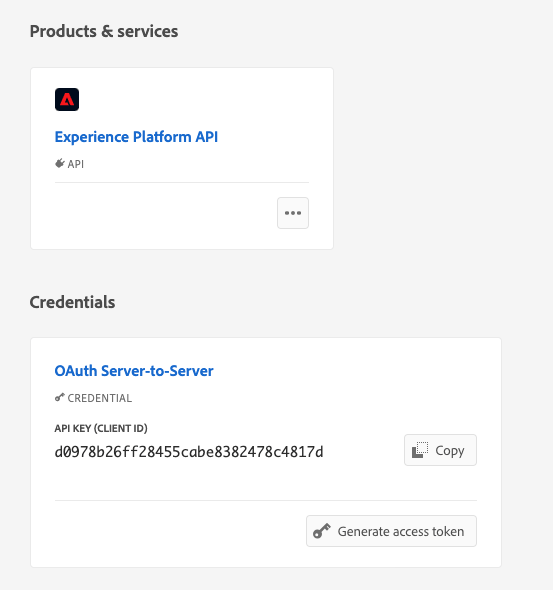
Nella sezione Credenziali, fai clic su OAuth Server-to-Server.
-
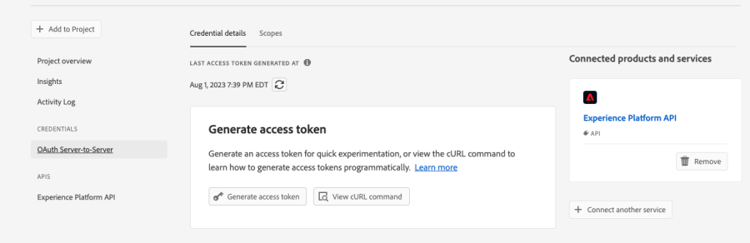
Fare clic su Visualizza comando cURL.
Selezione del tipo di azione
-
Copiare il comando cURL e archiviare client_id, client_secret, grant_type e scope.
curl -X POST 'https://ims-na1.adobelogin.com/ims/token/v3' -H 'Content-Type: application/x-www-form-urlencoded' -d 'grant_type=client_credentials&client_id=1234&client_secret=5678&scope=openid,AdobeID,read_organizations,additional_info.projectedProductContext,session'
Configurare l’origine utilizzando l’ingresso API HTTP
-
Creare un endpoint in Adobe Experience Platform per scrivere i dati dai percorsi.
-
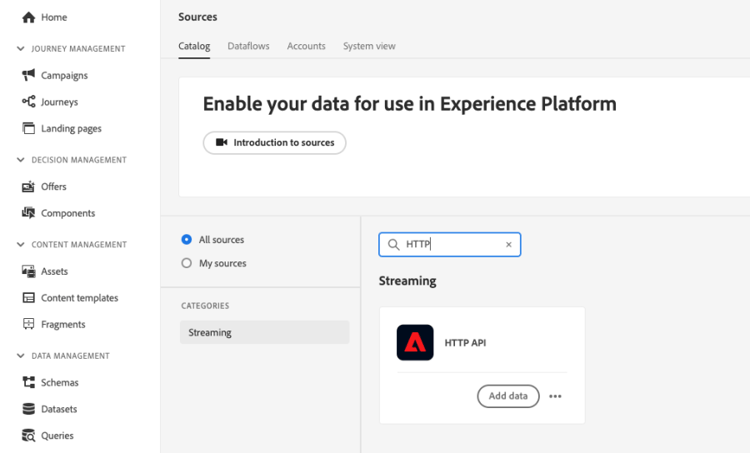
In Adobe Experience Platform, fai clic su Origini, in Connessioni nel menu a sinistra. In API HTTP, fare clic su Aggiungi dati.
-
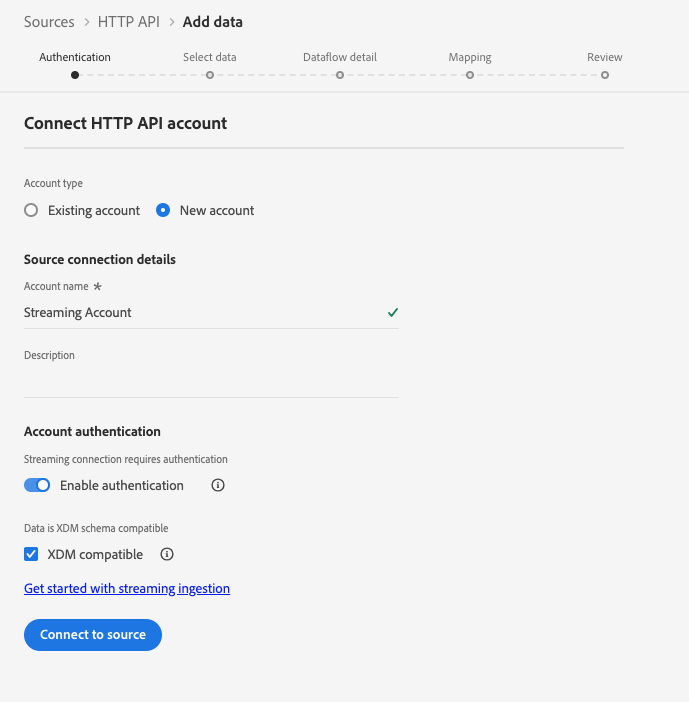
Seleziona Nuovo account e abilita l’autenticazione. Selezionare Connetti a Source.
-
Seleziona Avanti e il set di dati in cui desideri scrivere i dati. Fai clic su Avanti e Fine.
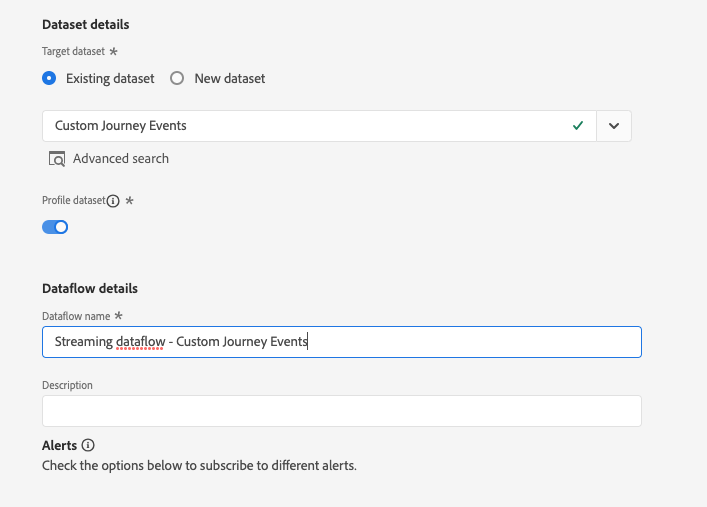
-
Apri il flusso di dati appena creato. Copia il payload dello schema e salvalo nel blocco note.
{
"header": {
"schemaRef": {
"id": "https://ns.adobe.com/<your_org>/schemas/<schema_id>",
"contentType": "application/vnd.adobe.xed-full+json;version=1.0"
},
"imsOrgId": "<org_id>",
"datasetId": "<dataset_id>",
"source": {
"name": "Custom Journey Events"
}
},
"body": {
"xdmMeta": {
"schemaRef": {
"id": "https://ns.adobe.com/<your_org>/schemas/<schema_id>",
"contentType": "application/vnd.adobe.xed-full+json;version=1.0"
}
},
"xdmEntity": {
"_id": "test1",
"<your_org>": {
"journeyVersionId": "",
"nodeId": "", "customer_Id":""
},
"eventMergeId": "",
"eventType": "",
"producedBy": "self",
"timestamp": "2018-11-12T20:20:39+00:00"
}
}
}
Configurare l’azione personalizzata custom-action-config
La configurazione dell’azione personalizzata è dettagliata in questa pagina.
Per questo esempio, segui questi passaggi:
-
Apri Adobe Journey Optimizer e fai clic su Configurazioni, in Amministrazione nel menu a sinistra. In Azioni, fai clic su Gestisci e poi su Crea azione.
-
Imposta l’URL e seleziona il metodo Post.
https://dcs.adobedc.net/collection/<collection_id>?syncValidation=false -
Assicurati che le intestazioni (Content-Type, Charset, sandbox-name) siano configurate.
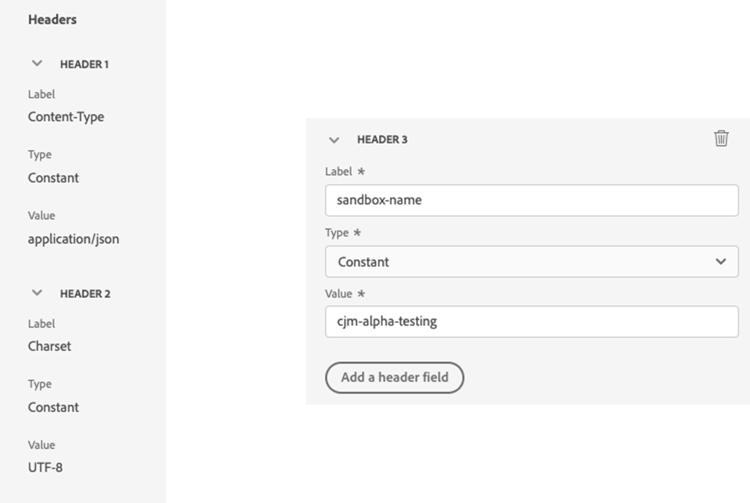
Configurare l’autenticazione custom-action-aep-authentication
-
Seleziona Tipo come Personalizzato con il seguente payload.
-
Incollare client_secret, client_id, scope e grant_type dal payload del progetto IO utilizzato in precedenza.
code language-none { "type": "customAuthorization", "authorizationType": "Bearer", "endpoint": "https://ims-na1.adobelogin.com/ims/token/v3", "method": "POST", "headers": {}, "body": { "bodyType": "form", "bodyParams": { "grant_type": "client_credentials", "client_secret": "********", "client_id": "<client_id>", "scope": "openid,AdobeID,read_organizations,additional_info.projectedProductContext,session" } }, "tokenInResponse": "json://access_token", "cacheDuration": { "duration": 28000, "timeUnit": "seconds" } } -
Utilizza Fare clic per verificare l’autenticazione per verificare la connessione.
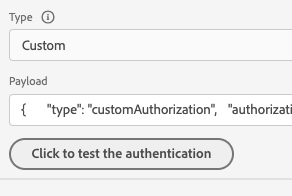
Impostare il payload custom-action-aep-payload
-
Nei campi Richiesta e Risposta, incolla il payload dalla connessione di origine utilizzata in precedenza.
code language-none { "xdmMeta": { "schemaRef": { "id": "https://ns.adobe.com/<your_org>/schemas/<schema_id>", "contentType": "application/vnd.adobe.xed-full+json;version=1.0" } }, "xdmEntity": { "_id": "/uri-reference", "<your_org>": { "journeyVersionId": "Sample value", "nodeId": "Sample value", "customer_Id":"" }, "eventMergeId": "Sample value", "eventType": "advertising.completes, "producedBy": "self", "timestamp": "2018-11-12T20:20:39+00:00" } } -
Modifica la configurazione del campo da Costante a Variabile per i campi che verranno compilati in modo dinamico.
-
Salva l’azione personalizzata.
Percorso
-
Infine, utilizza questa azione personalizzata in un percorso per scrivere gli eventi di percorso personalizzati.
-
Popola l’ID versione del Percorso, l’ID nodo, il nome del nodo e altri attributi in base al tuo caso d’uso.
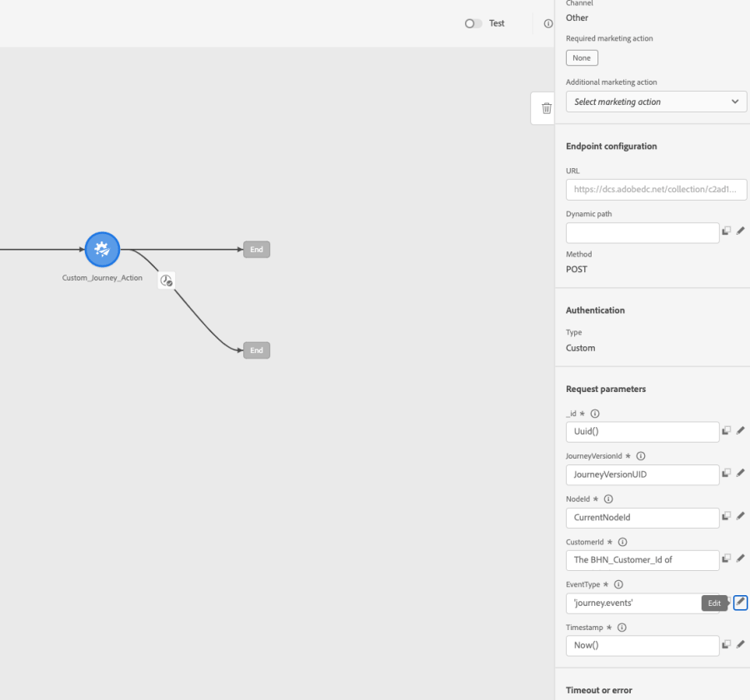
This section contains structured knowledge intended to support interpretation, retrieval, and question answering related to this topic.
For complete understanding, this information should be combined with the documentation on this page. Neither source is intended to stand alone; the page describes the feature, while this section provides additional context that helps disambiguate terminology, intent, applicability, and constraints.
- TL;DR: This use case explains how to configure a custom action in Journey Optimizer that writes journey event data into Adobe Experience Platform using an HTTP API inlet and OAuth Server-to-Server authenticated calls.
Intents:
- Set up an Adobe Developer Console IO project with OAuth Server-to-Server credentials for AEP API authentication
- Create an HTTP API inlet source in Adobe Experience Platform to receive streaming journey event data
- Configure a custom action in Journey Optimizer with the correct URL, headers, and custom Bearer token authentication
- Map journey fields (journey version ID, node ID, customer ID) dynamically as variables in the custom action payload
- Use the custom action in a journey to write custom events to an AEP dataset
Glossary:
- HTTP API Inlet: An Adobe Experience Platform source connector that creates a streaming endpoint for ingesting data via HTTP POST requests (product-specific)
- OAuth Server-to-Server: An authentication credential type in Adobe Developer Console that generates Bearer tokens for server-to-server API calls without user interaction (product-specific)
- Custom authorization: A Journey Optimizer custom action authentication type that fetches a Bearer token from a specified endpoint and caches it for a configured duration (product-specific)
- XDM entity: The data payload structure conforming to the Experience Data Model schema, used as the body when writing events to AEP via the HTTP API inlet (product-specific)
- cacheDuration: The token cache setting in custom authorization configuration that controls how long the fetched Bearer token is reused before a new one is requested (product-specific)
Guardrails:
- After creating the Adobe Developer Console project, developer and API access control permissions must be explicitly granted before the credentials can be used
- The HTTP API inlet source must be created with authentication enabled; the connection endpoint URL and schema payload must be copied and stored for use in the custom action configuration
- Custom action headers must include Content-Type, Charset, and sandbox-name
- Fields intended to be populated dynamically at runtime must be changed from Constant to Variable in the custom action payload configuration
Terminology:
- Canonical name: Custom action — Acronym: none — variants: custom action configuration, Journey Optimizer custom action
- Canonical name: Adobe Experience Platform — Acronym: AEP — variants: Experience Platform, Platform
- Synonyms: “HTTP API Inlet” = “streaming endpoint” = “DCS collection endpoint”
- Do not confuse: “OAuth Server-to-Server” ≠ “OAuth user authentication” (Server-to-Server does not require a user login; it uses client credentials)
FAQ:
- Q: What type of authentication is used to call the AEP HTTP API Inlet from a Journey Optimizer custom action? — Custom Bearer token authentication using OAuth Server-to-Server client credentials fetched from the Adobe IMS token endpoint.
- Q: Where do I find the client_id, client_secret, grant_type, and scope values? — From the OAuth Server-to-Server credentials section of your Adobe Developer Console IO project, by clicking “View cURL command.”
- Q: How do I make journey-specific fields (e.g., journeyVersionId, nodeId) dynamic in the payload? — Change their field configuration from Constant to Variable in the custom action payload setup so they are populated from the journey context at runtime.
- Q: What permissions are required on the Adobe Developer Console project? — Developer and API access control must be granted with the right permissions after the project is created, as described in the AEP API authentication documentation.
- Q: What is the purpose of the cacheDuration setting in the authentication payload? — It controls how long the fetched Bearer token is cached and reused (28,000 seconds in the example) before the custom action requests a new token.