Conditional content
Conditional content allows you to adapt email and fragment content based on conditional rules. These rules are defined using profile attributes or contextual events. You can create conditional rules in the rule builder, and you can store them for reuse across your person journeys.
To add conditional content to your fragments and email messages, Marketo Optimizer allows you to apply conditional rules that are stored in the Conditions library. Apply conditional rules within the visual design space as you author email content or a fragment.
Add conditional content add-conditional-content
As you author a fragment or an email in the visual design space, use conditional rules to define multiple variants for a content component.
-
Select a content component and click the Enable conditional content icon in the component toolbar.
See Content component toolbars.
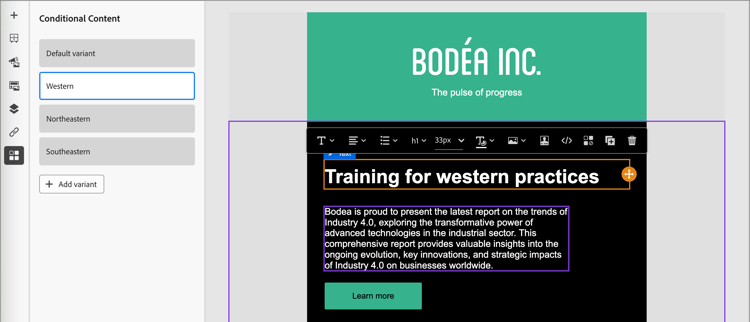
The component is outlined in orange to indicate that it is activated as a conditional component. The Conditional Content pane displays on the left with the Default variant and Variant - 1.
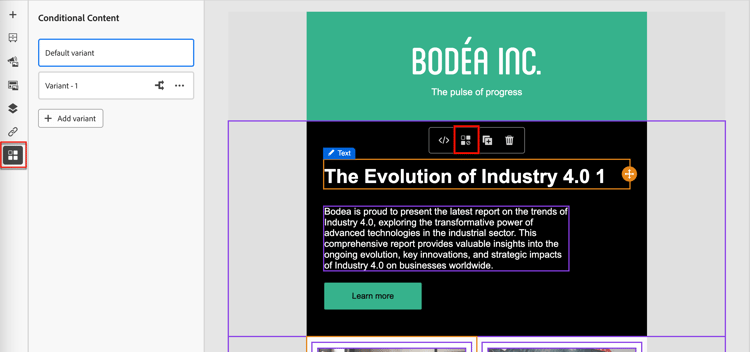
The original content that you selected and activated is the default and applies when none of the conditional rules are satisfied for any of the variants that you define.
From this pane, you can define multiple variants for the selected content component using conditional rules.
-
Hover over the first variant (Variant - 1) and click the Select condition icon (

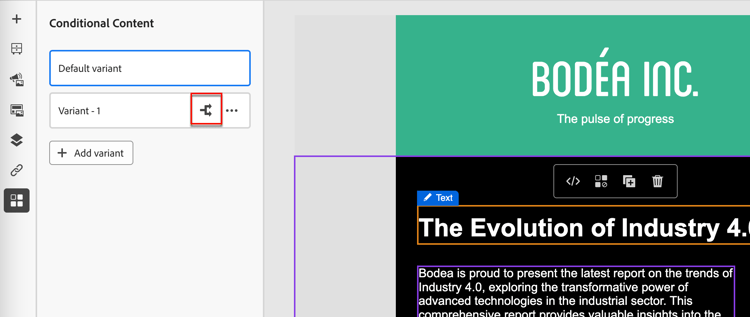
The Select condition dialog opens and displays the conditions library.
If you want to view details for a condition to ensure it is what you want, click the More menu icon (…) and choose View Info.
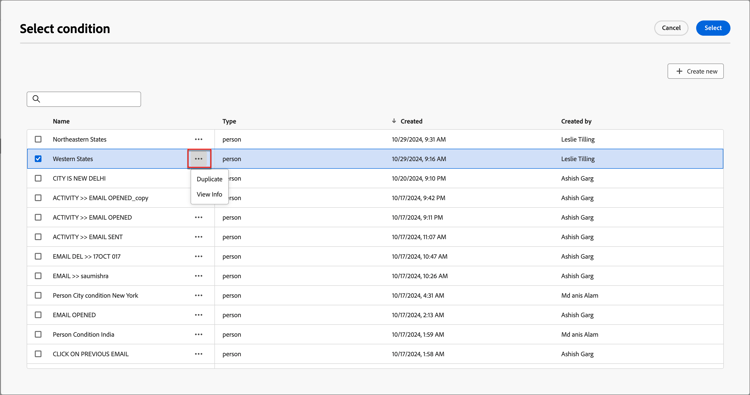
If the condition that you need does not exist, create a conditional rule by clicking Create new.
-
Select the conditional rule and click Select to associate it with the variant.
-
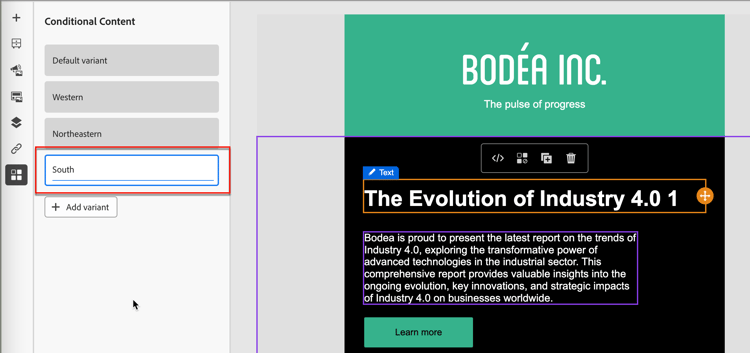
For better readability, rename the variant by clicking the More menu icon (…) for the variant and choosing Rename.
Enter a meaningful name for the variant that helps you identify the variant and its intent.
-
With the variant selected in the left pane, change the component to alter how it appears in the message when the condition is true.
In this example, the variant for the text component uses a different description based on the region of the recipient.
-
If needed, define another variant by clicking Add variant.
Repeat steps 2-5 to select a condition, rename the variant, and change the component for the variant.
You can add as many variants as needed for the content component. Change the selected variant in the left pane at any time to check how the content component appears for the condition.
note important IMPORTANT Conditional content is evaluated against associated rules in the order in which the variants are listed. The first variant with a condition that evaluates as true is used for the component. If none of the defined variant conditions evaluates as true when sending the message, the content component appears according to the Default variant. -
To delete a variant, click the More menu icon (…) for the variant and choose Delete.
Click Delete in the confirmation dialog.
Conditional rules conditional-rules
Conditional rules are a set of conditional expressions that can be evaluated as true or false. Use these rules to determine which content variant to display in a message based on various filters, such as profile attributes or contextual events.
The rules are stored in the conditions library, where they are available for reuse across email and fragment content for your organization.
Create a conditional rule create-conditional-rule
Access the conditional rule builder from the design space when you select a condition for a component variant.
-
In the Select condition dialog, click Create new.
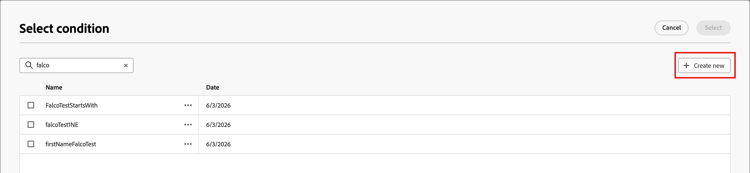
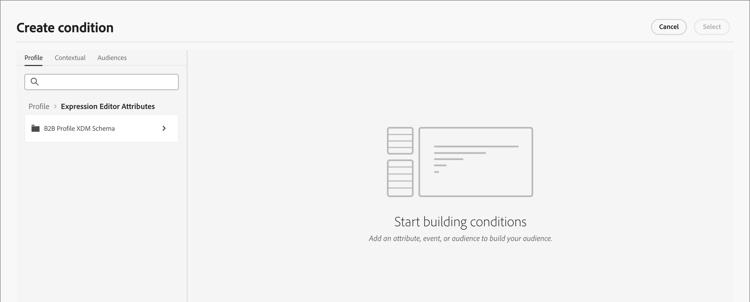
This action opens the Create condition dialog. Use the dialog tools to combine attributes into the canvas (similar to the segment building experience in Experience Platform). The filter attributes are organized into three tabs:
-
Profile - B2B Profile XDM Schema lists all the profile attributes associated to the Experience Data Model (XDM) schema defined in Adobe Experience Platform.
-
Contextual - When your message is used in a journey, contextual journey fields are available through this tab.
-
Audiences - Lists all the audiences generated from segment definitions created in Adobe Experience Platform Segmentation service.
-
-
Build the conditional rule according to your needs.
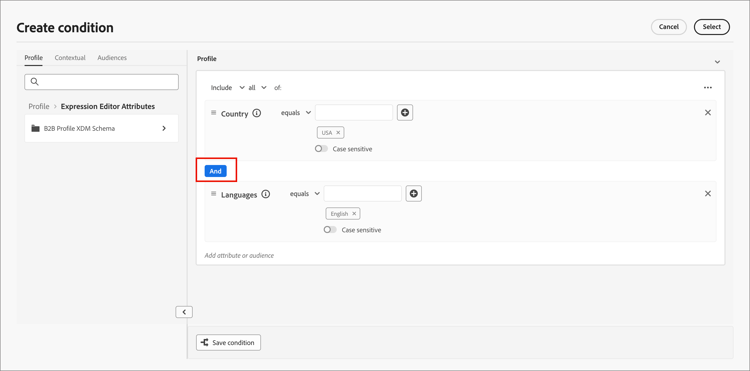
For each filter that you want to include in the rule, drag and drop the item onto the rule canvas. Expand the filter and complete the expression.
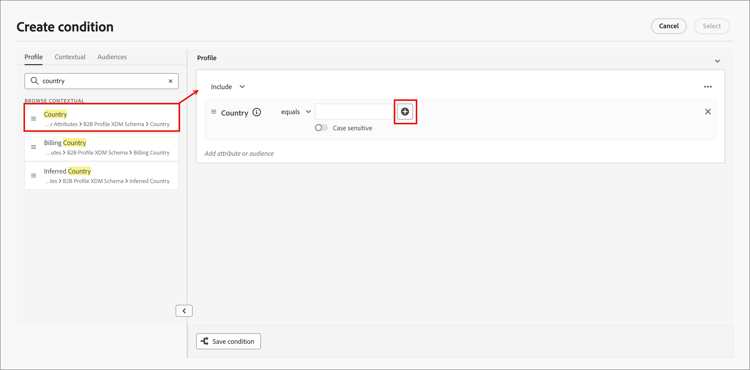
Drag and drop additional filters as needed.
If you include more than one filter, you can toggle the filter logic setting according to how you want to apply the filters:
- And - The rule evaluates as true if all the filters are true.
- Or - The rule evaluates as true if any of the filters is true.
-
Click Select to use the custom rule for the condition.
If you want to make the rule available for reuse, you can add it to the library.
Add a condition to the library add-to-library
-
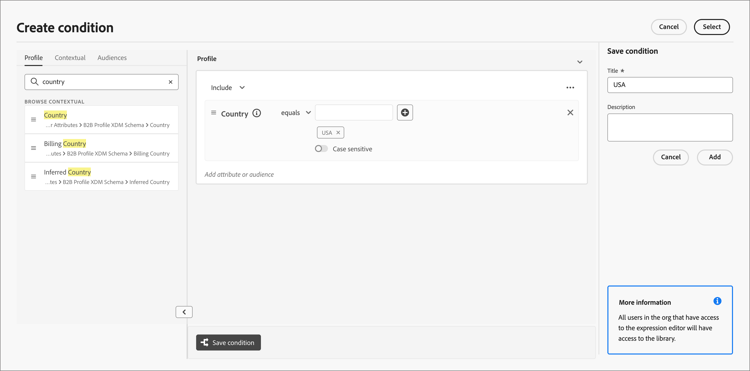
In the Create Condition dialog, click Save condition at the bottom.
-
On the right, enter the Name (required) and a Description (optional) for the rule.
Use a meaningful name and useful description to help others in your organization reuse it instead of creating a duplicate condition.
-
Click Add.
The conditional rule is saved to the library and you can select it for the current variant. It is also included in the library for use by any other dynamic content variants across person journeys.