Business rules business-rules
Business rules allow your organization to define and group multiple rules into rule sets so that marketers can apply them to their emails as needed. This provides improved granularity to limit how often and how many journeys a customer can enter within a certain time frame or control how often users receive messages depending on the type of communication.
You can create two types of rule sets:
-
Channel rule sets apply rules to communication channels. They allow you to set:
- Frequency capping rules - Example: Do not send more than one Email, SMS, Push, Direct mail, or WhatsApp communication per day.
- Quiet hours rules - Example: Do not send email messages outside of the 8AM - 9PM timeslot.
-
Journey rule sets apply entry and concurrency capping rules to a journey. (Not yet supported for the Beta release.)
- View Frequency Rules: Access and view business rules.
- Manage Frequency Rules: Create, edit or delete business rules.
Access and manage rule sets access-manage
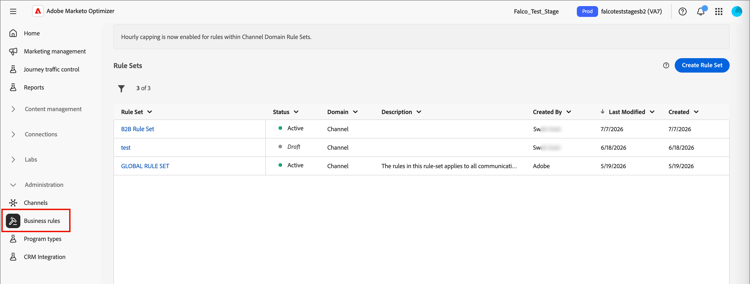
To access all existing rule sets, expand Administration in the left navigation and select Business rules.
Global and custom rule sets global-custom
When accessing Rule Sets for the first time, a default rule set is pre-created and active: GLOBAL RULE SET. This is a global rule set that you can apply to control how often users receive messages across one or multiple channels. The rules defined in this rule set apply to all selected channels.
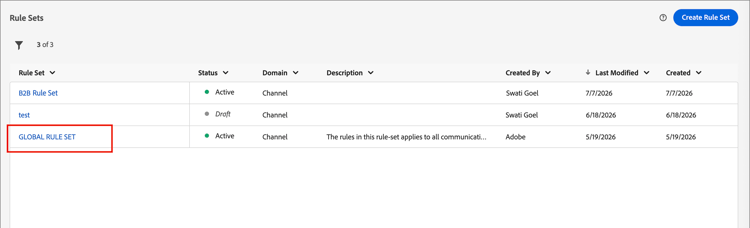
In addition to this default rule set, you can create your own custom rule sets and apply them to a journey or channel node to use specific capping and quiet hours rules.
Open a rule set open-rule-set
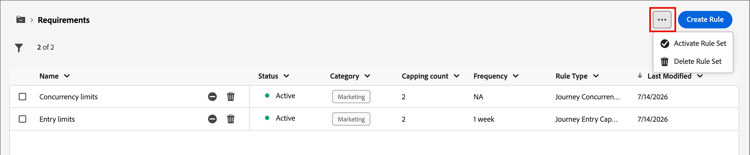
Click a rule set name to view and edit its rule definitions. All rules included in that rule set are listed. Use the More menu ( … ) on the top right to activate it, deactivate it, or delete it.
Edit the rules edit-rules
For any draft rule in the rule set, click the Edit (

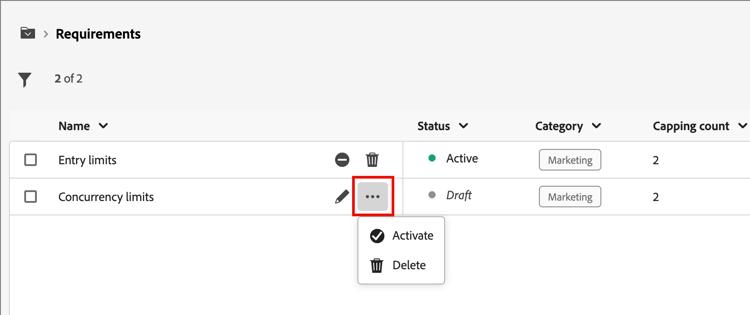
To deactivate a rule, click the Deactivate (

Create and activate custom rule sets create
-
Expand Administration in the left navigation and select Business rules.
-
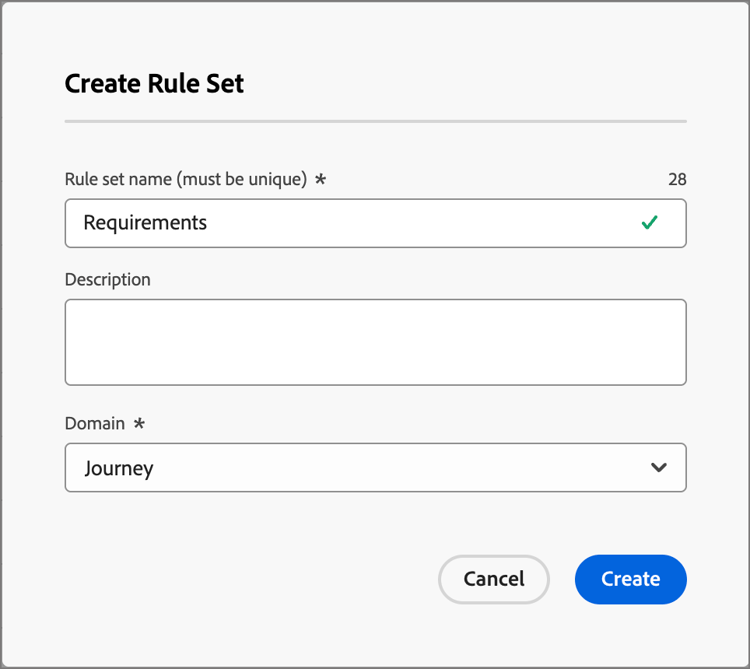
On the Rules sets list page, click Create rule set at the top right.
-
Enter a unique Name (required) for the rule set and add a Description (optional).
-
Select the rule set Domain.
- Channel - Apply capping rules or quiet hours rules to communication channels.
- Journey - Apply entry and concurrency capping rules to a journey.
note important IMPORTANT Journey rules are not yet supported in this Beta release. -
Click Save.
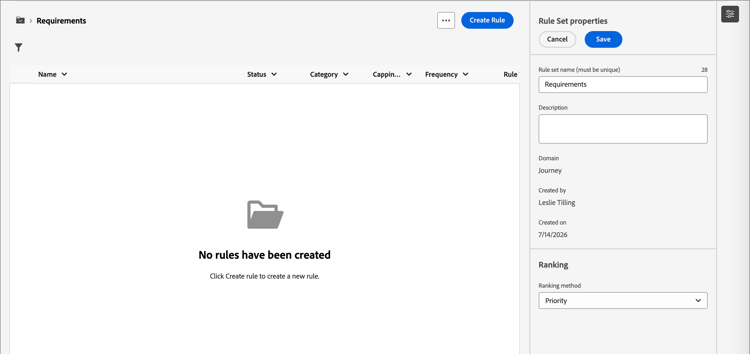
Add the rules add-rules
After you create the rule set, add each rule that you want to include.
-
Click Add rule.
-
Configure the rule parameters according to its purpose.
The parameters available for the rule depend on the rule set domain selected at its creation.
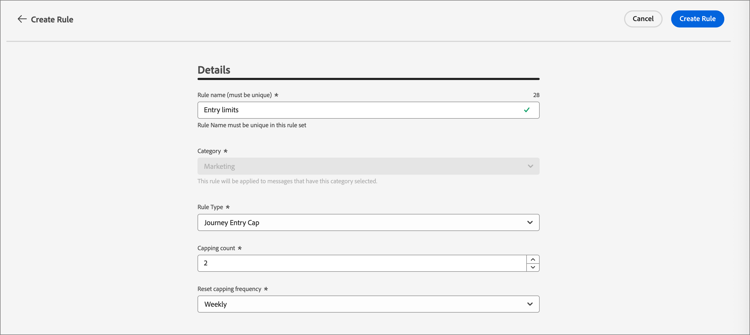
Detailed information about configuring journey and channel rules is available in these sections:
-
Click Create Rule to confirm the rule creation.
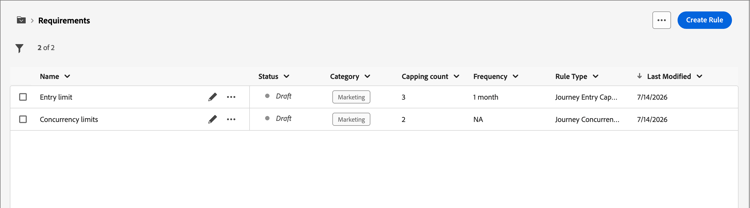
The new rule is listed in the rule set with Draft status.
-
Repeat the preceding steps to add as many rules as needed for the rule set.
When created, a rule has the Draft status and cannot yet impact any message.
-
To activate a rule for the rule set, click the More menu ( … ) icon next to the rule name and choose Activate.
In the confirmation dialog, click Activate.
Activate the rule set activate-rule-set
Activating the rule set makes it available to apply to a journey or channel message. When a rule set is active, you cannot add more rules to it. You can deactivate it to make changes and then activate it again.
-
Open the rule set from the Rule Sets list page.
-
Click the More menu ( … ) at the top right and choose Activate Rule Set.
-
In the confirmation dialog, click Activate.
note NOTE It can take up to 10 minutes for a rule or rule set to be fully activated. You do not need to modify messages or republish journeys for a rule to take effect.
You can apply the active rule set to a message or a journey, depending on the domain setting for the rule set.
Frequency capping by channel frequency-capping
Set frequency caps by channel and communication type to limit how many messages a profile receives and avoid overwhelming customers with similar communications. Channel rule sets apply capping rules to communication channels. For example, do not send more than one email or SMS communication per day.
Leveraging channel rule sets allows you to set frequency capping by communication type to prevent overloading customers with similar messages. For example, you can create a rule set to limit the number of promotional communications sent to your customers and another rule set to limit the number of newsletters sent to them. You can then choose to apply either the promotional communication or the newsletters rule set.
Create a channel capping rule create-capping-rule
-
Select the channel rule set where you want to add the capping rule, or create a new channel rule set.
-
In the rule set page, click Add Rule and enter a unique name for the rule.
note NOTE The Category field specifies the messaging category for the rule. Currently, this field is read-only and only the Marketing category is available. -
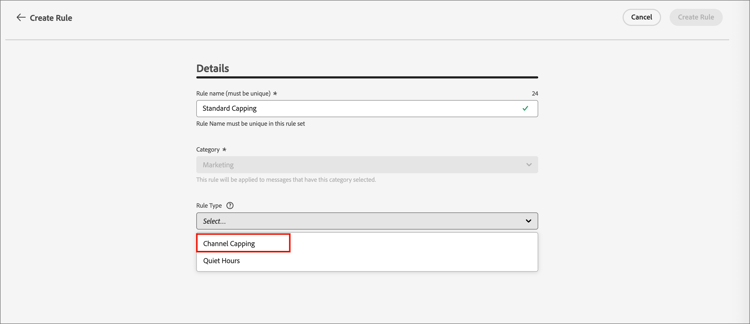
For the Rule Type, choose Channel capping.
-
In the Capping count field, set the capping value for your rule.
This value is the maximum number of messages that can be sent to an individual user profile each month, week, day, or hour, according to your selection in the other fields.
-
For Reset capping frequency, select if you want the capping to be applied.
Frequency cap is based on the selected calendar period. It is reset at the beginning of the corresponding time frame. Choose the expiry of the counter for each period:
- Hourly - The frequency cap is valid for the selected number of hours. The counter automatically resets at the beginning of each time window. For a 1-hour frequency cap, it resets every hour, coinciding with the end of a UTC hour.
- Daily - The daily frequency cap is valid for the day until 23:59:59 UTC and resets to 0 at the start of the next day.
- Weekly - The frequency cap is valid until Saturday 23:59:59 UTC of that week. The expiry date applies regardless of when the rule was created. For example, if the rule is created on Thursday, this rule is valid until Saturday at 23:59:59.
- Monthly - The frequency cap is valid until the last day of the month at 23:59:59 UTC. For example, the monthly expiration for January is 01-31 23:59:59 UTC.
note important IMPORTANT -
To ensure accuracy, make sure you choose the highest priority namespace while authoring a journey. Learn more about namespace priority in the Platform Identity Service guide
-
The profile counter value updates when the communication is delivered. Consider this when you are sending large volumes of communications, because the throughput could result in the recipient getting the email minutes or even hours after the initiation of the communication (in the case that you are sending millions of communications simultaneously). This matters in the case that a recipient receives two communications close together. It is recommended that you space communications apart by at least two hours where possible to provide enough time for the recipient to receive the communication and the counter value to update accordingly.
-
Use the Every field to set the frequency for the capping rule over multiple hours, days, weeks, or months (depending on the specified time frame).
Make sure you enter a value that matches the selected duration type: 1-23 for Hourly, 1-30 for Daily, 1-4 for Weekly, and 1-3 for Monthly.
The counter automatically resets to 0 when a new time window begins. For a two-day frequency cap, this reset occurs every two days at midnight UTC.
-
Select the channels you want to use for this rule:
- SMS (not currently supported for this Beta release)
- Push notification (not currently supported for this Beta release)
- Direct mail (not currently supported for this Beta release)
- WhatsApp (not currently supported for this Beta release)
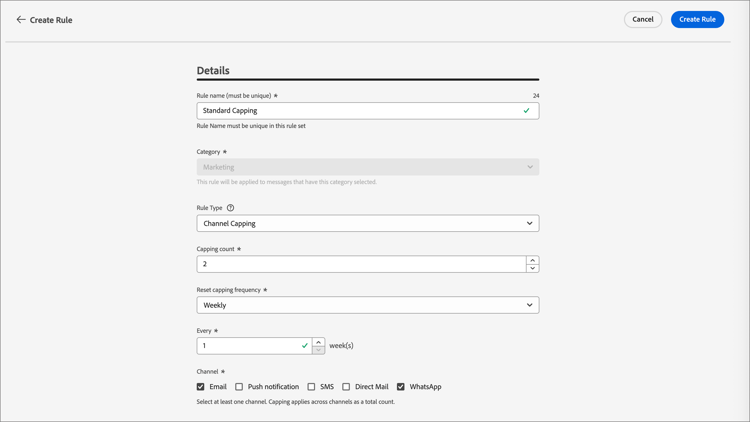
Select multiple channels if you want to apply capping across all selected channels as a total count.
For example, set capping to 5, and select both the Email and SMS channels. If a profile has already received three marketing emails and two marketing SMS messages for the selected period, this profile is excluded from the very next delivery of any marketing email or SMS message.
-
Click Save to confirm the rule creation.
Your frequency rule is added to the rule set with the Draft status.
-
Repeat the steps above to add as many rules as needed to the rule set.
-
When the capping rule is ready to be applied to messages, activate the rule and the rule set.
Apply the channel capping rule set apply-capping-rule
-
When creating a journey, add one of the Send action nodes for a channel that you selected for your rule and edit the content of your message.
-
On the Actions tab, set the Business rules option to the rule set with the frequency capping rule.
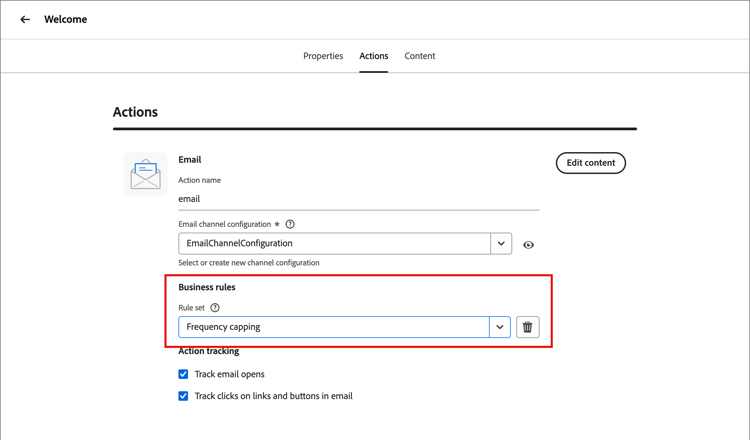
note NOTE Only activated rule sets are available in the list. -
Before activating your journey, make sure you schedule its execution at least 10 minutes into the future.
This provides the required time to populate the counter values on the profile for the business rule you selected. If you activate the journey immediately, the rule set counter values cannot populate on the profiles of the recipients, and the message is not counted toward their frequency capping rules for the custom rule sets.
When testing frequency rules, it is recommended to use a newly created test profile, because when a profile’s frequency cap is reached, there is no way to reset the counter until the next period. Deactivating a rule allows capped profiles to receive messages, but it does not remove or delete any counter increments.
Set quiet hours quiet-hours
Quiet hours let you define time-based exclusions for email, SMS, Push, and WhatsApp channels. They ensure that no messages are sent during specific periods of time, helping you respect customer preferences and compliance requirements.
You can apply quiet hours through rule sets and assign them to individual channel actions in journeys for precise control. By streamlining these standards, you can enhance customer experience, save time, and ensure compliance with communication rules:
- Don’t wake up your customer - The right customer, right channel, right time is the mantra of many marketers, so it makes sense that timing is a critical part of the customer journey. By setting a Quiet hours rule, brands have better control over when contacts are receiving messages, ensuring they are getting them when they’re more likely to take action on your message.
- Convenience - Easily intercept communications across campaigns & journeys when you need to prevent an audience from receiving a message without needing to stop the entire journey or campaign.
- Time Saving - Manage exclusions in one place by creating a time-based rule, instead of adding multiple condition nodes with custom expressions.
Guardrails and limitations
- Propagation delay – Updates to a quiet hours rule may take up to 12 hours to be applied to channel actions that already use that rule.
- High-volume latency – In cases of high-volume communications, the system may take additional time to begin successfully enforcing quiet hour suppressions.
Create quiet hours rules create-quiet-hour-rules
-
Select the channel rule set where you want to add the rule, or create a new channel rule set.
-
In the rule set page, click Add Rule and enter a unique name for the rule.
note NOTE The Category field specifies the messaging category for the rule. Currently, this field is read-only and only the Marketing category is available. -
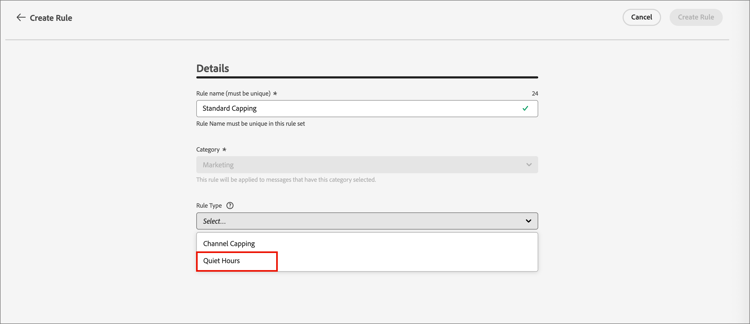
For the Rule type select Quiet hours.
-
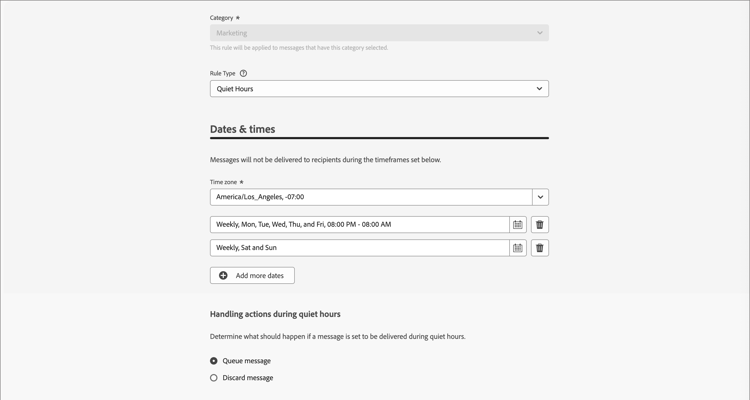
In the Dates & times section, define when to apply quiet hours:
-
For Time zone, choose a standard time zone for all recipients in the audience, regardless of their individual time zones.
To use the time zone field from each profile, select Use recipients local time zone.
note important IMPORTANT If a profile has no time zone value, quiet hours are not enforced for that profile. -
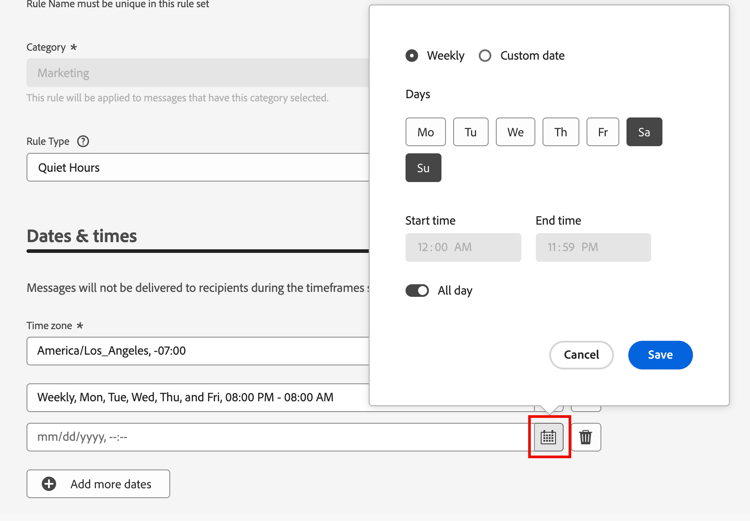
Click the Calendar icon and specify the time period at which quiet hours should apply.
-
Weekly - Choose specific days of the week and a timeslot. You can also enforce the rule All day.
-
Custom date - Choose specific dates in the calendar and a timeslot. You can also enforce the rule All day.
-
-
Click the Add more dates button to add up to five separate periods.
-
-
In the Handling actions during quiet hours section, choose how messages are treated during the selected period of time:
-
Queue message - Messages are sent at the completion of the quiet hours period unless in Paused state.
note NOTE If a message remains in a queued state for a profile for more than 7 days, the message will be discarded. -
Discard message - Messages are never sent.
note NOTE If you select Discard and apply this rule to a journey action, the profile is removed from the message delivery and exited from the journey.
-
-
Click Save to confirm the rule creation.
Your quiet hours rule is added to the rule set with the Draft status.
-
Repeat the steps above to add as many rules as needed to the rule set.
-
When the rule is ready to be applied to messages, activate the rule and the rule set.
Apply quiet hours to a journey action apply-quiet-hours
After the rule is saved and the rule set is activated, you can apply it to channel actions in journeys.
-
When creating a journey, add one of the Send action nodes for a channel that you selected for your rule and edit the content of your message.
-
On the Actions tab, set the Business rules option to the rule set with the quiet hours rule.
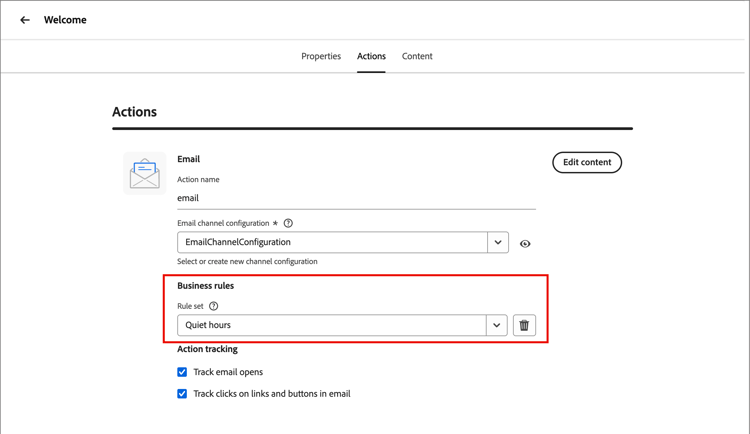
note NOTE Only activated rule sets are available in the list. -
Complete and publish the journey when you are ready.