Create Your First App Automatically create-first-app
The platform turns your website into a fully functional app. It proposes actions, writes handler code and tests, creates EDS widgets, and sends the generated files to two GitHub repositories that you own.
Allow approximately 15 minutes for generation. At the end of this tutorial, you will have a deployed app that you can test in a supported LLM platform such as ChatGPT.
Journey: Confirm requirements → create two repositories → create the app → review generated actions → deploy to Stage → test the plugin → connect production systems.
Before you begin
Complete all LLM Apps requirements before starting this tutorial.
This tutorial creates an LLM App for Frescopa Coffee.
Create two empty repositories
The platform needs two empty repositories. Create both under the same GitHub account or organization:
- Handler repository — stores action handlers and tests. For example,
my-brand-llm-app. - EDS repository — stores generated widget blocks and styles. For example,
my-brand-llm-app-eds.
Go to github.com/new for each repository.
Do not initialize either repository with a README, .gitignore, or license. The platform prepares the required project structure.
Start the app
-
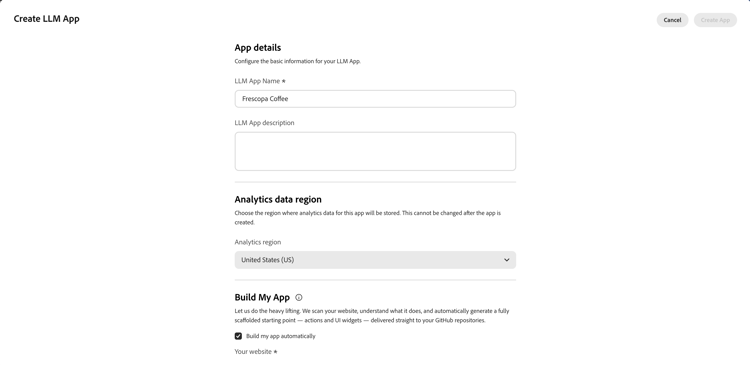
Open Adobe LLM Apps and select Create App.
-
Enter the LLM App Name and an optional description.
-
Select the Analytics region.
note important IMPORTANT The analytics region cannot be changed after the app is created. -
In Build My App, select Build my app automatically.
-
In your website, enter your website URL including the
https://protocol. The platform analyzes this site to determine useful actions and representative sample results.
Give LLM Apps access to the repositories
The Adobe LLM Apps GitHub App gives LLM Apps access to the repositories you select.
Connected organization
If the Adobe LLM Apps GitHub App was already installed before you created the repositories:
- Select the connected organization.
- Select Manage repos on GitHub.
- Add the two repositories to the existing GitHub App installation.
- Return to LLM Apps and refresh the repository lists.
First-time connection only
If the organization does not appear in the dialog:
- Select Connect a GitHub org.
- Install the Adobe LLM Apps GitHub App.
- Choose Only select repositories and select the two repositories.
- Return to the Create LLM App dialog.
If you cannot install or update the GitHub App, ask an organization administrator.
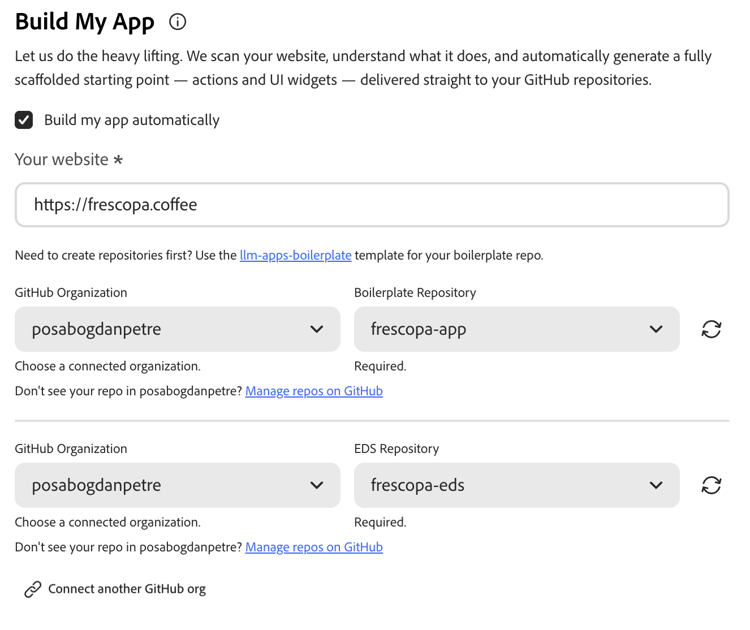
Select the repositories
-
Under Boilerplate Repository, select the organization and the empty handler repository.
-
Under EDS Repository, select the organization and the empty EDS repository.
-
Under Terms & Conditions, check I accept the Adobe Developer Terms.
-
Select Create App.
Complete the EDS setup
When the selected EDS repository is empty, LLM Apps initializes it with the AEM boilerplate. The dialog then asks you to install AEM Code Sync before trying to create the app again.
-
In the message below the EDS repository, select Install AEM Code Sync.
-
On GitHub, install AEM Code Sync and grant it access to the EDS repository.
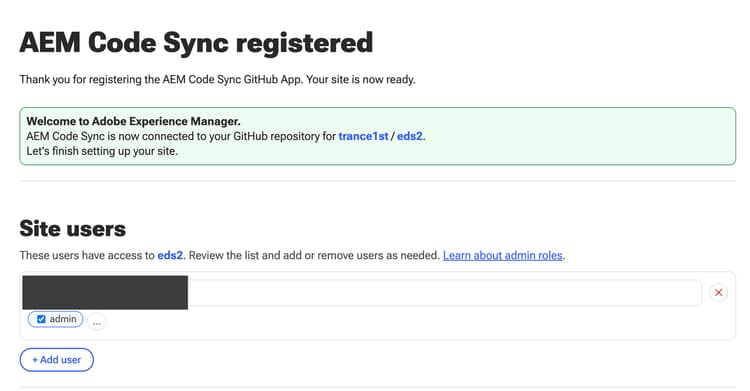
On the AEM Code Sync registered confirmation page, under Site users, select + Add user and add the email address you use to sign in to LLM Apps with the admin role. Then select Finish setup at the bottom of the page.
-
Return to the Create LLM App dialog.

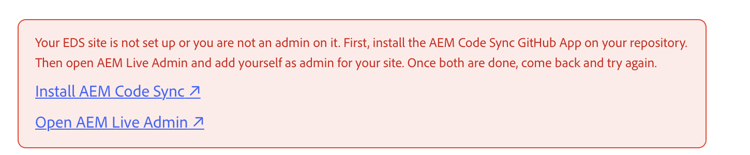
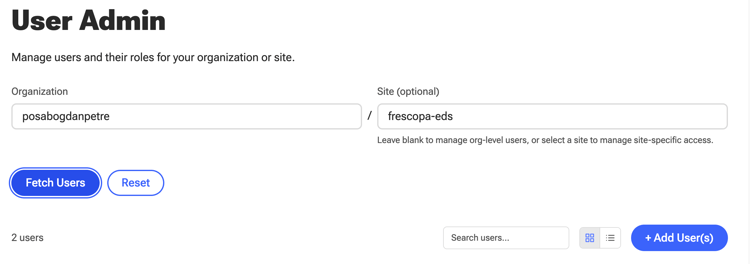
You must be an administrator for the EDS site. If the dialog reports that you are not an administrator:
-
Select Open AEM Live Admin.
-
Add yourself as an administrator for the EDS site by clicking on the + Add User(s) button.
-
Return to LLM Apps, refresh the EDS repository, and select Create App again.
After the repository and administrator checks pass, LLM Apps creates the app and starts generating actions.
Wait for Actions generation
Go to Actions page, from the left. The Actions page shows Discovering actions for your conversational experience while the agent analyzes the website and generates the app. Generation usually takes approximately 15 minutes. You can leave this page and return later.
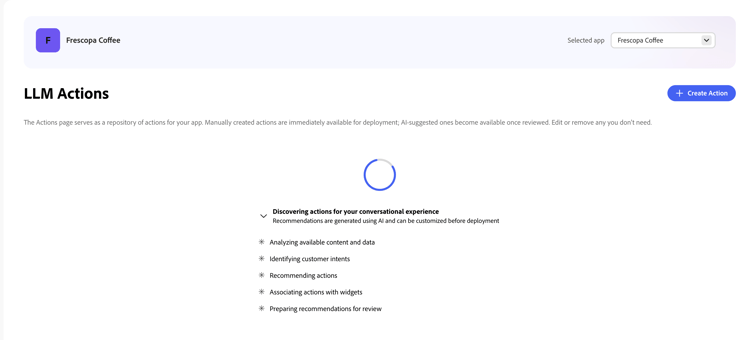
During generation, LLM Apps:
- Analyzes the website and identifies useful customer intents.
- Creates action metadata, including descriptions and input parameters.
- Generates a handler and tests for each action in the handler repository.
- Generates an EDS widget for each action in the EDS repository.
- Prepares the actions for your review.
The generated handlers initially use sample data derived from the website. They demonstrate the complete experience but do not connect to your production systems.
Review the generated actions
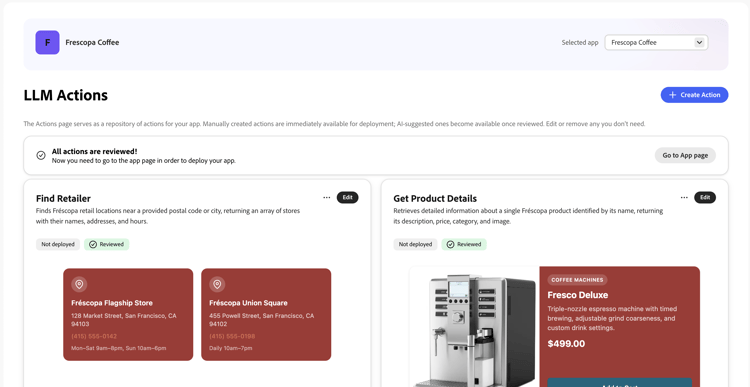
When generation finishes, the Actions page displays the generated actions and widget previews. Each action has an AI-generated action, needs review badge.
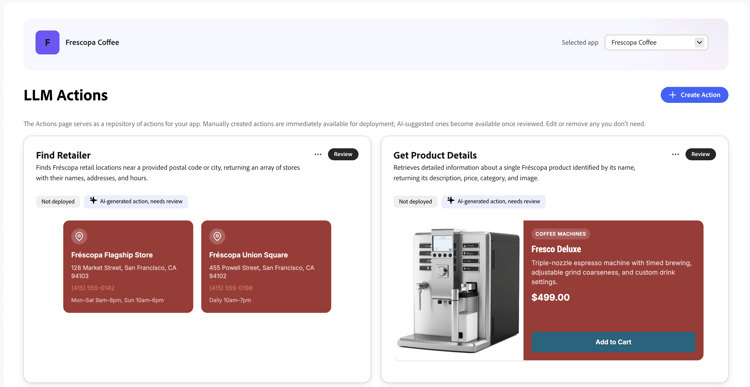
For each action:
- Select Review.
- Review the name, description, parameters, annotations, generated handler, and widget.
- Select Mark as reviewed. This merges the generated pull requests.
- Return to the Actions page and repeat for the remaining actions.
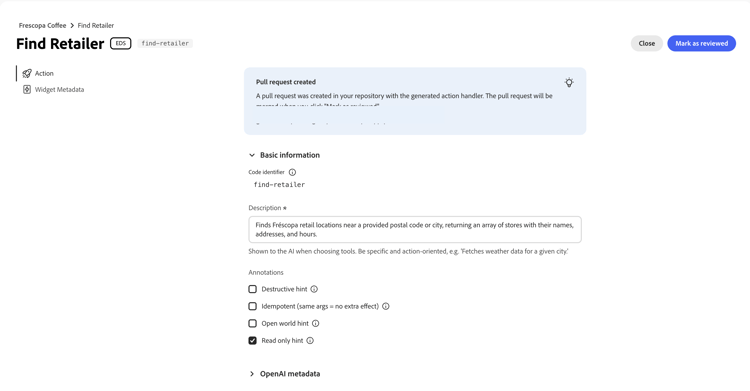
When all actions are reviewed, select Go to App page.
Deploy the app
- Return to the App Detail page.
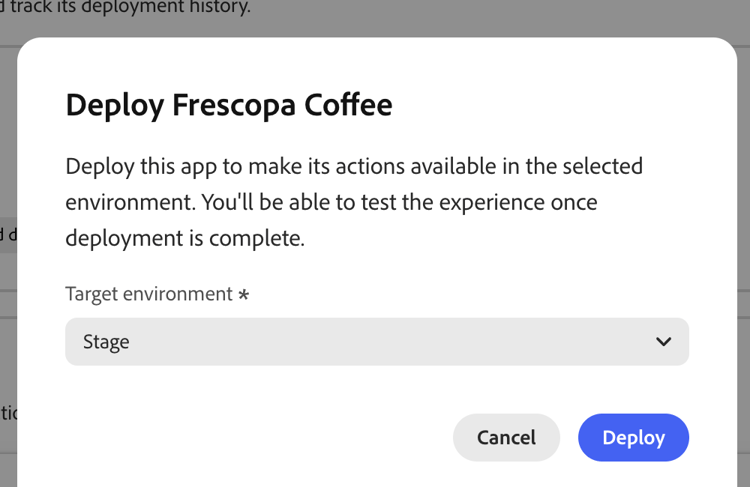
- Select Deploy.
- Select Stage as the target environment.
- Select Deploy.
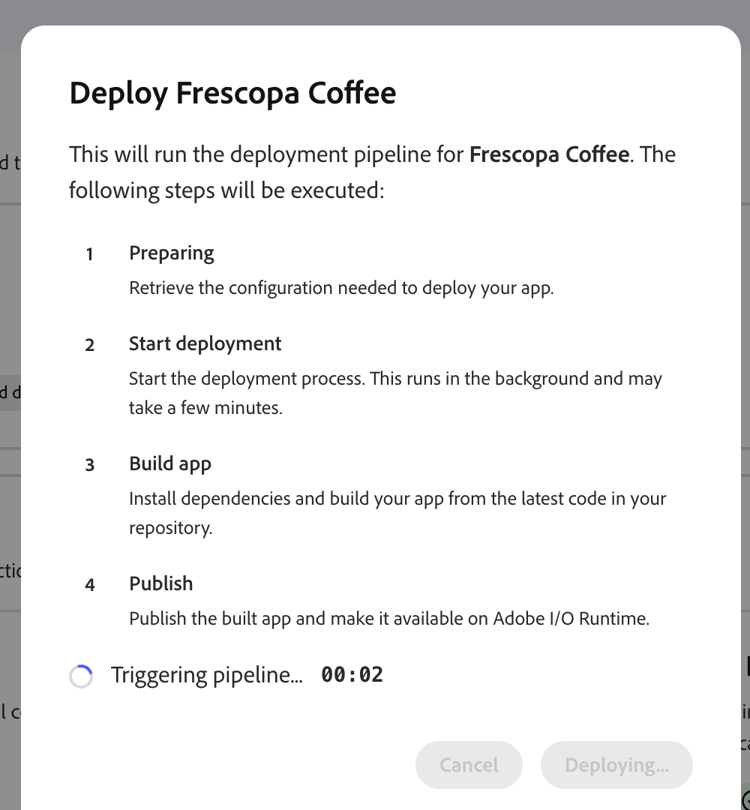
Wait while LLM Apps prepares, builds, and publishes the app.
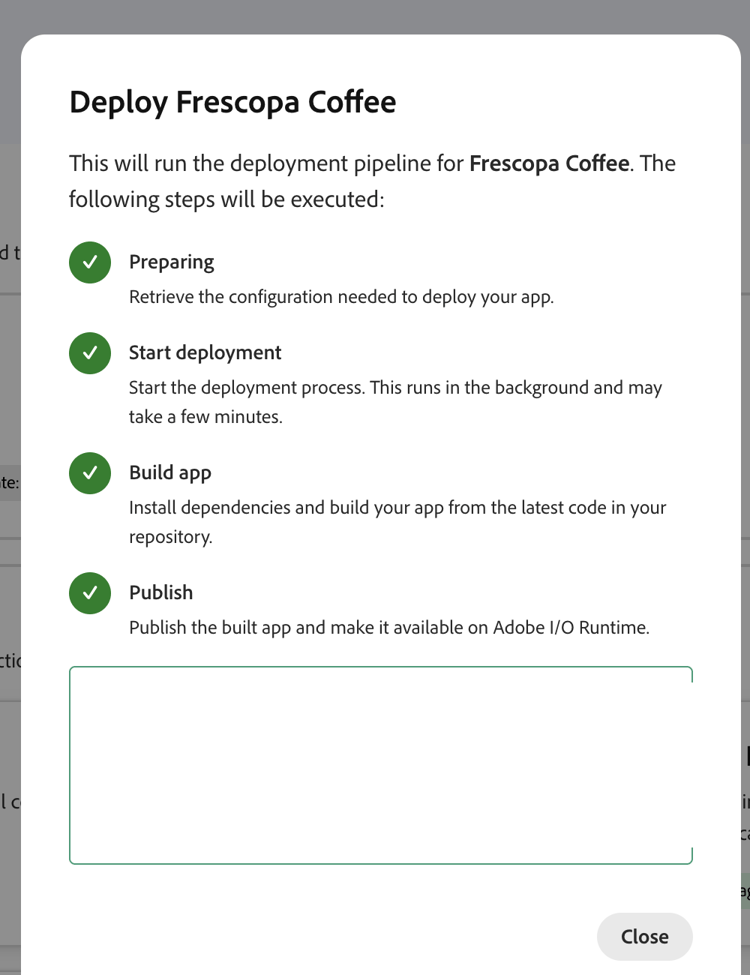
After deployment, the Test the app section displays the staging MCP server URL. Select Copy URL.

Test in ChatGPT
Follow Test in ChatGPT to create a plugin using the staging MCP server URL.
Ask a question that matches one of the generated actions. Verify that:
- ChatGPT selects the expected action.
- The widget renders and contains the expected sample data.
- Widget controls produce the expected follow-up behavior.
- The text response accurately summarizes the result.
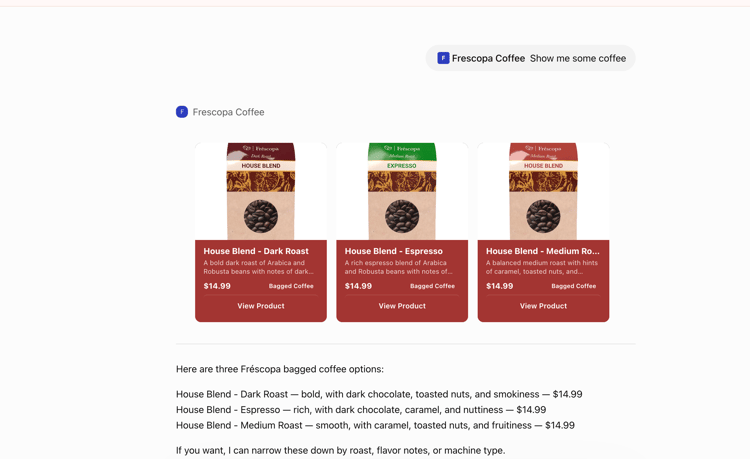
You now have a fully functional, working end-to-end app.
Make the app production-ready
The generated app uses sample data. Before using it with customers:
- Connect your systems — customize each generated handler to replace sample data with calls to your APIs or data sources.
- Protect credentials — store API URLs and credentials in managed runtime configuration, never in source code or widget JavaScript.
- Validate data — validate action arguments and API responses, add request timeouts, and return safe error messages.
- Update the widgets — keep each widget aligned with its handler’s
structuredContent, then apply your branding and accessibility requirements. See Customize a generated widget. - Test the handlers — cover valid input, invalid input, empty results, API failures, and the data shape expected by the widget.
- Verify in Stage — redeploy and test every action through the ChatGPT plugin.
- Deploy to Production — after Stage testing succeeds, deploy to Production and create or update the plugin with the production MCP server URL.
To add a capability that the platform did not create, see Create an action from scratch.