On this page: Add and manage your Web Application Firewall (WAF) egress IPs per delegated subdomain directly in Journey Optimizer, so that only traffic routed through your firewall can reach your Journey Optimizer-hosted links.
Organizations with strict network security requirements — such as those in the financial sector — can mandate that all requests to links hosted by Adobe Journey Optimizer must flow through a customer-managed Web Application Firewall (WAF) before reaching the Adobe network. Any request that bypasses the firewall must be rejected.
Journey Optimizer lets administrators configure, per delegated subdomain, the public egress IPs of their WAF. Once set, only traffic originating from those IPs can reach the corresponding subdomain. All other inbound requests — including direct requests that bypass the firewall — are rejected.
How it works waf-ip-allowlist-how-it-works
Enabling WAF-only routing for a subdomain requires two steps as detailed below.
- DNS re-pointing: the subdomain’s DNS records must be updated to route traffic to your organization’s WAF instead of directly to Adobe’s network edge.
- WAF egress IP declaration: your organization provides the public egress IPs of your WAF in Journey Optimizer. These are the IPs from which the firewall sends requests onward to Adobe.
Once both are in place, the traffic flow works as follows:
-
A recipient clicks a link in an Adobe Journey Optimizer communication.
-
The request reaches your organization’s WAF, which inspects and filters it according to your security policies.
-
The WAF forwards the request to Adobe’s network edge, from one of its declared egress IPs.
-
Journey Optimizer checks the source IP of the incoming request against the subdomain’s allowed list.
- IP matches → the request went through the WAF → processed normally.
- IP does not match → the request bypassed the WAF → rejected with a 403 Forbidden error. The recipient sees a broken link.
Requests for subdomains without allowed IPs configured are not affected and continue to work as before.
Guardrails and constraints waf-ip-allowlist-guardrails
If incorrect WAF egress IPs are saved, Journey Optimizer will reject every incoming request for that subdomain — including legitimate ones from real recipients clicking links in communications, who will receive a 403 error page.
Always confirm the exact egress IPs with your security team before saving, and test on a non-production subdomain first if possible.
Access and manage allowed IPs waf-ip-allowlist-access
To access the list of subdomains for which you have allowed the IPs of your Web Application Firewall, go to Administration > Channels > General Settings, and select Allowed list - IPs.
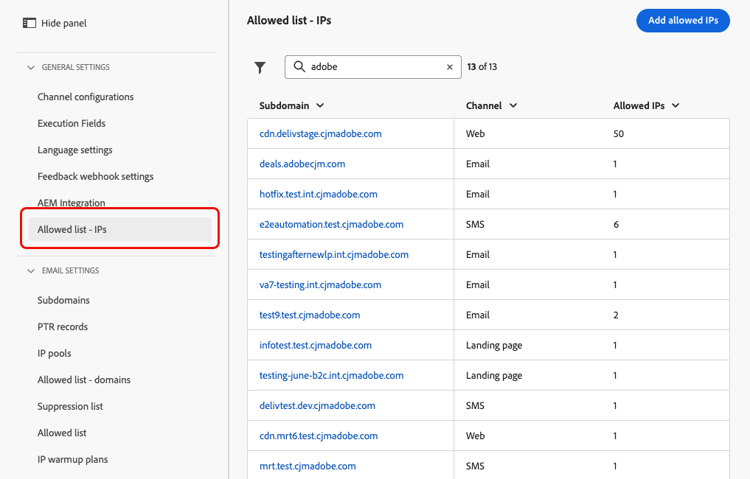
The inventory page lists all subdomains that have at least one IP allowed, across all channel types (Email, Landing page, SMS, Web). Learn more on subdomains in this section.
The list shows the number of allowed IPs per subdomain, and the author of the last modification.
You can filter the inventory by channel type, and search by subdomain name.
Add IPs to the allowed list waf-ip-allowlist-add
To add IPs to the allowed list for a given subdomain, follow the steps below.
-
From the Allowed list - IPs inventory, click the Add allowed IPs button.
-
Select the target subdomain from the Subdomain drop-down list. Only delegated subdomains are listed, across all supported channel types: Email, Landing page, SMS, and Web.
-
In the IP address field, enter the public egress IPs of your WAF. IPv4, IPv6, and CIDR ranges are supported (for example,
203.0.113.42,2001:db8::1,203.0.113.0/24).Each valid, non-duplicate entry is validated inline before being added. You can add up to 50 IP entries per subdomain.
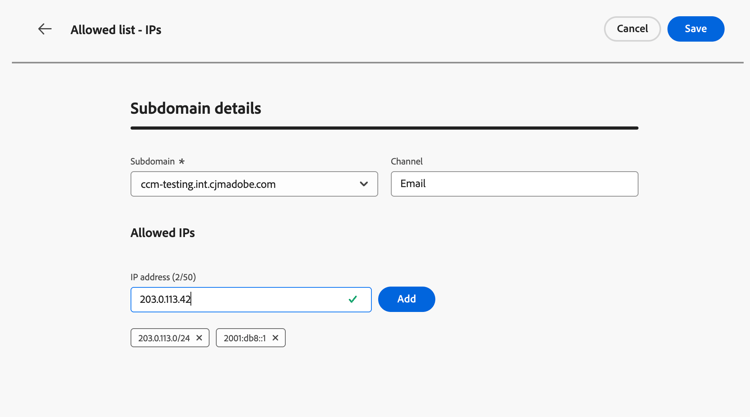
note important IMPORTANT A warning is displayed when private or reserved IP ranges (RFC 1918, loopback, link-local) are entered. WAF egress IPs are normally public addresses. -
If needed, you can remove an IP from the list by clicking the ✕ icon on its chip.
-
Click Save. The allowed list is applied and propagated to the edge. The subdomain appears in the inventory and its IPs are enforced immediately.
Now any requests to this subdomain from any IP not on this list will be rejected.
Edit allowed IPs waf-ip-allowlist-edit
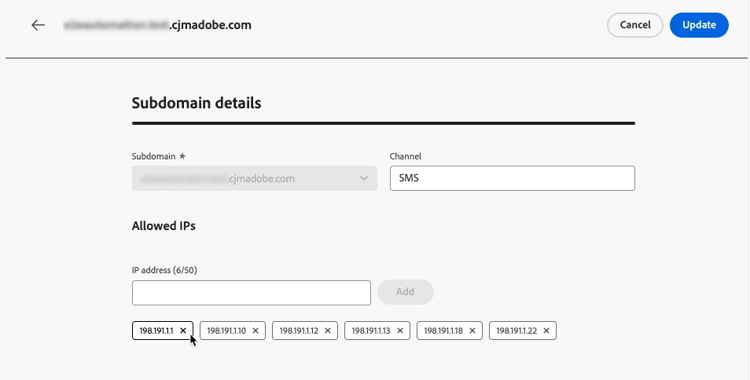
To update the allowed IPs for an existing subdomain, click the subdomain name in the inventory.
The Subdomain field is read-only — it cannot be changed after creation.
Add new IPs using the input field, or remove existing IPs by clicking the ✕ icon on each chip.
Remove allowed IPs waf-ip-allowlist-remove
To remove all IPs from the allowed list for a subdomain, use the Delete icon from the Actions column in the inventory. This fully lifts the WAF restriction for that subdomain.
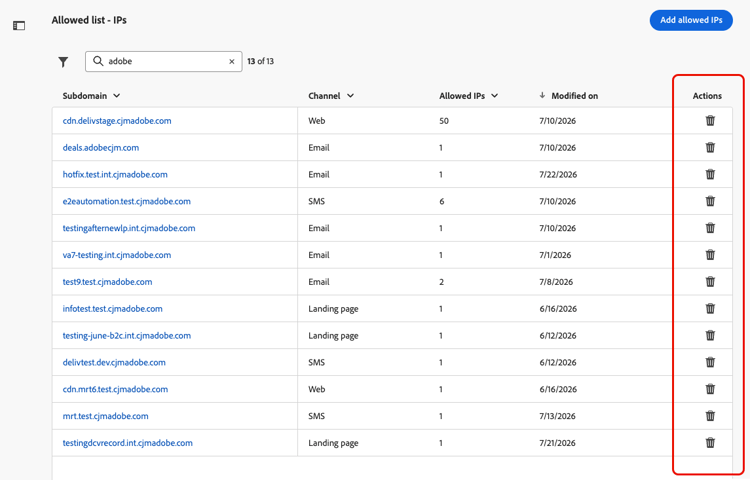
A confirmation pop-up opens. Type the exact subdomain name to confirm, then click Remove.
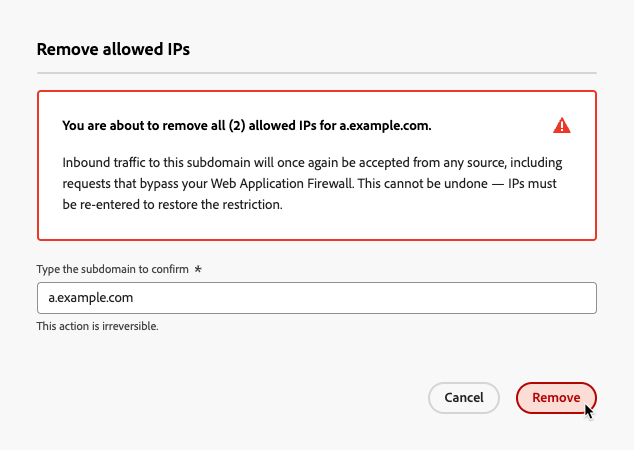
After removing all IPs, the subdomain no longer appears in the inventory. You can reconfigure it at any time by adding IPs again for this subdomain.