Record delete requests (UI Workflow) record-delete
Use the Data Lifecycle workspace to delete records in Adobe Experience Platform based on their primary identities. These records can be tied to individual consumers or any other entity that is included in the identity graph.
Prerequisites prerequisites
Deleting records requires a working understanding of how identity fields function in Experience Platform. Specifically, you must know the primary identity namespace and values for the entities whose records you want to delete, depending on the dataset (or datasets) you are deleting them from.
Refer to the following documentation for more information on identities in Experience Platform:
- Adobe Experience Platform Identity Service: Bridges identities across devices and systems, linking datasets together based on the identity fields defined by the XDM schemas they conform to.
- Identity namespaces: Identity namespaces define the different types of identity information that can relate to a single person, and are a required component for each identity field.
- Real-Time Customer Profile: Uses identity graphs to provide unified consumer profiles based on aggregated data from multiple sources, updated in near-real-time.
- Experience Data Model (XDM): Provides standard definitions and structures for Experience Platform data through the use of schemas. All Experience Platform datasets conform to a specific XDM schema, and the schema defines which fields are identities.
- Identity fields: Learn how an identity field is defined in an XDM schema.
- Secondary identities are not scanned. If a dataset contains multiple identity fields, only the primary identity is used for matching. Records cannot be targeted or deleted based on non-primary identities.
- Records without a populated primary identity are skipped. If a record does not have primary identity metadata populated, it is not eligible for deletion.
- Data ingested before identity configuration is not eligible. If the primary identity field was added to a schema after data ingestion, previously ingested records cannot be deleted through this workflow.
Create a request create-request
To start the process, select Data Lifecycle in the left navigation of the Experience Platform UI. The Data lifecycle requests workspace appears. Next, select Create request from the main page in the workspace.

The request creation workflow appears. By default, the Delete record option is selected under the Requested Action section. Leave this option selected.

Select datasets select-dataset
The next step is to determine whether you want to delete records from a single dataset or all datasets. Depending on your organization’s configuration, the dataset selection option may not be available. If you do not see this option, continue to the Provide identities section of the guide.
In the Record Details section, select a radio button to choose either a specific dataset or all datasets.
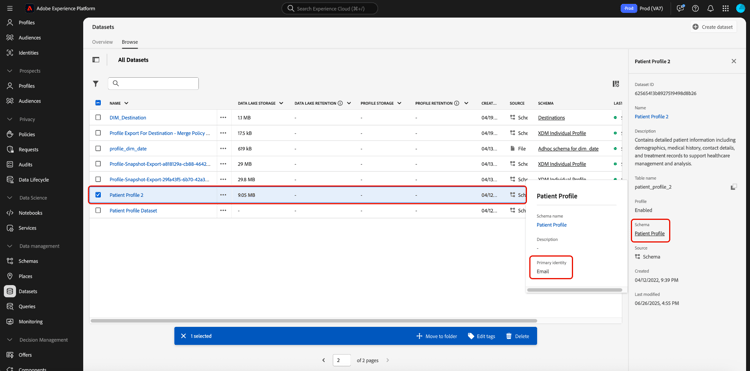
To delete from a specific dataset, select Select dataset, then select the database icon (


To delete from all datasets, select All datasets. This option increases the scope of the operation and requires you to provide the primary identity type for each dataset you want to target.

Each dataset in Experience Platform supports only one primary identity type.
- When deleting from a single dataset, all identities in your request must use the same type.
- When deleting from all datasets, you can include multiple identity types, since different datasets may rely on different primary identities."
Provide identities provide-identities
When deleting records, you must provide identity information so the system can determine which records are to be deleted. For any dataset in Experience Platform, records are deleted based on the primary identity field that is defined by the dataset’s schema.
Like all identity fields in Experience Platform, a primary identity is composed of two things: a type (the identity namespace) and a value. The identity type provides context as to how the field identifies a record (such as an email address). The value represents a record’s specific identity for that type (for example, jdoe@example.com for the email identity type). Common fields used as primary identities include account information, device IDs, and cookie IDs.
There are two options to provide identities when deleting records:
Upload a JSON file upload-json
To upload a JSON file, you can drag and drop the file into the provided area, or select Choose files to browse and select from your local directory.

The JSON file must be formatted as an array of objects, each object representing a primary identity value for the target dataset.
[
  {
    "namespaceCode": "email",
    "value": "jdoe@example.com"
  },
  {
    "namespaceCode": "email",
    "value": "san.gray@example.com"
  }
]
namespaceCodevalueOnce the file is uploaded, you can continue to submit the request.
Manually enter identities manual-identity
To enter identities manually, select Add identity.

Controls appear that allow you to enter identities one at a time. Under identity namespace, use the dropdown menu to select the identity type. Under Primary Identity Value, provide the identity namespace value for the record.

To add more identities, select the plus icon (


Quotas and processing timelines quotas
Record Delete requests are subject to daily and monthly identifier submission limits, determined by your organization’s license entitlement. These limits apply to both UI- and API-based delete requests.
Monthly submission entitlement by product quota-limits
The table below outlines identifier submission limits by product and entitlement level. For each product, the monthly cap is the lesser of two values: a fixed identifier ceiling or a percentage-based threshold tied to your licensed data volume.
Quotas reset on the first day of each calendar month. Unused quota does not carry over.
Processing timelines for identifier submissions sla-processing-timelines
Record delete requests are processed based on entitlement tier, with different SLA commitments for standard and Shield customers. For a full breakdown of processing stages and timelines, see Data Lifecycle processing timelines.
Submit the request submit
Once you have finished adding identities to the request, under Request settings, provide a name and optional description for the request before selecting Submit.

A Confirm request dialog appears to indicate that the identities cannot be recovered once deleted. Select Submit to confirm the list of identities whose data you want to delete.

After the request is submitted, a work order is created and appears on the Record tab of the Data Lifecycle workspace. From here, you can monitor the work order’s status as it processes the request.

Deleting records from datasets based on relational schemas relational-record-delete
If the dataset you are deleting from is based on a relational schema, review the following considerations to ensure records are removed correctly and not re-ingested due to mismatches between Experience Platform and your source system.
Record deletion behavior
The following table outlines how record deletions behave across Experience Platform and source systems, depending on the ingestion method and change data capture configuration.
_change_request_type = 'd' are deleted during ingestion. Unflagged records may be re-ingested.To prevent re-ingestion, apply the same deletion approach in both your source system and Experience Platform, either by removing records from both systems or including _change_request_type = 'd' for records you intend to delete.
Change data capture and control columns
Relational schemas that use Sources with change data capture can use the _change_request_type control column when distinguishing deletes from upserts. During ingestion, records flagged with d are deleted from the dataset, while those flagged with u or without the column are treated as upserts. The _change_request_type column is read at ingestion time only and is not stored in the target schema or mapped to XDM fields.
Additional deletion methods for relational schemas
Beyond the standard record deletion workflow, relational schemas support additional methods for specific use cases:
- Safe-copy dataset approach: Duplicate the production dataset and apply deletes to the copy for controlled testing or reconciliation before applying changes to production data.
- Deletes-only batch upload: Upload a file containing only delete operations for targeted hygiene when you need to remove specific records without affecting other data.
Descriptor support for hygiene operations descriptor-support
Relational schema descriptors provide essential metadata for precise hygiene operations:
- Primary key descriptor: Identifies records uniquely for targeted updates or deletes, ensuring the correct records are affected.
- Version descriptor: Ensures deletes and updates apply in the correct chronological order, preventing out-of-sequence operations.
- Timestamp descriptor (time-series schemas): Aligns delete operations with event occurrence times rather than ingestion times.
Scheduled retention for relational schemas
For automated hygiene based on data age rather than specific identities, see Manage Experience Event dataset retention (TTL) for scheduled row-level retention in the data lake.
Best practices for relational record deletion
To avoid unintentional re-ingestion and maintain data consistency across systems, follow these best practices:
- Coordinate deletions: Align record deletions with your change data capture configuration and source data management strategy.
- Monitor change data capture flows: After deleting records in Platform, monitor dataflows and confirm that the source system either removes the same records or includes them with
_change_request_type = 'd'. - Clean up the source: For sources using full refresh ingestion or those that do not support deletes through change data capture, delete records directly from the source system to avoid re-ingestion.
For more details on schema requirements, see relational schema descriptor requirements.
To learn how change data capture works with sources, see Enable change data capture in sources.
Next steps
This document covered how to delete records in the Experience Platform UI. For information on how to perform other data lifecycle management tasks in the UI, refer to the Data Lifecycle UI overview.
To learn how to delete records using the Data Hygiene API, refer to the work order endpoint guide.