Set up and manage your Content AI Sources
This guide walks you through setting up Content AI Sources in Cloud Manager - from meeting prerequisites to creating a content source and confirming it is indexed and available.
Prerequisites prerequisites
Before you begin, ensure the following conditions are met:
- You have an active Cloud Manager program with at least one AEM as a Cloud Service environment.
- You have a Cloud Manager product profile and can sign in to Cloud Manager - see Get access to Cloud Manager below.
- Your user is assigned to the AEM Users product profile for the target environment, which lets the user view content sources.
- Your user is assigned to the AEM Administrators product profile for the target environment, which lets the user create and edit content sources. Access to Cloud Manager alone is not sufficient - see Assign a user to an AEM product profile below.
- The environment product profile has been provisioned in Adobe Admin Console.
Get access to Cloud Manager cloud-manager-access
To open the Content AI Configuration tab, you need access to the Cloud Manager UI. Your organization’s Adobe Admin Console administrator (system administrator or product administrator) grants this access.
-
Contact your Adobe Admin Console administrator. If you are not yet a member of the organization, ask the administrator to add your Adobe ID or email address.
-
Ask the administrator to assign you a Cloud Manager product profile for the organization’s AEM as a Cloud Service program:
table 0-row-2 1-row-2 2-row-2 3-row-2 4-row-2 Product profile What it allows Business Owner Manages programs. Has broad Cloud Manager permissions, including Manage Access. Deployment Manager Manages environments, deployments, and pipelines. Program Manager Manages team setup and program oversight. Developer Works with code and Git. Has limited Cloud Manager permissions. -
To open Cloud Manager, sign in at Cloud Manager or go to Adobe Experience Cloud > Experience Manager > Cloud Manager. If your Adobe ID belongs to more than one organization, select the correct organization.
If you sign in but cannot see the program or the Content AI Configuration tab, ask your administrator to verify your assigned product profiles. Also confirm that you selected the correct organization at sign-in. AEM Managed Services uses a different Admin Console product context and setup than AEM as a Cloud Service.
To create programs during initial onboarding, the system administrator must first have the Business Owner profile and sign in to Cloud Manager.
For more information, see:
Assign a user to an AEM product profile assign-product-profile
Use this procedure to grant a user access to Adobe Experience Manager as a Cloud Service for a specific environment. Assign the profile that matches the access the user needs:
- AEM Users - view content sources.
- AEM Administrators - create and edit content sources.
To assign these profiles, you must be a system administrator with the Business Owner Cloud Manager product profile. Have the user’s name and email address ready.
-
In Cloud Manager, navigate to your program and select Manage Access for the target environment. A new tab opens Adobe Admin Console for that environment.
-
Select the AEM Users or AEM Administrators product profile for both the author and publish tiers - for example,
AEM Administrators - author - Program 12345 - Environment 67890andAEM Administrators - publish - Program 12345 - Environment 67890.- AEM Users - read-only operations.
- AEM Administrators - write operations, such as creating, editing, or removing a content source, and triggering acquisition.
-
Select Add User.
-
Enter the user’s name and email address, then save the change. The user is added to the product profile.
Repeat these steps for each environment where the user needs access, such as development, staging, or production.
Verify the assignment verify-assignment
To verify that the assignment succeeded:
- In Admin Console, reopen the product profile you assigned.
- Confirm that the user appears in the member list.
If you are troubleshooting access or token issues, confirm that the user is added directly to the product profile and not only through a group.
Step 1 - Open the Content AI Configuration Tab open-tab
-
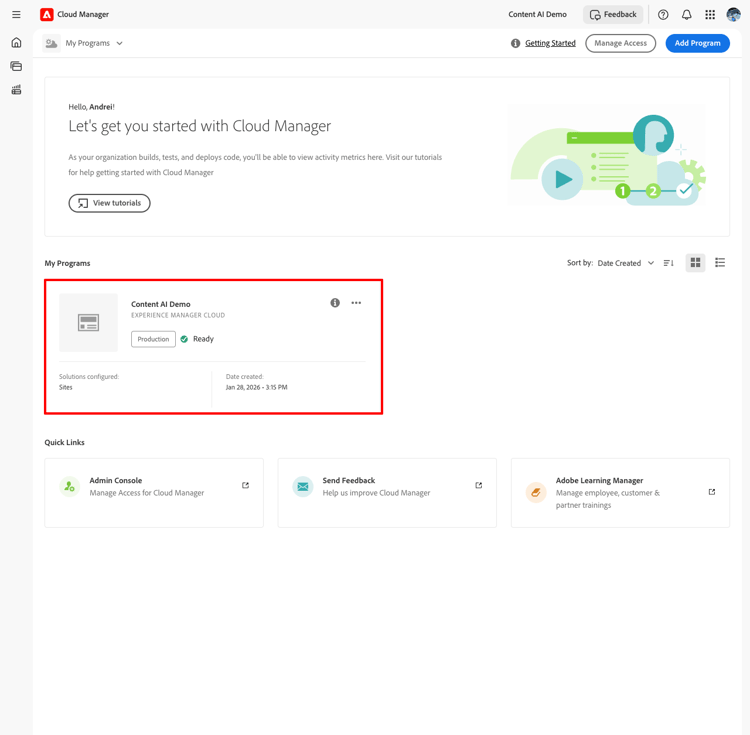
Sign in to Cloud Manager and select your program.
-
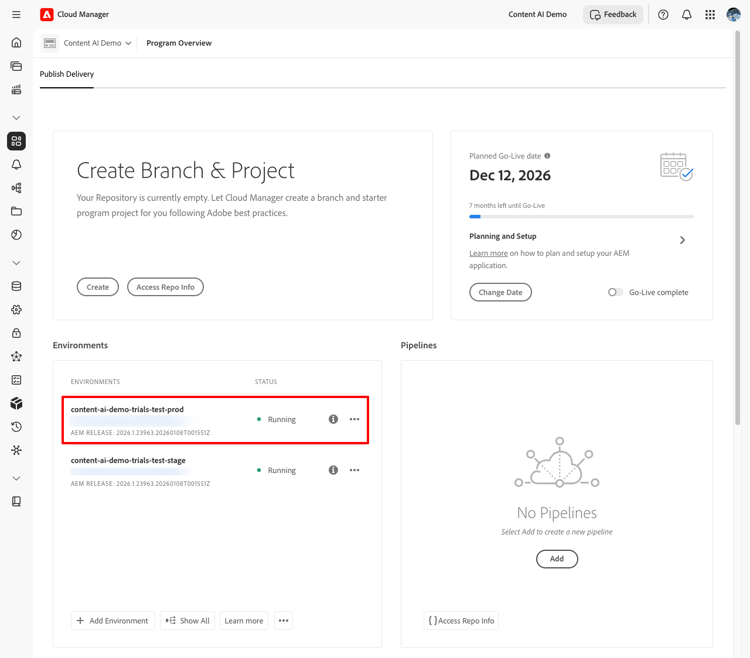
From the Program Overview, locate the Environments section and select the environment you want to configure.
-
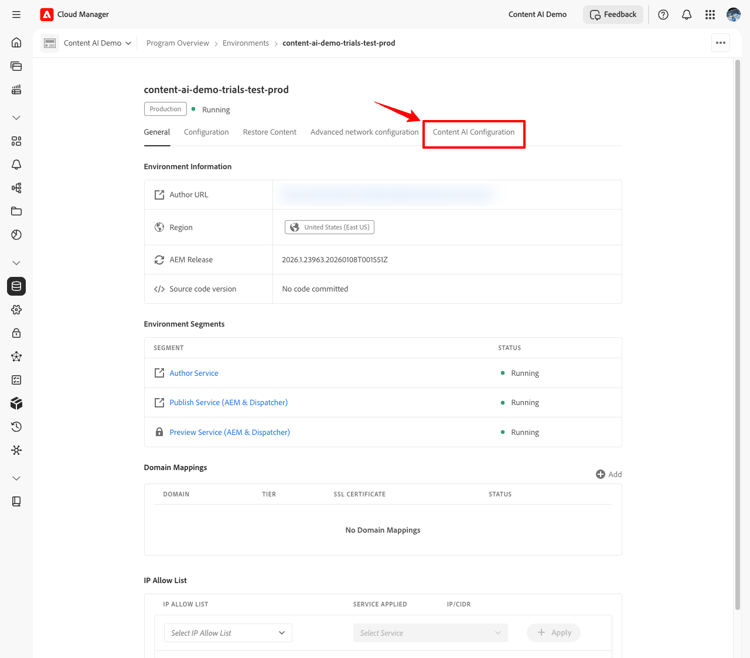
On the environment detail page, select the Content AI Configuration tab.
Step 2 - Create a Content AI Source create-source
A content source defines the website that Content AI crawls and indexes.
-
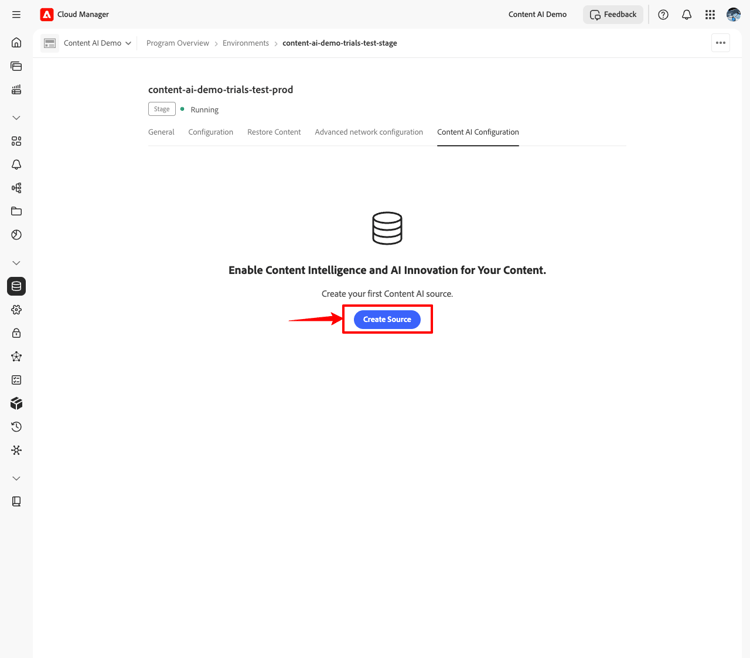
On the Content AI Configuration tab, select Create Source.
-
In the Create/Add new Content AI Source dialog, fill in the fields:
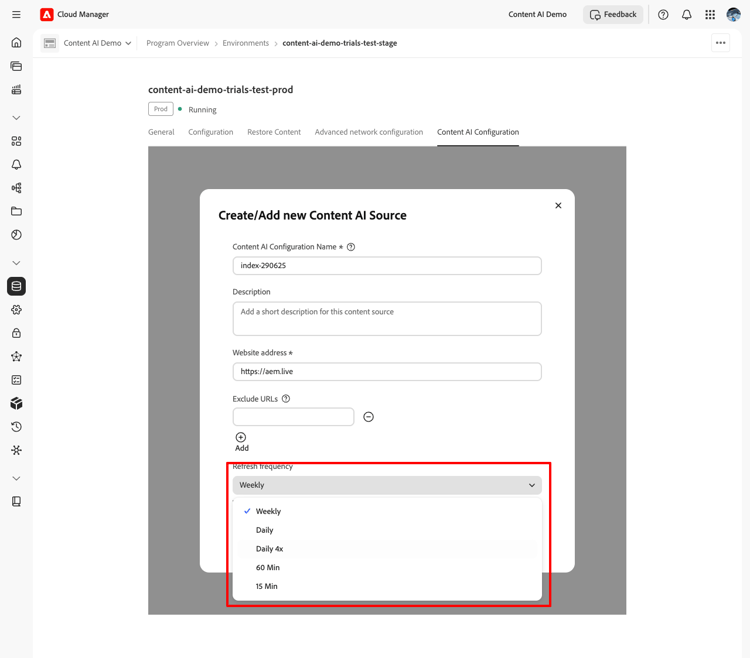
table 0-row-2 1-row-2 2-row-2 3-row-2 4-row-2 5-row-2 Field Description Content AI Configuration Name A unique identifier for this source (for example, my-site-index). Cannot be changed after creation.Description (Optional) A short description of the content source. Website address The root URL of the website to crawl (for example, https://www.example.com/).Exclude URLs (Optional) URL patterns to skip during crawling. Refresh frequency How often Content AI re-crawls the source: Weekly, Daily, Daily 4×, 60 Min, or 15 Min. 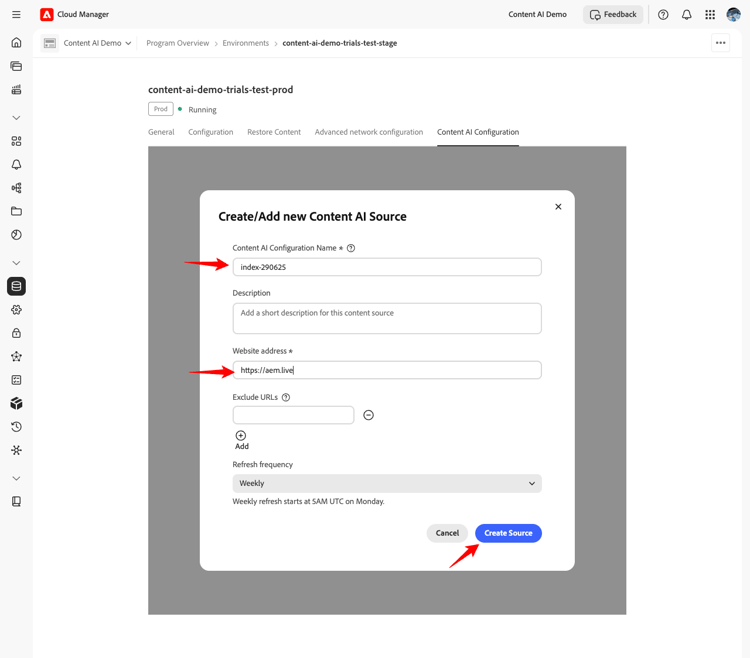
-
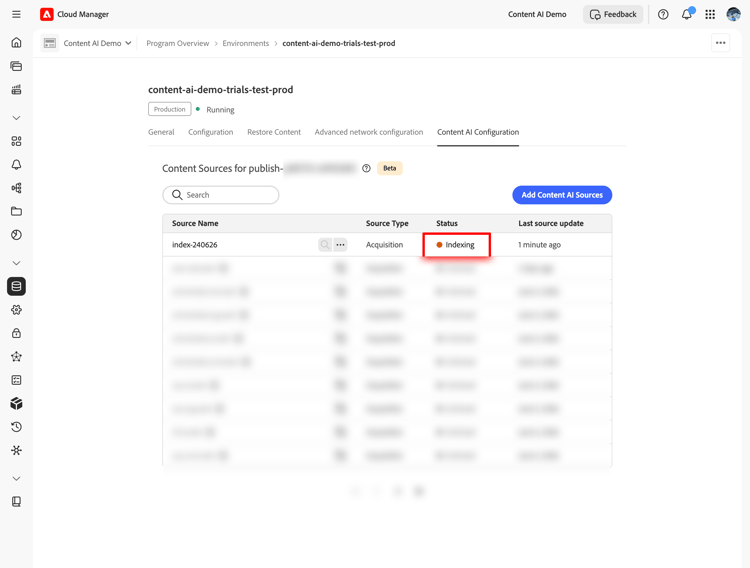
Select Create Source. Acquisition starts automatically, and the source moves to Indexing.
Step 3 - Re-run Acquisition trigger-acquisition
Acquisition runs automatically when you create a source and then on the schedule set by the Refresh frequency. You can also trigger a run manually at any time - for example, to re-index immediately after publishing new content.
-
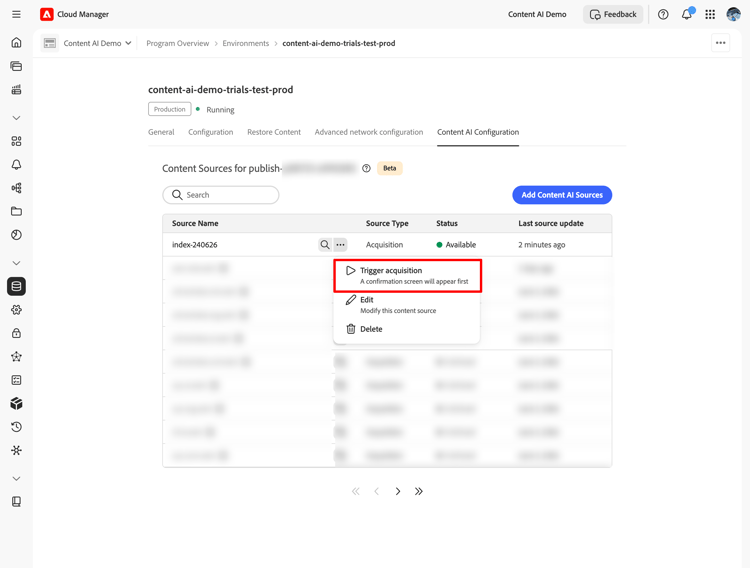
In the source list, select the more actions (…) icon next to your source, then select Trigger acquisition.
-
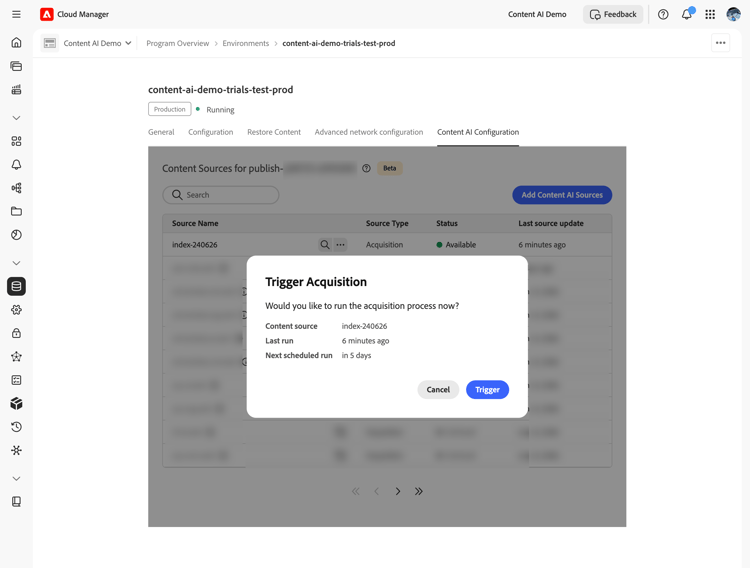
In the Trigger Acquisition dialog, review the source details - Content source, Last run, and Next scheduled run - and select Trigger.
Step 4 - Monitor Indexing Status monitor-status
After acquisition starts, the source status updates in real time.
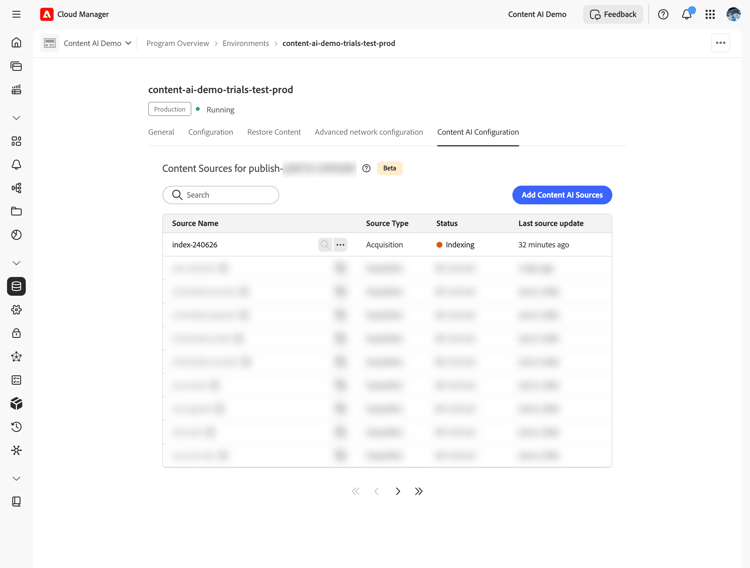
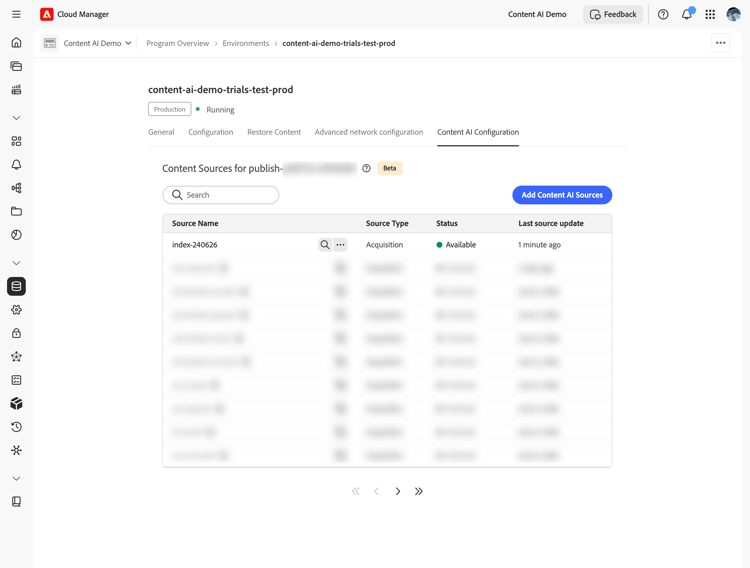
Wait for the status to reach Available before searching the index or testing the API.
Step 5 - Search Indexed Content search-content
Once the source status is Available, you can run search queries directly from Cloud Manager to verify that content has been indexed correctly.
-
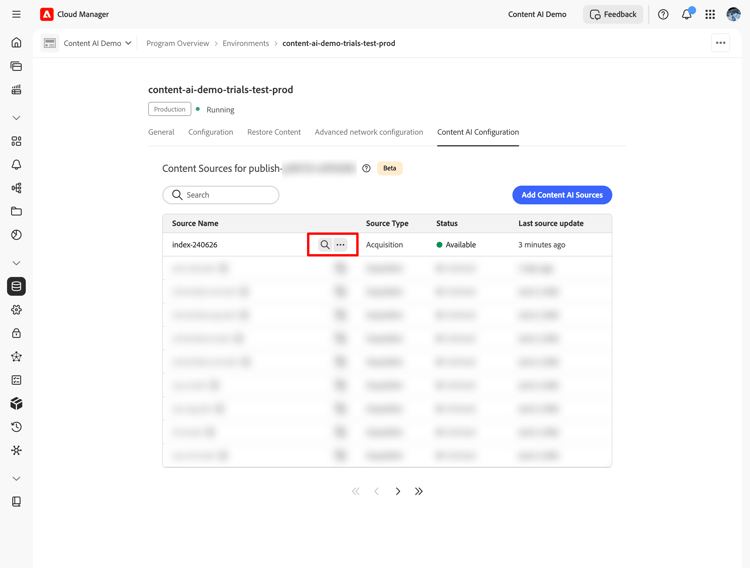
In the source list, select the search (magnifying glass) icon next to your source.
-
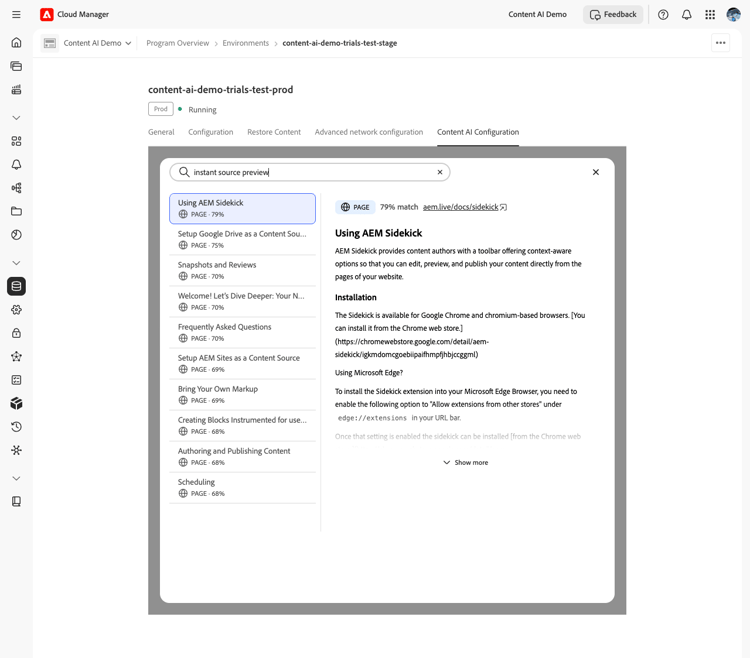
Enter a query in the search field. Results show a list of matching items with a match score and content type (for example, PAGE or PDF). Selecting a result opens a preview on the right.
Modify or Delete a Source modify-source
Modify a source modify
To update a source configuration after it has been created:
-
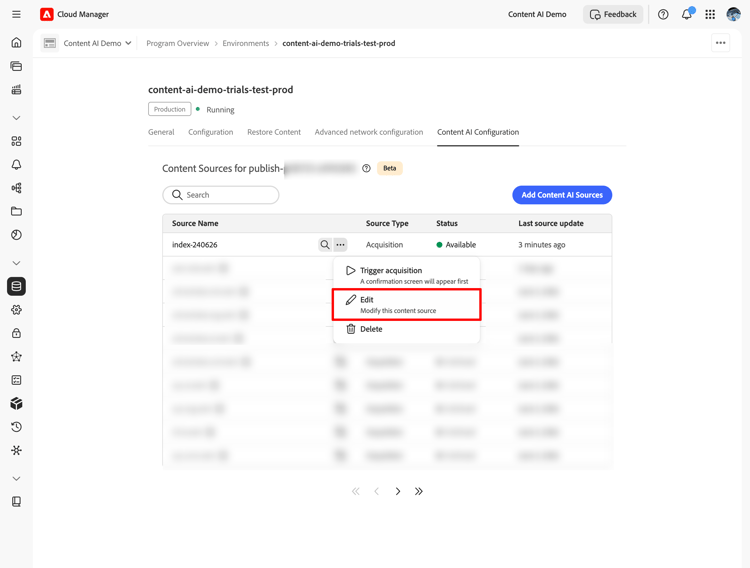
In the source list, select the more actions (…) icon next to the source, then select Edit.
-
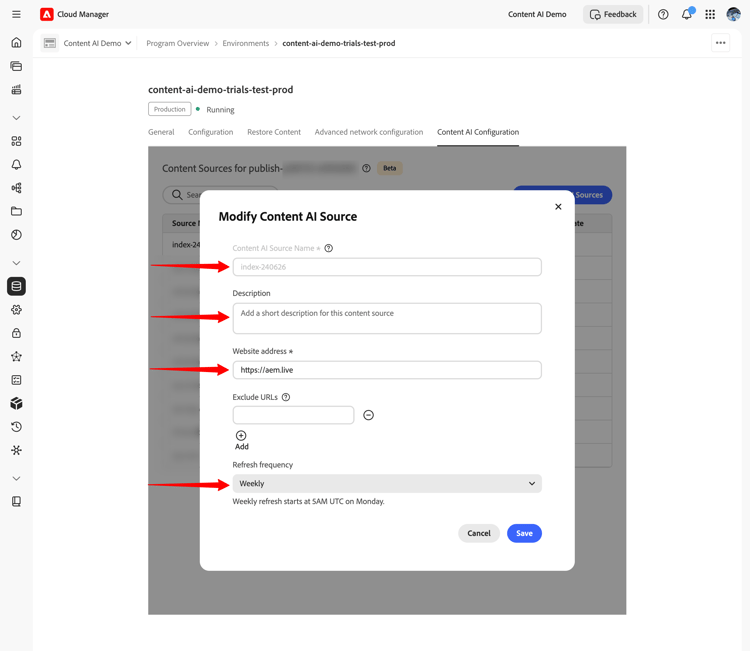
In the Modify Content AI Source dialog, update the Description, Website address, Exclude URLs, or Refresh frequency as needed. The Content AI Configuration Name is read-only and cannot be changed.
-
Select Save to apply the changes. The source list updates to reflect your changes.
Delete a source delete
-
In the source list, select the more actions (…) icon next to the source, then select Delete.
note warning WARNING Deleting a source is permanent. All indexed content for that source is removed and can no longer serve search queries.
After deletion, the source no longer appears in the list.
Next Steps next-steps
- Set Up an Adobe Developer Console Project - Create the ADC project and credentials you need to call the API.
- Content AI API reference - Query your indexed content using semantic, fulltext, or hybrid search endpoints.
Troubleshooting troubleshooting
- Source stays in Indexing for an extended period. Retry the acquisition from the (…) menu. If the status does not advance after a second run, verify that the Website address is publicly reachable and that the Exclude URLs patterns do not filter out every page.
- Source moves back to New after a run. The crawler could not fetch any pages from the configured root URL. Confirm the URL responds with
200 OKand that the site is not blocking automated requests. - Search returns no results for an Available source. Indexing succeeded, but no content matched the query. Try a broader query or check that the crawled URLs include the pages you expect.