Brands Management
Brands Management is the central place to configure and manage the brands you monitor in Adobe Brand Visibility. From here, you can create brands, configure the markets where your brand is monitored, manage websites and aliases, organize prompts, and track other brands in your market.
Every Brand Presence, Prompt Strategy, Prompt Library, and Opportunity in Adobe Brand Visibility is associated with a brand.

Create a brand create-a-brand
A brand represents the business, product, or organization that you want to monitor in AI-generated responses.
During the trial experience, you’ll create a single brand as part of onboarding. Enhanced editions support creating and managing multiple brands from Brands Management.
To create a brand:
- Navigate to Configuration > Brands Management.
- Select Create Brand.
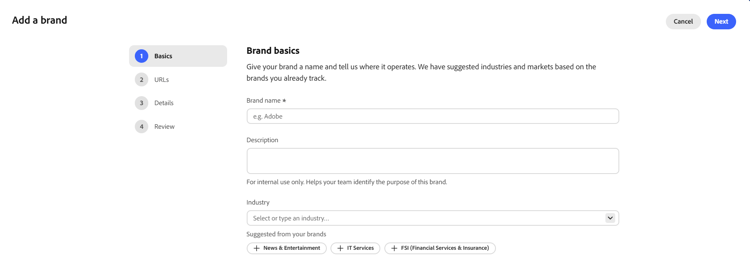
- Enter the brand name.
- Optionally provide a description.
- Select the industry.
- Associate the brand with a website.
- Select Create.
You can also save a brand as Pending before activating it if it requires additional review.
Configure markets configure-markets
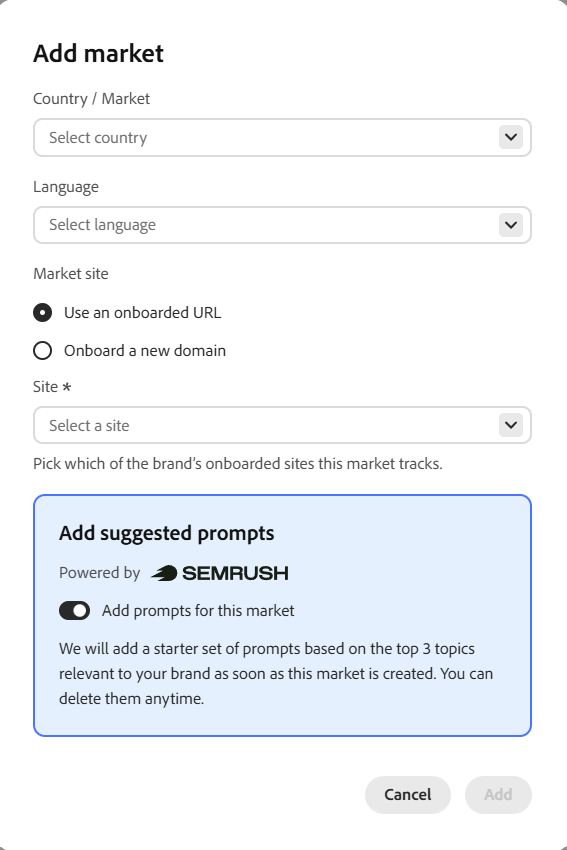
Markets define where Adobe Brand Visibility measures your Brand Presence.
Each market includes:
- Country or region
- Language
- Website
You can configure multiple markets for each brand to monitor how your brand appears across different regions and languages.
Enhanced editions also allows you to optionally add a starter set of prompts powered by Semrush, when creating a market.
Manage Brand URLs manage-brand-urls
Use the URLs tab to manage the websites associated with your brand.
Brand URLs determine which websites Adobe Brand Visibility associates with your brand when monitoring Brand Presence and generating insights.
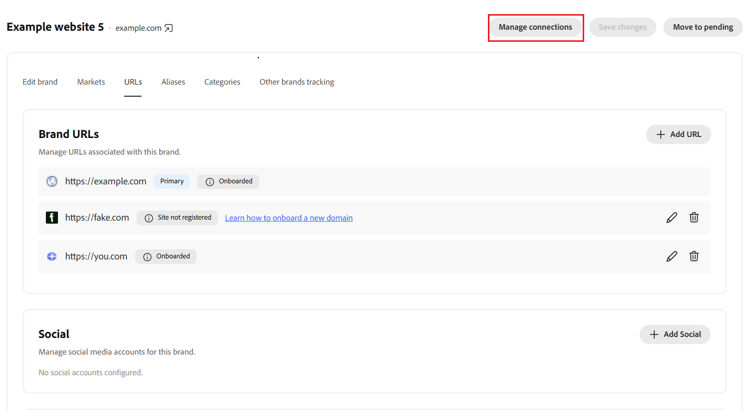
Each URL has one of the following states:
Add a URL add-a-url
Add a URL to associate an additional website with your brand.
Adding a URL enables Adobe Brand Visibility to recognize citations and mentions for that website as part of your Brand Presence. However, adding a URL alone does not onboard the domain for content analysis.
Examples include:
- Regional websites
- Product websites
- Microsites
- Social profiles
- Earned content sources
Onboard a domain onboard-a-domain
Onboarding a domain registers it with Adobe Brand Visibility for content analysis and optimization.
When a domain is onboarded, Adobe Brand Visibility can:
- Crawl and analyze your website content.
- Generate onsite optimization opportunities.
- Connect CDN log forwarding.
- Surface Agentic Traffic and Referral Traffic insights.
- Measure the impact of deployed optimizations.
During the trial, you onboard one domain as part of the trial activation and onboarding process. This domain becomes the primary website used for content analysis throughout the trial.
In the enhanced experience, you can onboard additional domains from the URLs tab. If a URL shows Site not registered, you will need to onboard the domain to unlock onsite analysis and optimization capabilities.
Manage connections manage-connections
After a domain has been onboarded, you can configure additional connections for that URL.
To manage connections:
- Navigate to Configuration > Brands Management.
- Select a brand.
- Open the URLs tab.
- Select an onboarded URL.
- Click Manage connections.
The available connections depend on the selected URL.
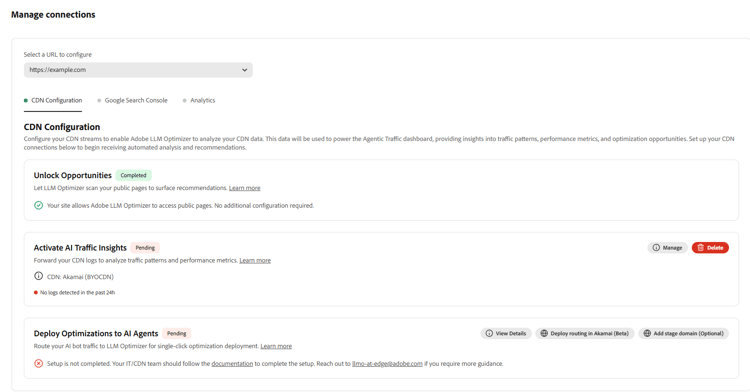
CDN Configuration cdn-configuration
Configure your CDN to enable website analysis and AI traffic capabilities.
From the CDN Configuration tab, you can:
- Verify that Adobe Brand Visibility can access your public pages.
- Configure CDN log forwarding to enable Agentic Traffic and Referral Traffic insights.
- Configure routing to support edge-based optimization deployments. See Optimize at Edge for more details.
Connection status and setup progress are displayed for each capability. For more details, see BYOCDN Log Forwarding.
Google Search Console google-search-console
Connect Google Search Console to enrich Adobe Brand Visibility with search performance data.
After connecting your account, Adobe Brand Visibility can use Google Search Console metrics to provide additional context for optimization opportunities and search performance. For more details, see Google Search Console.
Analytics analytics
Connect your analytics provider to measure the business impact of AI-driven traffic.
Supported providers include:
Analytics integrations enable reporting on referral traffic, engagement, conversions, and revenue attributed to AI-generated traffic.
Manage aliases manage-aliases
Aliases represent alternate names for your brand that may appear in AI-generated responses.
For example, you might configure abbreviations, product names, or commonly used brand variations as aliases. Mentions of these aliases are attributed to the parent brand when calculating Brand Presence.

Manage Categories manage-categories
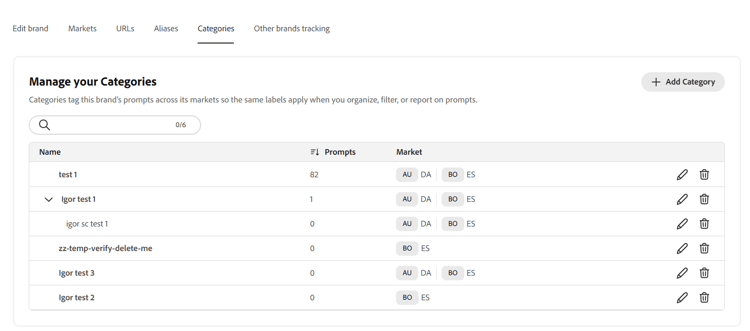
Categories organize prompts for a brand across its markets. They provide a consistent way to organize, filter, and report on related prompts, regardless of the market in which they are tracked.
Each category contains a collection of prompts grouped by a common theme.
- In the trial experience, prompts are organized within Topics.
- In the enhanced experience, Topics are renamed to Subcategories, providing a more flexible organizational structure while maintaining the same relationship to Categories.
Use the Categories tab to:
- Create and manage categories.
- Create and manage topics (trial) or subcategories (enhanced).
- View the number of prompts assigned to each category.
- View the markets where prompts in the category are tracked.
Create a category create-a-category
To create a category:
- Navigate to Configuration > Brands Management.
- Select the brand you want to manage.
- Open the Categories tab.
- Select Add Category.
- Enter a category name.
- Save your changes.
Track other brands track-other-brands
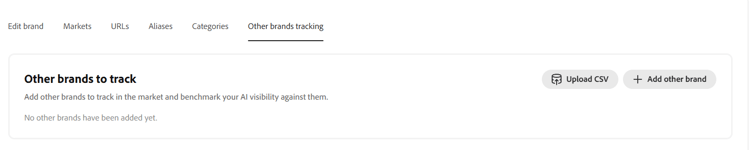
You can configure additional brands to provide context for your Brand Presence.
For each tracked brand, specify:
- Brand name
- Website
Tracking other brands enables Brand Presence to compare your performance against other brands within the same market.