이 페이지에서: 사용자 지정 작업 및 인증된 API 호출을 사용하여 여정에서 Adobe Experience Platform에 사용자 지정 여정 이벤트를 작성하는 방법에 대해 알아봅니다.
이 사용 사례에서는 사용자 지정 작업 및 인증된 호출을 사용하여 여정에서 Adobe Experience Platform에 사용자 지정 이벤트를 작성하는 방법을 설명합니다.
개발자 프로젝트 구성 custom-action-aep-IO
-
Adobe Developer Console에서 프로젝트를 클릭하고 IO 프로젝트를 엽니다.
-
자격 증명 섹션에서 OAuth 서버 간을(를) 클릭합니다.
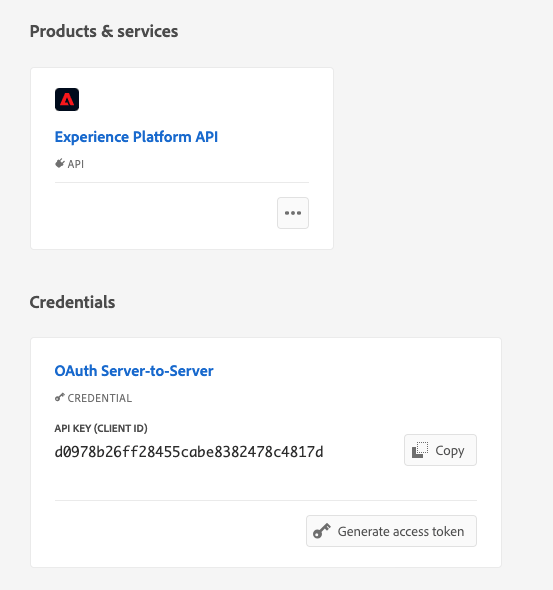
-
cURL 명령 보기를 클릭합니다.
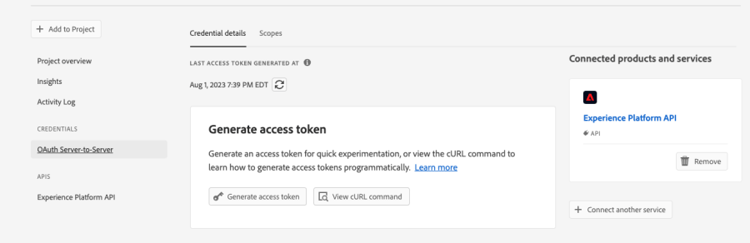
-
cURL 명령을 복사하고 client_id, client_secret, grant_type 및 범위를 저장합니다.
curl -X POST 'https://ims-na1.adobelogin.com/ims/token/v3' -H 'Content-Type: application/x-www-form-urlencoded' -d 'grant_type=client_credentials&client_id=1234&client_secret=5678&scope=openid,AdobeID,read_organizations,additional_info.projectedProductContext,session'
HTTP API Inlet을 사용하여 소스 구성
-
여정에서 데이터를 쓰려면 Adobe Experience Platform에 끝점을 만드십시오.
-
Adobe Experience Platform의 왼쪽 메뉴에서 연결 아래의 원본을 클릭합니다. HTTP API에서 데이터 추가를 클릭합니다.
Adobe Experience Platform
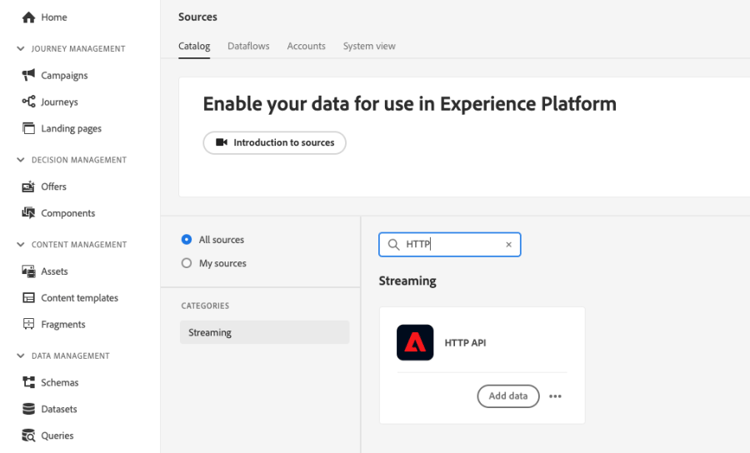
-
새 계정을 선택하고 인증을 사용하도록 설정합니다. Source에 연결을 선택합니다.
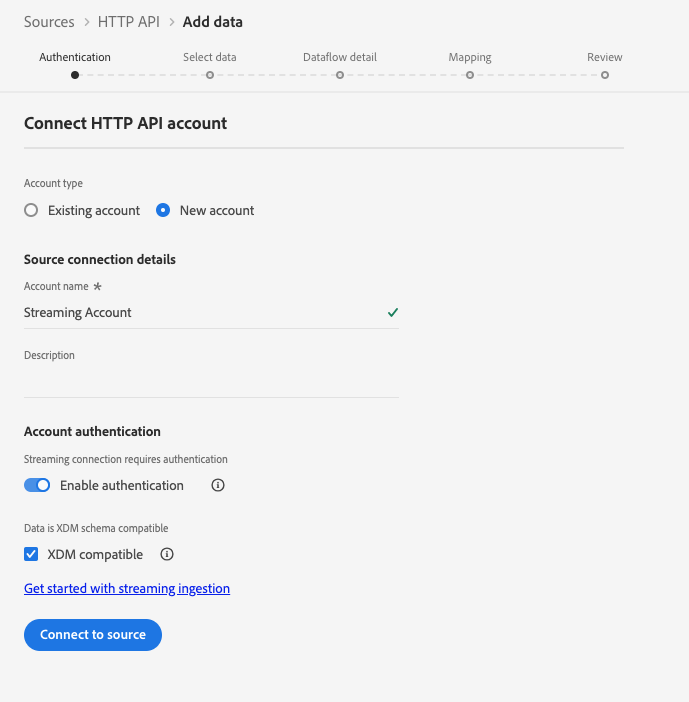
-
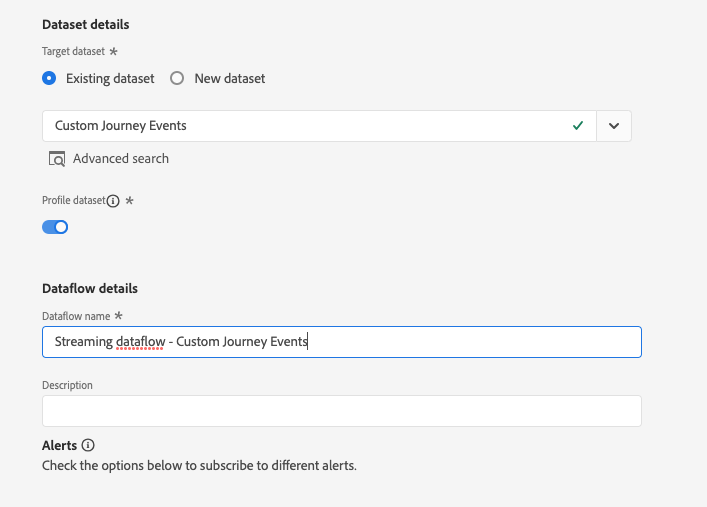
데이터를 쓸 다음 및 데이터 집합을 선택하십시오. 다음 및 마침을 클릭합니다.
-
새로 생성된 데이터 흐름을 엽니다. 스키마 페이로드를 복사하여 메모장에 저장합니다.
{
"header": {
"schemaRef": {
"id": "https://ns.adobe.com/<your_org>/schemas/<schema_id>",
"contentType": "application/vnd.adobe.xed-full+json;version=1.0"
},
"imsOrgId": "<org_id>",
"datasetId": "<dataset_id>",
"source": {
"name": "Custom Journey Events"
}
},
"body": {
"xdmMeta": {
"schemaRef": {
"id": "https://ns.adobe.com/<your_org>/schemas/<schema_id>",
"contentType": "application/vnd.adobe.xed-full+json;version=1.0"
}
},
"xdmEntity": {
"_id": "test1",
"<your_org>": {
"journeyVersionId": "",
"nodeId": "", "customer_Id":""
},
"eventMergeId": "",
"eventType": "",
"producedBy": "self",
"timestamp": "2018-11-12T20:20:39+00:00"
}
}
}
사용자 지정 작업 구성 custom-action-config
사용자 지정 작업 구성은 이 페이지에 자세히 설명되어 있습니다.
이 예제의 경우 다음 단계를 수행합니다.
-
Adobe Journey Optimizer을(를) 열고 왼쪽 메뉴에서 관리 아래의 구성을(를) 클릭합니다. 작업에서 관리를 클릭하고 작업 만들기를 클릭합니다.
-
URL을 설정하고 Post 메서드를 선택합니다.
https://dcs.adobedc.net/collection/<collection_id>?syncValidation=false -
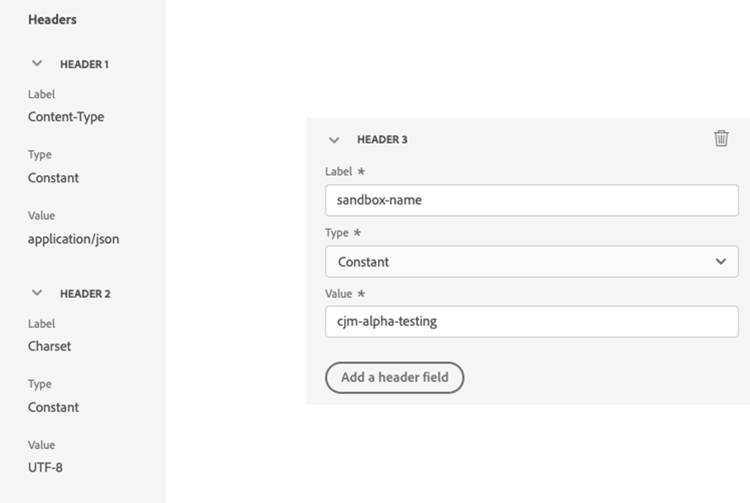
헤더(Content-Type, Charset, sandbox-name)가 구성되어 있는지 확인합니다.
인증 설정 custom-action-aep-authentication
-
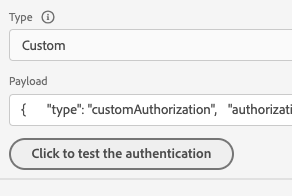
다음 페이로드를 사용하여 Type을(를) Custom(으)로 선택하십시오.
-
(이전에 사용한 IO 프로젝트 페이로드에서) client_secret, client_id, scope 및 grant_type을 붙여넣습니다.
code language-none { "type": "customAuthorization", "authorizationType": "Bearer", "endpoint": "https://ims-na1.adobelogin.com/ims/token/v3", "method": "POST", "headers": {}, "body": { "bodyType": "form", "bodyParams": { "grant_type": "client_credentials", "client_secret": "********", "client_id": "<client_id>", "scope": "openid,AdobeID,read_organizations,additional_info.projectedProductContext,session" } }, "tokenInResponse": "json://access_token", "cacheDuration": { "duration": 28000, "timeUnit": "seconds" } } -
인증을 테스트하려면 클릭 단추를 사용하여 연결을 테스트하십시오.
페이로드 설정 custom-action-aep-payload
-
요청 및 응답 필드에 이전에 사용한 원본 연결에서 페이로드를 붙여 넣으십시오.
code language-none { "xdmMeta": { "schemaRef": { "id": "https://ns.adobe.com/<your_org>/schemas/<schema_id>", "contentType": "application/vnd.adobe.xed-full+json;version=1.0" } }, "xdmEntity": { "_id": "/uri-reference", "<your_org>": { "journeyVersionId": "Sample value", "nodeId": "Sample value", "customer_Id":"" }, "eventMergeId": "Sample value", "eventType": "advertising.completes, "producedBy": "self", "timestamp": "2018-11-12T20:20:39+00:00" } } -
동적으로 채워질 필드에 대한 필드 구성을 상수에서 변수(으)로 변경합니다.
-
사용자 지정 작업을 저장합니다.
여정
-
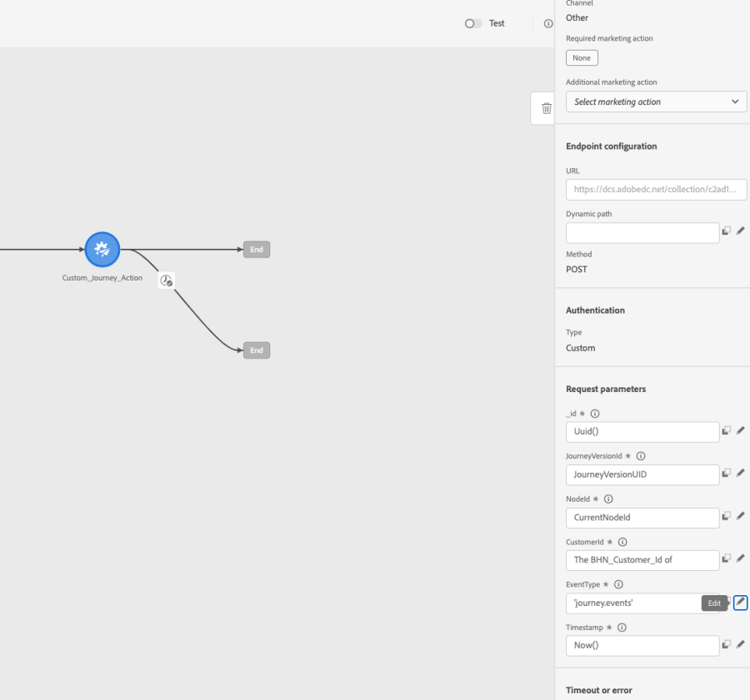
마지막으로 여정에서 이 사용자 지정 작업을 사용하여 사용자 지정 여정 이벤트를 작성합니다.
-
사용 사례에 따라 여정 버전 ID, 노드 ID, 노드 이름 및 기타 속성을 채웁니다.
This section contains structured knowledge intended to support interpretation, retrieval, and question answering related to this topic.
For complete understanding, this information should be combined with the documentation on this page. Neither source is intended to stand alone; the page describes the feature, while this section provides additional context that helps disambiguate terminology, intent, applicability, and constraints.
- TL;DR: This use case explains how to configure a custom action in Journey Optimizer that writes journey event data into Adobe Experience Platform using an HTTP API inlet and OAuth Server-to-Server authenticated calls.
Intents:
- Set up an Adobe Developer Console IO project with OAuth Server-to-Server credentials for AEP API authentication
- Create an HTTP API inlet source in Adobe Experience Platform to receive streaming journey event data
- Configure a custom action in Journey Optimizer with the correct URL, headers, and custom Bearer token authentication
- Map journey fields (journey version ID, node ID, customer ID) dynamically as variables in the custom action payload
- Use the custom action in a journey to write custom events to an AEP dataset
Glossary:
- HTTP API Inlet: An Adobe Experience Platform source connector that creates a streaming endpoint for ingesting data via HTTP POST requests (product-specific)
- OAuth Server-to-Server: An authentication credential type in Adobe Developer Console that generates Bearer tokens for server-to-server API calls without user interaction (product-specific)
- Custom authorization: A Journey Optimizer custom action authentication type that fetches a Bearer token from a specified endpoint and caches it for a configured duration (product-specific)
- XDM entity: The data payload structure conforming to the Experience Data Model schema, used as the body when writing events to AEP via the HTTP API inlet (product-specific)
- cacheDuration: The token cache setting in custom authorization configuration that controls how long the fetched Bearer token is reused before a new one is requested (product-specific)
Guardrails:
- After creating the Adobe Developer Console project, developer and API access control permissions must be explicitly granted before the credentials can be used
- The HTTP API inlet source must be created with authentication enabled; the connection endpoint URL and schema payload must be copied and stored for use in the custom action configuration
- Custom action headers must include Content-Type, Charset, and sandbox-name
- Fields intended to be populated dynamically at runtime must be changed from Constant to Variable in the custom action payload configuration
Terminology:
- Canonical name: Custom action — Acronym: none — variants: custom action configuration, Journey Optimizer custom action
- Canonical name: Adobe Experience Platform — Acronym: AEP — variants: Experience Platform, Platform
- Synonyms: “HTTP API Inlet” = “streaming endpoint” = “DCS collection endpoint”
- Do not confuse: “OAuth Server-to-Server” ≠ “OAuth user authentication” (Server-to-Server does not require a user login; it uses client credentials)
FAQ:
- Q: What type of authentication is used to call the AEP HTTP API Inlet from a Journey Optimizer custom action? — Custom Bearer token authentication using OAuth Server-to-Server client credentials fetched from the Adobe IMS token endpoint.
- Q: Where do I find the client_id, client_secret, grant_type, and scope values? — From the OAuth Server-to-Server credentials section of your Adobe Developer Console IO project, by clicking “View cURL command.”
- Q: How do I make journey-specific fields (e.g., journeyVersionId, nodeId) dynamic in the payload? — Change their field configuration from Constant to Variable in the custom action payload setup so they are populated from the journey context at runtime.
- Q: What permissions are required on the Adobe Developer Console project? — Developer and API access control must be granted with the right permissions after the project is created, as described in the AEP API authentication documentation.
- Q: What is the purpose of the cacheDuration setting in the authentication payload? — It controls how long the fetched Bearer token is cached and reused (28,000 seconds in the example) before the custom action requests a new token.