このページ:カスタムアクションと認証済みの API 呼び出しを使用して、ジャーニーから Adobe Experience Platform にカスタムジャーニーイベントを書き込む方法について説明します。
このユースケースでは、カスタムアクションと認証済みの呼び出しを使用して、ジャーニーから Adobe Experience Platform にカスタムイベントを書き込む方法について説明します。
開発者プロジェクトの設定 custom-action-aep-IO
-
Adobe Developer Console で、「プロジェクト」をクリックし、IO プロジェクトを開きます。
-
「資格情報」セクションで、「OAuth サーバー間」をクリックします。
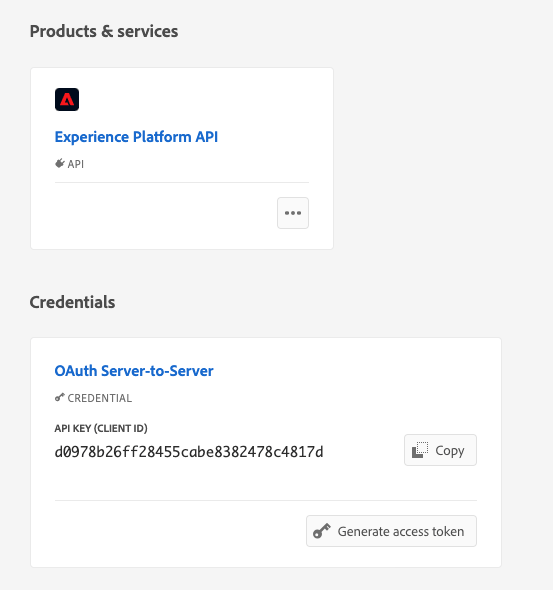
-
「cURL コマンドを表示」をクリックします。
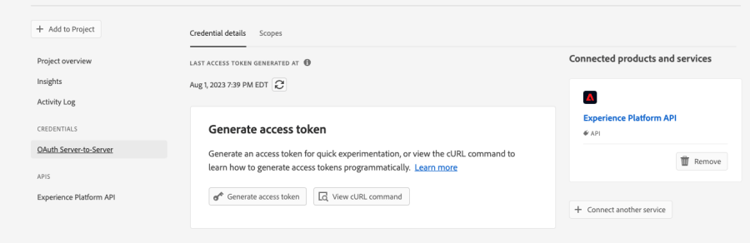
-
cURL コマンドをコピーし、client_id、client_secret、grant_type および scope を保存します。
curl -X POST 'https://ims-na1.adobelogin.com/ims/token/v3' -H 'Content-Type: application/x-www-form-urlencoded' -d 'grant_type=client_credentials&client_id=1234&client_secret=5678&scope=openid,AdobeID,read_organizations,additional_info.projectedProductContext,session'
HTTP API インレットを使用したソースの設定
-
ジャーニーからデータを書き込むエンドポイントを Adobe Experience Platform に作成します。
-
Adobe Experience Platform の左側のメニューの 接続 の下にある「ソース」をクリックします。 HTTP API で「データを追加」をクリックします。
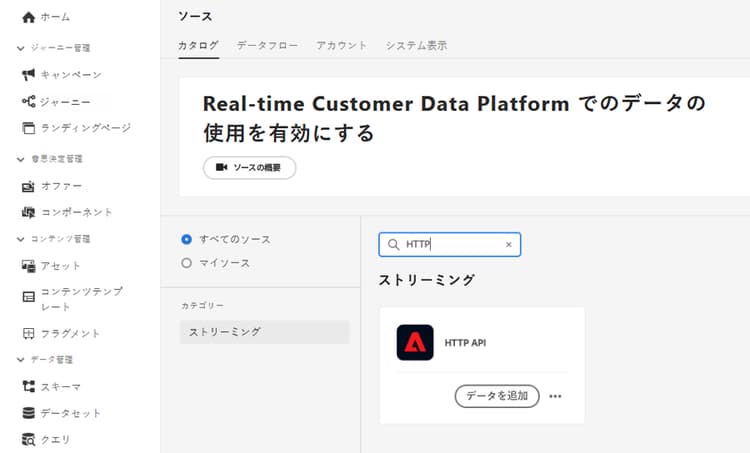
-
「新規アカウント」を選択し、認証を有効にします。 「ソースに接続」を選択します。
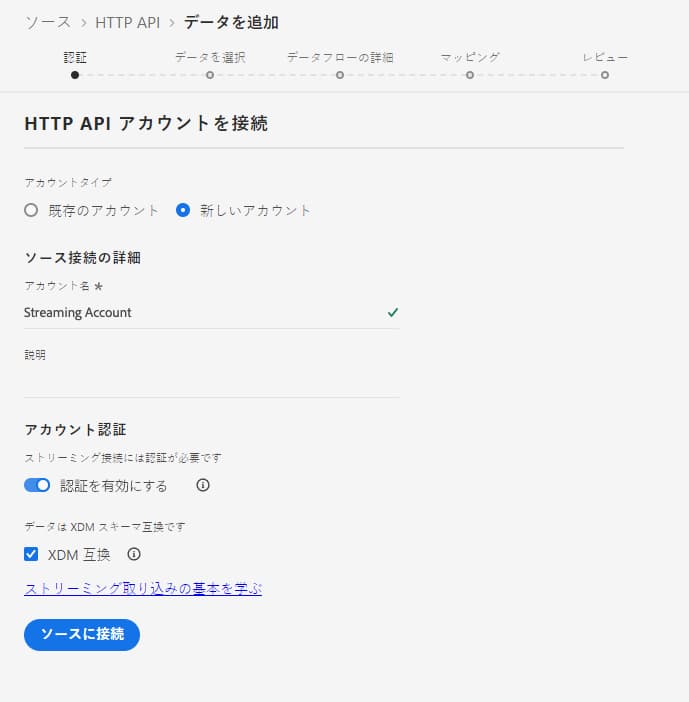
-
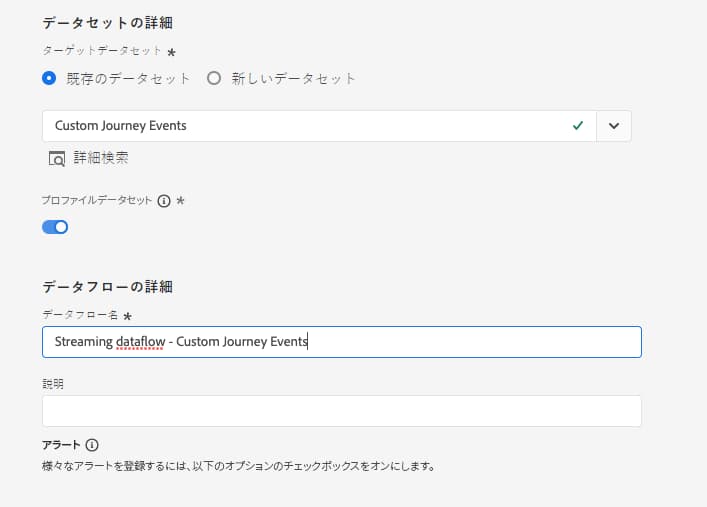
「次へ」を選択し、データを書き込むデータセットを選択します。 「次へ」、「終了」の順にクリックします。
-
新しく作成したデータフローを開きます。 スキーマペイロードをコピーして、メモ帳に保存します。
{
"header": {
"schemaRef": {
"id": "https://ns.adobe.com/<your_org>/schemas/<schema_id>",
"contentType": "application/vnd.adobe.xed-full+json;version=1.0"
},
"imsOrgId": "<org_id>",
"datasetId": "<dataset_id>",
"source": {
"name": "Custom Journey Events"
}
},
"body": {
"xdmMeta": {
"schemaRef": {
"id": "https://ns.adobe.com/<your_org>/schemas/<schema_id>",
"contentType": "application/vnd.adobe.xed-full+json;version=1.0"
}
},
"xdmEntity": {
"_id": "test1",
"<your_org>": {
"journeyVersionId": "",
"nodeId": "", "customer_Id":""
},
"eventMergeId": "",
"eventType": "",
"producedBy": "self",
"timestamp": "2018-11-12T20:20:39+00:00"
}
}
}
カスタムアクションの設定 custom-action-config
カスタムアクションの設定について詳しくは、このページを参照してください。
この例では、次の手順に従います。
-
Adobe Journey Optimizer を開き、左側のメニューの 管理 の下にある「設定」をクリックします。 アクションで、「管理」をクリックし、「アクションを作成」をクリックします。
-
URLを設定し、POST メソッドを選択します。
https://dcs.adobedc.net/collection/<collection_id>?syncValidation=false -
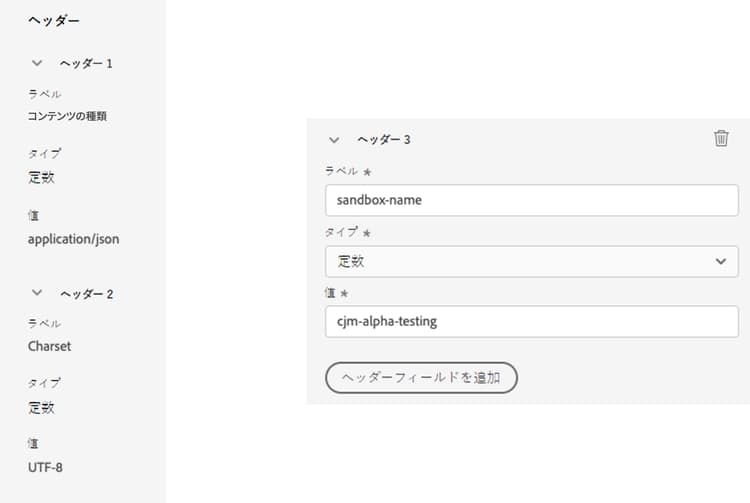
ヘッダー(Content-Type、Charset、sandbox-name)が設定されていることを確認します。
認証の設定 custom-action-aep-authentication
-
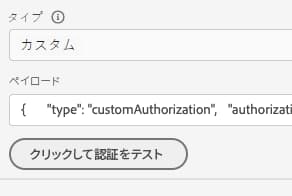
次のペイロードを持つ カスタム として タイプ を選択します。
-
client_secret、client_id、scope、grant_type を(以前に使用した IO プロジェクトペイロードから)貼り付けます。
code language-none { "type": "customAuthorization", "authorizationType": "Bearer", "endpoint": "https://ims-na1.adobelogin.com/ims/token/v3", "method": "POST", "headers": {}, "body": { "bodyType": "form", "bodyParams": { "grant_type": "client_credentials", "client_secret": "********", "client_id": "<client_id>", "scope": "openid,AdobeID,read_organizations,additional_info.projectedProductContext,session" } }, "tokenInResponse": "json://access_token", "cacheDuration": { "duration": 28000, "timeUnit": "seconds" } } -
「クリックして認証をテスト」ボタンを使用して、接続をテストします。
ペイロードの設定 custom-action-aep-payload
-
「リクエスト」フィールドと「応答」フィールドに、先ほど使用したソース接続からのペイロードを貼り付けます。
code language-none { "xdmMeta": { "schemaRef": { "id": "https://ns.adobe.com/<your_org>/schemas/<schema_id>", "contentType": "application/vnd.adobe.xed-full+json;version=1.0" } }, "xdmEntity": { "_id": "/uri-reference", "<your_org>": { "journeyVersionId": "Sample value", "nodeId": "Sample value", "customer_Id":"" }, "eventMergeId": "Sample value", "eventType": "advertising.completes, "producedBy": "self", "timestamp": "2018-11-12T20:20:39+00:00" } } -
動的に入力されるフィールドのフィールド設定を、定数から 変数 に変更します。
-
カスタムアクションを保存します。
ジャーニー
-
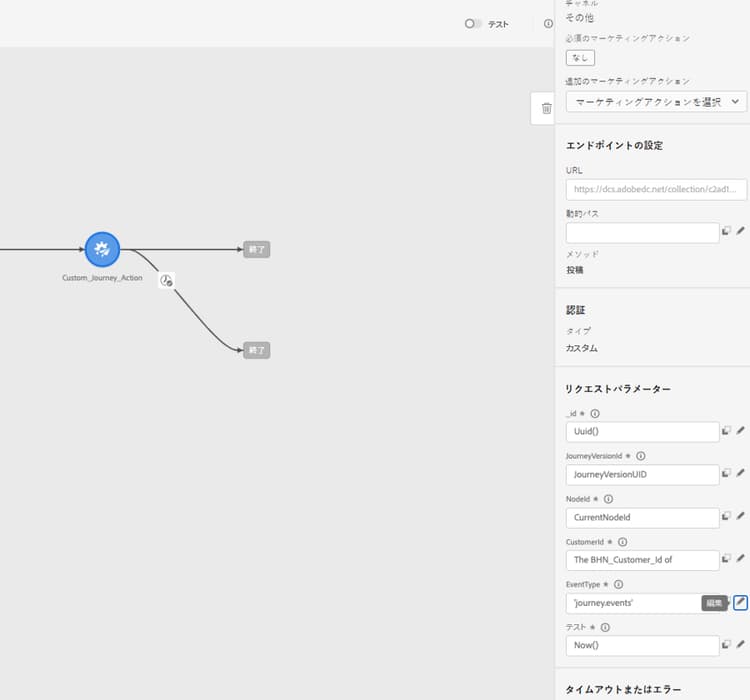
最後に、ジャーニーでこのカスタムアクションを使用して、カスタムジャーニーイベントを書き込みます。
-
ユースケースに応じて、ジャーニーバージョン ID、ノード ID、ノード名およびその他の属性を入力します。
This section contains structured knowledge intended to support interpretation, retrieval, and question answering related to this topic.
For complete understanding, this information should be combined with the documentation on this page. Neither source is intended to stand alone; the page describes the feature, while this section provides additional context that helps disambiguate terminology, intent, applicability, and constraints.
- TL;DR: This use case explains how to configure a custom action in Journey Optimizer that writes journey event data into Adobe Experience Platform using an HTTP API inlet and OAuth Server-to-Server authenticated calls.
Intents:
- Set up an Adobe Developer Console IO project with OAuth Server-to-Server credentials for AEP API authentication
- Create an HTTP API inlet source in Adobe Experience Platform to receive streaming journey event data
- Configure a custom action in Journey Optimizer with the correct URL, headers, and custom Bearer token authentication
- Map journey fields (journey version ID, node ID, customer ID) dynamically as variables in the custom action payload
- Use the custom action in a journey to write custom events to an AEP dataset
Glossary:
- HTTP API Inlet: An Adobe Experience Platform source connector that creates a streaming endpoint for ingesting data via HTTP POST requests (product-specific)
- OAuth Server-to-Server: An authentication credential type in Adobe Developer Console that generates Bearer tokens for server-to-server API calls without user interaction (product-specific)
- Custom authorization: A Journey Optimizer custom action authentication type that fetches a Bearer token from a specified endpoint and caches it for a configured duration (product-specific)
- XDM entity: The data payload structure conforming to the Experience Data Model schema, used as the body when writing events to AEP via the HTTP API inlet (product-specific)
- cacheDuration: The token cache setting in custom authorization configuration that controls how long the fetched Bearer token is reused before a new one is requested (product-specific)
Guardrails:
- After creating the Adobe Developer Console project, developer and API access control permissions must be explicitly granted before the credentials can be used
- The HTTP API inlet source must be created with authentication enabled; the connection endpoint URL and schema payload must be copied and stored for use in the custom action configuration
- Custom action headers must include Content-Type, Charset, and sandbox-name
- Fields intended to be populated dynamically at runtime must be changed from Constant to Variable in the custom action payload configuration
Terminology:
- Canonical name: Custom action — Acronym: none — variants: custom action configuration, Journey Optimizer custom action
- Canonical name: Adobe Experience Platform — Acronym: AEP — variants: Experience Platform, Platform
- Synonyms: “HTTP API Inlet” = “streaming endpoint” = “DCS collection endpoint”
- Do not confuse: “OAuth Server-to-Server” ≠ “OAuth user authentication” (Server-to-Server does not require a user login; it uses client credentials)
FAQ:
- Q: What type of authentication is used to call the AEP HTTP API Inlet from a Journey Optimizer custom action? — Custom Bearer token authentication using OAuth Server-to-Server client credentials fetched from the Adobe IMS token endpoint.
- Q: Where do I find the client_id, client_secret, grant_type, and scope values? — From the OAuth Server-to-Server credentials section of your Adobe Developer Console IO project, by clicking “View cURL command.”
- Q: How do I make journey-specific fields (e.g., journeyVersionId, nodeId) dynamic in the payload? — Change their field configuration from Constant to Variable in the custom action payload setup so they are populated from the journey context at runtime.
- Q: What permissions are required on the Adobe Developer Console project? — Developer and API access control must be granted with the right permissions after the project is created, as described in the AEP API authentication documentation.
- Q: What is the purpose of the cacheDuration setting in the authentication payload? — It controls how long the fetched Bearer token is cached and reused (28,000 seconds in the example) before the custom action requests a new token.