このページ: Journey Optimizer の Adobe Express の統合を使用して、画像のサイズ変更、背景の削除、ビジュアルの切り抜き、アセットの JPEG または PNG への変換を行う方法について説明します。
Adobe Journey Optimizer の Adobe Express 統合により、コンテンツの作成中に Adobe Express の強力な編集ツールに簡単にアクセスできます。 この統合により、ソリューションを切り替えることなく、画像のサイズ変更、背景の削除、ビジュアルの切り抜き、アセットの JPEG または PNG への変換が可能になります。
Adobe Express について詳しくは、このドキュメントを参照してください。
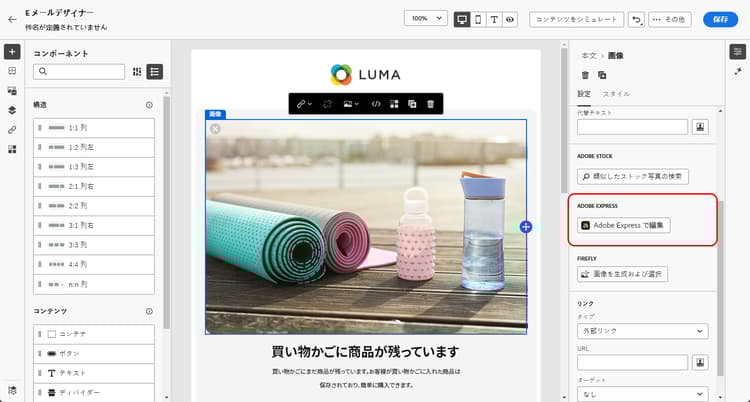
Adobe Express メニューにアクセスするには、E メールデザイナーから 画像設定 にアクセスし、「Adobe Express で編集」をクリックします。
➡️ この機能をビデオで確認
エンタープライズ版ライセンスでの Adobe Express の使用 licence
以下の節で説明する機能には、Adobe Express エンタープライズ版ライセンスを持たないユーザーもアクセスできます。
エンタープライズ版ライセンスを使用すると、ユーザーは Adobe Express web エディターにフルアクセスでき、アセット設定の調整、Firefly を使用したコンテンツの生成、テキストの追加、追加のカスタマイズの適用を行うことができます。
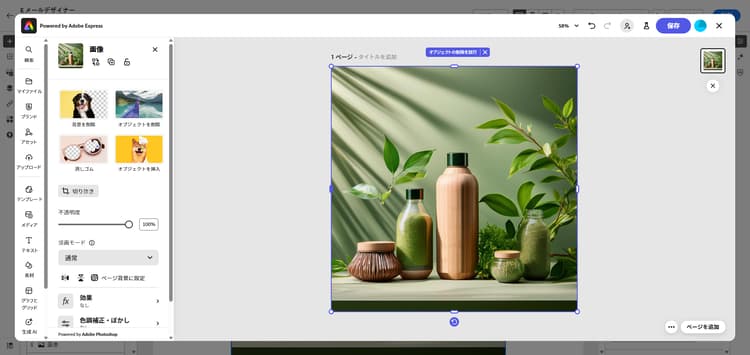
Adobe Express のエンタープライズ版ライセンスを持つユーザーが使用できるユースケースについて詳しくは、Adobe Express web ドキュメントを参照してください。
エンタープライズ版ライセンスなしでの Adobe Express の使用 edit
エンタープライズ版ライセンスを持たないユーザーは、Adobe Express で使用可能な次のユースケースにアクセスできます。
画像のサイズ変更 resize
-
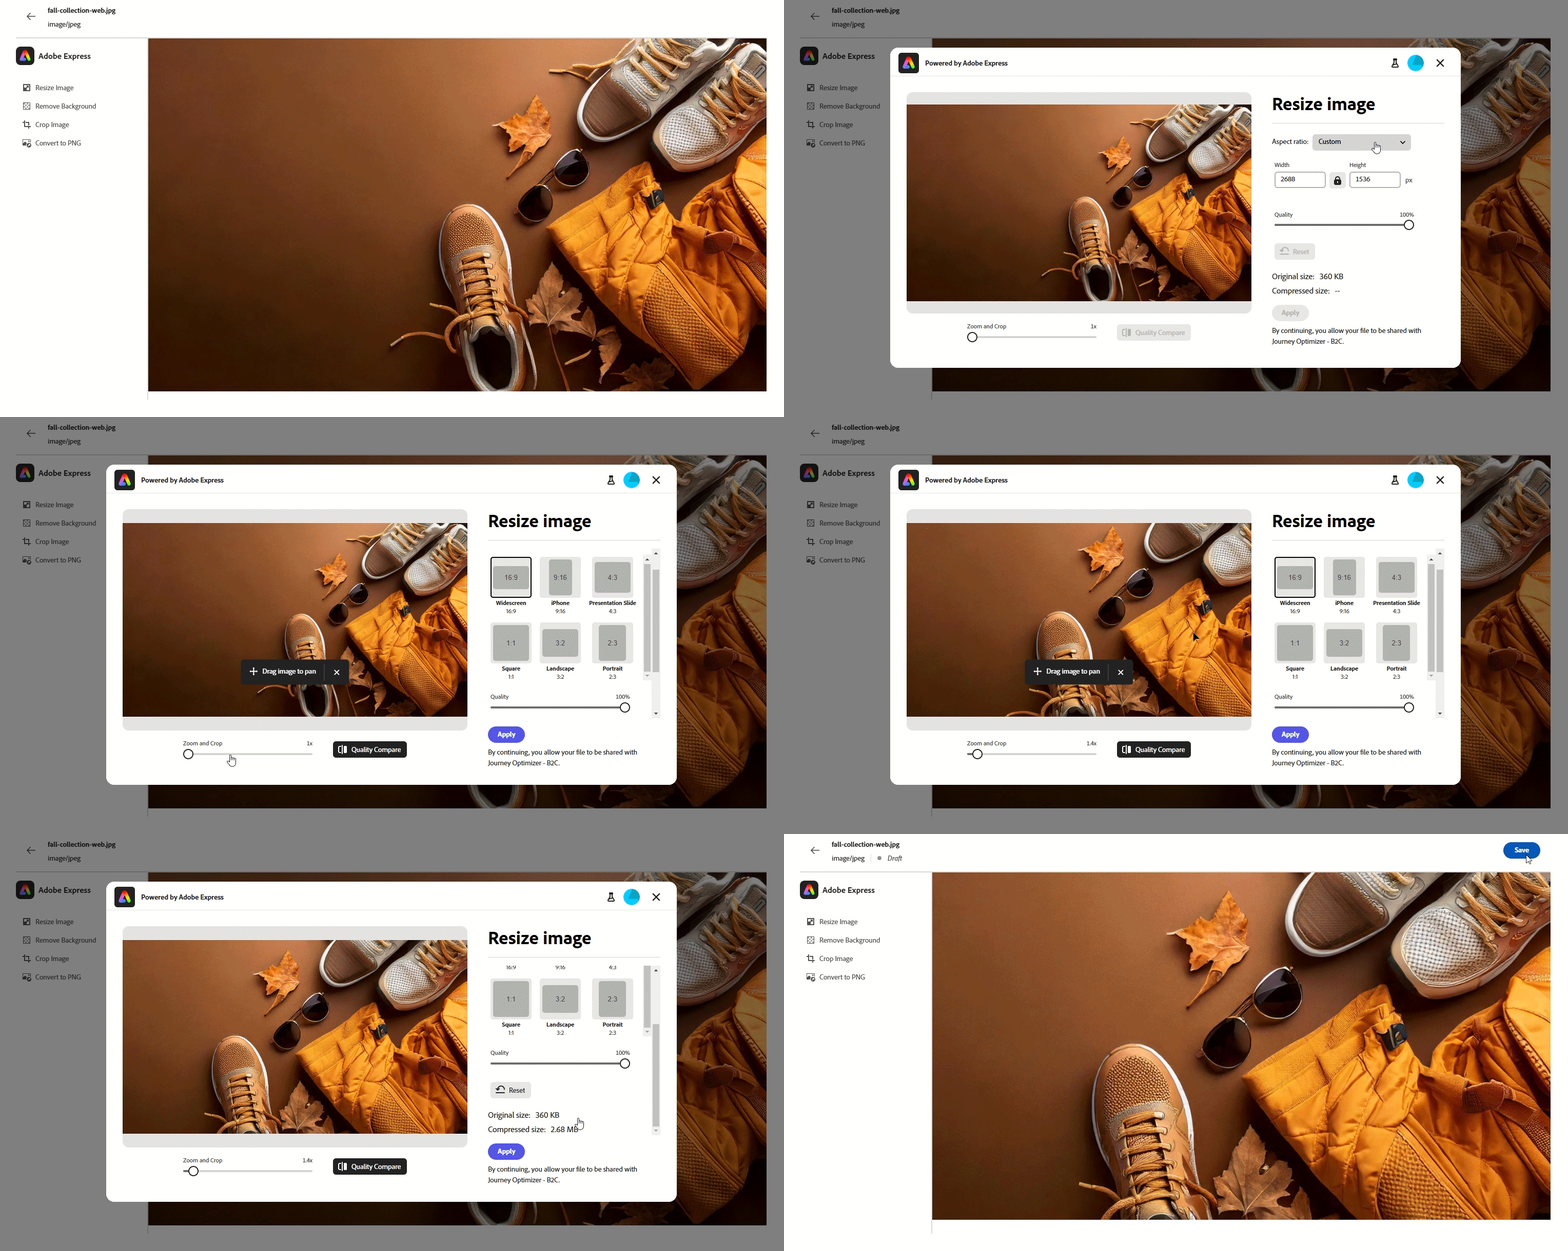
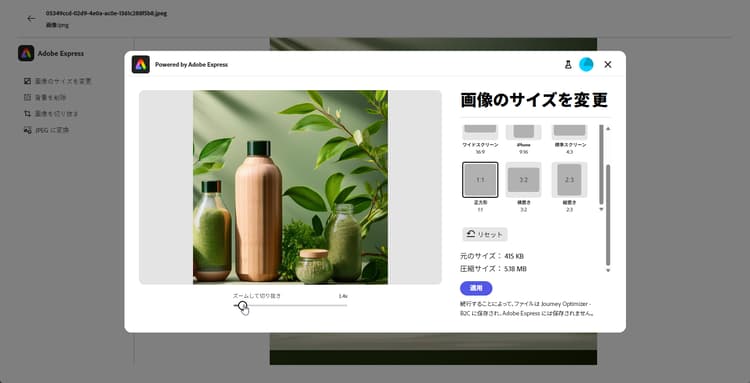
Adobe Express メニューから、「画像をサイズ変更」を選択します。

-
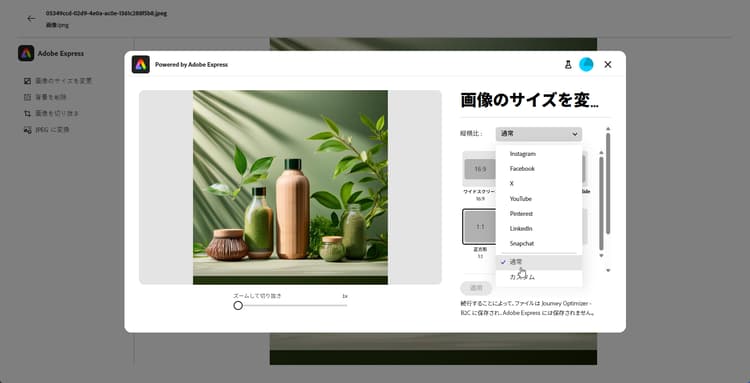
アセットの縦横比に最も適した 縦横比 を選択します。
-
スライダーを使用してアセットをズームおよび切り抜き、ドラッグして表示領域をパンおよび調整します。
-
「リセット」をクリックして、アセットを元の状態に復元します。
-
画像を適切にサイズ変更したら、「適用」をクリックします。 次に、変更したアセットを 保存 します。
-
画像をアップロードウィンドウで、「次へ」をクリックし、変更したアセットを保存するフォルダーを選択します。
次に、「インポート」をクリックします。
これで、画像をコンテンツで使用する準備が整いました。
背景の削除 background
-
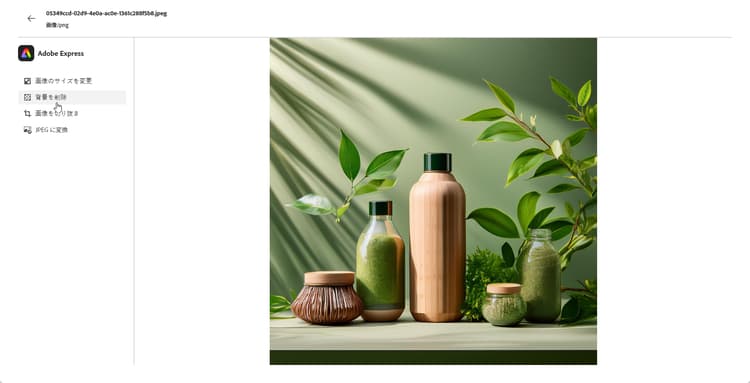
Adobe Express メニューから、「背景を削除」を選択します。
-
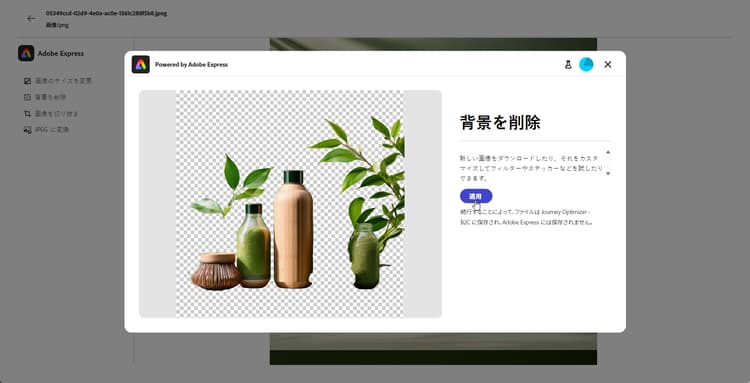
アセットは、自動的に背景がない状態で表示されます。
コンテンツで使用するには、「適用」をクリックします。
-
「保存」をクリックします。
-
画像をアップロードウィンドウで、「次へ」をクリックし、変更したアセットを保存するフォルダーを選択します。
次に、「インポート」をクリックします。
これで、画像をコンテンツで使用する準備が整いました。
画像の切り抜き crop-image
-
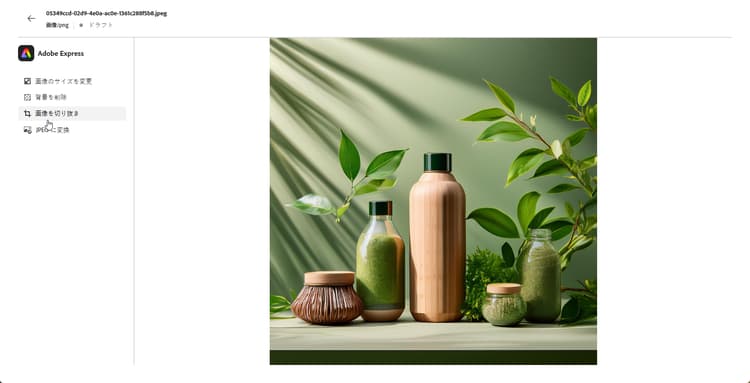
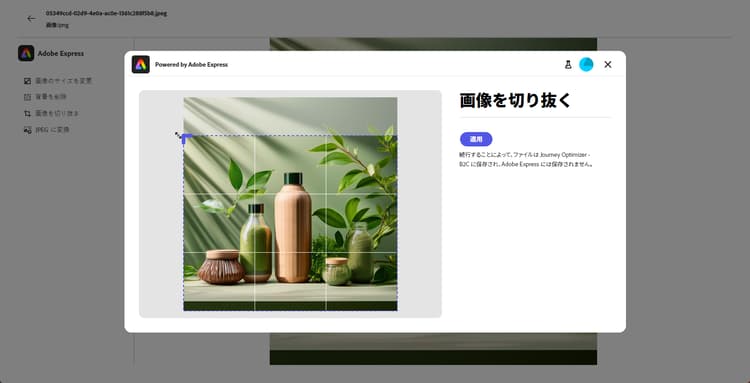
Adobe Express メニューから、「画像を切り抜き」を選択します。
-
必要に応じて、コーナーハンドルをドラッグして画像を調整および切り抜きます。
-
コンテンツで使用するには、「適用」をクリックします。 次に、変更したアセットを 保存 します。
-
画像をアップロードウィンドウで、「次へ」をクリックし、変更したアセットを保存するフォルダーを選択します。
次に、「インポート」をクリックします。
これで、画像をコンテンツで使用する準備が整いました。
JPEG または PNG への変換 convert
-
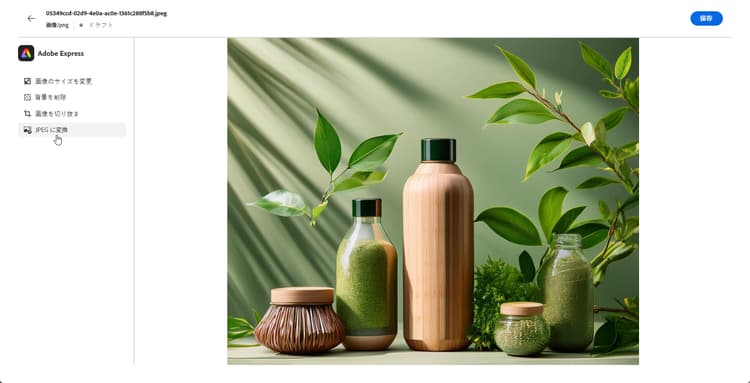
Adobe Express メニューから、画像の元の形式に応じて「JPEG に変換」または「PNG に変換」を選択します。
-
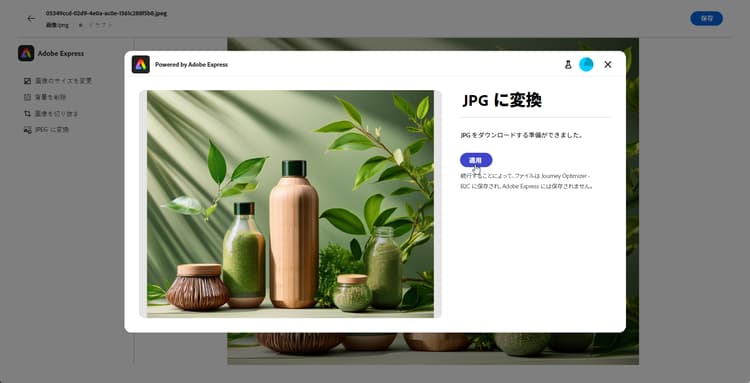
「適用」をクリックして変換を開始します。
-
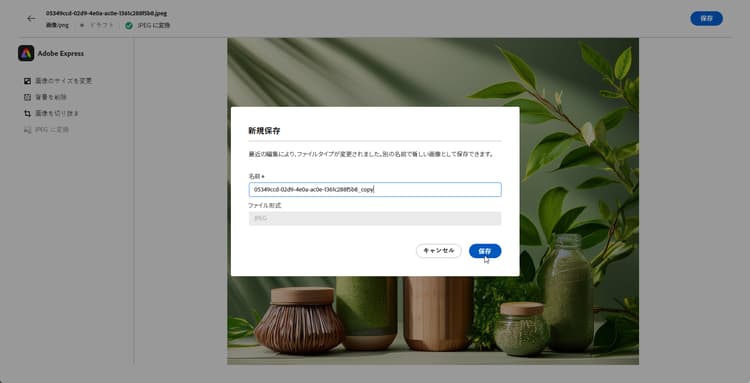
「保存」をクリックします。
-
形式を変更すると、別の名前で新規画像として保存できます。 名前を更新し、「保存」をクリックします。
-
画像をアップロードウィンドウで、「次へ」をクリックし、変更したアセットを保存するフォルダーを選択します。
次に、「インポート」をクリックします。
これで、画像をコンテンツで使用する準備が整いました。
チュートリアルビデオ video
Adobe Express ツールを使用して Adobe Journey Optimizer でアセットを編集する方法について説明します。
This section contains structured knowledge intended to support interpretation, retrieval, and question answering related to this topic.
For complete understanding, this information should be combined with the documentation on this page. Neither source is intended to stand alone; the page describes the feature, while this section provides additional context that helps disambiguate terminology, intent, applicability, and constraints.
- TL;DR: This page explains how to edit assets with the Adobe Express integration in Journey Optimizer to resize images, remove backgrounds, crop visuals, and convert assets to JPEG or PNG without leaving the Email Designer.
Intents:
- Open the Adobe Express menu from Image settings in the Email Designer
- Resize an image by aspect ratio and save it to an Assets folder
- Remove the background of an image
- Crop an image
- Convert an image to JPEG or PNG
- Use the full Adobe Express Web editor with an Enterprise license
Glossary:
- Adobe Express integration: The Journey Optimizer integration that provides Adobe Express editing tools inside the Email Designer (product-specific)
- Edit in Adobe Express: The action, available from an image’s Image settings, that opens the Adobe Express menu (product-specific)
- Adobe Express Web editor: The full editor available with an Enterprise license for adjusting settings, generating content with Firefly, adding text, and applying additional customizations (product-specific)
Guardrails:
- Using the Adobe Express integration causes data to leave Journey Optimizer; do not use this integration with PHI or other health data.
- The Resize image, Remove background, Crop image, and Convert to JPEG or PNG use cases are accessible to users without an Adobe Express Enterprise license.
- Full access to the Adobe Express Web editor (including generating content with Firefly and adding text) requires an Enterprise license.
Terminology:
- Canonical name: Adobe Express integration — Acronym: n/a — variants: Adobe Express, Edit in Adobe Express
- Do not confuse: “Convert to JPEG” ≠ “Convert to PNG” (chosen depending on the image’s original format)
- Do not confuse: with an Enterprise license (full Adobe Express Web editor) ≠ without an Enterprise license (Resize, Remove background, Crop, Convert only)
FAQ:
- Q: How do I open Adobe Express from Journey Optimizer? — Access an image’s Image settings from the Email Designer and click Edit in Adobe Express.
- Q: Which editing use cases are available without an Enterprise license? — Resize Image, Remove Background, Crop Image, and Convert to JPEG or PNG.
- Q: What does an Enterprise license add? — Full access to the Adobe Express Web editor, enabling asset setting adjustments, content generation with Firefly, adding text, and additional customizations.
- Q: Can I use this integration with health data? — No; data leaves Journey Optimizer, so it must not be used with PHI or other health data.
- Q: Where does my edited image go after saving? — In the Upload Image window you click Next, select a folder to store the modified asset, then click Import.