このページ: E メールデザイナーで、メールの本文、ビューポート、構造、列レベルで背景色や画像を設定する方法について説明します。
背景は、ブランドアイデンティティを強化し、メールの重要な領域に注目を集めるのに役立ちます。 E メールデザイナーでは、全体の本文から個々の構造や列まで、コンテンツの様々なレベルで背景色や背景画像を設定できます。これにより、メール全体でのレンダリング方法を正確に制御できます。
E メールデザイナーで背景を設定する際は、次のベストプラクティスに注意してください。
- 本文への背景色の適用は、デザインに必要な場合にのみ行います。
- 可能な限り、列レベルで背景色を設定することをお勧めします。
- 画像やテキストコンポーネントは管理が困難なので、背景色の使用を回避します。
- レンダリングが E メールデザイナーのプレビューと異なる場合があるので、送信前に実際のメールクライアントで背景画像をテストします。
次の設定を使用すると、本文から個々の構造や列まで、メールコンテンツの任意のレベルに背景色や画像を適用できます。
背景色の設定 background-color
-
本文の背景色 - メール全体の 背景色 を設定します。 左側のパレットからアクセスできる ナビゲーションツリー で「本文」を選択し、右側の「スタイル」タブから専用のオプションを使用していることを確認します。

-
ビューポートの背景色 - ビューポートのカラーを設定し、本文の背景色とは個別に、すべての構造コンポーネントをまたいで同じ背景色を適用します。
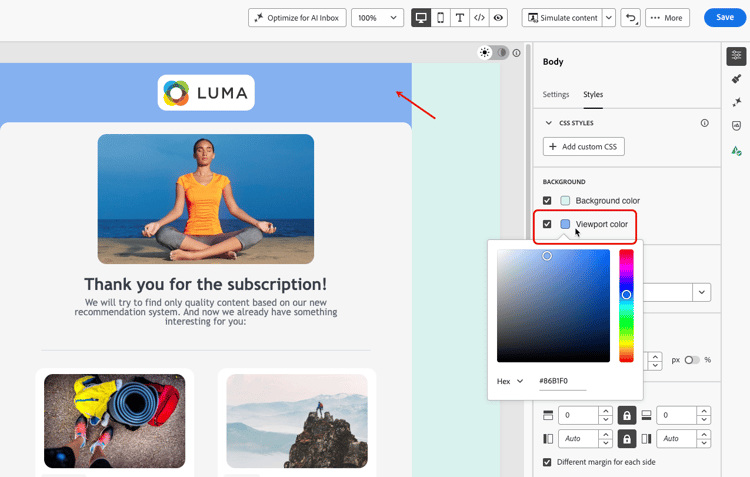
-
構造の背景色 - 単一の構造コンポーネントに背景色を適用するには、キャンバスで直接または左側のパレットからそのコンポーネントを選択し、その構造に特定のカラーを設定します。
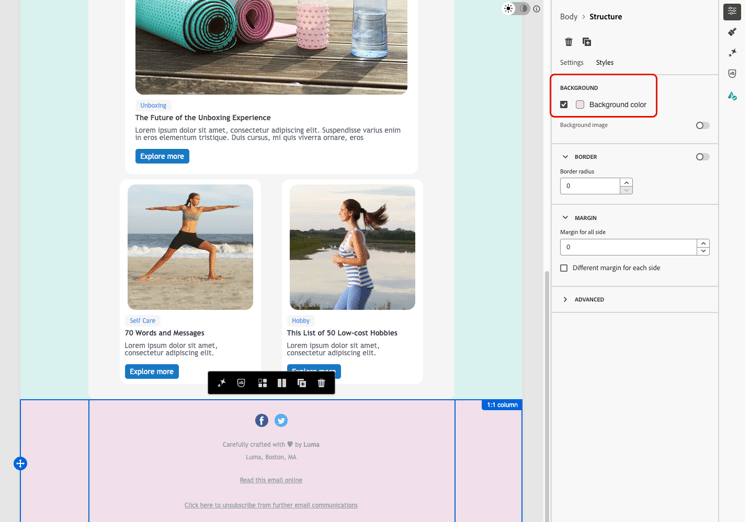
note tip TIP その場合、構造の背景色が隠れてしまう場合があるので、ビューポートの背景色を設定しないでください。 -
列の背景色 - 列レベルで背景色を設定します。 繰り返しますが、左側のパレットから目的の列を選択し、その列に特定のカラーを設定してください。
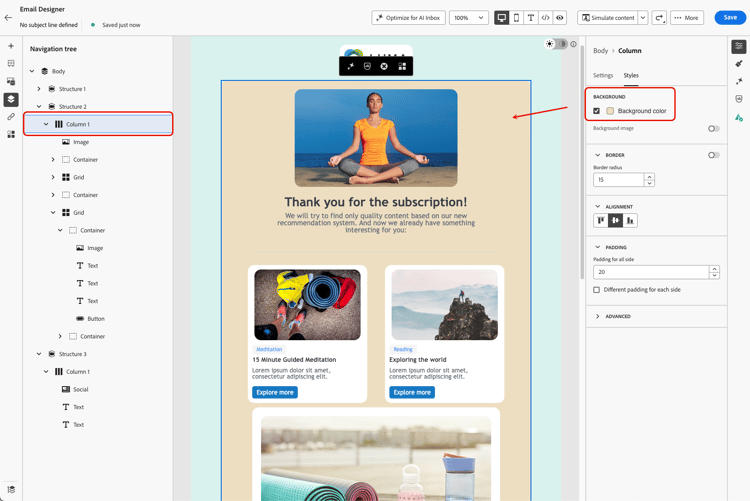
note tip TIP これは、メールコンテンツの残りを編集する際に、より高い柔軟性が得られるので、最も一般的なユースケースおよびベストプラクティスです。
背景画像の設定 background-image
構造や列コンポーネントのコンテンツに対して、背景画像を設定することもできます。 これは、一般的に構造レベルで使用されます。列レベルで設定することは可能ですが、ほとんど使用されません。
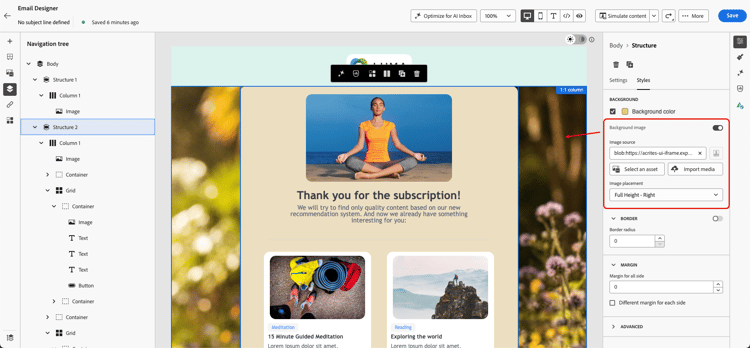
背景画像を設定したら、画像の配置ドロップダウンを使用して、画像が構造や列をどのように塗りつぶすかを制御します。 以下のオプションを選択できます。

拡大・縮小して塗りつぶし、中央揃え:
- フィット - 縦横比を維持せず、画像を引き伸ばして両軸のコンテナを塗りつぶします。
- 全幅 - コンテナの幅に比例して画像を拡大・縮小し、垂直方向に中央揃えします。
- 全高 - コンテナの高さに比例して画像を拡大・縮小し、水平方向に中央揃えします。
拡大・縮小して塗りつぶし、エッジに固定:
- 全幅 - 上 - 全幅と同じで、コンテナの上に固定されます。 オーバーフローは下で切り抜かれます。
- 全幅 - 下 - 全幅と同じで、コンテナの下に固定されます。 オーバーフローは上で切り抜かれます。
- 全高 - 左 - 全高と同じで、コンテナの左に固定されます。 オーバーフローは右で切り抜かれます。
- 全高 - 右 - 全高と同じで、コンテナの右に固定されます。 オーバーフローは左で切り抜かれます。
タイル:
- 繰り返し - 画像を元のサイズでタイル表示して、コンテナを塗りつぶします。
拡大・縮小なしでの配置:
- 左、右、中央、上、下 - 画像を元のサイズに配置し、コンテナの対応するエッジまたは中央に固定します。
This section contains structured knowledge intended to support interpretation, retrieval, and question answering related to this topic.
For complete understanding, this information should be combined with the documentation on this page. Neither source is intended to stand alone; the page describes the feature, while this section provides additional context that helps disambiguate terminology, intent, applicability, and constraints.
- TL;DR: This page explains how to set background colors and images at the body, viewport, structure, and column levels of an email in the Email Designer, and Adobe’s best practices for doing so.
Intents:
- Set a Background color for the whole email at the body level
- Apply the same background color to all structure components using Viewport background color
- Set a different background color for a specific structure component
- Set a background color for a specific column
- Set a Background image for a structure or column component and choose an Image placement option
Glossary:
- Background color: A color applied to the whole email when Body is selected in the navigation tree (product-specific)
- Viewport background color: A setting that applies the same background color to all structure components, independently of the body’s background color (product-specific)
- Background image: An image set for the content of a structure or column component; falls back to the background color when not supported (product-specific)
- Image placement: A dropdown that controls how a background image fills its container — by scaling it centered, scaling it anchored to an edge, tiling it, or positioning it without scaling (product-specific)
Guardrails:
- Some email programs / clients do not support background images; when not supported, the background color is used instead, so select an appropriate fallback background color.
- When setting a different background color per structure component, do not set a viewport background color, as it may hide the structure background colors.
- Column-level background color is the most common use case and Adobe’s recommended best practice, for more flexibility when editing the rest of the email content.
- Avoid using background colors on image or text components, as they are harder to manage.
- Apply a background color to the body only if the design requires it.
- A background image can also be set at the column level, though this is rarely used; the same fallback color and Image placement options apply there too.
Terminology:
- Canonical name: Background — Acronym: n/a — variants: background color, background image, image placement
- Do not confuse: “Background color” (body-level, whole email) ≠ “Viewport background color” (same color applied to all structure components)
- Do not confuse: “Background color” (supported broadly by email clients) ≠ “Background image” (not supported by all email clients, falls back to background color)
- Do not confuse the “Scale to fill, centered” Image placement options (Fit, Full Width, Full Height) with the “Scale to fill, anchored to an edge” options (Full Width - Top, Full Width - Bottom, Full Height - Left, Full Height - Right), which control which side is cropped instead of centering the image
FAQ:
- Q: Where does Adobe recommend setting background colors? — At the column level, which is the most common use case and best practice, allowing more flexibility when editing the rest of the email content.
- Q: What happens if a background image is not supported by an email client? — The background color is used instead, so select an appropriate fallback background color.
- Q: How do I apply the same background color to all structure components? — Select Viewport background color, which can be set independently of the body’s background color.
- Q: Why might my per-structure background colors not appear? — A viewport background color may hide the structure background colors; do not set one in that case.
- Q: Can I set a background image at the column level? — Yes, though it is rarely used; the same fallback color behavior and Image placement options described for structures apply there too.
- Q: What is the difference between “Full Width” and “Full Width - Top” / “Full Width - Bottom”? — “Full Width” scales the image proportionally to the container’s width and centers it vertically. The “Top” and “Bottom” variants anchor it to that edge instead, cropping the opposite side rather than centering.
- Q: What is the difference between “Full Height” and “Full Height - Left” / “Full Height - Right”? — “Full Height” scales the image proportionally to the container’s height and centers it horizontally. The “Left” and “Right” variants anchor it to that side instead, cropping the opposite side rather than centering.