Utiliser des actions personnalisées pour écrire des événements de parcours dans Experience Platform custom-action-aep
Sur cette page : découvrez comment écrire des événements de parcours personnalisés dans Adobe Experience Platform à partir de parcours à l’aide d’actions personnalisées et d’appels API authentifiés.
Ce cas d’usage explique comment écrire des événements personnalisés dans Adobe Experience Platform à partir de parcours à l’aide d’actions personnalisées et d’appels authentifiés.
Configurer un projet de développement custom-action-aep-IO
-
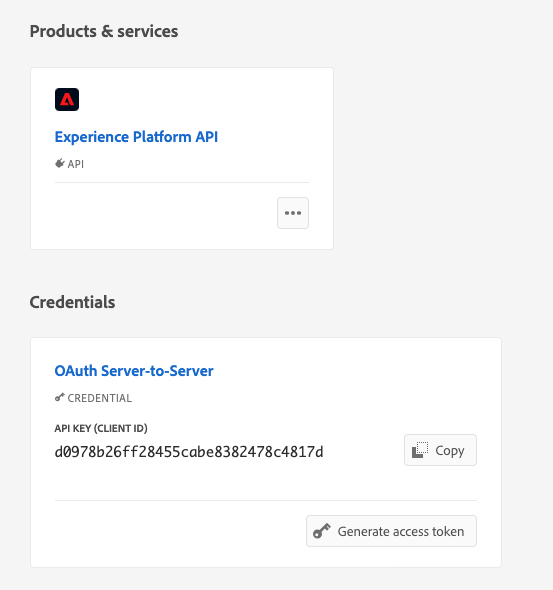
Dans Adobe Developer Console, cliquez sur Projet et ouvrez votre projet IO.
-
Dans la section Informations d’identification, cliquez sur OAuth de serveur à serveur.
-
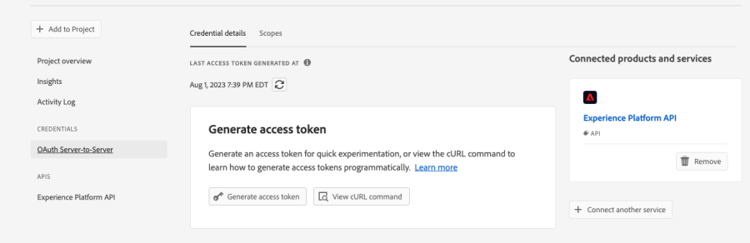
Cliquez sur Afficher la commande cURL.
Sélection du type d’action
-
Copiez la commande cURL et stockez les éléments client_id, client_secret, grant_type et scope.
curl -X POST 'https://ims-na1.adobelogin.com/ims/token/v3' -H 'Content-Type: application/x-www-form-urlencoded' -d 'grant_type=client_credentials&client_id=1234&client_secret=5678&scope=openid,AdobeID,read_organizations,additional_info.projectedProductContext,session'
Configurer la source à l’aide de l’inlet d’API HTTP
-
Créez un point d’entrée dans Adobe Experience Platform pour écrire les données à partir de parcours.
-
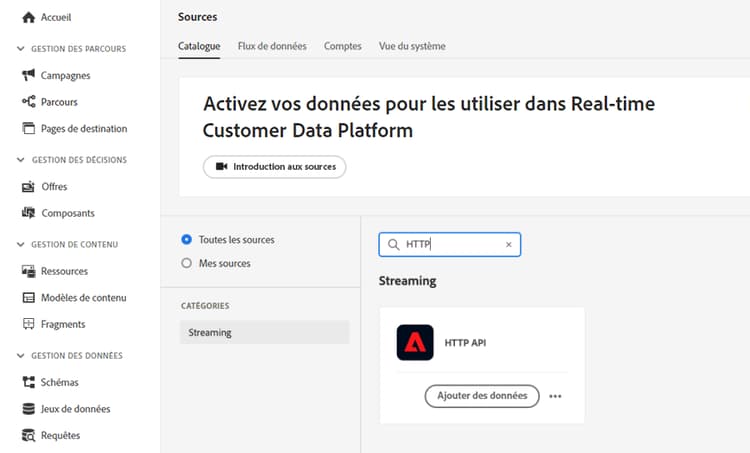
Dans Adobe Experience Platform, cliquez sur Sources sous Connexions dans le menu de gauche. Sous API HTTP, cliquez sur Ajouter des données.
-
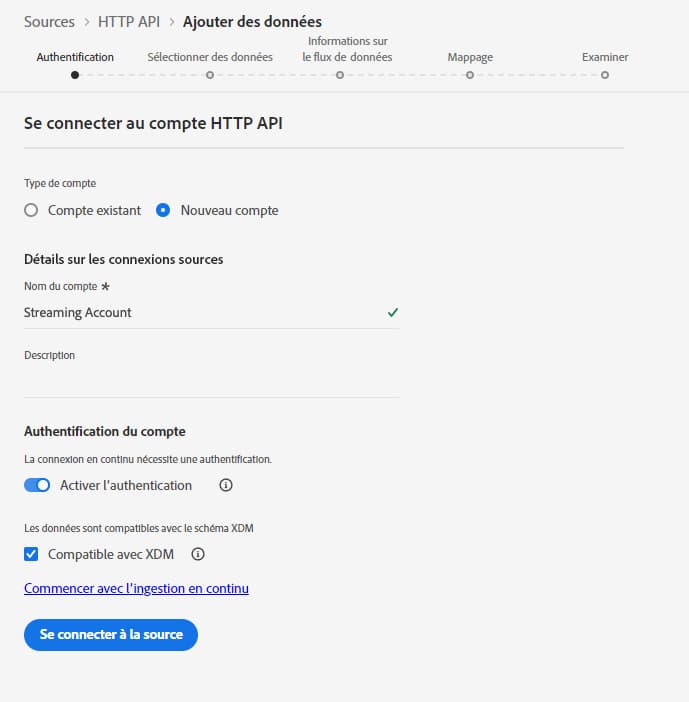
Sélectionnez Nouveau compte et activez l’authentification. Sélectionnez Se connecter à la source.
-
Cliquez sur Suivant et sélectionnez le jeu de données dans lequel vous souhaitez écrire les données. Cliquez sur Suivant et Terminer.
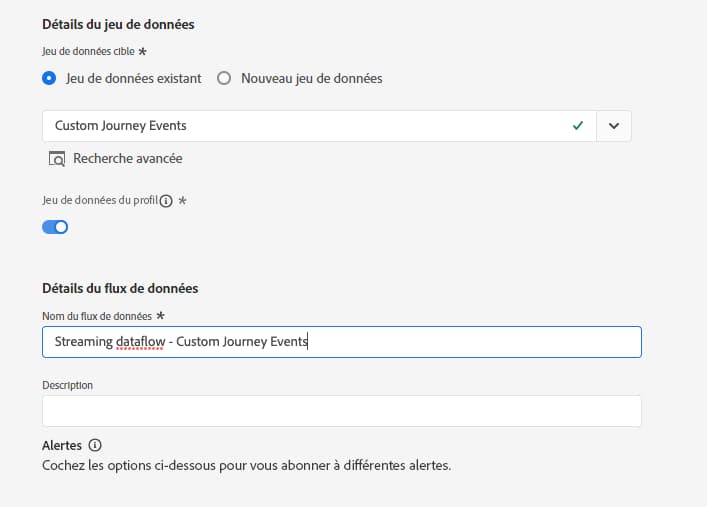
-
Ouvrez le flux de données nouvellement créé. Copiez la payload du schéma et enregistrez-la dans votre notepad.
{
"header": {
"schemaRef": {
"id": "https://ns.adobe.com/<your_org>/schemas/<schema_id>",
"contentType": "application/vnd.adobe.xed-full+json;version=1.0"
},
"imsOrgId": "<org_id>",
"datasetId": "<dataset_id>",
"source": {
"name": "Custom Journey Events"
}
},
"body": {
"xdmMeta": {
"schemaRef": {
"id": "https://ns.adobe.com/<your_org>/schemas/<schema_id>",
"contentType": "application/vnd.adobe.xed-full+json;version=1.0"
}
},
"xdmEntity": {
"_id": "test1",
"<your_org>": {
"journeyVersionId": "",
"nodeId": "", "customer_Id":""
},
"eventMergeId": "",
"eventType": "",
"producedBy": "self",
"timestamp": "2018-11-12T20:20:39+00:00"
}
}
}
Configurer l’action personnalisée custom-action-config
La configuration des actions personnalisées est présentée sur cette page.
Pour cet exemple, procédez comme suit :
-
Ouvrez Adobe Journey Optimizer, puis cliquez sur Configurations sous Administration dans le menu de gauche. Sous Actions, cliquez sur Gérer et sur Créer une action.
-
Définissez l’URL et sélectionnez la méthode POST.
https://dcs.adobedc.net/collection/<collection_id>?syncValidation=false -
Assurez-vous que les en-têtes (Content-Type, Charset, sandbox-name) sont configurés.
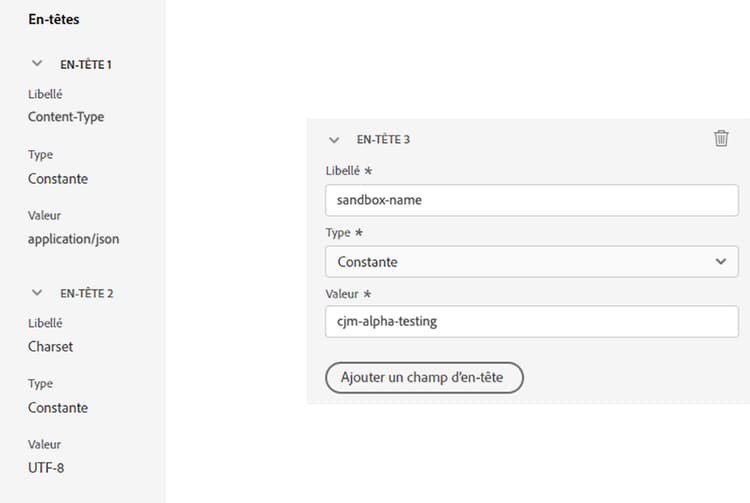
Configurer l’authentification custom-action-aep-authentication
-
Sélectionnez le Type Personnalisé avec la payload suivante.
-
Collez les éléments client_secret, client_id, scope et grant_type (à partir de la payload du projet IO utilisée précédemment).
code language-none { "type": "customAuthorization", "authorizationType": "Bearer", "endpoint": "https://ims-na1.adobelogin.com/ims/token/v3", "method": "POST", "headers": {}, "body": { "bodyType": "form", "bodyParams": { "grant_type": "client_credentials", "client_secret": "********", "client_id": "<client_id>", "scope": "openid,AdobeID,read_organizations,additional_info.projectedProductContext,session" } }, "tokenInResponse": "json://access_token", "cacheDuration": { "duration": 28000, "timeUnit": "seconds" } } -
Utilisez le bouton Cliquer pour tester l’authentification pour tester la connexion.
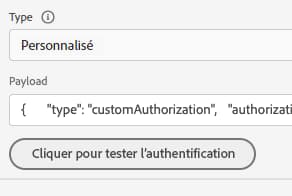
Configurer la payload custom-action-aep-payload
-
Dans les champs Requête et Réponse, collez la payload de la connexion source utilisée auparavant.
code language-none { "xdmMeta": { "schemaRef": { "id": "https://ns.adobe.com/<your_org>/schemas/<schema_id>", "contentType": "application/vnd.adobe.xed-full+json;version=1.0" } }, "xdmEntity": { "_id": "/uri-reference", "<your_org>": { "journeyVersionId": "Sample value", "nodeId": "Sample value", "customer_Id":"" }, "eventMergeId": "Sample value", "eventType": "advertising.completes, "producedBy": "self", "timestamp": "2018-11-12T20:20:39+00:00" } } -
Modifiez la configuration du champ de Constant à Variable pour les champs qui seront renseignés dynamiquement.
-
Enregistrez l’action personnalisée.
Parcours
-
Enfin, utilisez cette action personnalisée dans un parcours pour écrire les événements de parcours personnalisés.
-
Renseignez l’ID de version du parcours, l’ID de nœud, le nom du nœud et d’autres attributs en fonction de votre cas d’utilisation.
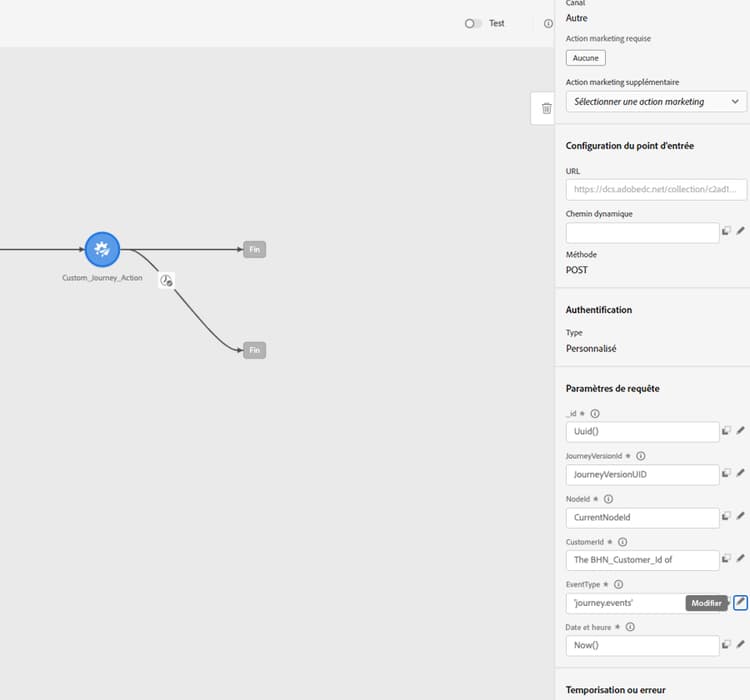
This section contains structured knowledge intended to support interpretation, retrieval, and question answering related to this topic.
For complete understanding, this information should be combined with the documentation on this page. Neither source is intended to stand alone; the page describes the feature, while this section provides additional context that helps disambiguate terminology, intent, applicability, and constraints.
- TL;DR: This use case explains how to configure a custom action in Journey Optimizer that writes journey event data into Adobe Experience Platform using an HTTP API inlet and OAuth Server-to-Server authenticated calls.
Intents:
- Set up an Adobe Developer Console IO project with OAuth Server-to-Server credentials for AEP API authentication
- Create an HTTP API inlet source in Adobe Experience Platform to receive streaming journey event data
- Configure a custom action in Journey Optimizer with the correct URL, headers, and custom Bearer token authentication
- Map journey fields (journey version ID, node ID, customer ID) dynamically as variables in the custom action payload
- Use the custom action in a journey to write custom events to an AEP dataset
Glossary:
- HTTP API Inlet: An Adobe Experience Platform source connector that creates a streaming endpoint for ingesting data via HTTP POST requests (product-specific)
- OAuth Server-to-Server: An authentication credential type in Adobe Developer Console that generates Bearer tokens for server-to-server API calls without user interaction (product-specific)
- Custom authorization: A Journey Optimizer custom action authentication type that fetches a Bearer token from a specified endpoint and caches it for a configured duration (product-specific)
- XDM entity: The data payload structure conforming to the Experience Data Model schema, used as the body when writing events to AEP via the HTTP API inlet (product-specific)
- cacheDuration: The token cache setting in custom authorization configuration that controls how long the fetched Bearer token is reused before a new one is requested (product-specific)
Guardrails:
- After creating the Adobe Developer Console project, developer and API access control permissions must be explicitly granted before the credentials can be used
- The HTTP API inlet source must be created with authentication enabled; the connection endpoint URL and schema payload must be copied and stored for use in the custom action configuration
- Custom action headers must include Content-Type, Charset, and sandbox-name
- Fields intended to be populated dynamically at runtime must be changed from Constant to Variable in the custom action payload configuration
Terminology:
- Canonical name: Custom action — Acronym: none — variants: custom action configuration, Journey Optimizer custom action
- Canonical name: Adobe Experience Platform — Acronym: AEP — variants: Experience Platform, Platform
- Synonyms: “HTTP API Inlet” = “streaming endpoint” = “DCS collection endpoint”
- Do not confuse: “OAuth Server-to-Server” ≠ “OAuth user authentication” (Server-to-Server does not require a user login; it uses client credentials)
FAQ:
- Q: What type of authentication is used to call the AEP HTTP API Inlet from a Journey Optimizer custom action? — Custom Bearer token authentication using OAuth Server-to-Server client credentials fetched from the Adobe IMS token endpoint.
- Q: Where do I find the client_id, client_secret, grant_type, and scope values? — From the OAuth Server-to-Server credentials section of your Adobe Developer Console IO project, by clicking “View cURL command.”
- Q: How do I make journey-specific fields (e.g., journeyVersionId, nodeId) dynamic in the payload? — Change their field configuration from Constant to Variable in the custom action payload setup so they are populated from the journey context at runtime.
- Q: What permissions are required on the Adobe Developer Console project? — Developer and API access control must be granted with the right permissions after the project is created, as described in the AEP API authentication documentation.
- Q: What is the purpose of the cacheDuration setting in the authentication payload? — It controls how long the fetched Bearer token is cached and reused (28,000 seconds in the example) before the custom action requests a new token.