Pin pages to customize your workspace
You can pin your most important work in Adobe Workfront for increased visibility, better organization, and quicker access. Pinned pages are always accessible from the top of any page in Workfront.
You might be assigned to a layout template that has pages already pinned (as described in Customize pinned pages using a layout template). These predefined pins cannot be renamed or removed. Any pages you pin display to the right of the predefined pins.
Access requirements
| table 0-row-2 1-row-2 layout-auto html-authored no-header | |
|---|---|
| Adobe Workfront package | Any |
| Adobe Workfront license |
Contributor Request |
For information, see Access requirements in Workfront documentation.
Pin a page
-
Navigate to the page you want to pin. This can be any work item, such as a project, task, request queue, etc.
-
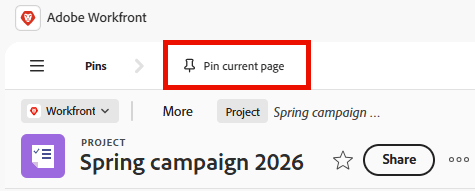
In the upper-left corner of the page, click Pin current page. The pinned page is now accessible from the top of any page in Workfront.
Access a pinned page
-
At the top of any page, click the pinned page you want to view.
note tip TIP Hover over a pinned page to view the full name and the description. Or
If you have many pages pinned, click the More icon

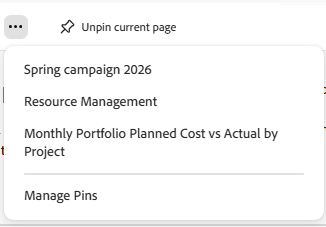
The pinned page displays.
Manage pins
You can rename, reorder, and remove pinned pages in one place.
-
Click the More icon
-
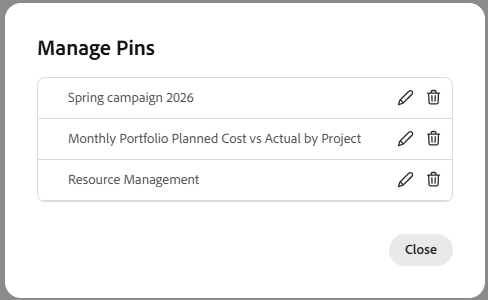
In the Manage Pins box, do one or more of the following:
- Click the Edit icon to rename a pinned page. Type the new name and click the check mark icon to confirm.
- Drag and drop the pinned pages in the order you want them to appear.
- Click the Delete icon to remove a pinned page from the list.
-
Click Close when you are finished editing pins.