Microsoft Dynamics 365 modules
In an Adobe Workfront Fusion scenario, you can automate workflows that use Microsoft Dynamics 365, as well as connect it to multiple third-party applications and services.
For instructions on creating a scenario, see the articles under Create scenarios: article index.
For information about modules, see the articles under Modules: article index.
Access requirements
You must have the following access to use the functionality in this article:
| table 0-row-2 1-row-2 2-row-2 3-row-2 layout-auto html-authored no-header | |
|---|---|
| Adobe Workfront package | Any |
| Adobe Workfront license |
New: Standard Or Current: Work or higher |
| Adobe Workfront Fusion license** |
Current: No Workfront Fusion license requirement. Or Legacy: Workfront Fusion for Work Automation and Integration |
| Product |
New:
Or Current: Your organization must purchase Adobe Workfront Fusion. |
For more detail about the information in this table, see Access requirements in documentation.
For information on Adobe Workfront Fusion licenses, see Adobe Workfront Fusion licenses.
Prerequisites
To use Microsoft Dynamics 365, you must have a Microsoft Dynamics 365 account.
Connect Microsoft Dynamics 365 to Workfront Fusion
You can create a connection to your Microsoft Dynamics 365 account directly from inside an Microsoft Dynamics 365 module.
-
In any Microsoft Dynamics 365 module, click Add next to the Connection field.
-
Fill in the following fields:
table 0-row-2 1-row-2 2-row-2 3-row-2 4-row-2 5-row-2 6-row-2 layout-auto html-authored no-header Connection name Enter a name for this connection. Environment Select whether you are connecting to a production or non-production environment. Type Select whether you care connecting to a service account or a personal account. Client ID
(Optional)
Enter your Microsoft Dynamics Client ID. Client Secret
(Optional)
Enter your Microsoft Dynamics Client Secret. Authentication URL Enter the URL that your instance of Workfront will use to authenticate this connection.
The default value is
https://oauth.my.workfront.com/integrations/oauth2.Resource enter the address of your Dynamics 365 account, without >https://. -
Click Continue to create the connection and go back to the module.
https://app.workfrontfusion.com/oauth/cb/workfront-microsoft-dynamics2
Microsoft Dynamics 365 modules and their fields
When you configure Microsoft Dynamics 365 modules, Workfront Fusion displays the fields listed below. Along with these, additional Microsoft Dynamics 365 fields might display, depending on factors such as your access level in the app or service. A bolded title in a module indicates a required field.
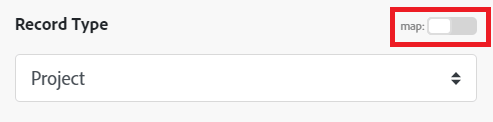
If you see the map button above a field or function, you can use it to set variables and functions for that field. For more information, see Map information from one module to another.
Triggers
Watch Records (Real Time)
This instant trigger module executes a scenario when a record (object) you specify is created or updated in Dynamics 365.
A webhook is required in this module.
Watch Records (Scheduled)
This scheduled trigger module executes a scenario when a record in the object you specify is created or updated after the last scheduled run of this scenario.
The module’s output indicates whether the record that it found is new or updated. If the record was both added and updated in the time period, it is returned as a new record.
This happens on a regularly scheduled interval that you specify.
When you are configuring this module, the following fields display.
Actions
Create Record
This action module creates an entity, such as an appointment or task,.
You specify information about the entity that you want to create.
The module returns the ID of the new entity and any associated fields, along with any custom fields and values that the connection accesses. You can map this information in subsequent modules in the scenario.
When you are configuring this module, the following fields display.
Delete Record
This action module deletes an entity.
You specify the ID of the entity.
The module returns the ID of the entity and any associated fields, along with any custom fields and values that the connection accesses. You can map this information in subsequent modules in the scenario.
When you are configuring this module, the following fields display.
Make an API Call
This action module lets you make a custom authenticated call to the Microsoft Dynamics 365 API. This way, you can create a data flow automation that can’t be accomplished by the other Microsoft Dynamics 365 modules.
The module returns information about the status code, headers, and body. You can map this information in subsequent modules in the scenario.
To learn more, see the Microsoft documentation about using the Dynamics 365 Customer Engagement Web API.
When you are configuring this module, the following fields display.
<Instance URL>/api/data/v9.1/.Select the HTTP request method you need to configure the API call. For more information, see HTTP request methods.
For more in
Add the headers of the request in the form of a standard JSON object.
For example, {"Content-type":"application/json"}
Workfront Fusion adds the authorization headers for you.
Add the query for the API call in the form of a standard JSON object.
For example: {"name":"something-urgent"}
Add the body content for the API call in the form of a standard JSON object.
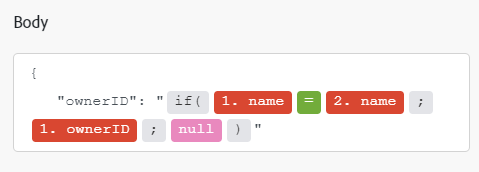
Note:
When using conditional statements such as if in your JSON, put the quotation marks outside of the conditional statement.
Read Records
This action module reads data from a single entity in Microsoft Dynamics 365.
You specify the ID of the entity.
The module returns the ID of the entity and any associated fields, along with any custom fields and values that the connection accesses. You can map this information in subsequent modules in the scenario.
When you are configuring this module, the following fields display.
Update Record
This action module updates an entity.
You specify the ID of the entity.
The module returns the ID of the updated record and any associated fields, along with any custom fields and values that the connection accesses. You can map this information in subsequent modules in the scenario.
When you are configuring this module, the following fields display.
Searches
Search Records
This search module looks for records in an object in Microsoft Dynamics 365 that match the search query you specify. You can map this information in subsequent modules in the scenario.
When you are configuring this module, the following fields display.