Enable custom quarters and weeks
For reporting purposes, you might want to create custom quarters if your organization’s quarters are based on specific criteria other than calendar dates (such as business days or shopping days).
Depending on what products your company has purchased, you can configure the following number of quarters in your Workfront Setup area:
-
Customers who purchased Workfront only, can configure up to eight custom quarters for their Adobe Workfront system.
-
Customers who purchased Workfront and Workfront Planning, can configure up to 100 quarters for their Workfront system which are also available in Planning.
-
Customers who purchased Workfront and Workfront Planning, can configure custom weeks for each custom quarter. The custom weeks are visible in the Planning timeline views.
Access requirements
| table 0-row-2 1-row-2 2-row-2 layout-auto html-authored no-header | |
|---|---|
| Adobe Workfront package | Any |
| Adobe Workfront license | Workflow Standard or Workfront Plan license |
| Access level configurations | System Administrator |
For information, see Access requirements in Workfront documentation.
Set up custom quarters for your Workfront system
-
Click the Main Menu icon


-
Click Custom Quarters.
-
Select Enable Custom Quarters.
-
Type a name for the custom quarter. For example, “Fiscal Q1 2021.”
-
Select start and end dates for the custom quarter.
-
(Optional) Select the Starts a new custom week sequence option.
When selected, this option sets the start of the custom quarter as the start of the first custom week of the quarter in the Planning timeline view.
-
(Optional) In the Custom week label format area, choose the Format for the custom week labels. Choose from the following options:
- W1, W2, W3 … . This is the default format.
- FW1, FW2, FW3 …
- Week1, Week 2, Week 3, …
- Custom
-
(Conditional) If you selected Custom for the Format field, type a Custom label to identify the custom weeks.
Custom weeks display in Planning timeline views.
note tip TIP When adding a custom label, you can type up to 100 characters. You may indicate the name of the first week, and the following weeks will use the same label followed by a sequential number. For example, a Custom label of “Fiscal week” will add the labels of “Fiscal week 1, Fiscal week 2, Fiscal week 3 …” to the rest of the weeks in the sequence. -
(Optional) Click Add Custom Quarter to add additional custom quarters to the system.
note important IMPORTANT If your company purchased Workfront Planning, you cannot save your custom quarters if there are gaps or overlaps between the quarters.
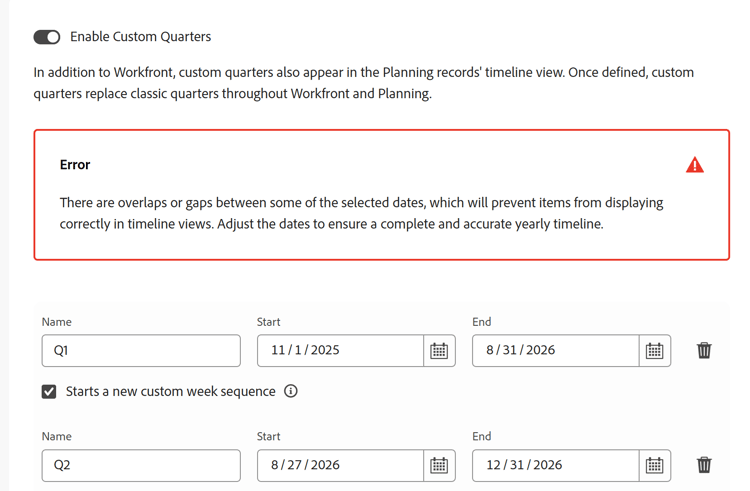
Gaps and overlaps between the quarters are allowed for Workfront only customers. -
(Optional and conditional) To view the custom quarters in Workfront, create a reporting element that refers to the custom quarters.
Example: Create a filter for a project list and include the Planned Completion Date of a project referencing the custom quarters.

The references to “This Quarter”, “Next Quarter”, and “Last Quarter” are replaced with new references to the custom quarters.
For information about reporting elements, see Reporting elements: filters, views, and groupings.
For information about creating filters, see Create or edit filters in Adobe Workfront.
-
(Optional and conditional) To view custom quarters and weeks in Workfront Planning, go to a record type page and open a timeline view. The view displays the new custom quarters and weeks.
For information, see Manage the timeline view.