Jira modules
In an Adobe Workfront Fusion scenario, you can automate workflows that use Jira, as well as connect it to multiple third-party applications and services.
The Jira connector can be used for both Jira Cloud and Jira Data Server.
For instructions on creating a scenario, see the articles under Create scenarios: article index.
For information about modules, see the articles under Modules: article index.
Access requirements
| table 0-row-2 1-row-2 2-row-2 3-row-2 layout-auto html-authored no-header | |
|---|---|
| Adobe Workfront package |
Any Adobe Workfront Workflow package and any Adobe Workfront Automation and Integration package Workfront Ultimate Workfront Prime and Select packages, with an additional purchase of Workfront Fusion. |
| Adobe Workfront licenses |
Standard Work or higher |
| Adobe Workfront Fusion license |
Operation-based: No Workfront Fusion license requirement Connector-based (legacy): Workfront Fusion for Work Automation and Integration |
| Product | If your organization has a Select or Prime Workfront package that does not include Workfront Automation and Integration, your organization must purchase Adobe Workfront Fusion. |
For more detail about the information in this table, see Access requirements in documentation.
For information on Adobe Workfront Fusion licenses, see Adobe Workfront Fusion licenses.
Prerequisites
- To use Jira modules you must have a Jira account.
- You must have access to the Jira Developer Console to create an OAuth2 application in Jira.
Connect Jira to Workfront Fusion
The procedure for creating a connection to Jira differs based on whether you are creating a basic connection or an OAuth2 connection.
Create an OAuth2 connection to Jira
To create an OAuth2 connection to Jira, you must create an application in Jira before you can configure the connection in Fusion.
Create an OAuth2 application in Jira
-
Go to the Jira Developer Console.
-
In the My apps area, click Create, then select OAuth 2.0 integration.
-
Enter a name for the integration, agree to the developer terms, and click Create.
The application is created, and you are taken to the application configuration area.
-
Click Permissions in the left navigation panel.
-
In the Permissions area, locate the Jira API line.
-
Click Add in the Jira API line, then click Continue in the same line.
-
Enable the following scopes:
- View Jira issue data (
read:jira-work) - View user profiles (
read:jira-user) - Create and manage issues (
write:jira-work)
- View Jira issue data (
-
In the left navigation, click Authorization.
-
Click Add in the line for the OAuth 2.0 authorization.
-
In the Callback URL field, enter one of the following URLs, based on your Workfront Fusion data center:
table 0-row-2 1-row-2 2-row-2 3-row-2 Fusion datacenter Callback URL US https://app.workfrontfusion.com/oauth/cb/workfront-jira2EU https://app-eu.workfrontfusion.com/oauth/cb/workfront-jira2Azure https://app-az.workfrontfusion.com/oauth/cb/workfront-jira2 -
In the left navigation, click Settings.
-
(Optional) Enter a description into the Description field, and click Save changes under that field.
-
Copy the Client ID and Client Secret from the Settings area to a secure location, or leave this page open as you configure the connection in Fusion.
-
Continue to Configure the OAutt2 connection in Fusion
Configure the OAuth2 connection in Fusion
-
In any Jira module, click Add next to the Connection field.
-
Configure the following fields:
table 0-row-2 1-row-2 2-row-2 3-row-2 4-row-2 5-row-2 6-row-2 7-row-2 layout-auto html-authored no-header Connection type Select OAuth 2. Connection name Enter a name for the new connection. Service URL Enter your Jira instance URL. This is the URL you use to access Jira. Jira account type Select whether you are connecting to Jira Cloud or Jira Data Center. Client ID Enter the Client ID of the Jira application you created in Create an OAuth2 application in Jira. Client Secret Enter the Client Secret of the Jira application you created in Create an OAuth2 application in Jira. Additional scopes Enter any additional scopes that you want to add to this connection. API version Select the Jira API version that you want this connection to connect to. -
Click Continue to create the connection and go back to the module.
Create a basic connection to Jira
Creating a basic connection to Jira differs depending on whether you are creating a connection to Jira Cloud or Jira Data Center.
Create a basic connection to Jira Cloud
For instructions on acquiring a Jira API token, see Manage API tokens for your Atlassian account in the Atlassian documentation.
-
In any Jira module, click Add next to the Connection field.
-
Configure the following fields:
table 0-row-2 1-row-2 2-row-2 3-row-2 4-row-2 5-row-2 6-row-2 layout-auto html-authored no-header Connection type Select whether you are creating a basic connection or an OAuth 2 connection. Connection name Enter a name for the new connection. Service URL Enter your Jira instance URL. This is the URL you use to access Jira. Jira account type Select whether you are connecting to Jira Cloud or Jira Data Center. Email Enter your email address. API Token Enter your API Token. API version Select the Jira API version that you want this connection to connect to. -
Click Continue to create the connection and go back to the module.
Create a basic connection to Jira Data Center
For instructions on acquiring a Jira personal access token, see Manage API tokens for your Atlassian account in the Atlassian documentation.
For considerations when creating the PAT, see Configure your PAT in this article.
-
In any Jira module, click Add next to the Connection field.
-
Configure the following fields:
table 0-row-2 1-row-2 2-row-2 3-row-2 4-row-2 5-row-2 layout-auto html-authored no-header Connection type Select whether you are creating a basic connection or an OAuth 2 connection. Connection name Enter a name for the new connection. Service URL Enter your Jira instance URL. This is the URL you use to access Jira. Jira account type Select whether you are connecting to Jira Cloud or Jira Data Center. PAT (Personal access token) Enter your Jira personal access token. API version Select the Jira API version that you want this connection to connect to. -
Click Continue to create the connection and go back to the module.
Configure your PAT
To create a basic connection to Jira Data Center, you must have a Jira personal access token (PAT).
For instructions on acquiring a Jira personal access token, see Manage API tokens for your Atlassian account in the Atlassian documentation.
You may need the following information when configuring your PAT
-
Redirect URLs
table 0-row-2 1-row-2 2-row-2 3-row-2 Fusion datacenter Redirect URL US https://app.workfrontfusion.com/oauth/cb/workfront-jiraEU https://app-eu.workfrontfusion.com/oauth/cb/workfront-jiraAzure https://app-az.workfrontfusion.com/oauth/cb/workfront-jira -
File configurations
To use a PAT, you must enable the following in the files jira/bin/WEB-INF/classes, in the file jira-config.properties:
jira.rest.auth.allow.basic = truejira.rest.csrf.disabled = true
If this file does not exist, you must create it.
Jira modules and their fields
When you configure Jira modules, Workfront Fusion displays the fields listed below. Along with these, additional Jira fields might display, depending on factors such as your access level in the app or service. A bolded title in a module indicates a required field.
If you see the map button above a field or function, you can use it to set variables and functions for that field. For more information, see Map information from one module to another.

Triggers
Watch for records
This trigger module starts a scenario when a record is added, updated, or deleted.
Actions
Add issue to sprint
This action module adds one or more issues to a sprint.
Create a Record
This action module creates a new record in Jira.
Custom API Call
This action module lets you make a custom authenticated call to the Jira API.
Select the HTTP request method you need to configure the API call. For more information, see HTTP request methods.
<Instance URL>/rest/api/2/Add the headers of the request in the form of a standard JSON object.
For example, {"Content-type":"application/json"}
Workfront Fusion adds the authorization headers for you.
Add the query for the API call in the form of a standard JSON object.
For example: {"name":"something-urgent"}
Add the body content for the API call in the form of a standard JSON object.
Note:
When using conditional statements such as if in your JSON, put the quotation marks outside of the conditional statement.

Delete a record
This action module deletes the specified record.
Download an attachment
This action module downloads the specified attachment.
Read a record
This action module reads data from the specified record in Jira.
Update a record
This action module updates an existing record, such as an issue or project.
Searches
[410] The requested API has been removed. Please migrate to the /rest/api/3/search/jql API. A full migration guideline is available at https://developer.atlassian.com/changelog/#CHANGE-2046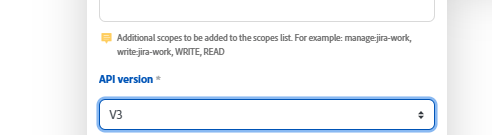
-
Only the Search module is affected. At this time, other Jira API endpoints used by the Fusion connector are not impacted by this deprecation.
-
Geographic rollout may cause inconsistencies. Atlassian is rolling out this change regionally, which means some Jira Cloud instances may still temporarily support older endpoints. This can lead to inconsistent behavior across environments.
Search for records
This search module looks for records in an object in Jira that match the search query you specify.
You can map this information in subsequent modules in the scenario.
When you are configuring this module, the following fields display.