Scanning best practices
The quality of a digitized material is decided long before you press the scan button. A clean, flat, well-placed sample produces clean maps that are ready to use, while a rushed capture carries every wrinkle, dust speck, and stray fiber straight into your PBR channels.
The rule of thumb is simple: one extra minute spent preparing your material before the scan saves you roughly ten minutes of clean-up later. Time spent ironing a fabric, brushing away dust, or aligning your sample is time you will not spend later unwarping the material, patching out particles, or removing loose fibers.
This page covers two areas that make the biggest difference: preparing your physical sample and placing it correctly in the device.
Prepare your physical sample
Everything visible on the sample when captured is baked into the maps. A few minutes of preparation removes problems at the source, before they become editing work.
Clean the sample
Give the sample a quick clean before placing it. Any mark on the surface will be interpreted as a material detail and reproduced across every channel.
Remove dust and foreign particles
Dust, hair, threads, and other loose particles are one of the most common sources of post-processing work. Brush or use compressed air to clear the surface, as each particle left behind has to be painted out by hand later.
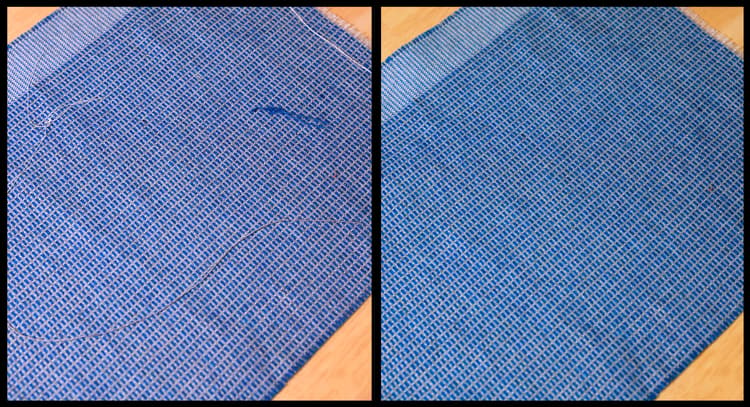
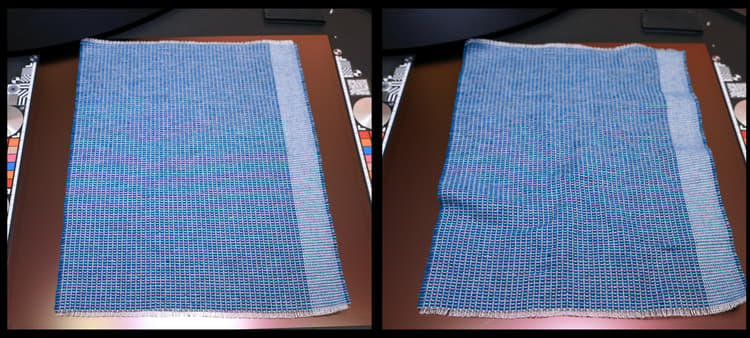
Iron fabrics to remove wrinkles
For fabrics and other flexible materials, always iron the sample flat before scanning. Wrinkles and folds create false height and shadow information that is difficult to remove later, and that breaks the material’s tileability.
Remove stains from smooth surfaces
On smooth, non-porous materials, wipe away any stains, fingerprints, or smudges. These show up clearly in the base color and roughness channels.
Know the sample thickness
Be aware of how thick your sample is. Knowing the thickness helps you place it correctly and set up the capture so the surface stays in focus across the whole scanning area.
Place your sample correctly
Good placement keeps the material flat, sharp, and centered, which reduces the amount of cropping, unwarping, and alignment you have to do later.
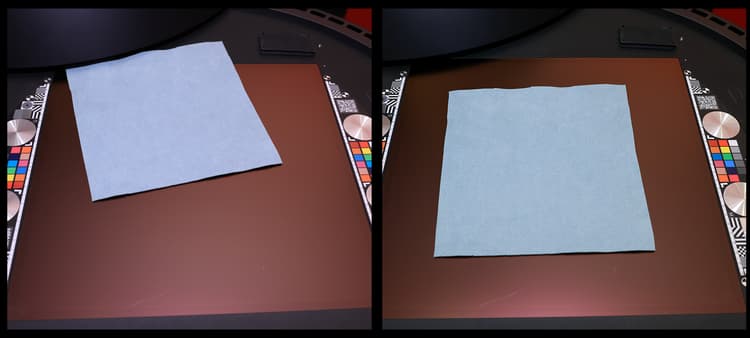
Center the material in the scanning area
Position the sample in the center of the scanning area. This is where focus and lighting are most even, and gives the most usable surface once the material is cropped. This is why it is always ideal to scan one sample at a time, so it can be placed in the center of the scanning area and give you the best possible results.
Align it as straight as possible
Line up the sample squarely with the scanning area rather than at an angle. A straight sample is far easier to make tileable and needs less rotation and cropping in Sampler.
Keep the sample flat
Make sure the sample lies completely flat against the scanning surface. If needed, use the magnets supplied with the HP Z Captis device to hold flexible or curling materials in place. A flat sample avoids the warping and uneven focus that is otherwise time-consuming to correct.
Do not overlap samples
If you place several samples at once, do not let them touch or overlap. Overlapping edges create ambiguous boundaries that are hard to separate and crop cleanly later.
The payoff in Sampler
When your sample is clean, flat, and centered, the maps that arrive in Sampler are already close to production-ready. You spend your time refining the material instead of repairing it: less time unwarping, less time cleaning dust and fibers, and less time patching stains and wrinkles out of your channels.
Once your material is imported, use Sampler filters (Equalize, Auto Tiling, Perspective Crop, Tiling, …) for the final touches, and export when you are happy with the result.